Gravity Forms to Mailchimp: The Complete Guide
Are you looking to connect Gravity Forms to MailChimp? If so, you will love this complete tutorial featuring Gravity Perks.
Are you looking to connect Gravity Forms to Mailchimp? If that’s a resounding yes, this tutorial will be helpful to you.
If you want to collect more data, improve signup forms, and populate your Mailchimp email list all at once, you’ll love Gravity Perks, a premium bundle of 47 powerful Gravity Forms add-ons.
In this tutorial, you discover exactly how to integrate Gravity Forms with the official Mailchimp add-on. You’ll also learn how Gravity Perks connects Gravity Forms to Mailchimp in more advanced ways.
Let’s get started.
How to Integrate Gravity Forms with Mailchimp: Prerequisites
For the tutorial, you need Gravity Forms, the official Mailchimp add-on, and Gravity Perks.
You also need a Mailchimp account to create an API key and signup forms.
But before we get into the tech, here is a primer if you’re just starting out.
What is Gravity Forms?
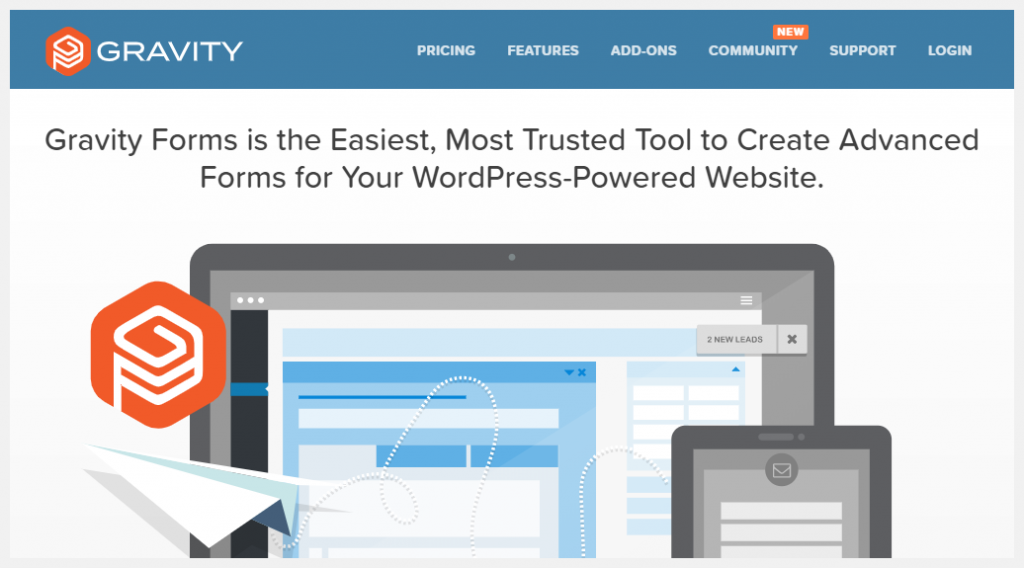
Gravity Forms is one of the best WordPress form plugins on the web.
It’s a premium WordPress form plugin with awesome features that make creating professional Mailchimp forms as easy as A, B, C.
Other than that, there are plenty of official (e.g. Mailchimp add-on) and third-party add-ons (e.g. Gravity Perks) to supercharge forms on your WordPress site.
For all users, the WordPress form plugin is easy to use, you can hit the ground running in a matter of clicks.
What is Mailchimp?

Mailchimp is one of the better-known email marketing providers on the web.
The service allows you to send email campaigns without prior coding knowledge. You get an intuitive user interface (UI) to create professional email newsletters quickly.
A free Mailchimp account offers up to 2,000 subscribers, basic templates, marketing CRM, one-click automation, seven marketing channels, and several other features.
The plan is suitable for beginners and small-to-medium-size businesses. As per your needs, you can always upgrade to a paid plan for more powerful features.
We are using the free version of Mailchimp for this guide.
What is Gravity Perks?
Mailchimp aside, Gravity Perks is a suite of 47 essential Gravity Forms add-ons.
You’ll need our suite of plugins to use this article. Buy Gravity Perks today to get conditional logic wizardry with all of our galatic Gravity Forms plugins!
It’s a super-powerful premium bundle that offers you a wide range of Gravity Forms add-ons such as GF Nested Forms, GF eCommerce fields, GF Limit Submissions, and so much more.
Thanks to Gravity Perks, you can extend the Gravity Forms plugin to achieve so much more. And in today’s tutorial, we show you exactly how you can extend Gravity Forms and the official Mailchimp add-on using Gravity Perks.
But first, let’s take a look at some of the benefits of combining Gravity Forms with Mailchimp.
Benefits of Combining Gravity Forms with Mailchimp
Better Signup Forms
Gravity Forms and Mailchimp are both great, but each tool has its limits. The former is primarily a WordPress plugin for creating forms, meaning you don’t get email marketing features. For that, you need an external email marketing provider such as Mailchimp.
Mailchimp is a useful email marketing provider but their default signup forms are ugly. The Gravity Forms plugin offers you a wide range of options to design great sign up forms.
Gravity Perks allows you to easily create dynamic forms that help you to gather more info from your users. For instance, you can use the GF Nested Forms add-on to add (or nest) forms on other forms.
Take Advantage of Mailchimp’s Automation & Tracking Features
When you combine the two, you get a powerful solution to generate leads and launch email marketing campaigns. With automation at your disposal, you will save you a lot of time and money. Throw Gravity Perks into the mix, and you can save even more.
Additionally, Mailchimp offers you impressive features to track your email campaigns easily. Thanks to the Gravity Forms Mailchimp add-on, you can easily collect data on your forms and send it to Mailchimp. After that, you can launch and track email marketing campaigns effortlessly.
Add More eCommerce Fields
Additionally, integrate the Mailchimp add-on with Gravity Perks to create eCommerce fields. This feature allows you to capture payments and populate your Mailchimp list all at once, killing two birds with the same stone.
Further, you can trigger conditional logic and limit forms based on IP addresses, logged-in status, and so on.
Better User Activation Pages
On top of that, you are free to customize the activation page the user sees after signing up. With their details loaded in Mailchimp already, you have more power to improve your customer onboarding process.
These are just a few examples of how you can use Gravity Perks to combine form building and email marketing like a seasoned developer.
In the next section, you learn how to integrate Gravity Forms with the official Mailchimp add-on. Later in the tutorial, we test-drive Gravity Perks, meaning we’re going to have fun!
How to Setup Gravity Forms Official Mailchimp Add-On
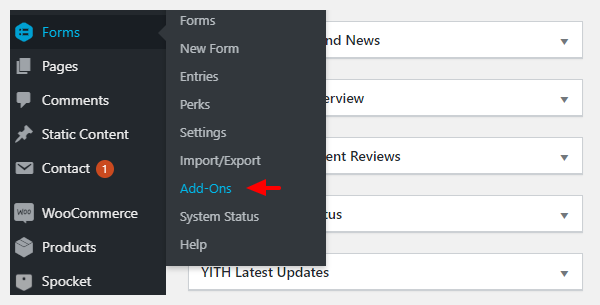
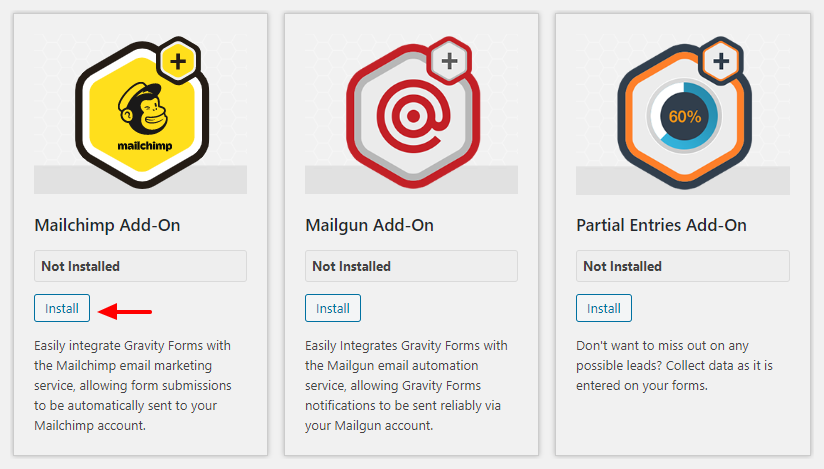
Login to your WordPress admin dashboard, and after installing and activating Gravity Forms, navigate to Forms > Add-Ons, as we highlight below.
Next, scroll down to the Mailchimp Add-On and hit the Install button.
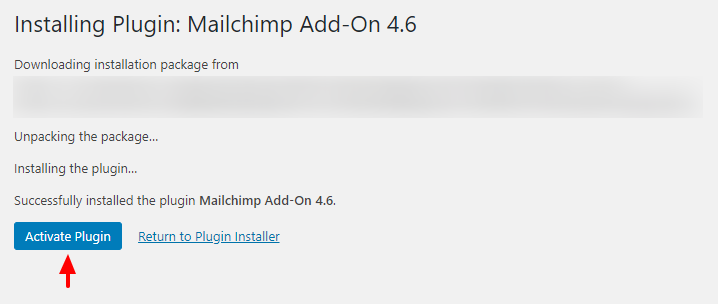
After that, click the Activate Plugin button.
Now, your Mailchimp add-on is active, but you need to link Gravity Forms to your Mailchimp account using an API key. Don’t worry; setting up your Mailchimp API key is easy.
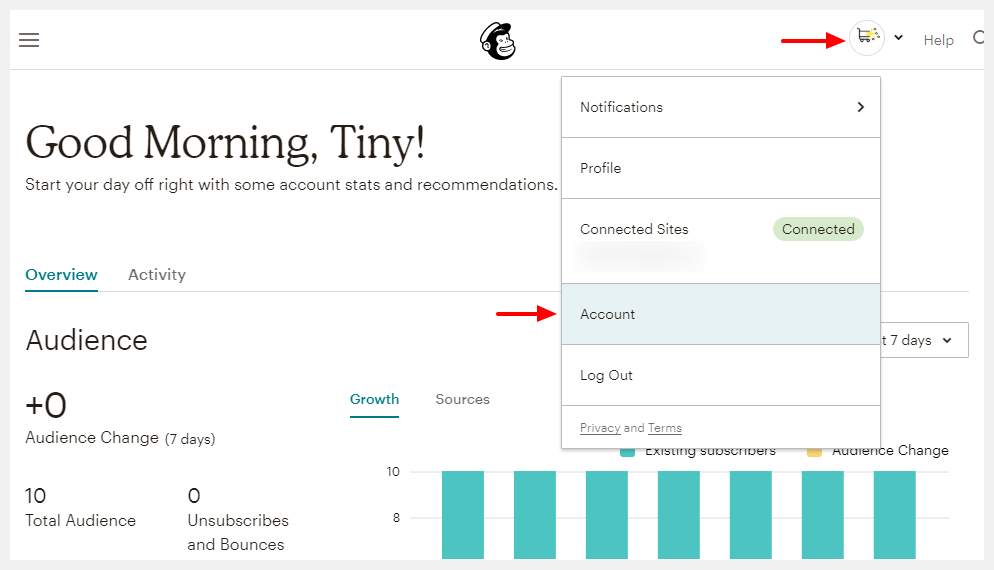
To obtain your Mailchimp API key, log in to your Mailchimp account. Next, navigate to your account settings by clicking the Account button.
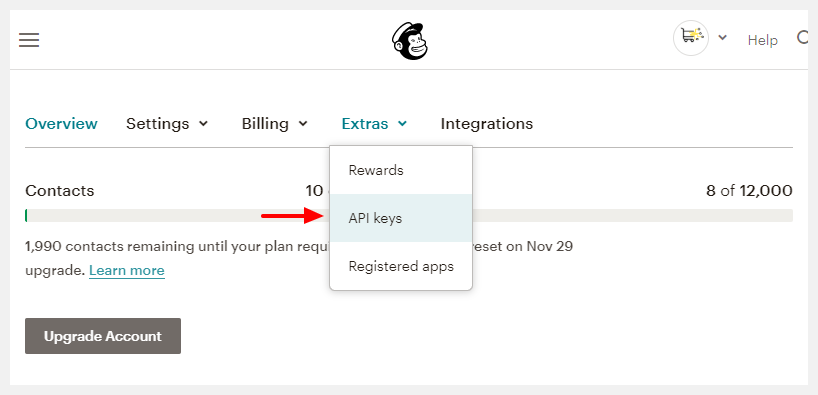
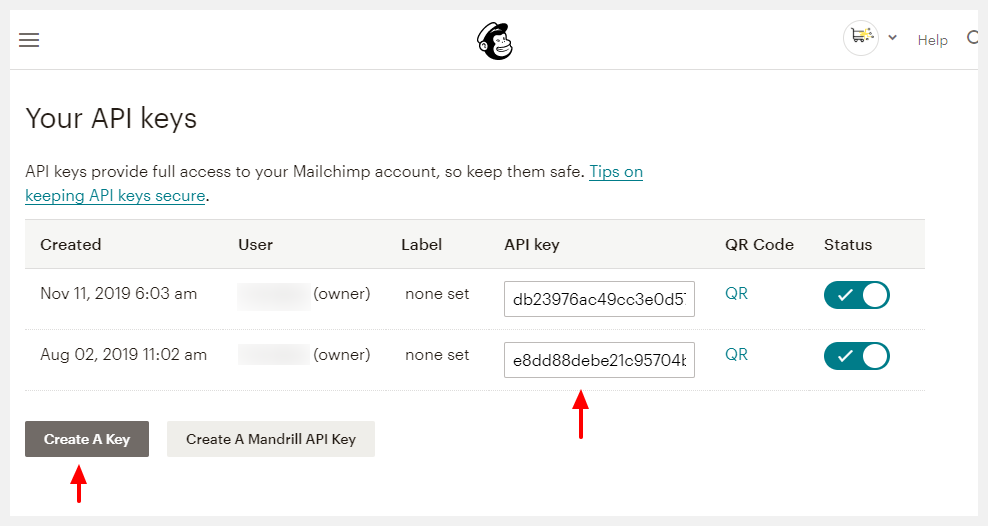
Next, navigate to Extras > API Keys as we highlight in the following image.
Next, copy an existing Mailchimp API key, or create a new one. The process is relatively simple.
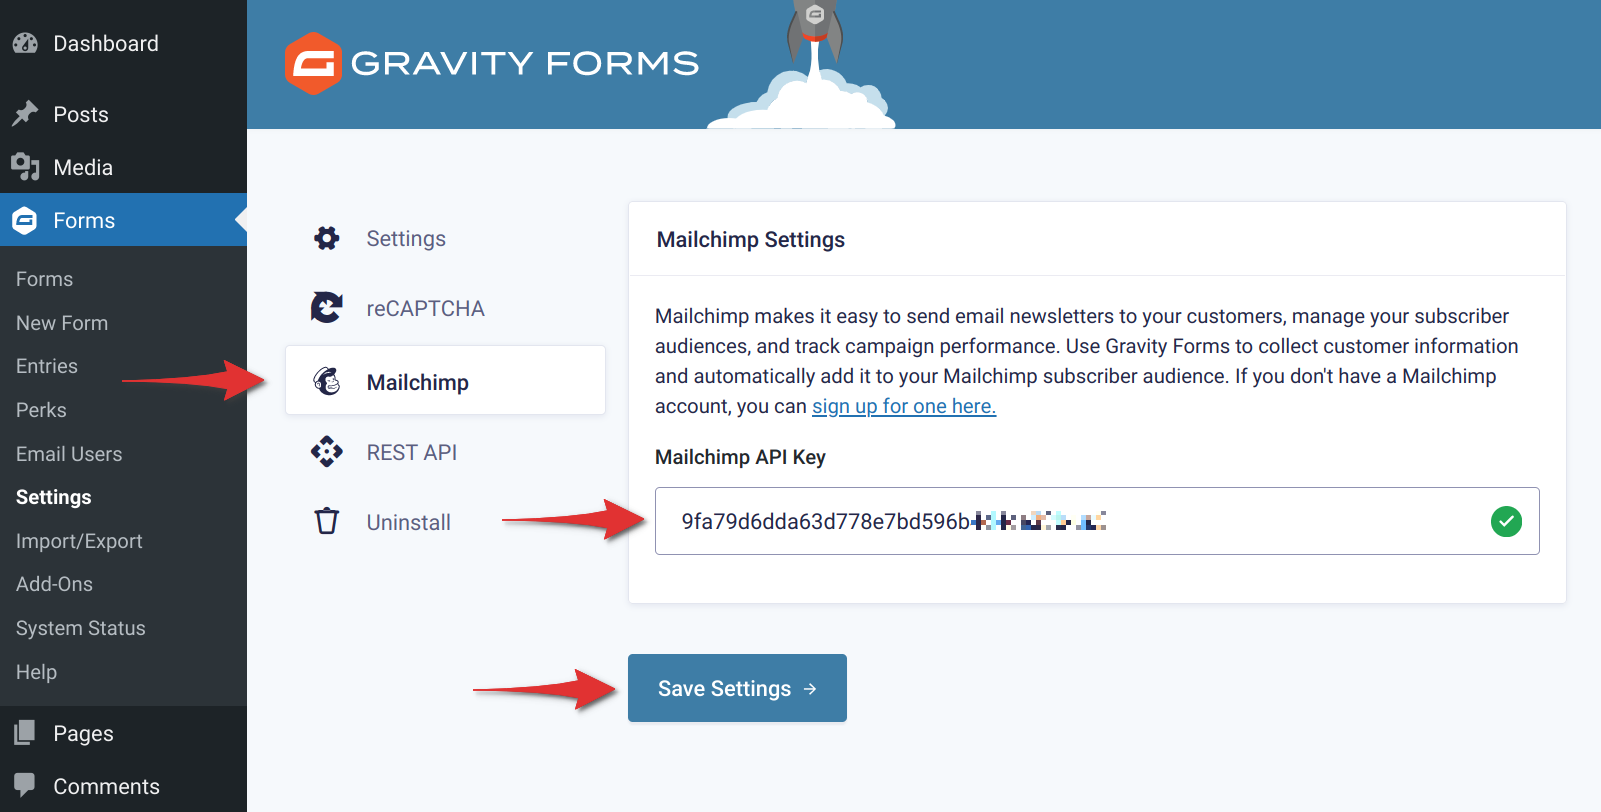
After that, log back in to your WordPress admin dashboard, navigate to Forms > Settings and click the Mailchimp tab.
Next, paste the Mailchimp API key and click the Update Settings button, as we illustrate in the image below.
At this point, the Mailchimp add-on is ready to use. You’ll just need to ensure that your website is connected to your Mailchimp account.
How?
Login to your Mailchimp account, and navigate to Your Profile > Connected Sites, as we highlight in the screenshot below.
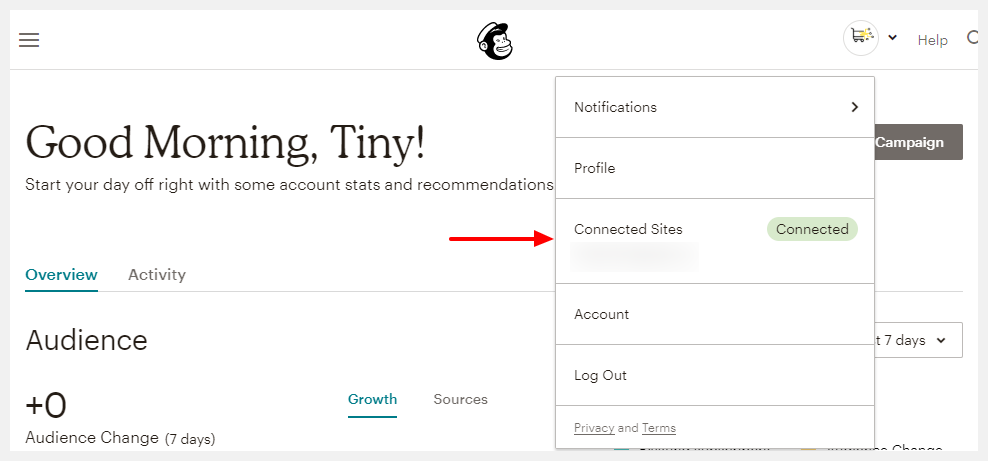
Follow instructions on the page to connect your Mailchimp account to your WordPress website. You’ll need the Insert Header and Footers WordPress plugin to add the verification code to your website.
Linking a Gravity Form to Mailchimp
Now that you have the official Mailchimp add-on ready, you need to create a subscription form in Gravity Forms and link it to your Mailchimp list. When users subscribe using the form, the plugin will push the data to your Mailchimp list automatically.
Navigate to Forms > New Form as shown in the image below.
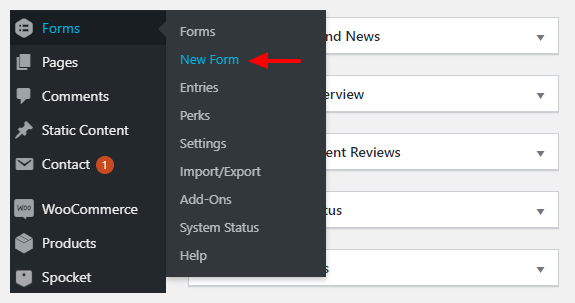
Next, add an appropriate form title (e.g. ‘Newsletter Subscription’), and a description as we detail below.
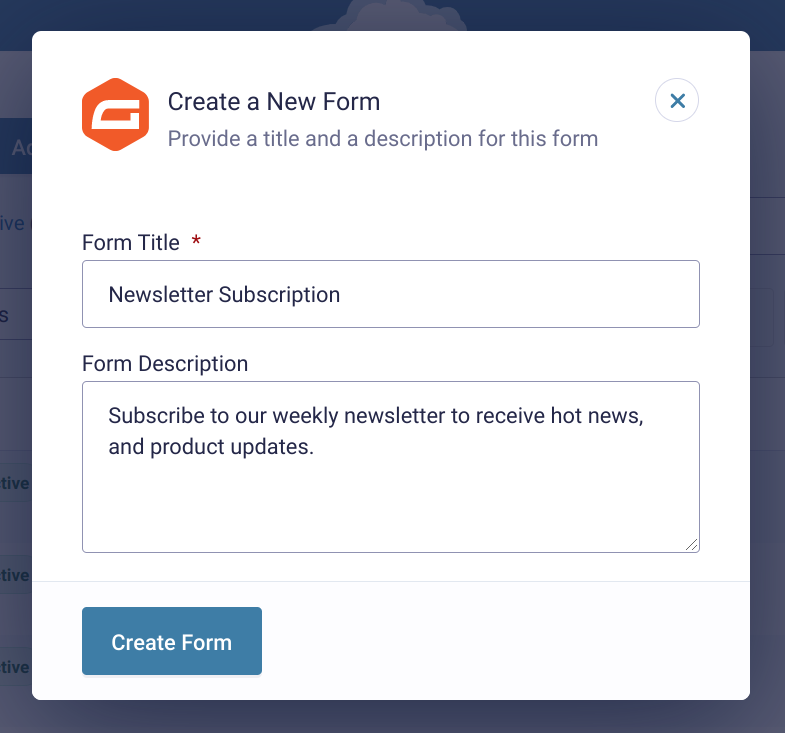
After that, click the Create Form button to access the intuitive form builder shown in the screengrab below.

Add the necessary fields to your form in the form builder. For purposes of illustration, we’re working with the name and email fields only.
Pro Tip:
Map your form fields with your Mailchimp email list. That way, you can populate your list effortlessly.
For instance, if you have five fields on your signup form, make sure you have five corresponding fields in your Mailchimp list.
Don’t know how to add more fields to your Mailchimp list?
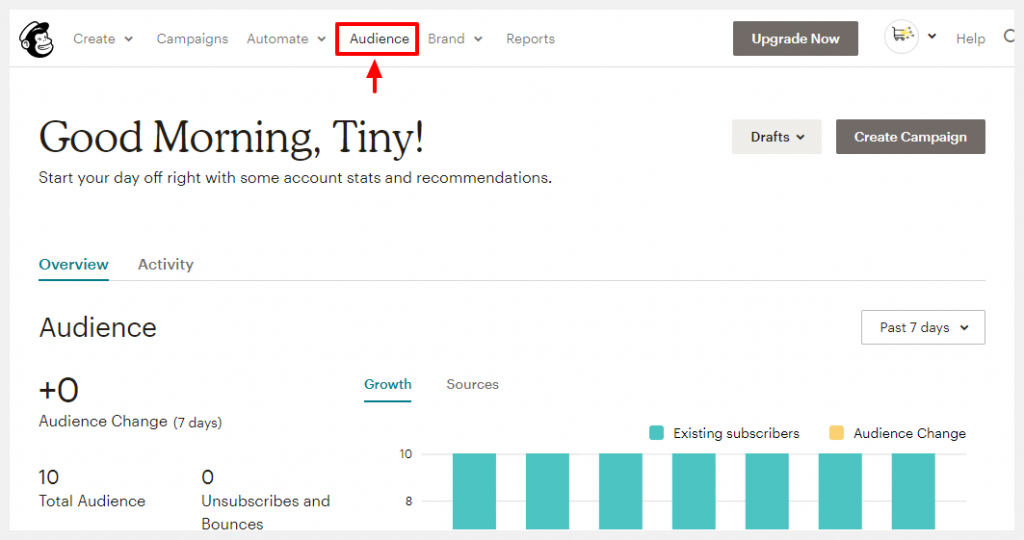
To add fields to your Mailchimp list, edit your signup form in your Mailchimp account. In your Mailchimp account, click Audience as shown below.
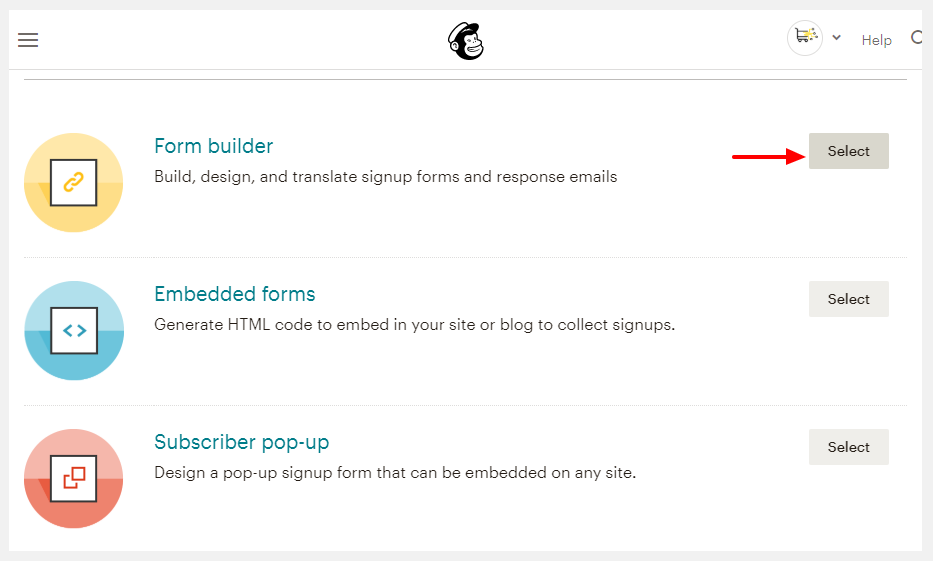
Next, click Signup forms under the Manage Audience tab as we highlight below.

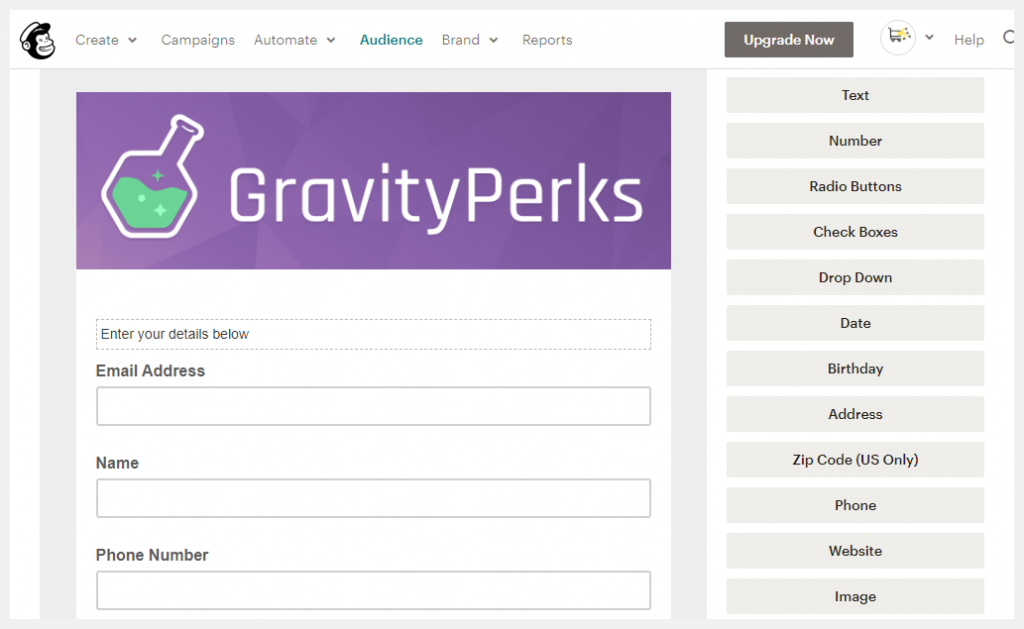
Next, select the form builder, as we illustrate in the following image.
After that, add fields and design your form as desired.
Let’s go back to Gravity Forms.
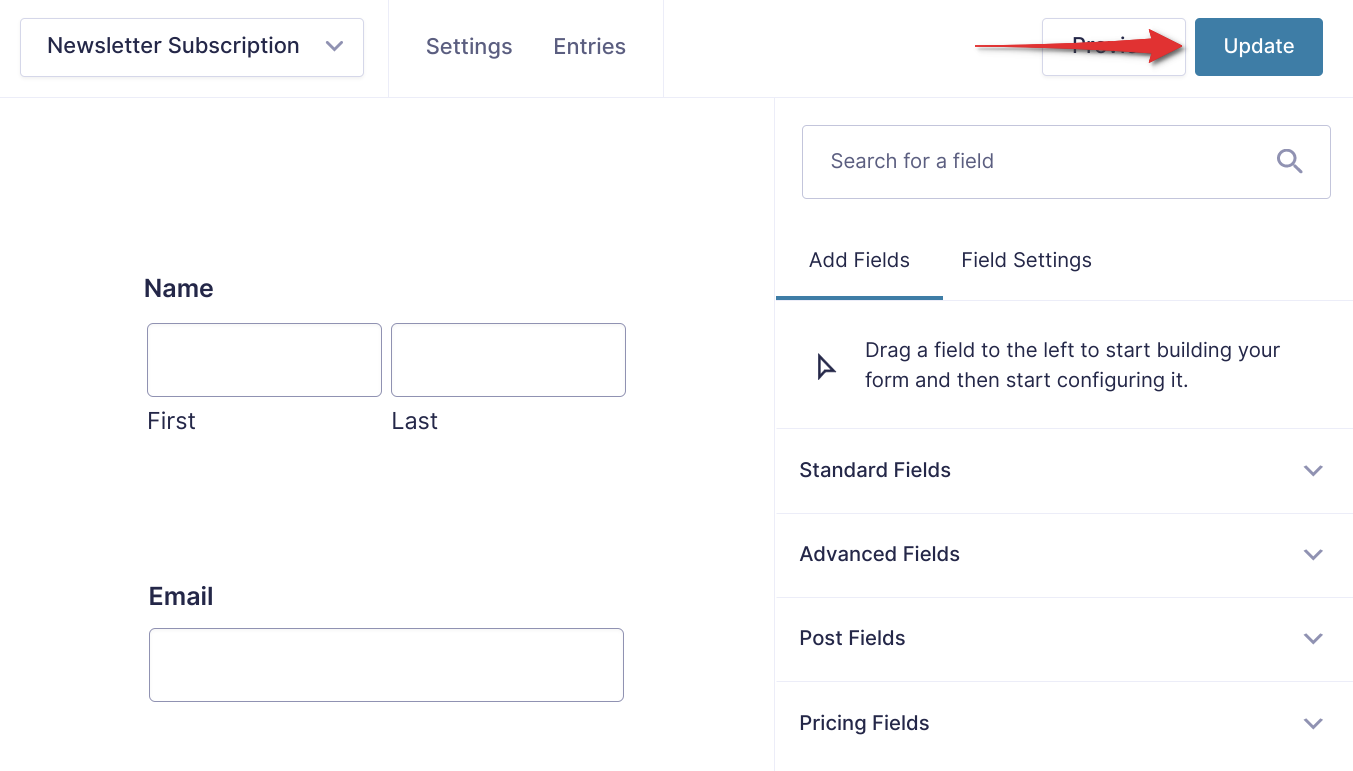
After adding your form fields as in the image below, click the Update button.
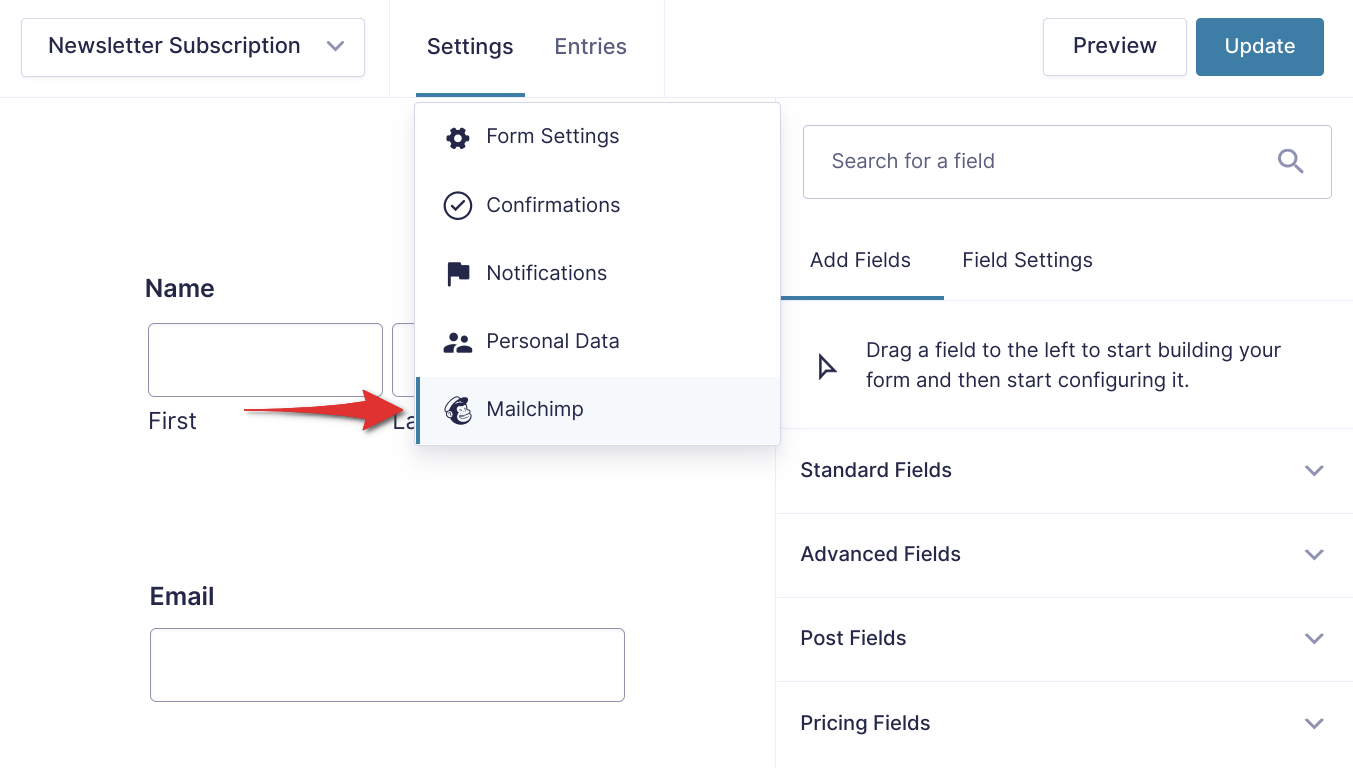
Next, go onto the Settings tab and click Mailchimp, as highlighted below.
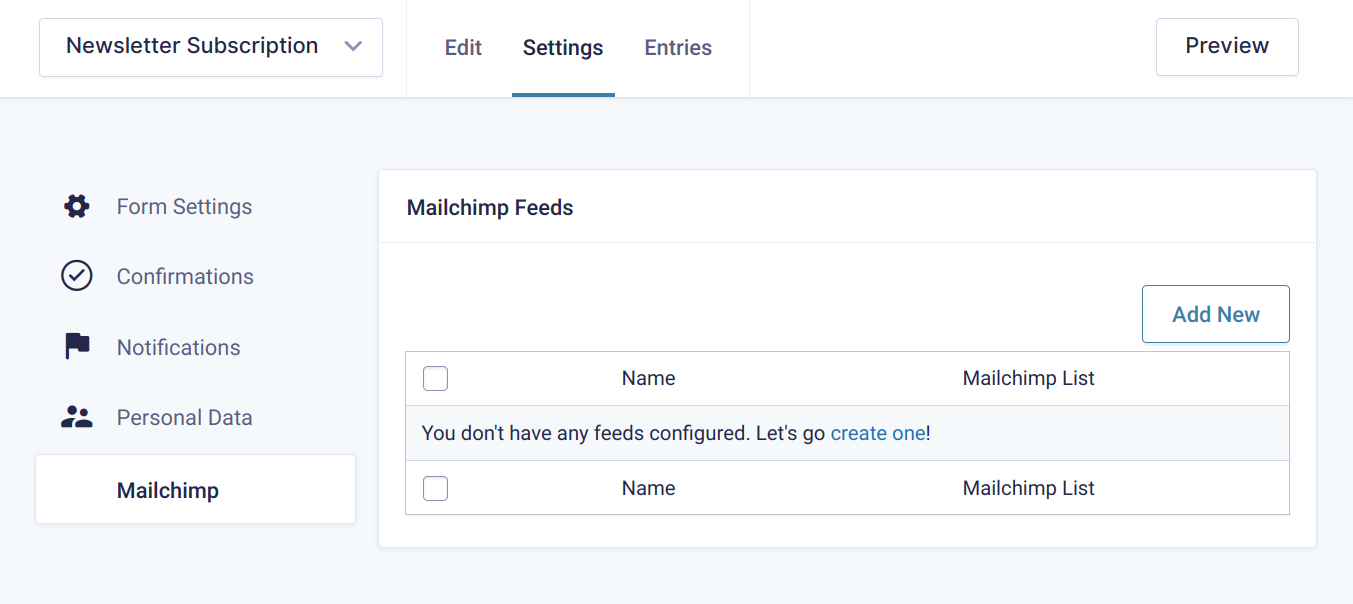
Now, you must add a new Mailchimp feed to your form.
You’ll then see the following screen, so hit the Add New button.
On the next screen, choose your options, as we detail below.
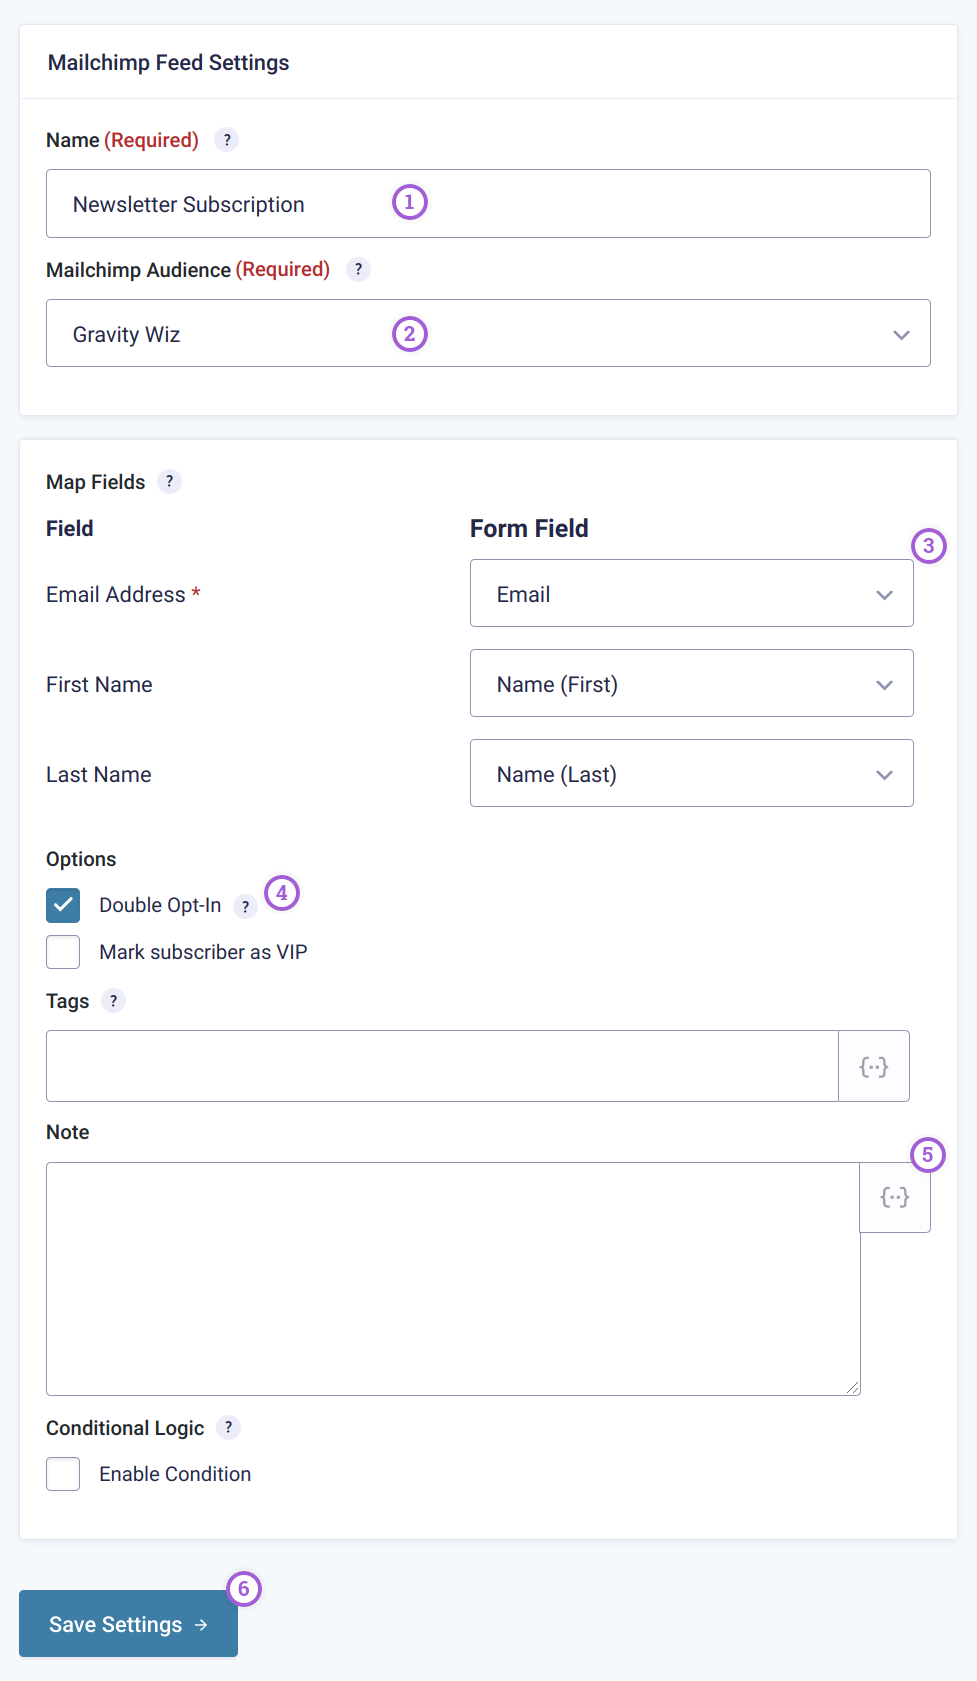
Here is a list corresponding to the numbered items above.
- Name your Mailchimp Feed. It can be anything you want.
- Choose your Mailchimp list
- Map fields to corresponding fields in your Mailchimp list
- Toggle on double opt-in, so subscribers can receive a verification email before subscribing
- Add Tags and Notes
- Click the Update Settings button to save your changes.
Next, add your new form in a post, page, or widget area, depending on your needs. Some themes come with dedicated subscription boxes, so check if that option applies.
Now, your Gravity Form subscription form is connected to your Mailchimp account, via the Mailchimp add-on. Anyone who uses the form (opt-in) is added to your Mailchimp list automatically.
Notes:
- Remember to activate double opt-in on your Mailchimp account
- You can customize your Gravity Form extensively using options available in the form builder, including custom CSS and HTML to style your form however you wish
- For best results, segment your audience using tags
- Activate the welcome email in your Mailchimp account, and take advantage of automation tools
- Supercharge your Mailchimp integration using Gravity Perks, which leads us to our next section
Gravity Perks + Gravity Forms + Mailchimp Add-On
In the following section, we shine a light on some Gravity Perks add-ons that help you to integrate Gravity Forms with Mailchimp in more advanced ways.
To be precise, out of the 47 add-ons, we cover GF Nested Forms, GF Easy Passthrough, GF eCommerce Fields, GF Limit Submissions, and GF Better User Activation.
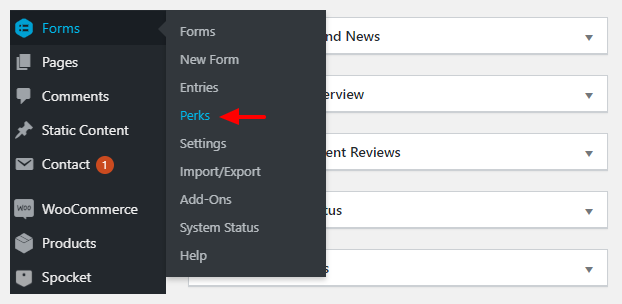
Before anything else, grab your copy of Gravity Perks. After that, install and activate the plugin. After activation, navigate to Forms > Perks as shown below.
Enter your license key and hit the Register License button, as shown below.
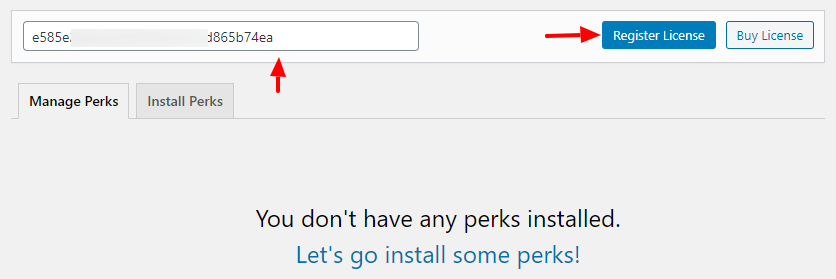
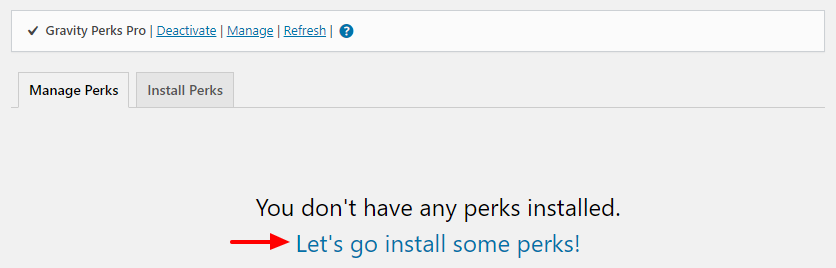
Doing so leads you to a clean Gravity Perks dashboard. As you can see, you don’t have any perks (add-ons) installed yet. Click the Let’s go install some perks! link, which leads you to the screen shown below.
Install and activate the perks you need. For the tutorial, we installed and activated the five perks we are working with, and here’s how the Gravity Perks dashboard looks now.
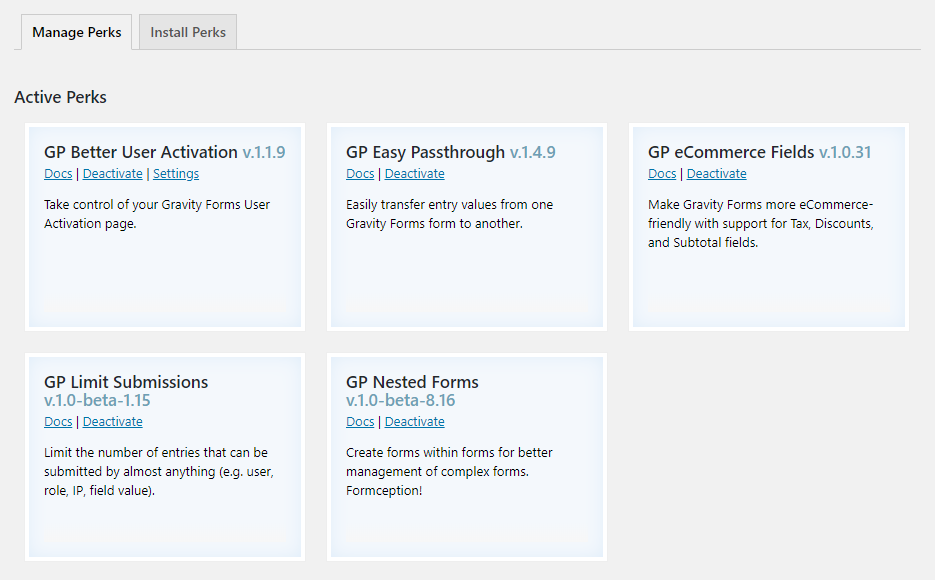
With your perks installed, you’re ready to continue.
GF Nested Forms
GF Nested Forms lets you “nest” one form inside another. You can use a child form to collect child “entries” and then attach those entries to a “parent” entry when a user submits the form.
For example, you can create a team/group registration form where form submitters can add new entries for each team/group member, including each member’s email address. Then, you can pass the name and email for each individual player to Mailchimp.
To get started, you’ll need to create two separate forms in Gravity Forms:
- Parent Form – has a “Text” field that collects the team name for a fictional softball league, as well as the nested child form to add team members.
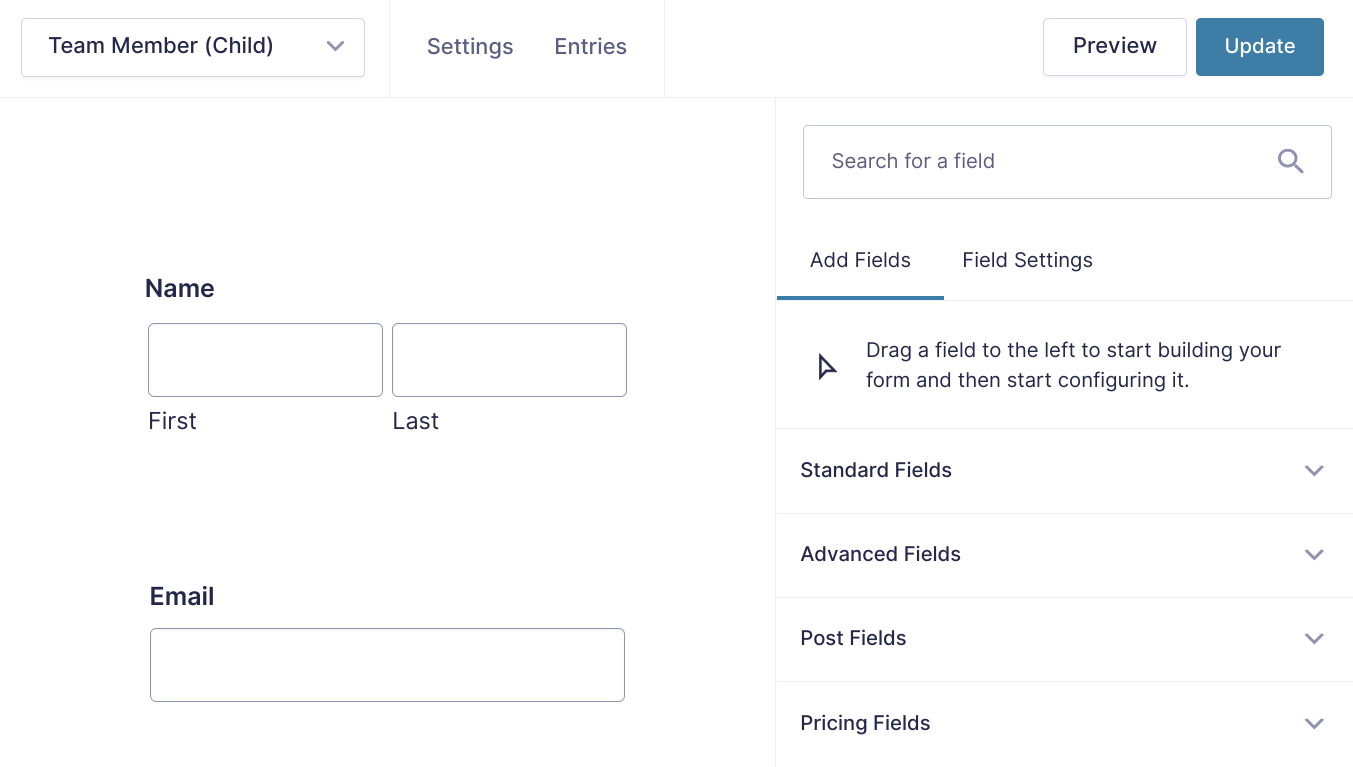
- Child form – has a “Name” and “Email” field to collect the name and email address of each individual team member.
You’ll want to create the child form first — here’s what it looks like with fields for each team member’s name and email address:
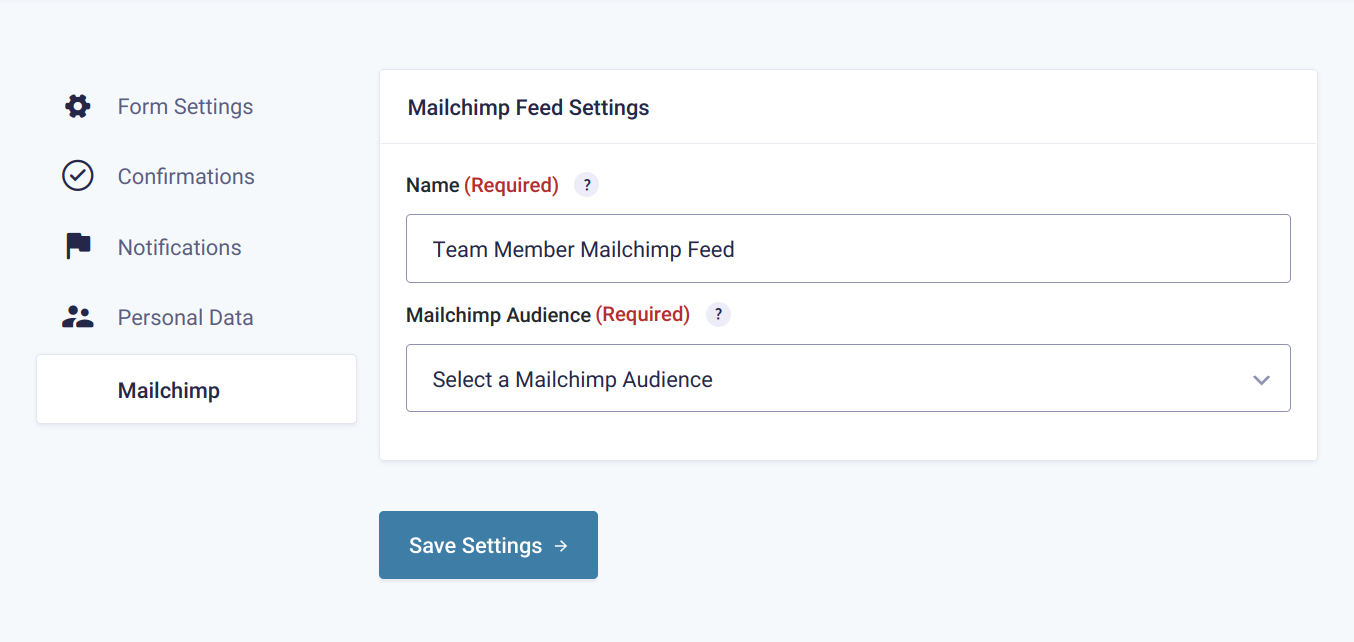
Important: Then, set up a Mailchimp Feed for your child form to add form submissions as Mailchimp subscribers (you can follow the exact same steps from above):
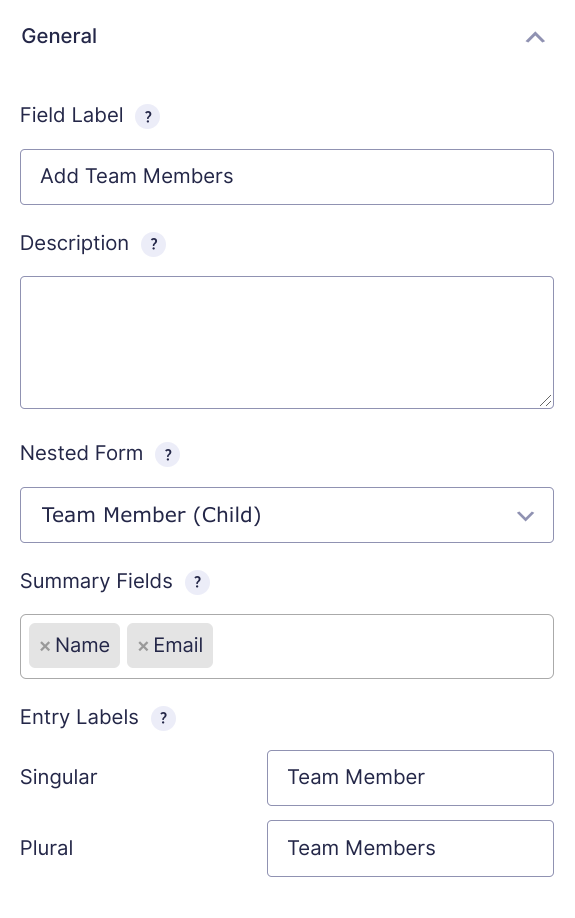
Next, create the parent form. Add a basic text field to collect the team name. Then, add a Nested Form field, which you’ll find in the Advanced Fields section. Open the settings for the nested form field and choose your child form from the drop-down. Then, add the name and email fields as Summary Fields and configure the labels:
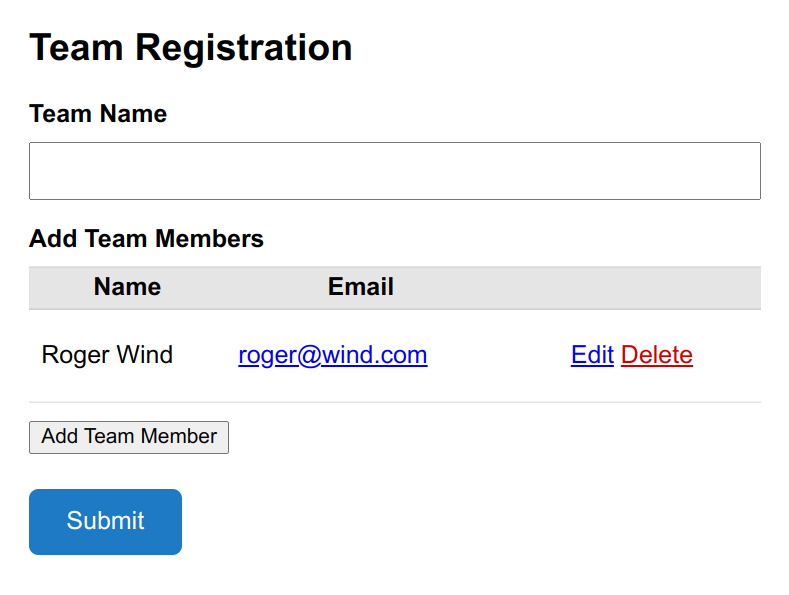
And that’s it! Now, when you add the parent form to the front-end of your site, people who submit the form will have the option to add as many team members as needed:
Once they submit the form, Gravity Forms will process the Mailchimp feed for each entry in the child form and add all those subscribers to your Mailchimp list.
If you’d like to send your child form data to Mailchimp immediately, you can add the following code to your functions.php file to enable the feed processing user interface. You’ll then need to go in and manually process the feeds.
add_filter( 'gpnf_enable_feed_processing_setting', '__return_true' );
To learn more about how to enable and process feeds, you can consult this help doc.
Ours is a basic example of how to use nested forms, but with a bit of creativity, you can create all manner of dynamic forms. For a great example, please check out the demo in the nested forms documentation.
Other than that, you get a lot of options to customize how your forms behave. For instance, you get conditional logic, entry limits, visibility options, custom CSS styles, the capability to populate child entries dynamically, and so much more.
GF Easy Passthrough
With GF Easy Passthrough, you can create multiple forms and pass information from one form to another.
For example, you could create a simple form on your landing page that collects a user’s name and email address. When they submit that form, you can add them to Mailchimp and then also pass that information to another form to collect their phone and website. If they submit that second form, you can also add that information to Mailchimp.
The nice thing about splitting your form up with GF Easy Passthrough, though, is that you’ll still have them in your Mailchimp list even if they just submit the first simple form on your landing page.
To get started:
- Create a new form.
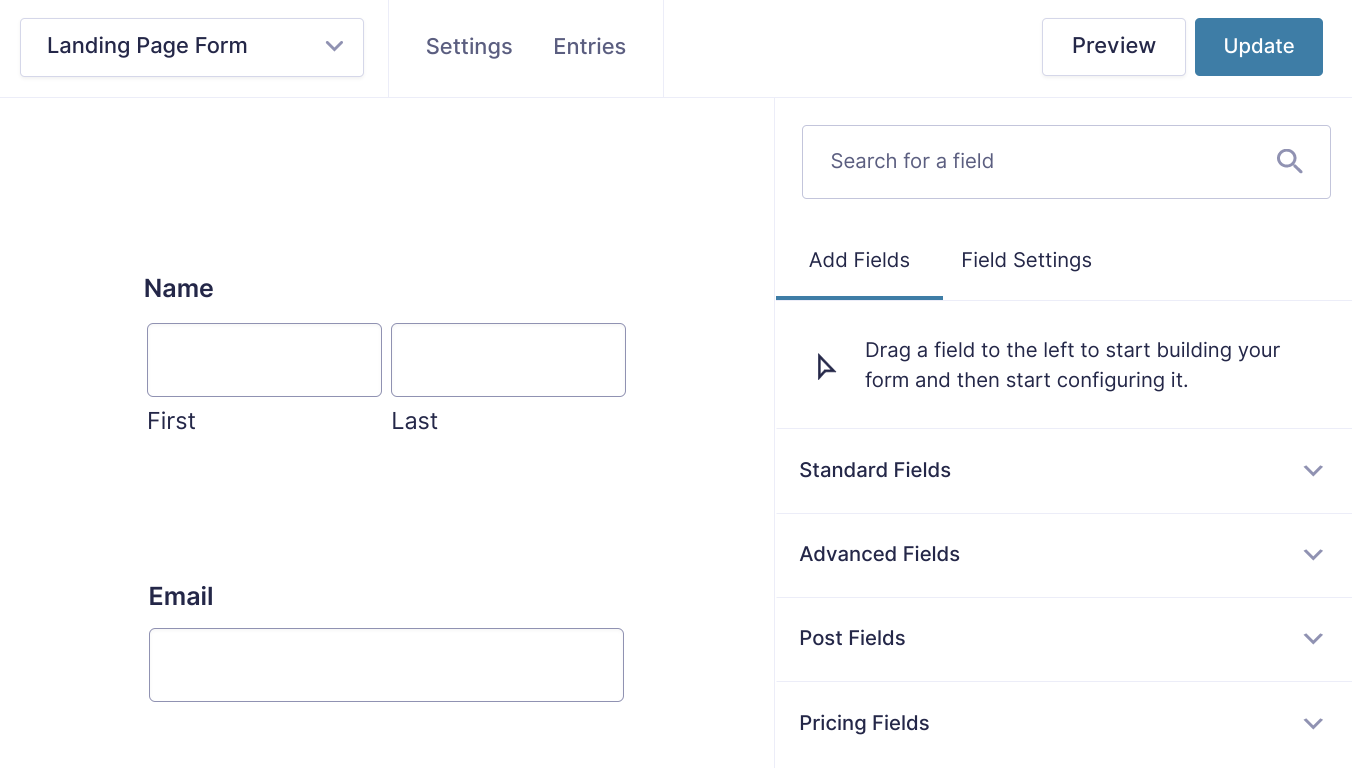
- Add two fields — Name and Email.
- Set up a feed to add form entries to Mailchimp (you can follow the exact same instructions from above).
We’ll call this our “Landing Page Form”, because it’s the simple, high-conversion form that we show right on the landing page:
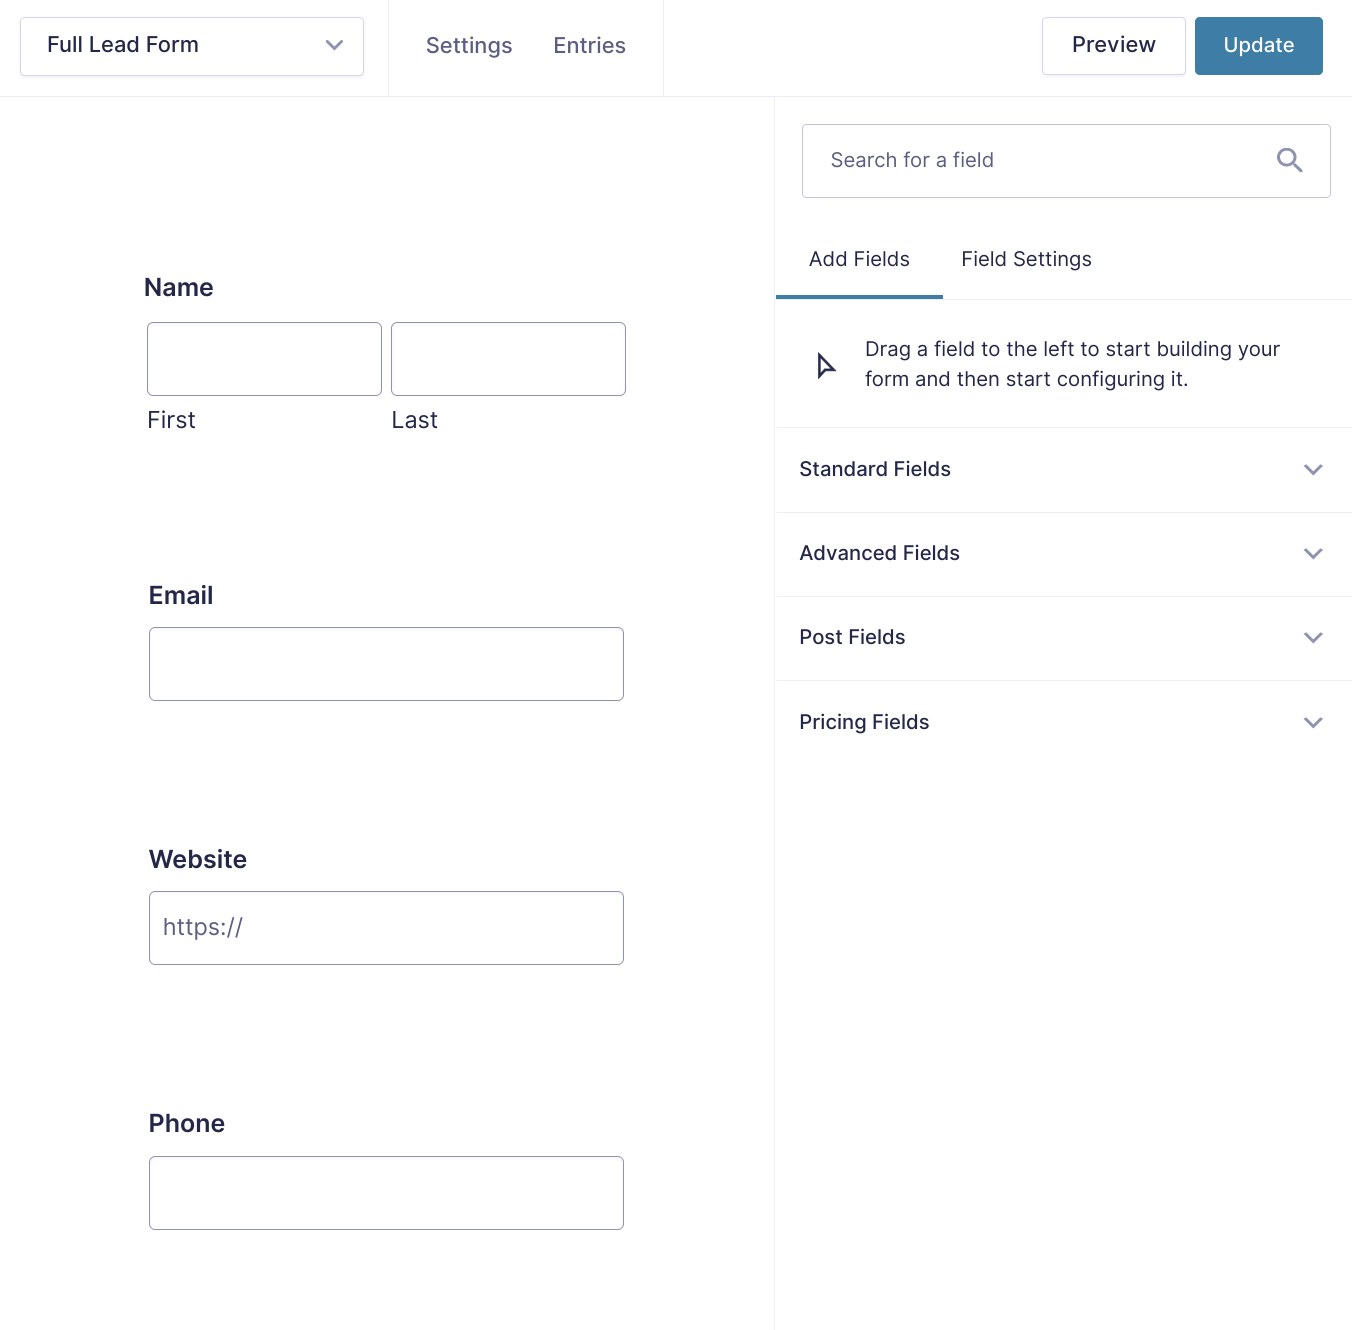
Now, create another form that includes the same Name and Email fields, plus two additional fields:
- Website
- Phone number
We’ll call this the “Full Lead Form”:
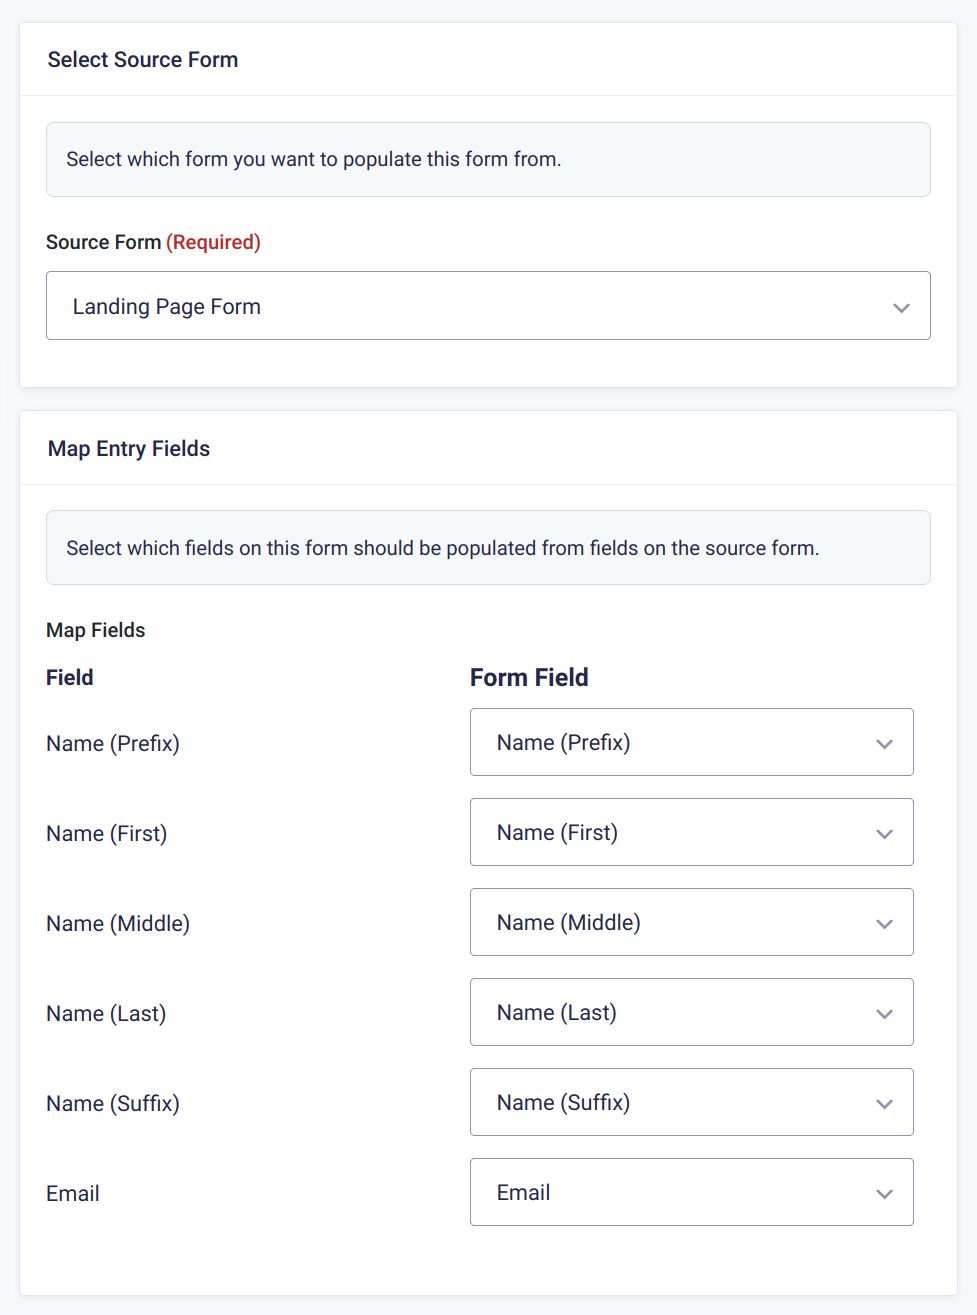
However, instead of forcing users to fill in their name and email again, you can use GF Easy Passthrough to automatically pull that information from the previous form.
To set up the passthrough, go to Settings > Easy Passthrough and click Add New to create a new feed. Then, select the “Landing Page Form” from the drop-down and map the fields:
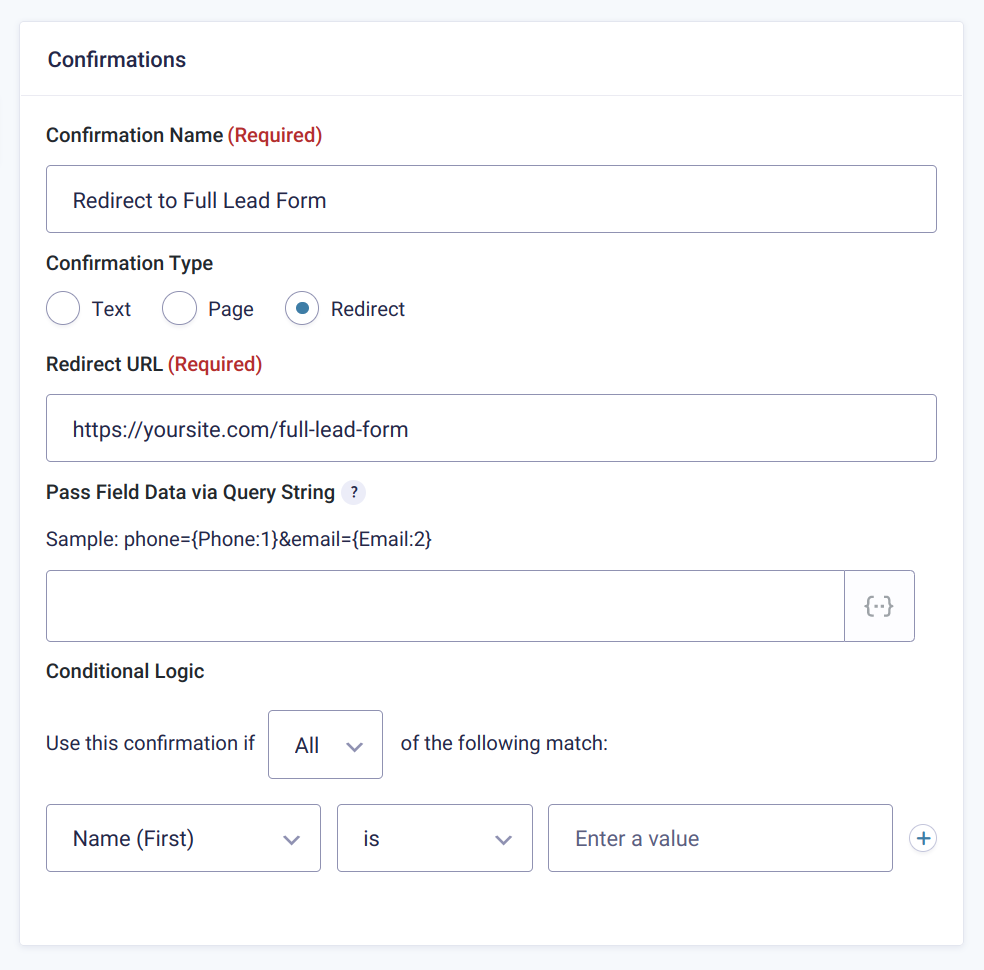
If you want to pass this additional information to Mailchimp, you can set up another Mailchimp feed as well.
To finish things out, open the settings for your “Landing Page Form” and set up a redirect confirmation to automatically send users to your “Full Lead Form” after they submit the “Landing Page Form”:
GF eCommerce Fields
Are you planning to use Gravity Forms for eCommerce? If so, you’ll love the GF eCommerce Fields add-on. This perk extends Gravity Forms by adding the Discount, Tax, and Subtotal eCommerce field types. On top of that, the add-on improves Gravity Forms’ Coupons and Shipping fields.
You can combine a payment gateway, GF eCommerce Fields, and the Mailchimp add-on to create a simple payment option that collects emails to your Mailchimp account. And while this is excellent news, Gravity Forms is not a fully-fledged eCommerce platform such as WooCommerce.
Gravity Forms is perfect for simple payments such as donations, pay-per-word functionality, event-based tickets, and products/services that require filling out a form before payment. Without a doubt, you can use Gravity Forms in many other ways, so don’t let our list limit you.
Now, we’ll build some more forms.
Example 1: Donation Form
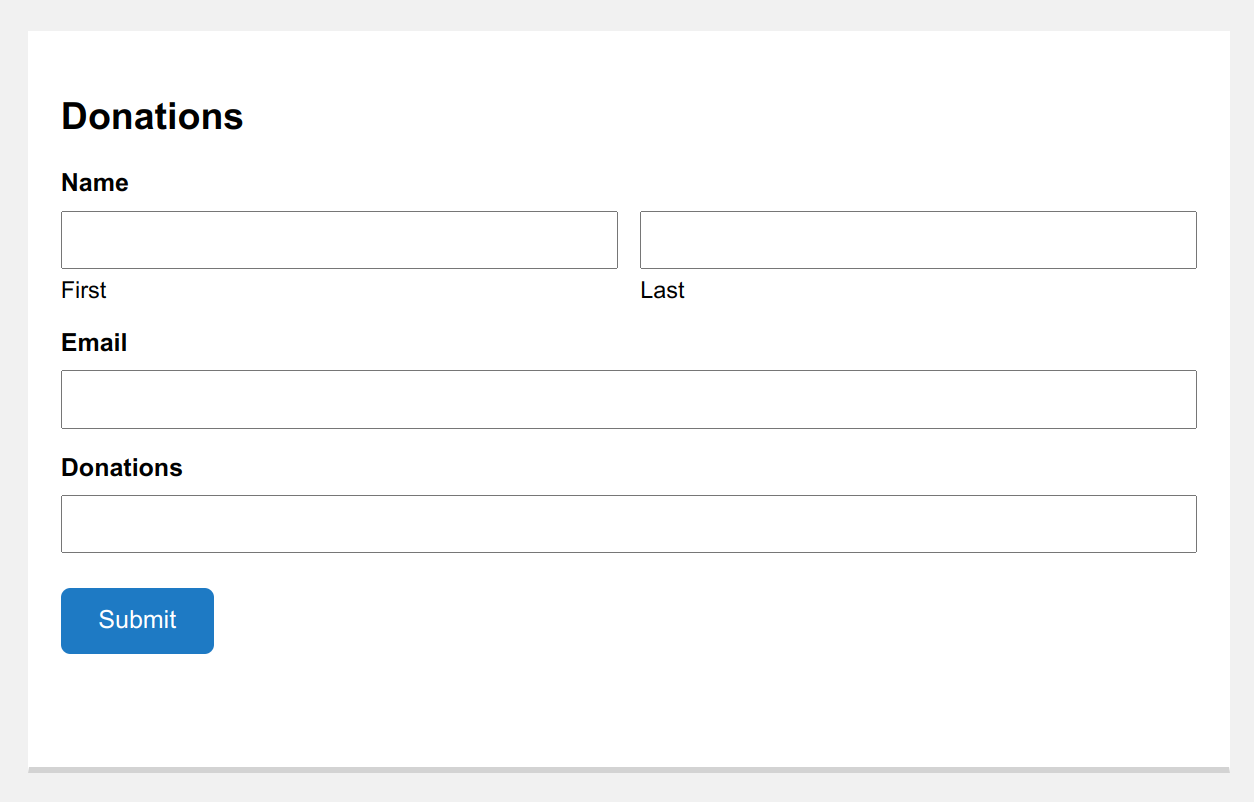
By now, you know how to create a form. Create a new form and name it accordingly. We called the first test form “Donations.” Next, add the necessary fields. For a donation form, for instance, I added name, email, and product fields, as shown below. You can also add a credit card field if you’d like to receive card donations.
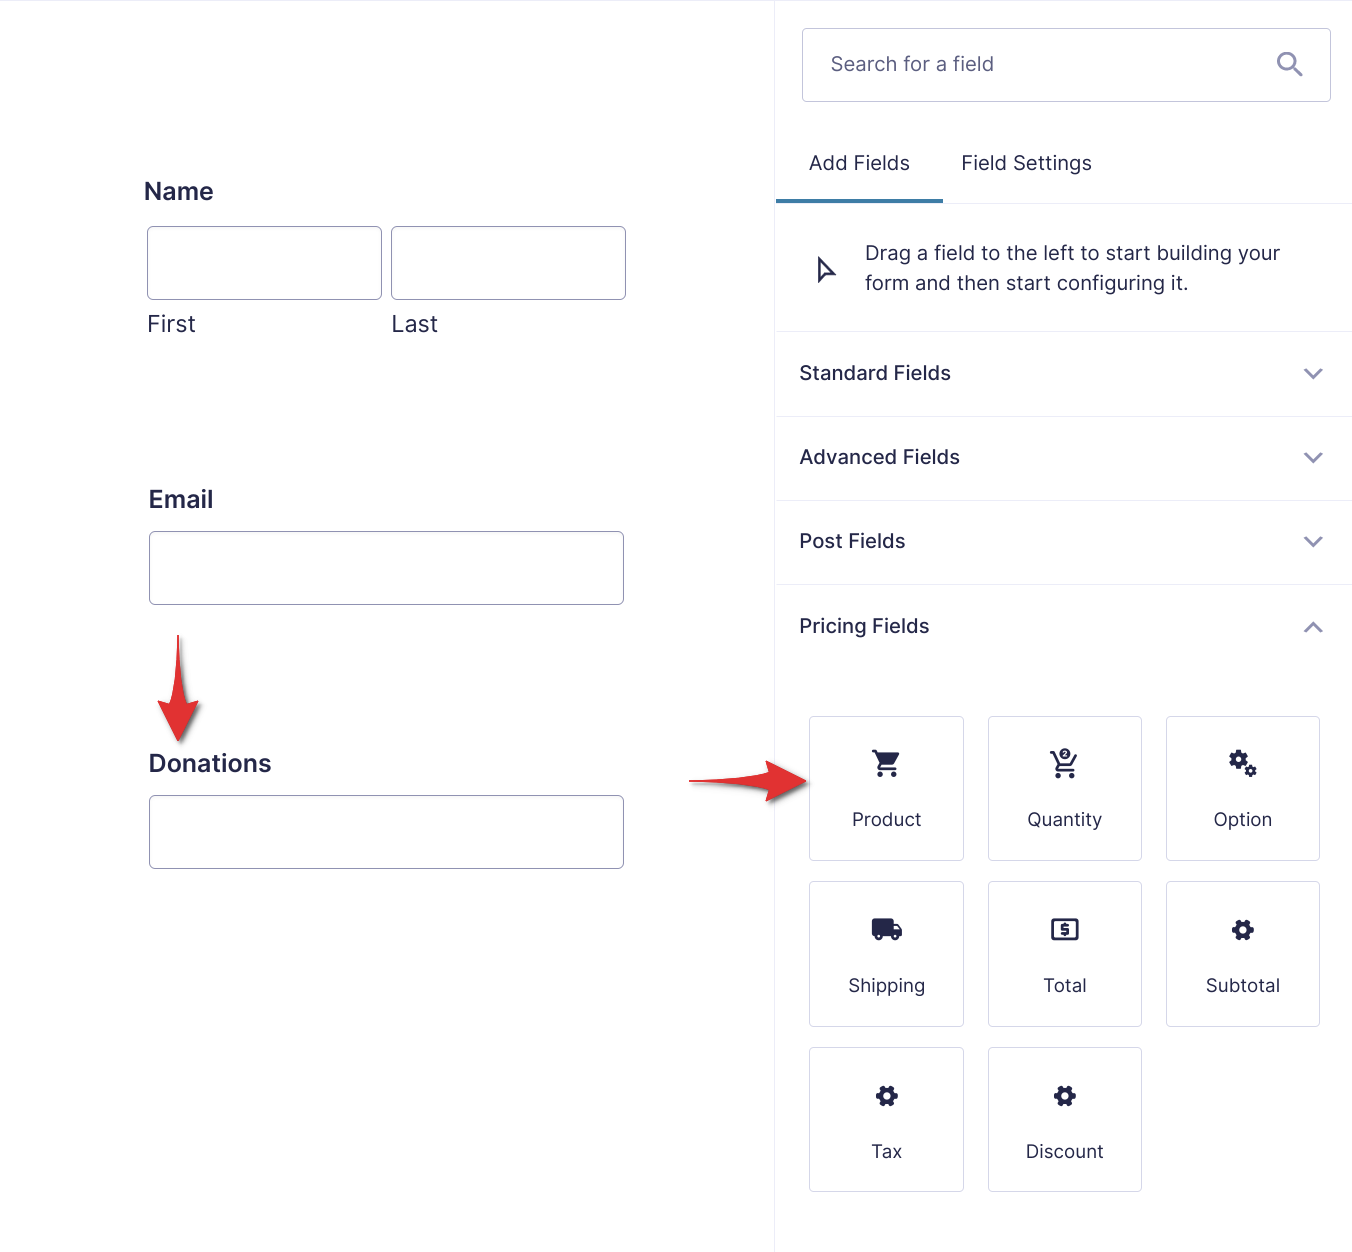
From the above image, notice the Product field that we’ll use to create donations. Also, see the GF eCommerce Fields, which we shall use for our second example :)
Next, click the Product field and do the following.
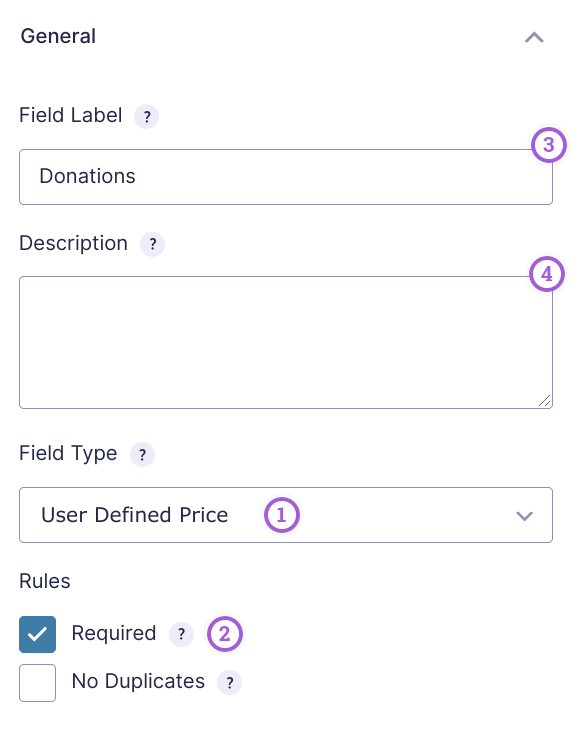
- Change the field type from “Simple Product” to “User Defined Price” from the drop-down list
- Tick the Required checkbox
- Add you field label. Ours is “Donations”
- Add a description guiding donors
Example 2: Product Form
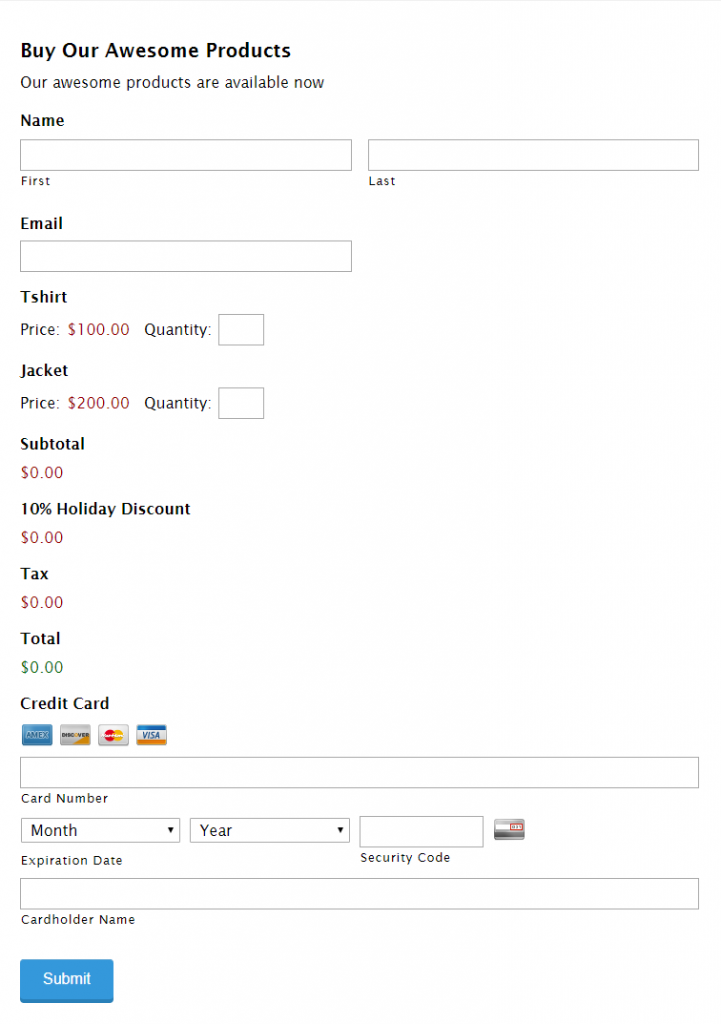
To create a form for your product/service(s) instead, we follow a similar approach with slight modifications. To illustrate, let us create a second test form that includes GF eCommerce Fields.
Create a new form. Add the name, email, product, discount, tax, subtotal, total and credit card fields. Remember, you can add several products/services to your form.
Customize the fields accordingly. That is, add your product label, price, and description. Also, add your discount and tax. The subtotal and total fields are calculated automatically.
After that, hit the Update button to save your form.
Integrating a Payment Gateway
Now that your form is ready, it’s time to link your payment gateway so you can collect money. Gravity Forms comes with Authorize.net, Stripe, PayPal Payments Standard, and PayPal Payments Pro add-ons. You need to install the appropriate add-on.
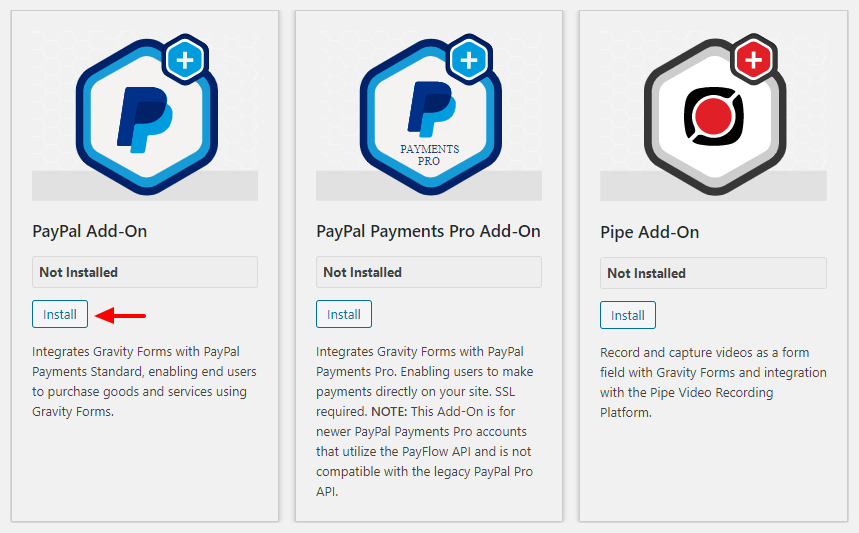
Navigate to Forms > Add-Ons as we highlight below.
For the tutorial, we are using PayPal Payments Standard, so I installed the add-on as shown below.
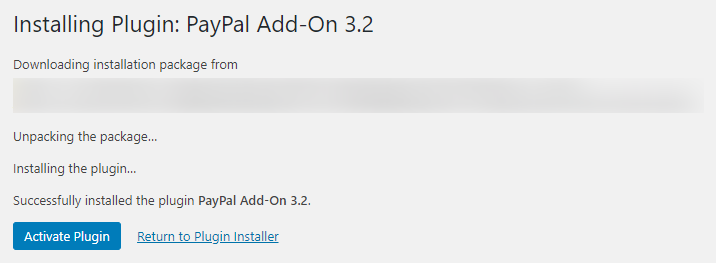
Next, activate the PayPal add-on.
Next, navigate to Forms > Settings > PayPal and follow the instructions to connect Gravity Forms to your PayPal account. If you’re using a different payment processor, similarly connect Gravity Forms.
Connect Product Form to Payment Processor
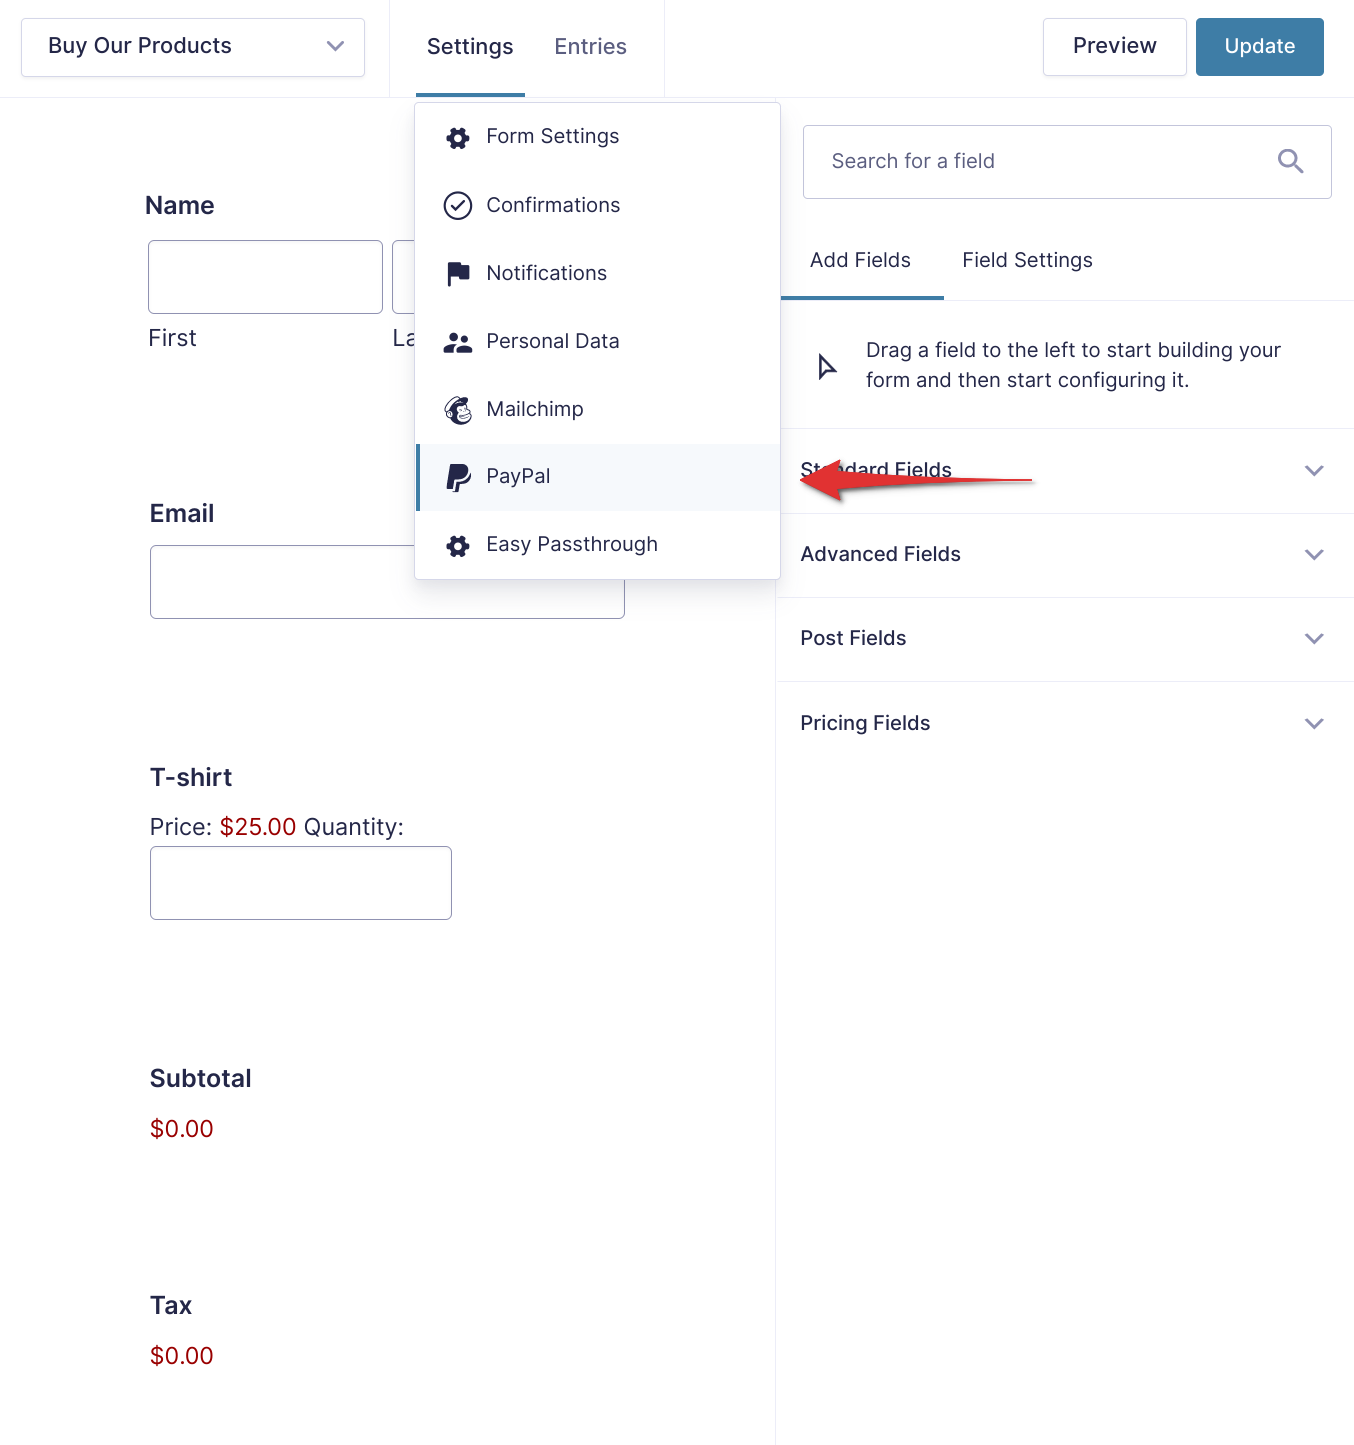
After connecting Gravity Forms to PayPal, open your product (or donation) form and navigate to PayPal as shown below.
Next, create a new PayPal feed.
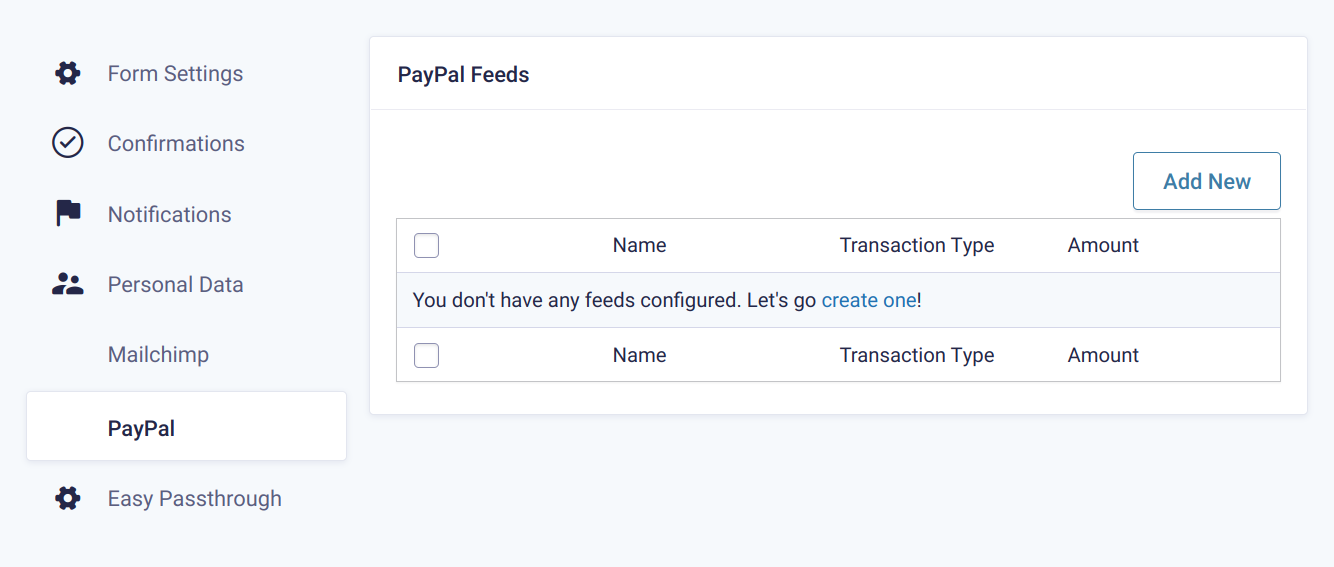
Fill out the PayPal feed accordingly. It’s relatively simple, although you might need to add billing and address fields to your form.
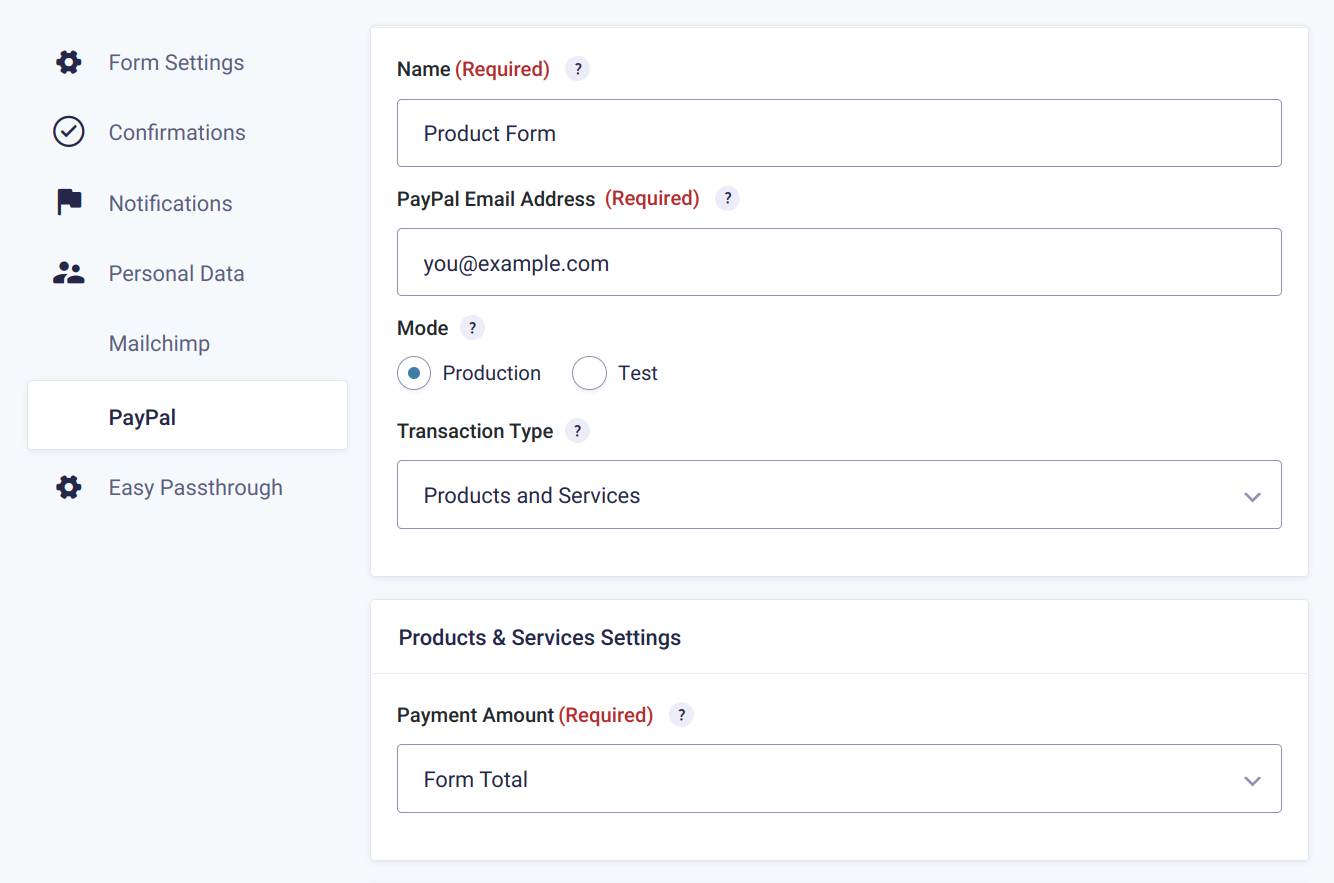
With your options in place, click the Update Settings button at the bottom of the screen to save your changes.
With your product form connected to PayPal, it’s time to connect your form to your Mailchimp account.
Finally, add your form to a page, post, or widget area, and start collecting payments while sending data to Mailchimp.
With that out of the way, we’ll now limit submissions on your forms using the GF Limit Submission add-on. This feature is useful if you want to control who can join a form. If you run a membership site, you will find the GF Limit Submission perk quite useful.
GF Limit Submissions
For some forms, you might not want users to be able to submit the forms multiple times. For example, for an email opt-in form, you only need their email address once. With the GF Limit Submissions perk, you can limit how many times a user can submit a form based on their:
- WordPress account
- User role
- IP
- Field value
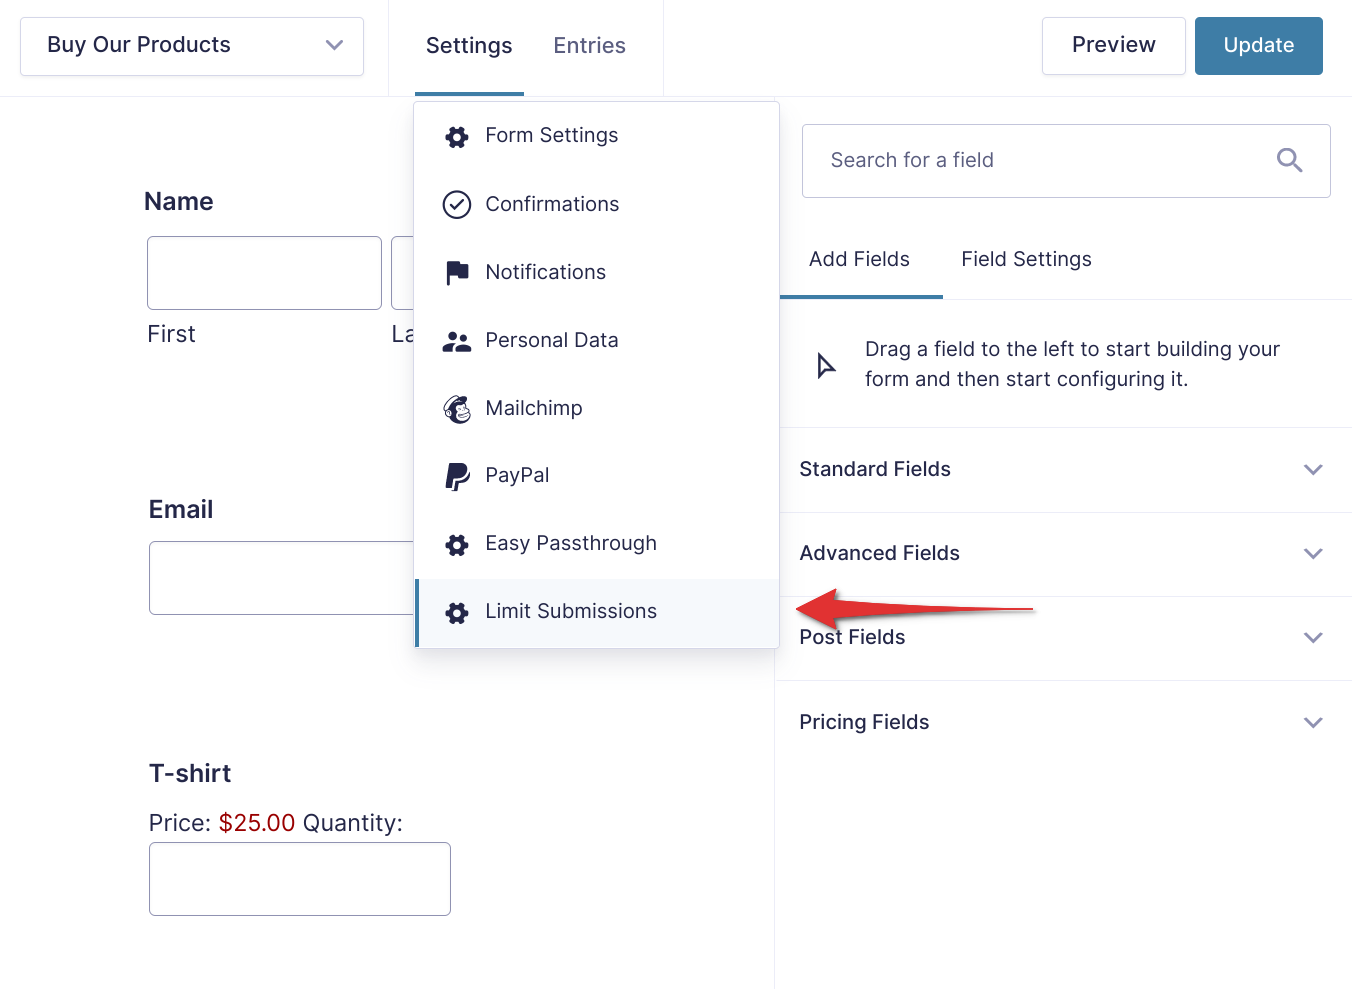
To set it up, first install and activate the GF Limit Submissions add-on. Next, open your signup form, and navigate to Settings > Limit Submissions as shown below.
Next, click the Add New button to create a new limit feed. The limit feed is a group of rules that dictate what or who should be limited.
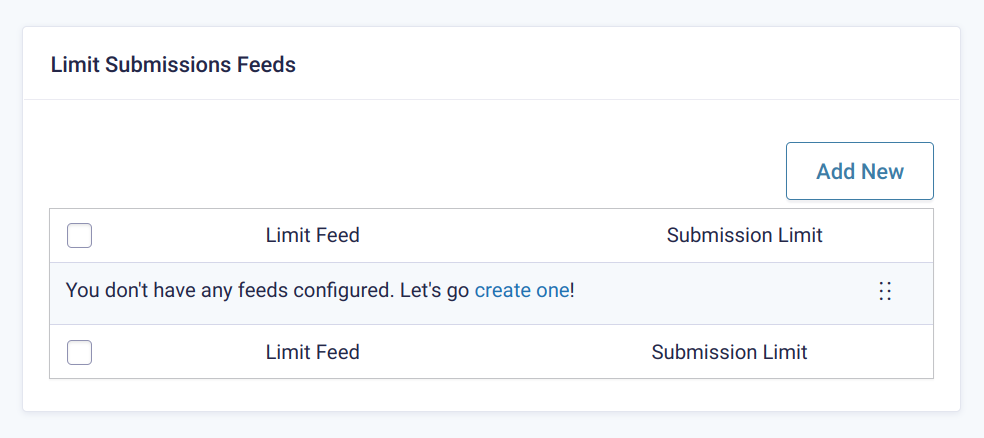
Configure the limit feed as you need, and click Update Settings to save your changes.
Your rules are invisible to your users but work in the background limiting your submissions as desired. As usual, don’t forget to connect your form to Mailchimp to collect user details.
With limit rules in place, let us improve the activation process after a user is created and their details sent to Mailchimp. For that, you need the GF Better User Activation add-on.
GF Better User Activation
Offering the best user experience on your website is of utmost importance as far as boosting your conversion rates goes.
Improving the user registration activation page is one of the best ways of improving user experience on your site.
In the following section, we will use the GF Better User Activation add-on to improve the activation process, so you can onboard users easily. You’ll still need to set up your basic registration forms with the Gravity Forms User Registration add-on. But once you have your basic registration form, you can use GF Better User Activation to improve the rest of the process.
With GF Better User Activation, your registration flow will work like this:
- A user submits your registration form via the Gravity Forms User Registration add-on.
- That user receives an email to activate their account.
- GF Better User Activation redirects that user to a custom activation page that you can customize as needed.
Before doing anything else, create a blank user activation page. Next, install and activate the GF Better User Activation add-on.
After that, navigate to Forms > Perks and click the Settings link on the GF Better User Activation perk as shown below.
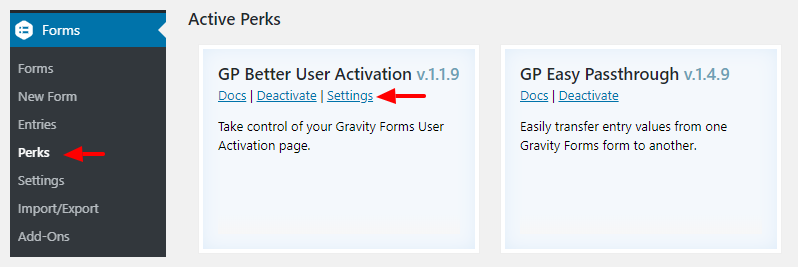
On the pop-up that follows, choose your custom activation page. Next, select the redirect page where users go after successful activation, and hit the Save Settings button as shown below.
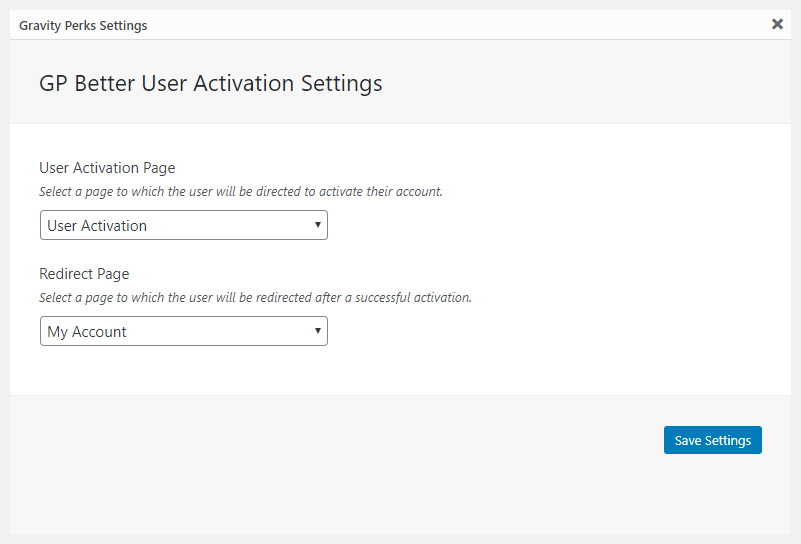
Pro Tip: If you can’t see your activation or redirect pages in the drop-down, please clear your browser cache, refresh the page and retry.
As soon as you set your activation page, the plugin will start working automatically. To edit the activation page, visit the page in edit mode, and find the Activation View Content tab.

Now you can integrate Gravity Forms with Mailchimp
At this point, you can integrate Gravity Forms with Mailchimp easily. On top of that, you can use GF Nested Forms and GF Easy Passthrough to create nested forms and pass data between forms, respectively. On top of that, you can add more eCommerce field types to your forms thanks to the GF eCommerce Fields add-on.
Further, you can collect payments on your Gravity Forms, while sending data to your Mailchimp account. On top of that, you can limit submissions on your forms as you desire using the GF Limit Submissions perk. Finally, you can use the GF Better User Activation add-on to improve the onboarding process on your website.
Gravity Forms is a powerful form-building plugin. It comes with a wide range of features and add-ons that help you do much more with your forms. For instance, you can use the Mailchimp add-on to send data from your Gravity Forms to your Mailchimp account automatically.
But to connect Gravity Forms with Mailchimp in advanced ways, you need Gravity Perks, a bundle of incredible Gravity Form add-ons.
You need Gravity Perks to get the full power of Mailchimp + Gravity Forms!. Buy Gravity Perks today to get conditional logic wizardry with all of our galatic Gravity Forms plugins!
Get your copy of Gravity Perks to supercharge your Gravity Forms in ways you never imagined before.

Thanks for information