How to Setup Gravity Forms to Accept Stripe Payments
Today’s tutorial covers everything you need to know about accepting Stripe payments on your Gravity Forms via the official Gravity Forms Stripe add-on and the GP eCommerce Fields Add-on.

Are you planning to accept Stripe payments on your Gravity Forms? If so, you’ll love today’s tutorial.
Stripe is a popular payment processor, much like PayPal. The payment gateway is a robust and secure method of processing customer credit card information to accept one-time payments, Stripe subscription payments, or recurring credit card payments on your site at checkout.

Gravity Forms is the most potent form building WordPress plugin. It offers you excellent features to create effective eCommerce forms for your website.
If you want the functionality to add discounts, complex products, taxes, and proper order summaries, among other things, you’ll need Gravity Perks.
And thanks to the Gravity Forms Stripe Add-on, you can easily connect your payment forms to Stripe to process payments securely and automatically.
The best part is you can leverage the power of Gravity Perks to capture payments in new and unique ways, in turn improving the payment experience on your WordPress site.
In today’s tutorial, you’ll learn how to connect Gravity Forms to Stripe in a few easy steps.
We’ll then explore a few Gravity Perks add-ons that will further improve your Gravity Forms Stripe integration.
Let’s get started.
How to Integrate Gravity Forms with Stripe
For the following section, you need:
- A Stripe account
- Gravity Forms, which you can buy at gravityforms.com
- Gravity Forms Stripe Add-On (a Gravity Forms Elite Add-On only available with a valid Elite Licence)
- GF eCommerce Fields
- SSL-ready domain
If you don’t have a Stripe account, you’ll need to create one. If you have an account, you can skip to the second section, where we install the Gravity Forms plugin.
How to Create a Stripe Account

Head over to stripe.com, and click the Start Now button. On the registration page that follows, enter email, name, password, check reCAPTCHA, and hit the Create your Stripe account as shown below.

Doing so leads you to a series of optional questions that you can skip if you click the Skip for now link, as shown below.

Log in to your mailbox, open the email from Stripe and click the Confirm email address button. Next, enter your password and click the Confirm your email button. After that, you’re redirected to your Stripe dashboard.
Next, click the Start button.
On the screens that follow, provide more information about your business and products to activate your Stripe account. You’ll also need your Stripe API keys.
You now have Stripe, so you’re ready to install the Gravity Forms plugin.
How to Install Gravity Forms
Login to your WordPress dashboard and navigate to Plugins > Add New.
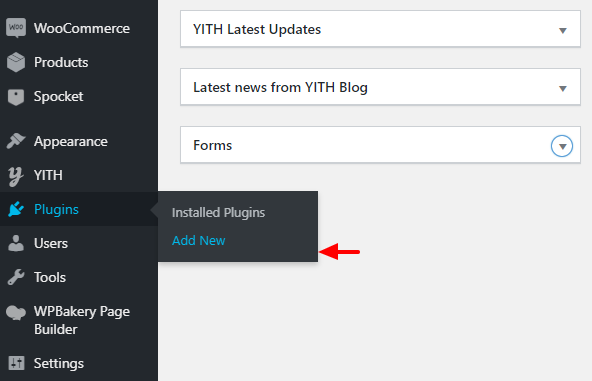
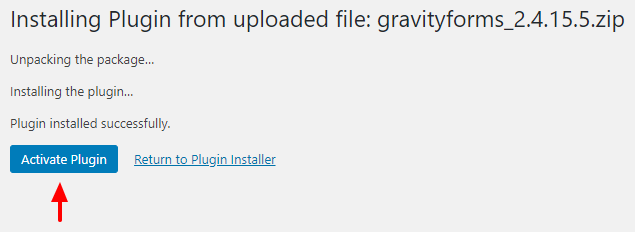
Next, click the Upload Plugin button, choose Gravity Forms and go to Install Now.

After that, click Activate Plugin as shown below.
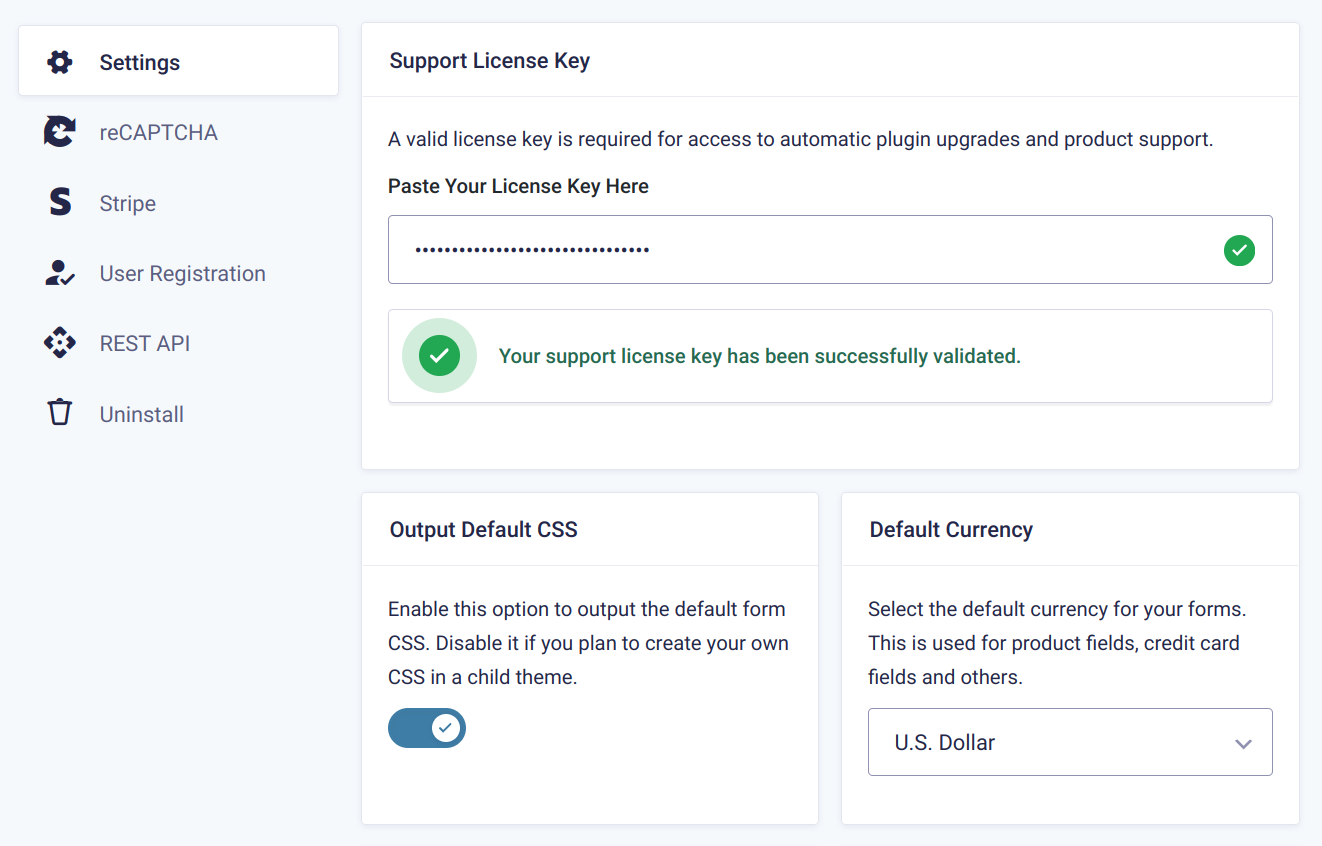
Next, navigate to Forms > Settings, enter your Gravity Forms license key, scroll to the bottom of the page and click the Save Settings button.
Now that Gravity Forms is ready to use, we’ll move on to installing the Gravity Forms Stripe Add-On.
How to Install Gravity Forms Stripe Add-On
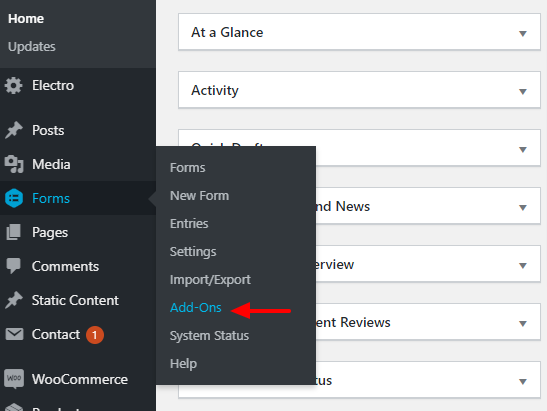
Installing the Gravity Forms Stripe Add-On is easy. Navigate to Forms > Add-Ons as shown below.
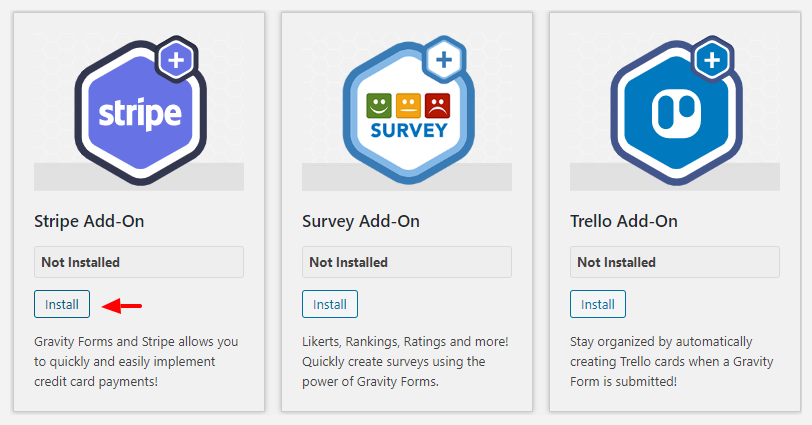
Next, scroll down and install the latest version of the Stripe Add-On.
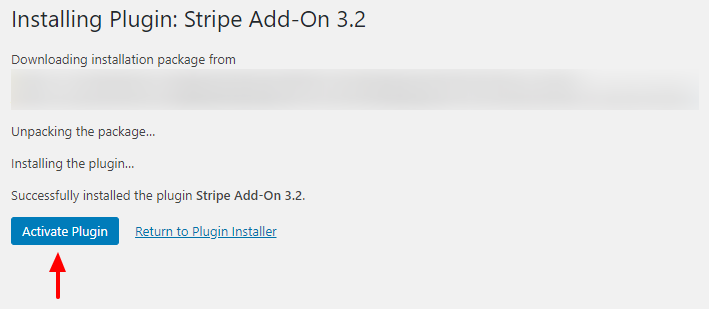
After that, hit the Activate Plugin button.
You’ve successfully installed the official Gravity Forms Stripe Add-On. It’s time to link your Gravity Forms plugin to your Stripe account.
How to Connect Gravity Forms to Stripe
Both Gravity Forms and the Stripe Add-On are good to go, but your site is not connected to your Stripe account yet. Now, we’ll connect Gravity Forms to Stripe in your WordPress admin dashboard.
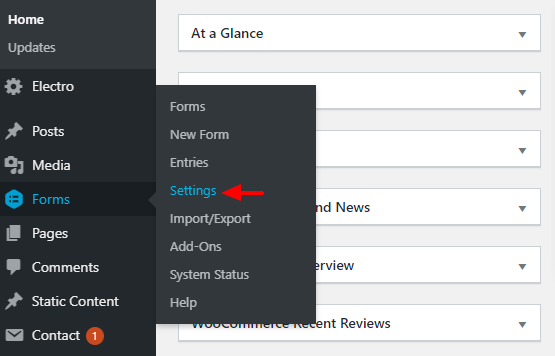
Navigate to Forms > Settings as shown in the following image.
Next, click the Stripe tab as we detail in the following screenshot. As you can see, you can either use Stripe’s live or test platform.

The test platform allows you to test out your integration before deploying it on a live website. Choose Test and click the Connect with Stripe button.
On the following page, click the Skip this account form link as we highlight below.

Stripe takes you back to your WordPress admin dashboard. Next, let us enable the Gravity Forms webhook URL. To do that, click the View instructions link as we highlight below.
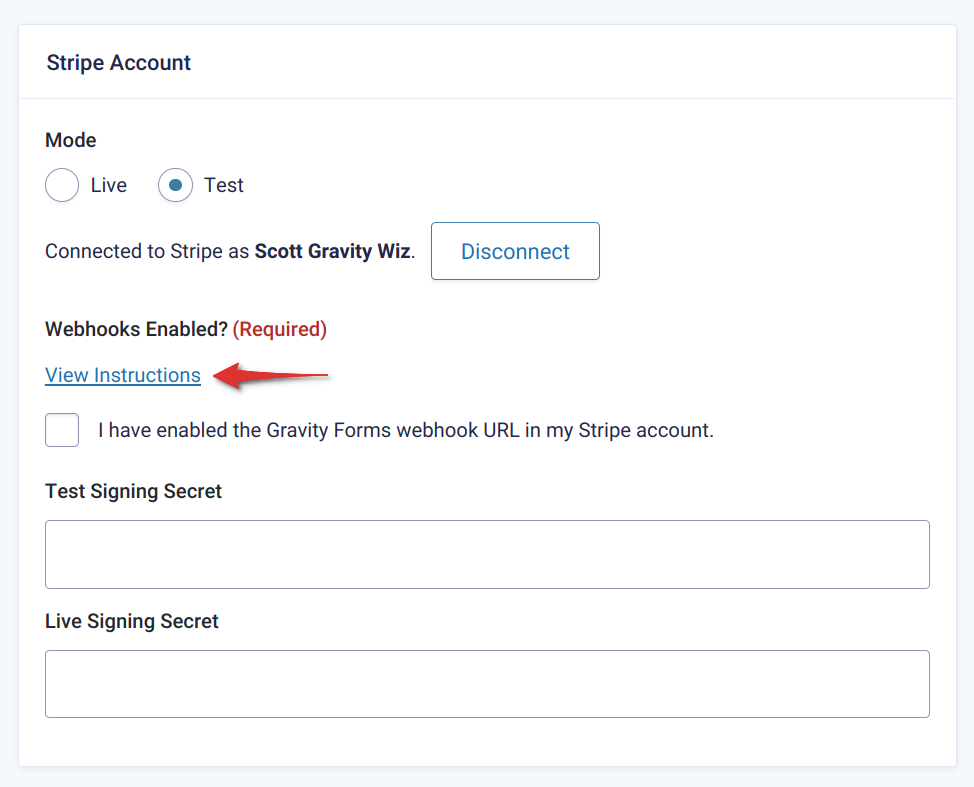
You’ll then need to follow the instructions on the pop-up that follows to set up your Gravity Forms webhook URL:

Note: To connect Gravity Forms to your Stripe account, you’ll need the Gravity Forms webhook URL shown under list item no.3 in the image above.
But to save time, here is what to do.
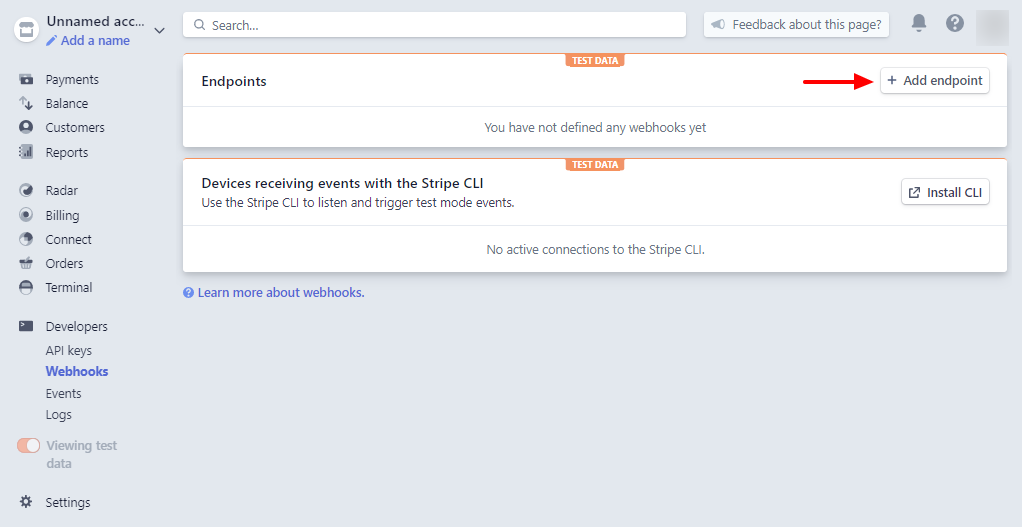
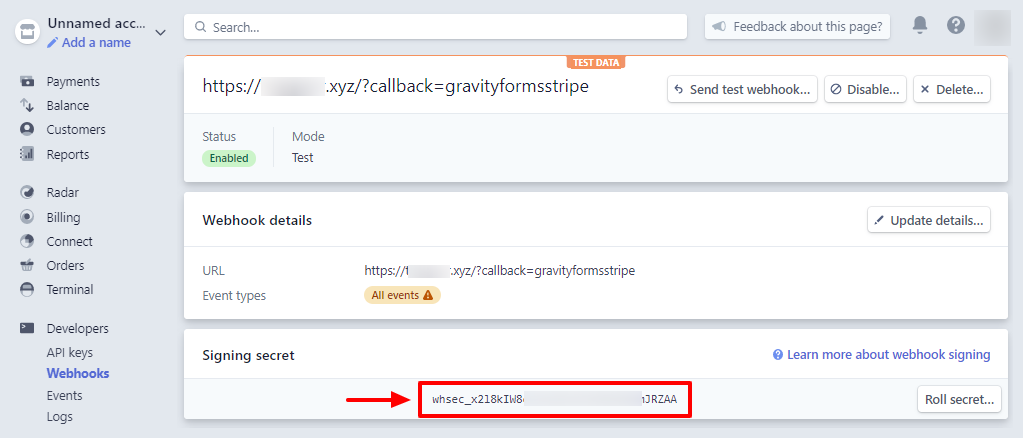
Navigate to Developers > Webhooks, and click the Add endpoint button as we illustrate below.
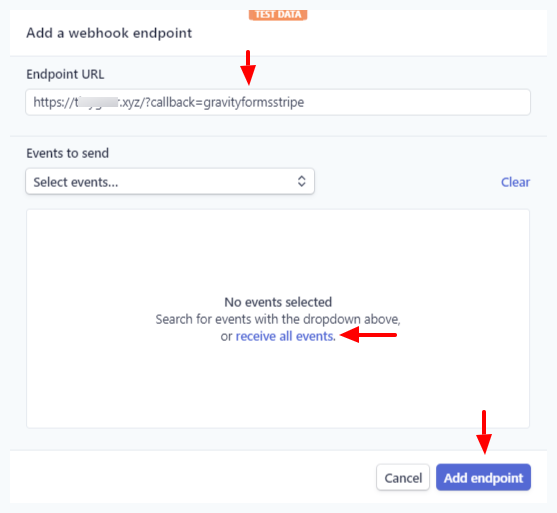
Next, copy-paste your Gravity Forms webhook URL, select receive all events, and click Add endpoint as shown in the following image.
Check the status of your Gravity Forms webhook URL and copy your Signing secret as shown below.
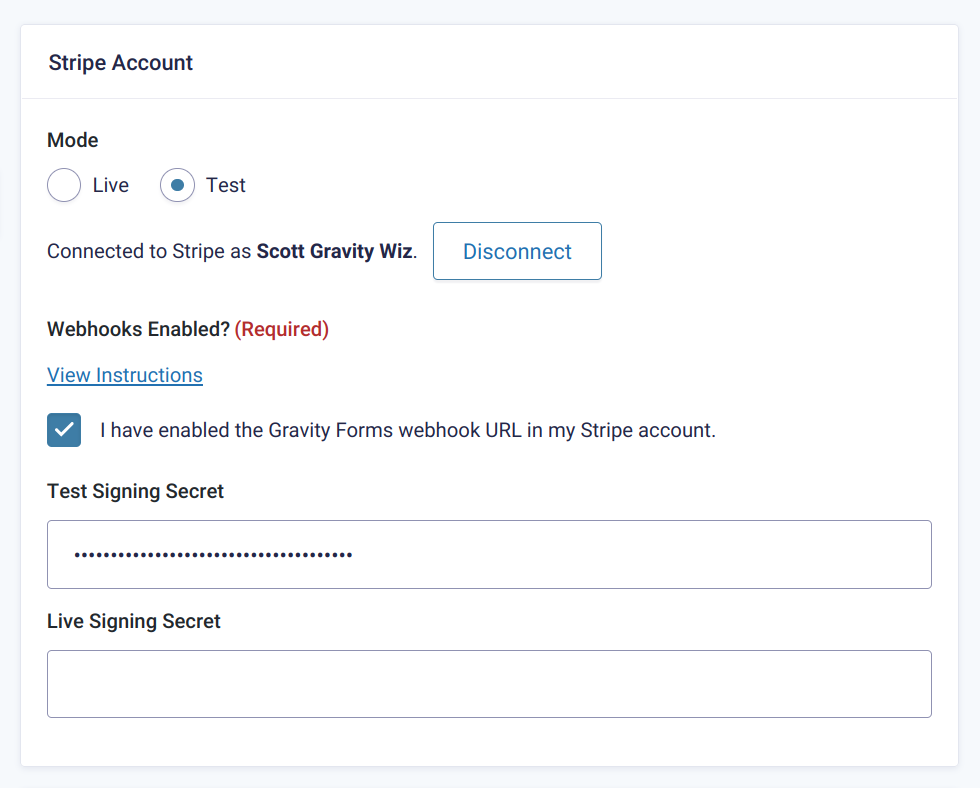
Go back to your Gravity Forms Stripe settings, tick the Webhooks Enabled? checkbox and paste your signing secret in the Test Signing Secret field, as shown below.
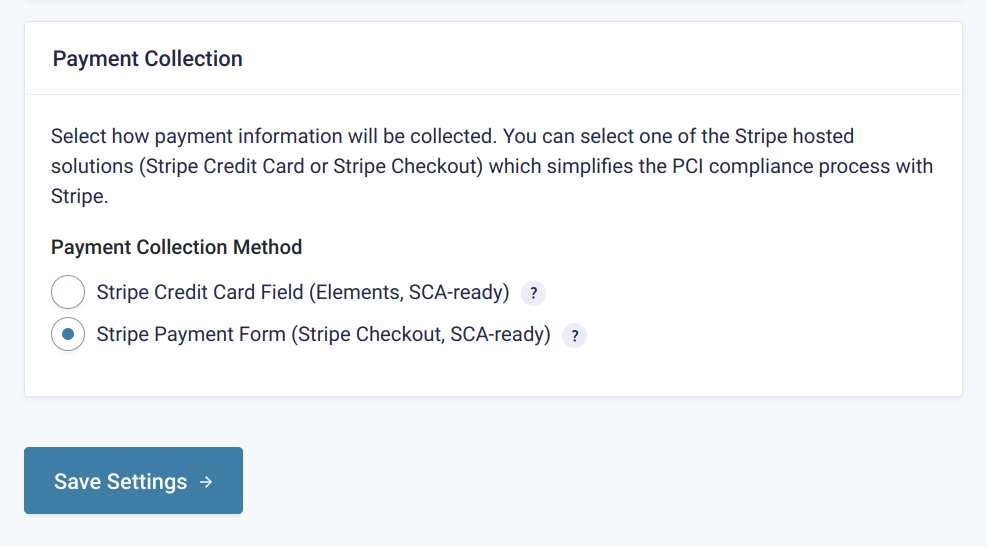
After that, scroll to the bottom of the page. For the Payment Collection Method, choose Stripe Payment Form. The benefit of this method is that it simplifies PCI compliance and helps you meet the strong customer authentication requirement (SCA) in the EU Revised Directive on Payment Services. Once you’ve made your choice, click Update Settings.
Gravity Forms is now connected to your Stripe account. Now, we’ll test the integration with a test transaction. For that, create a test payment form, complete with GF eCommerce Fields. For that, you’ll need to install the GF eCommerce Fields add-on first.
How to Install GF eCommerce Fields Add-On
GF eCommerce Fields is an essential Gravity Perks add-on, which helps you to improve your Gravity payment or eCommerce forms. To install GF eCommerce Fields, you need one of the three Gravity Perks bundles. Purchase your license, and download Gravity Perks to your computer.
GF eCommerce Fields
Once you purchase your license, you can follow these instructions to install Gravity Perks on your WordPress site and activate your license.
Once you’ve done that, click the Let’s go install some perks! link, as shown below.

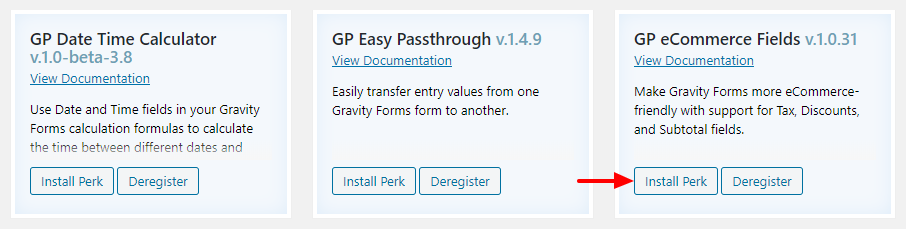
Find the GF eCommerce Fields add-on, and click the Install Perk button.
Next, click Activate Perk, as shown below.

In the next section, we show you exactly how to connect your payment forms to Stripe. We also use the GF eCommerce Fields add-on to add eCommerce field types to your forms.
How to Connect a Payment Form with Stripe
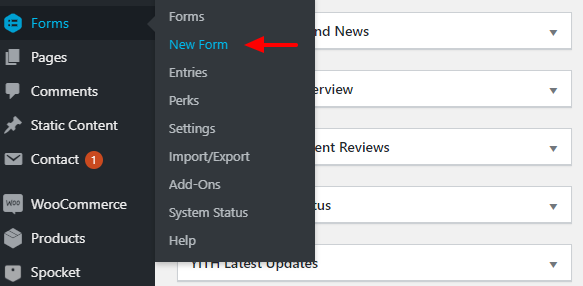
On your WordPress admin menu, go to Forms > New Form to create a new product form.
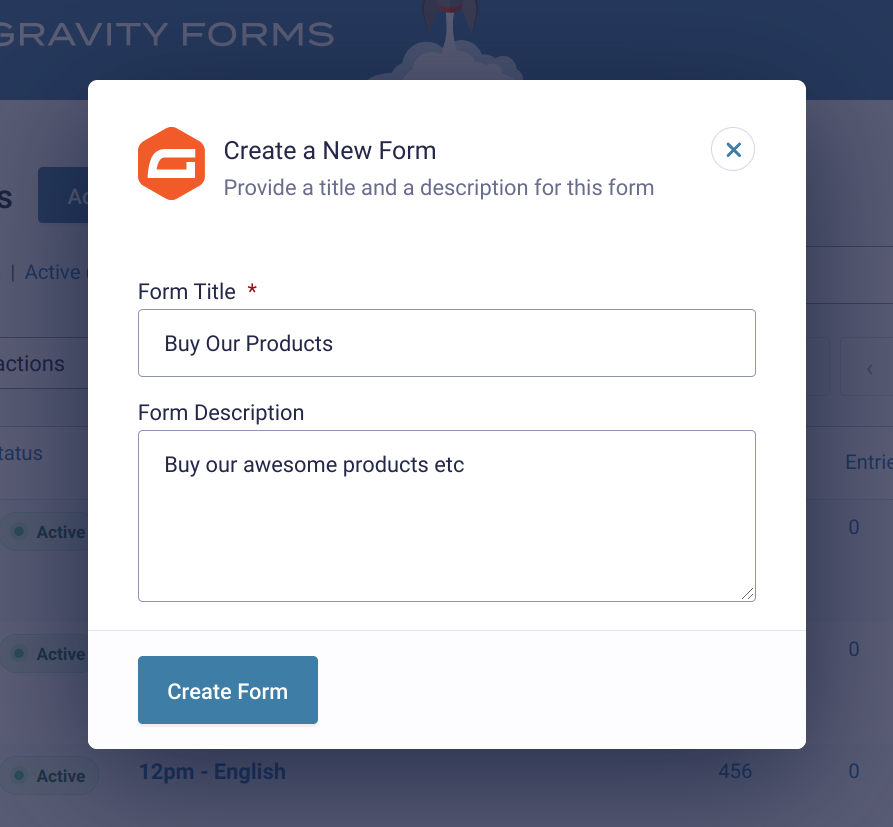
Add a form title, description and click the Create Form button, as detailed below.
Doing so leads you to the intuitive Gravity Forms form builder.
In the form builder, add the relevant fields, i.e., name, email, product field, tax, discount, subtotal, and total, as shown below.
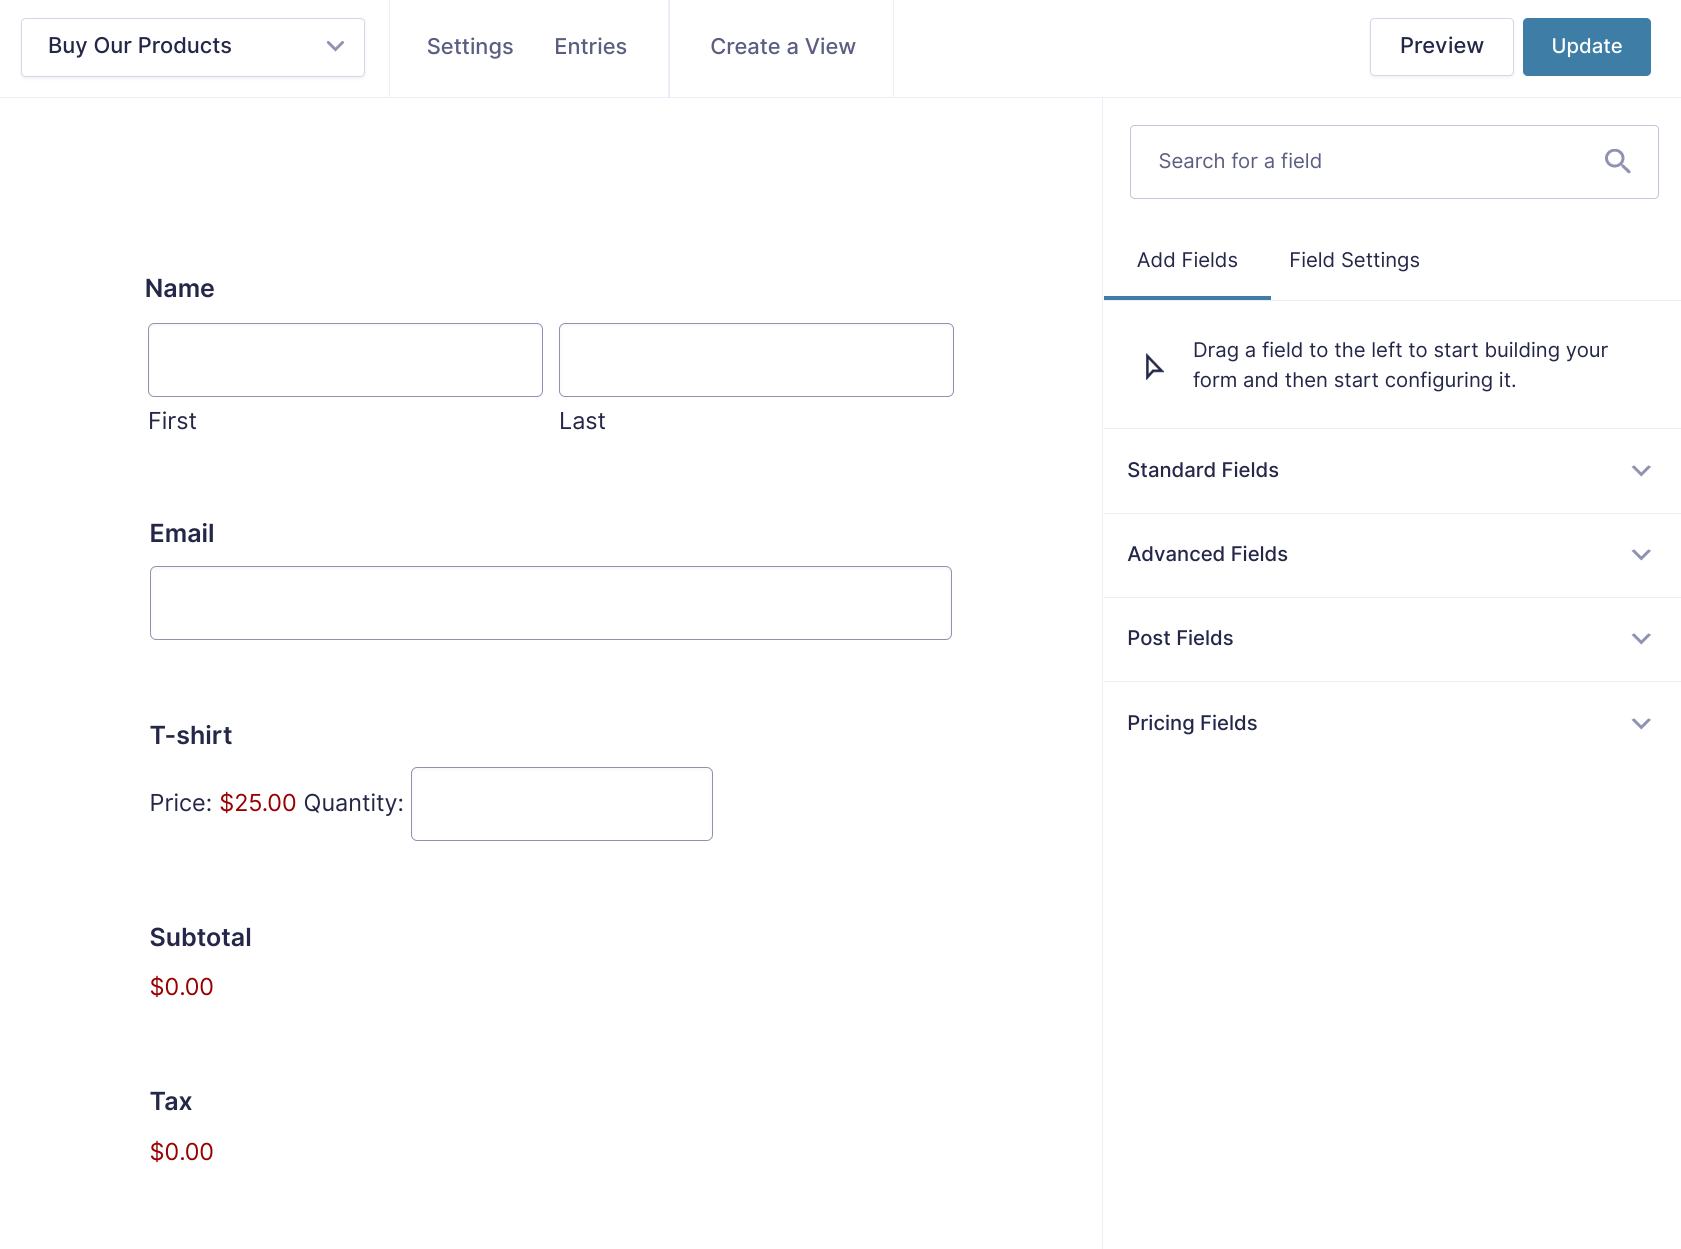
You can find all the fields you need for this section under “Advanced Fields” and “Pricing Fields” tabs.
Click the Update button to save your changes. Before we talk a bit more about the GF eCommerce fields we mentioned earlier, you need to link the product form to your Stripe account and test out the integration.
How?
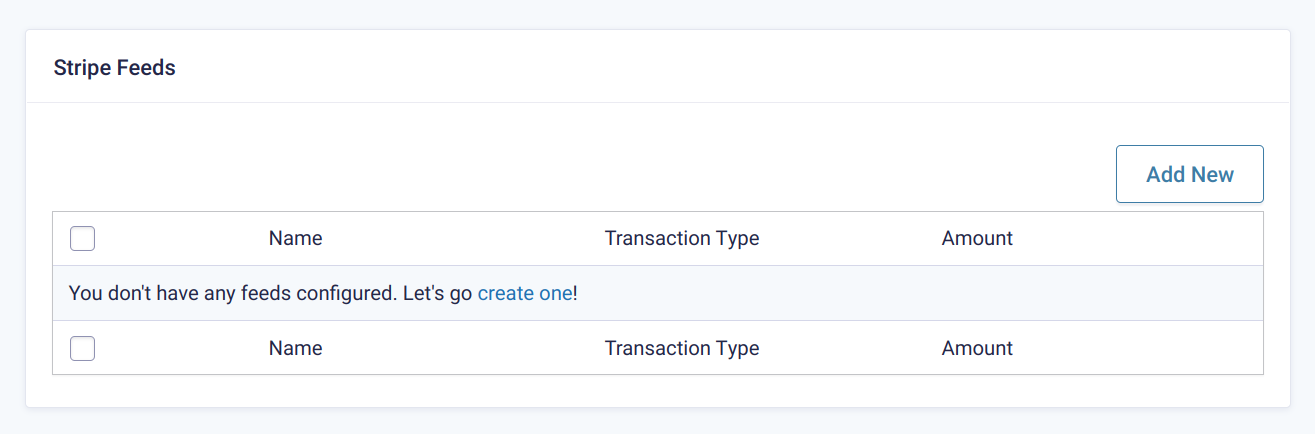
Next, navigate to Settings > Stripe as shown below.

Click the Add New button to create a new Stripe Feed, as shown in the following image.
On the next screen, name your feed, and choose the transaction type. As you’ll notice, Stripe supports one-time payments and recurring subscription payments. For this example, choose Product and Services. Next, choose your payment amount, add metadata if need be, enable Stripe receipts, toggle conditional logic, and hit the Update Settings button as we highlight below.

Your payment form is ready, so let’s publish it and test the payment.
Publish Your Payment Form
For this section, we add the form to a page, but you can insert your form in a post or widget area. Go to Pages > Add New, as shown below.

Name your page, hit the plus (+) icon in your Gutenberg editor, and choose Gravity Forms under Embeds as shown below.
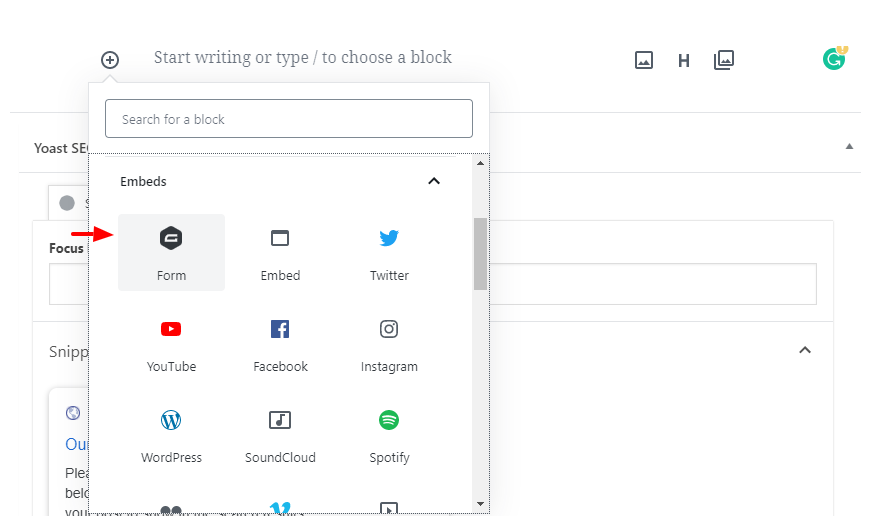
Next, choose your form from the drop-down list.
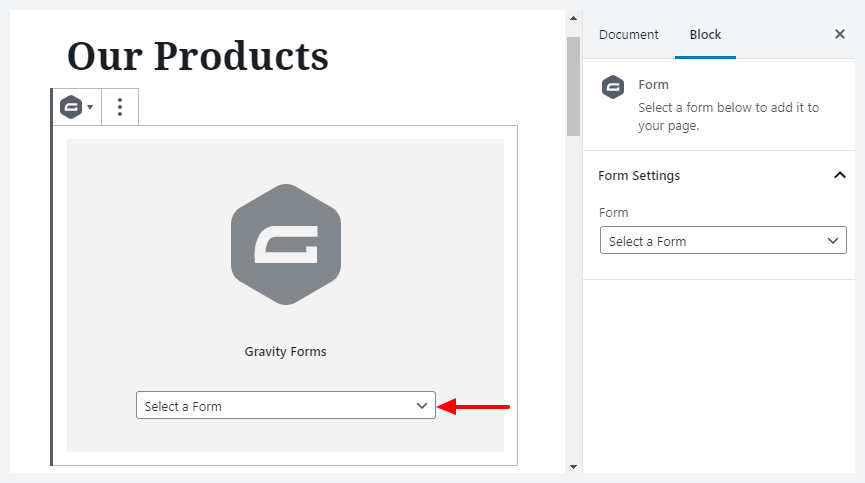
If you’re using Gutenberg, it adds your form to the page automatically.
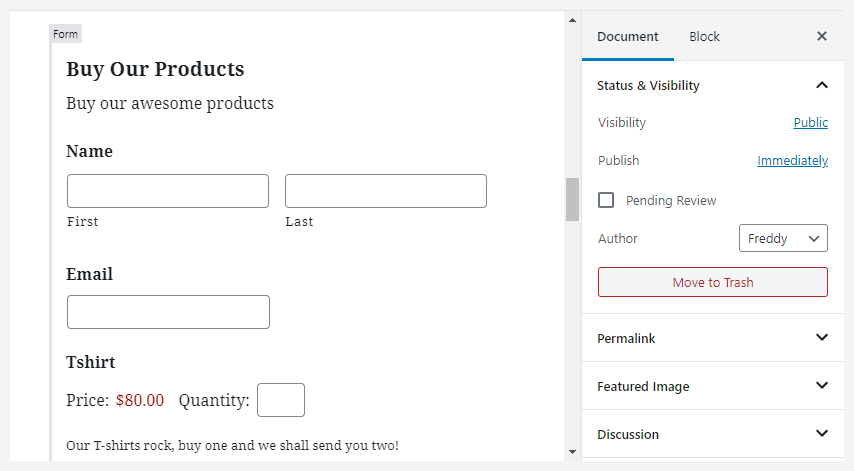
Click the Publish button, and then open your new form in the frontend.

Aside: Remember, you can customize how your form looks extensively within the form builder.
Moving on, fill out the form with your details, choose your products, and only use one of the test cards available in Stripe’s testing docs. You can use this to test out the credit card field since it’s a required field. Using real card details to test in live mode is prohibited by the Stripe Service Agreement.
Submit your form and login to your Stripe account. Navigate to the Payments tab in your dashboard as illustrated below.
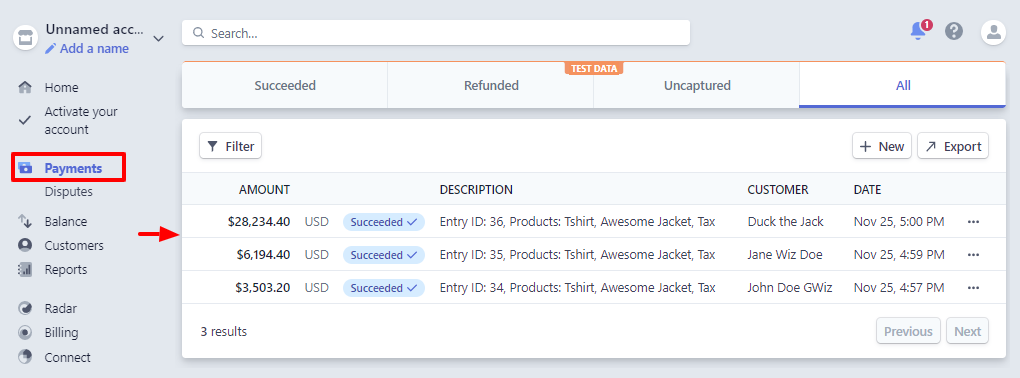
As you can see, our connection is working perfectly. To reiterate, Stripe’s test environment allows you to test everything before going live. When you’re ready to go live, simply switch to your live key.
All done. Now, let us delve deeper into the GF eCommerce fields we used in our payment form.
GF eCommerce Fields Used in our Example
When creating our test payment form, we added the Discount, Tax, and Subtotal fields via the GF eCommerce Fields add-on. In the following section, we explore each field.
Discounts Field
The Discount field allows you to apply a flat or percentage discount to a specific product field, or the form total.

You can use the discount field to apply dynamic discounts to your forms. As shown in the image above, add your field label, description, a flat or percentage discount amount, and select the applicable products. Further, you can add multiple discounts to a form, and enable conditional logic if need be.
For more info, learn how to apply discounts with Gravity Forms.
Tax Field
GF eCommerce Fields’ Tax filed allows you to add a preconfigured tax to your form. Unlike the Discount field, the tax field supports percentage values only.
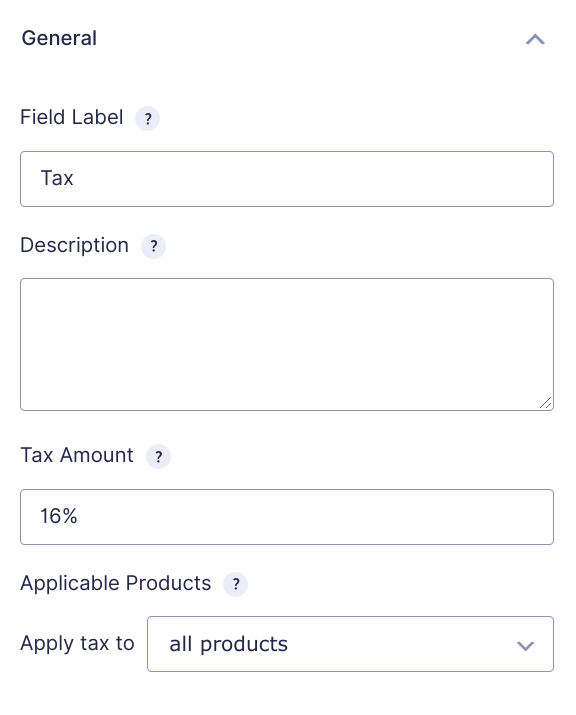
Applying taxes to your forms is straightforward. Add your field label, description, tax amount (in %), and choose applicable products. Note that you can also use conditional logic to apply taxes. To learn more, check out How to Calculate Tax or VAT with Gravity Forms.
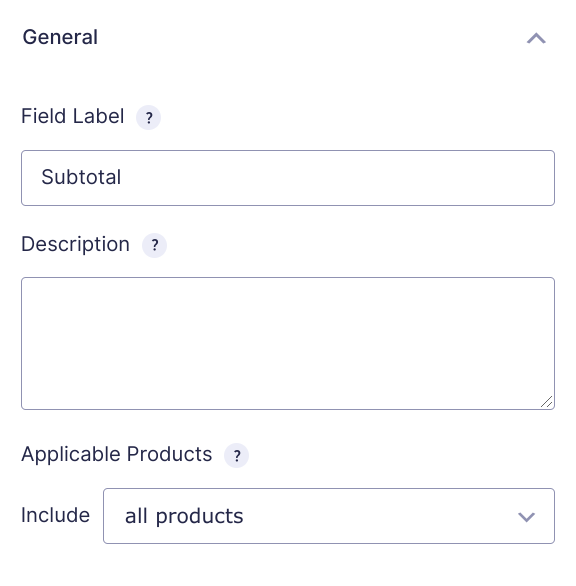
Subtotal Field
The subtotal field allows you to show a subtotal of all products on your form. The field doesn’t include taxes, shipping, discounts, and coupons.
The field is incredibly easy to use, but if you want to learn more, check out subtotal field documentation.
And to learn more about GF eCommerce Fields in general, check out Gravity Forms eCommerce Fields.
Seeing as you can successfully connect Gravity Forms to Stripe like a pro, you can call it a day.
Get the most out of Stripe + Gravity Forms
Accepting Stripe payments on your Gravity Forms needn’t be challenging. From today’s tutorial, you learned how to integrate Gravity Forms with Stripe via the official add-on. On top of that, we pointed you towards GF eCommerce Fields, a fantastic add-on that allows you to supercharge your payment forms.
Remember to start with Stripe’s test environment, and when you’re sure things are working correctly, switch to the live account. GF eCommerce Fields is just one of the many Gravity Perks you can use to improve Stripe payments on your site and ultimately increase form submissions from your subscribers.
Do you have queries or suggestions? If so, we’re happy to help. Please leave your comments below!
To get started, get Gravity Perks now.


Any guide on setting up Gravity Forms and Stripe Connect for Split Pay scenarios? This would be helpful to demonstrate some snippet for these kind of situations.
Hi Philip,
We do not have a tutorial or guide for this. I suggest you check with Gravity Forms Support to see if they have something in that area.
Best,
Hi Phillip, did you get a solution to split pay scenarios using Gravity Forms and Stripe? Best regards, B
Is there a reason we can add more than 5 Stripe Card fields to our forms before creating a feed? We don’t have the ability to add additional stripe card fields. Thank you.
Hi Jack,
I’m not really tracking your question very well, and I think Gravity Forms Support will be in a better position to assist you since the Stripe Addon is their product. I’ll suggest you get in touch with their support team on this.
Best,
hi, I want to add separate fields for cardnumber, cvc, year, month. How i can do this ? Please try to reply it asap.
Regards,
Hi Nit,
We do not have a solution for this, and because the Gravity Forms Stripe Add-On is a product of Gravity Forms, you may want to check with Gravity Forms Support to see if they have a solution for what you want.
Best,
As always… another stellar tutorial. Don’t forget about the free GravityStripe add-on that makes it so users can view their subscription details. When they are charged, how much, and even the ability to cancel on their own. Also gives an administrator view to see all subscriptions, whether they are active, failed, or cancelled. https://wordpress.org/plugins/manage-gravity-forms-stripe-subscriptions/