Leveraging MailPoet Tags Using Gravity Forms
Add or remove tags from MailPoet subscribers automatically on form submission using GC MailPoet–a spellbinding approach to email marketing automation in WordPress.
- Step 1 — Install and Activate GC MailPoet
- Step 2 — Create a GC MailPoet Feed
- Step 3 — Set Up GC MailPoet Feed
- Taking it Further
MailPoet tags are a powerful feature for narrowing down each subscriber’s interests and behaviors more granularly, helping move them along segments and empowering automation. Combine that with Gravity Forms’ conditional logic and endless use cases (e.g. newsletter signups, payment forms, user profiles), and you’ve got the bones of a robust email marketing automation platform that is 100% WordPress-based.
What completes the platform is a link between the two: GC MailPoet. Not only can it subscribe, update, and unsubscribe MailPoet users automatically from Gravity Forms, it can also add and remove tags, being a tried-and-true companion for all stages of a user’s lifecycle.
Let’s see how the tag management part of it works:
This article requires the Gravity Connect MailPoet plugin.
Buy Gravity Connect to get this plus other premium Gravity Forms plugins!
Step 1 — Install and Activate GC MailPoet
GC MailPoet is available through Gravity Connect. You can quickly install and activate it via Spellbook.
Step 2 — Create a GC MailPoet Feed
Head to the form you want to use to update MailPoet subscriber tags. In the Settings menu, click on MailPoet and it’ll take you to the GC MailPoet Feeds screen. From there, click on Add.
Step 3 — Set Up GC MailPoet Feed
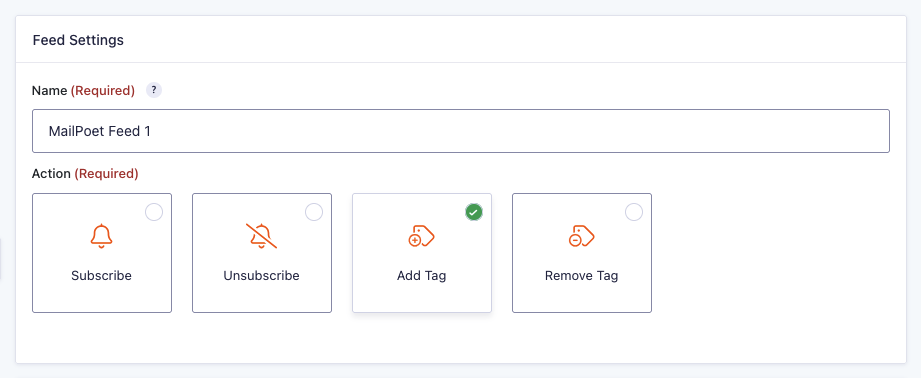
Name your feed and choose either the Add Tag or Remove Tag action. The following settings will be the same!
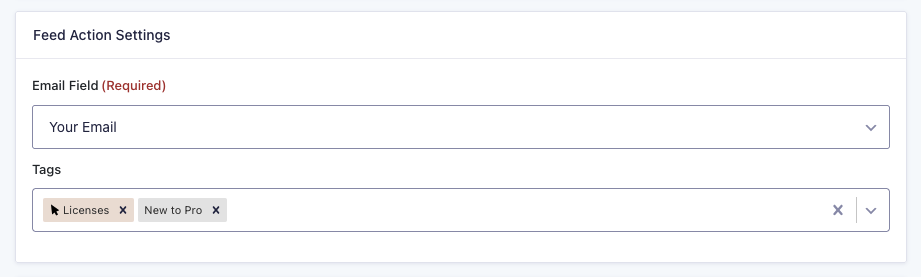
Next up, choose the email field–this is the email that will be used to identify the subscriber. Then, choose which tags will be added (or removed)–you can choose form fields, pre-existing MailPoet tags, or create brand new ones.
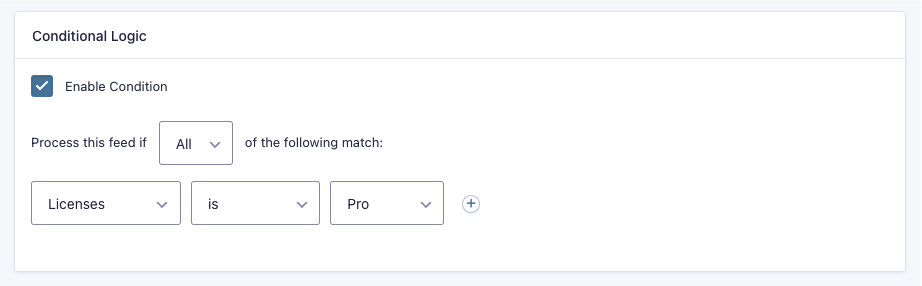
Now, this is where things get interesting: you can set up conditional logic for your feed.
In this case, I’m running an upsell campaign for Basic license users that links to this special upsell form. I have a separate Remove Tag feed that always runs, but this Add Tag feed should only run if they choose to upgrade to a Pro license specifically, so I set up conditional logic to fit the bill.
What’s happening in MailPoet: These tag changes move the user from the Basic segment to the Pro segment, and trigger the end of the Basic Upsell automation and the start of New to Pro (>30 days).
That’s it–keep it as simple as this tutorial did or create a constellation of conditional logic points. The sky is the limit!
Taking it Further
Since you already have users’ emails in your website, you can populate the email field automatically using a merge tag for the field’s default value.
- For logged-in users, use the
{user:user_email}merge tag. - For non-logged-in users, you can send an email with MailPoet’s
[subscriber:email]shortcode to include their email in the form URL (e.g.https://example.com/yourform?email=[subscriber:email]). Then use the{get:param}merge tag to pull it into the form — enabled via this snippet.
This way, users have an enchanted quill inputting their emails for them, making their experience seamless.
If you have any questions, let us know in the comments. 💫


Excellent opportunities for every gravity customer. So really best analysis for the wiz.
Thank you.