How to Connect Gravity Forms to Any API for Live Data Lookup
Connect Gravity Forms to external databases—like government APIs—to fetch and auto-populate data instantly.

Imagine typing in a single piece of info and having your form instantly pull up all the related details from an external database. That’s pretty powerful—turning Gravity Forms into a tool that can push and pull data from the rest of the web.
Say someone fills out your form and enters their Vehicle Identification Number (VIN). You could also ask them to type in the year, make and model, or you could just ask for the VIN and pull the rest automatically.
With GC API Alchemist, you connect your form to an external database, pull in those vehicle details, and save them with the entry. Add GP Populate Anything to the mix, and those details are now auto-populated in the form fields instantly.
Here are two ways to do this:
- Standard: Data is fetched after the form is submitted. Great if you just need it stored in the entry.
- Live: Data shows up as the user types, before they submit the form. Great for instant validation, real-time lookups, or building conditional logic based on the fetched data.
Let’s walk through both methods and turn a basic VIN field into a lookup tool. 🔎
This article requires the Gravity Connect API Alchemist plugin.
Buy Gravity Connect to get this plus other premium Gravity Forms plugins!
The Setup
First, we’ll connect our website to the NHTSA API and build the form that’ll display the vehicle data.
Install GC API Alchemist
- Open your Spellbook › click Connect › install and activate GC API Alchemist.
- Once active, you’ll see API Connections in the dashboard under Forms.
Connect to NTHSA
Let’s connect your site to the NHTSA API and save it as a new “Connection Profile.”
- Open API Connections from the dashboard.
- Click Add New API Connection.
- Set name:
VIN - Base URL:
https://vpic.nhtsa.dot.gov/api/ - Authentication tab:
None - Click Publish.

Build the Form
Let’s build the form that’ll pull in and display the vehicle data.
- Create a new form (or edit an existing one).
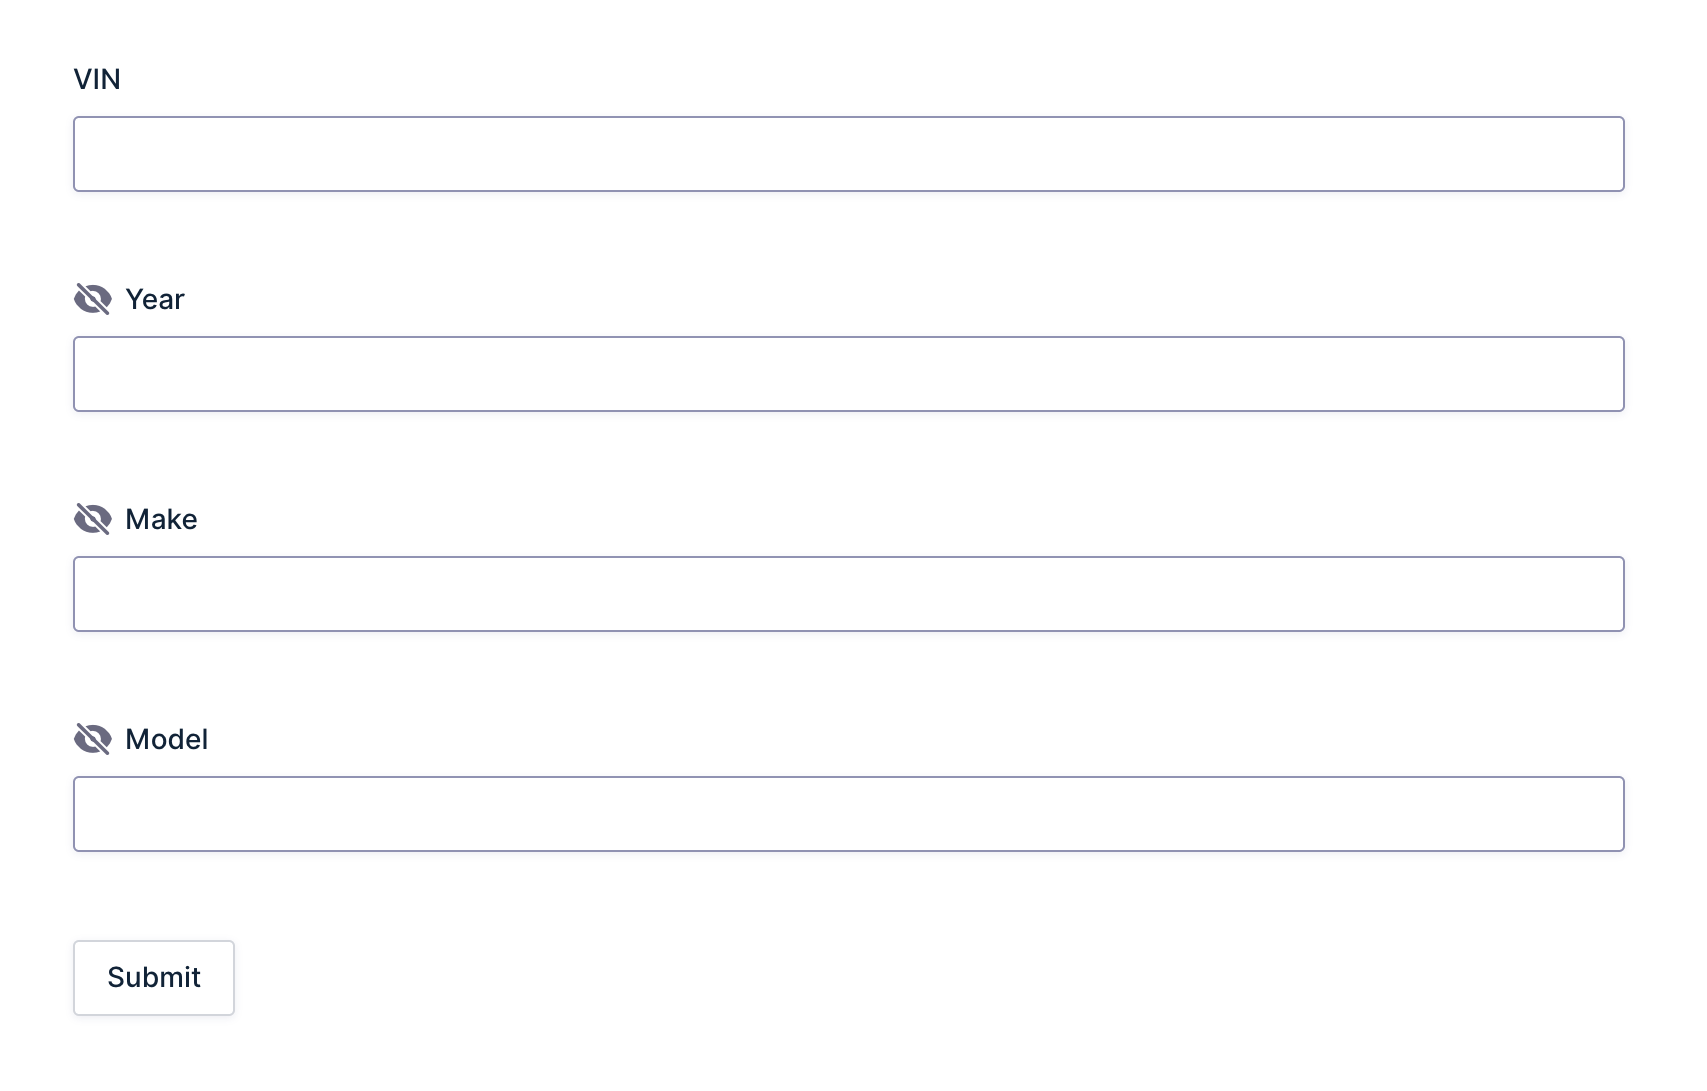
- Add Single Line Text fields and label with the following:
- VIN
- Year — Hidden
- Make — Hidden
- Model — Hidden
- Save the form.
We’ve hidden the Year, Make, and Model fields because they don’t need to be seen, as they’ll only be filled in once the form is submitted.
Two Ways to Display Data
- Method 1 (Standard) pulls in the data after the form is submitted, which can be viewed in the entry.
- Method 2 (Live) populates the vehicle data instantly as soon as someone types in a VIN, all before the form is submitted.
Method 1: Standard
In this method, the user enters a VIN and submits the form. GC API Alchemist then “talks” to the database, brings back the vehicle data, and automatically updates the submitted entry.
This works well if you only need the data behind the scenes—for validation, record-keeping, notifications, and more.
Set Up Feed
Think of a feed as the instructions. When someone submits a form, the feed says: “Hey, take this VIN, send it to NHTSA, and bring back the vehicle data for me.”
- In the form, navigate to Settings › API Alchemist.
- Click Add New › name the feed
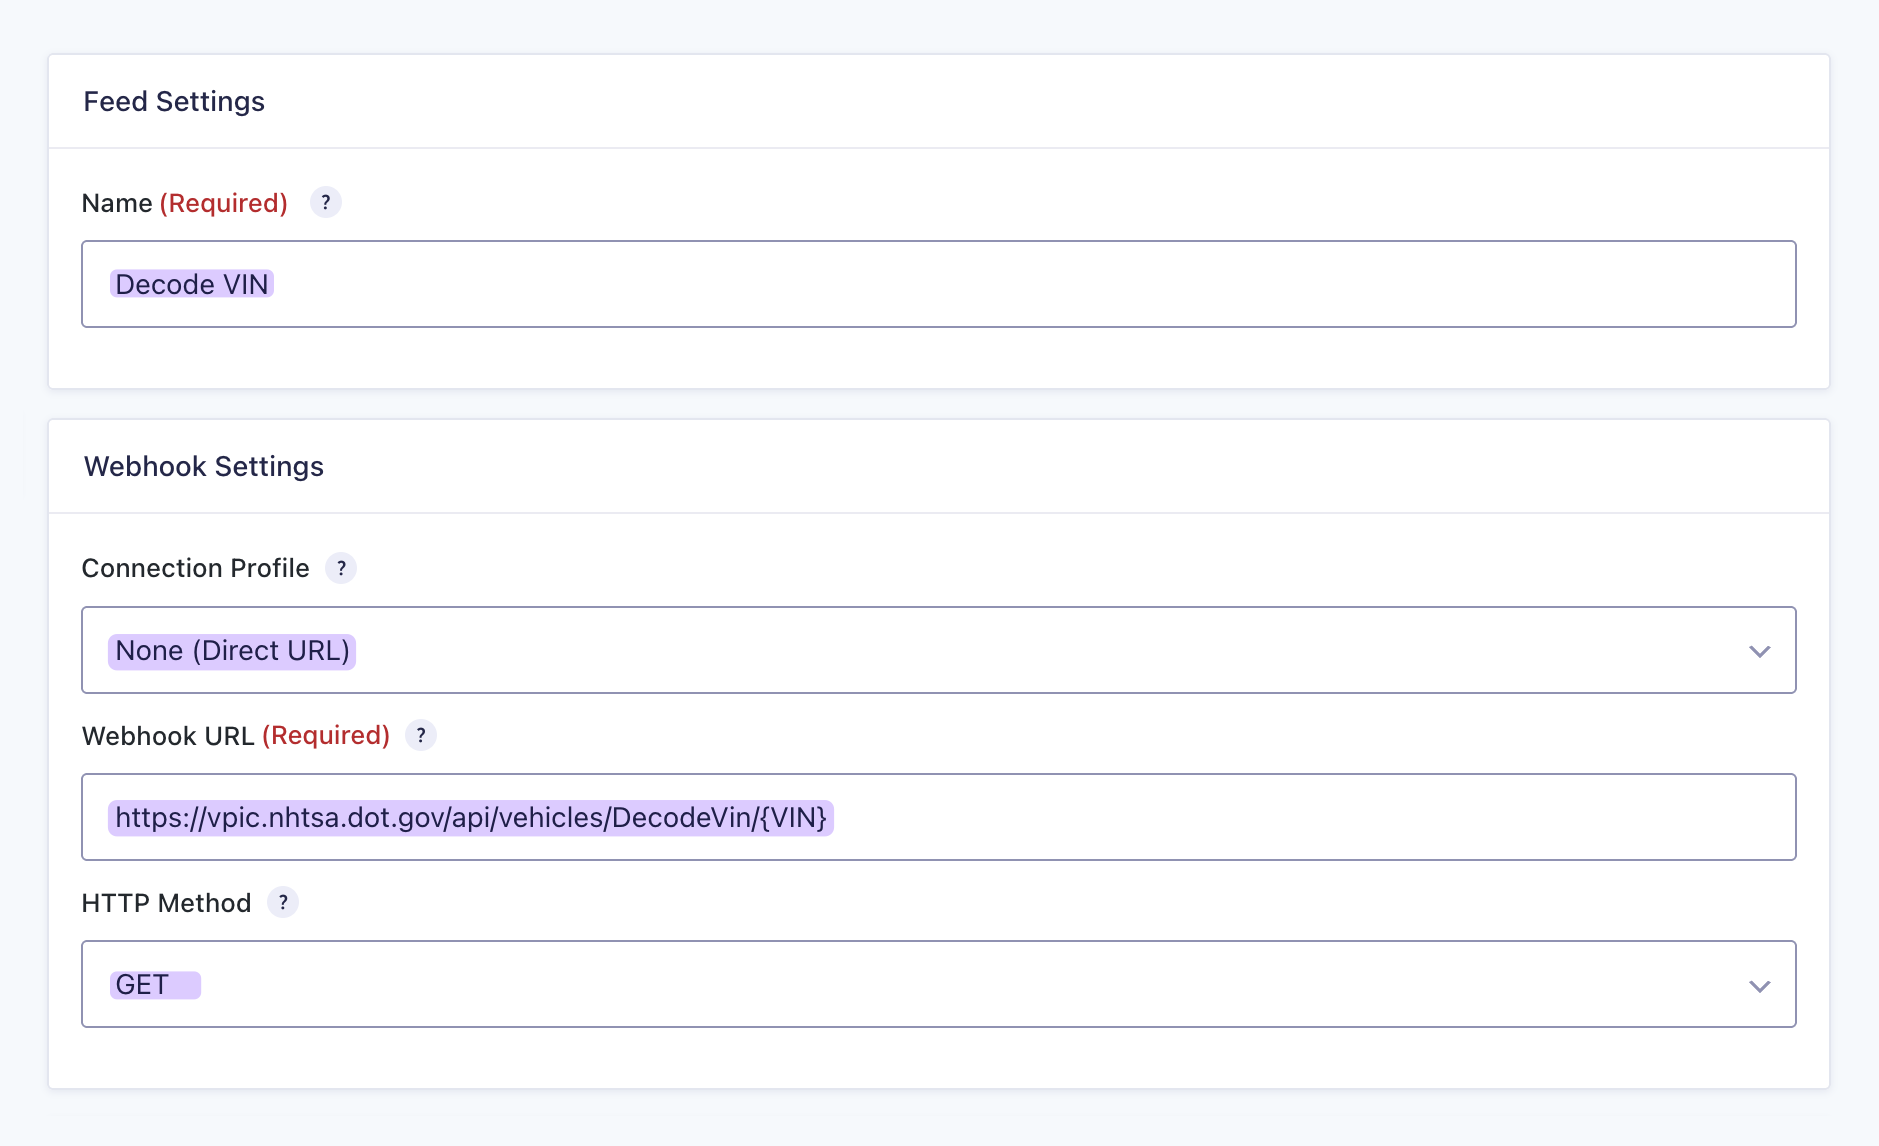
Decode VIN.
Webhook Settings
- Under Connection Profile › select None (Direct URL).
- For Endpoint Path:
https://vpic.nhtsa.dot.gov/api/vehicles/DecodeVin/{VIN} - HTTP Method:
GET
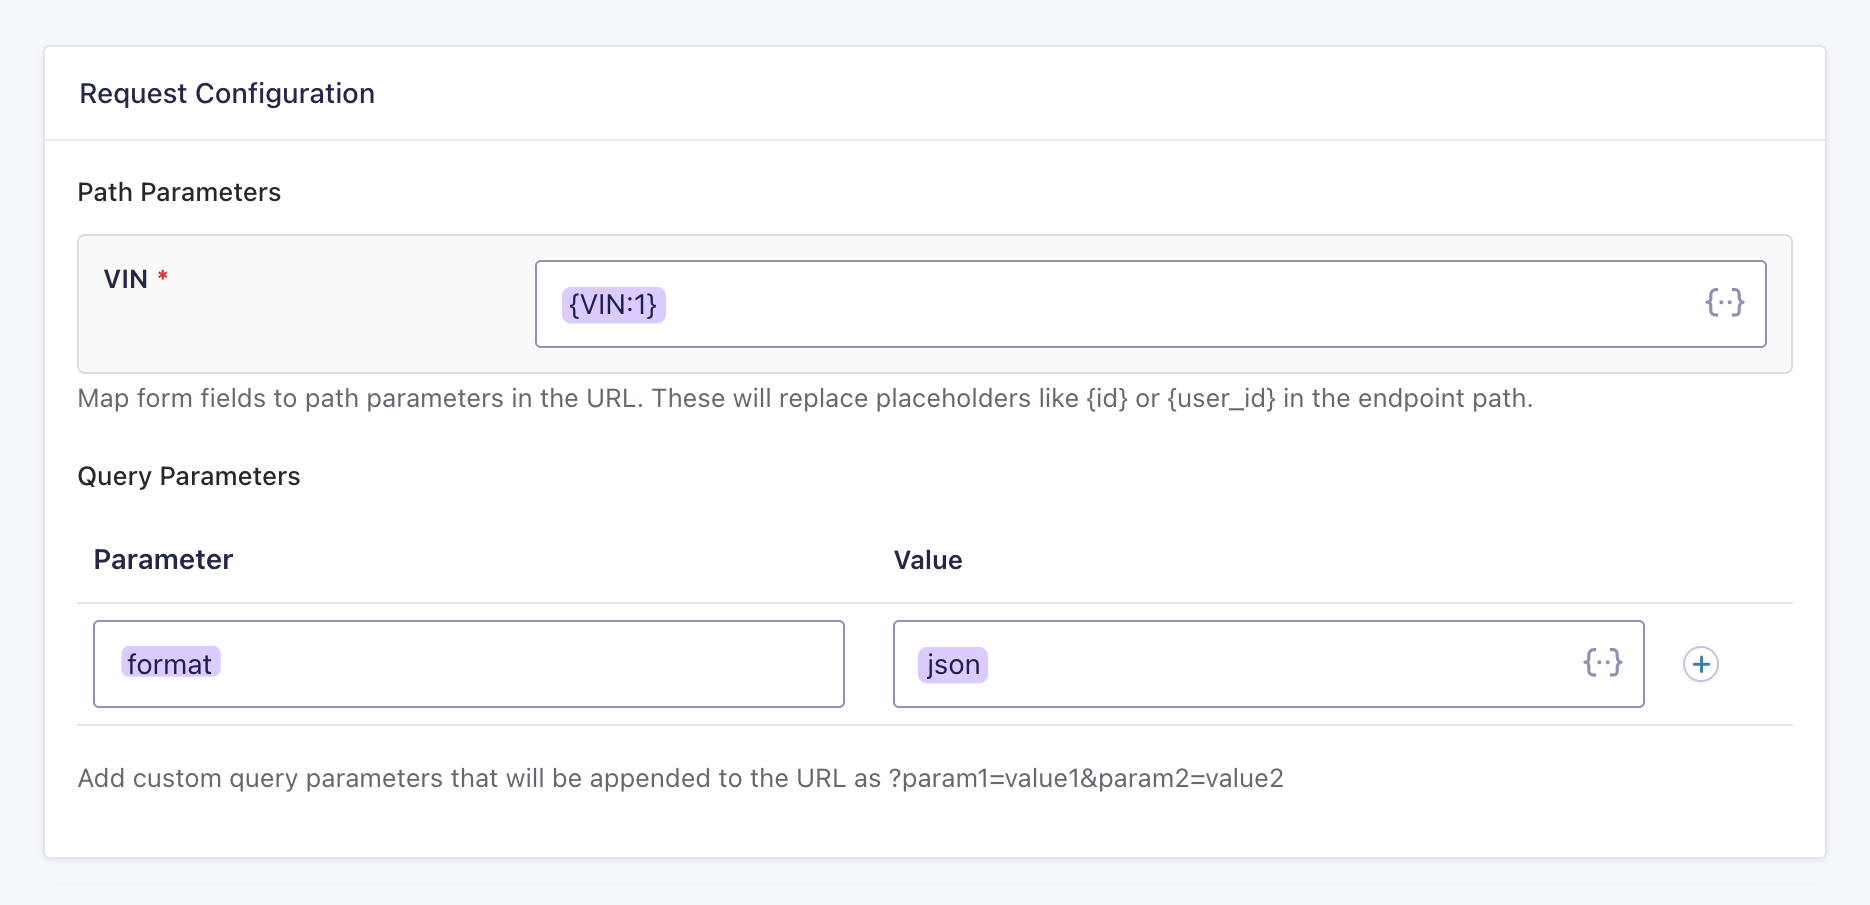
Request Configuration
- Click the merge tag icon and select the
VINfield. - Parameter:
format - Value:
json
Response Handling
- Enable Response Handling › select Simple.
Map Response Data
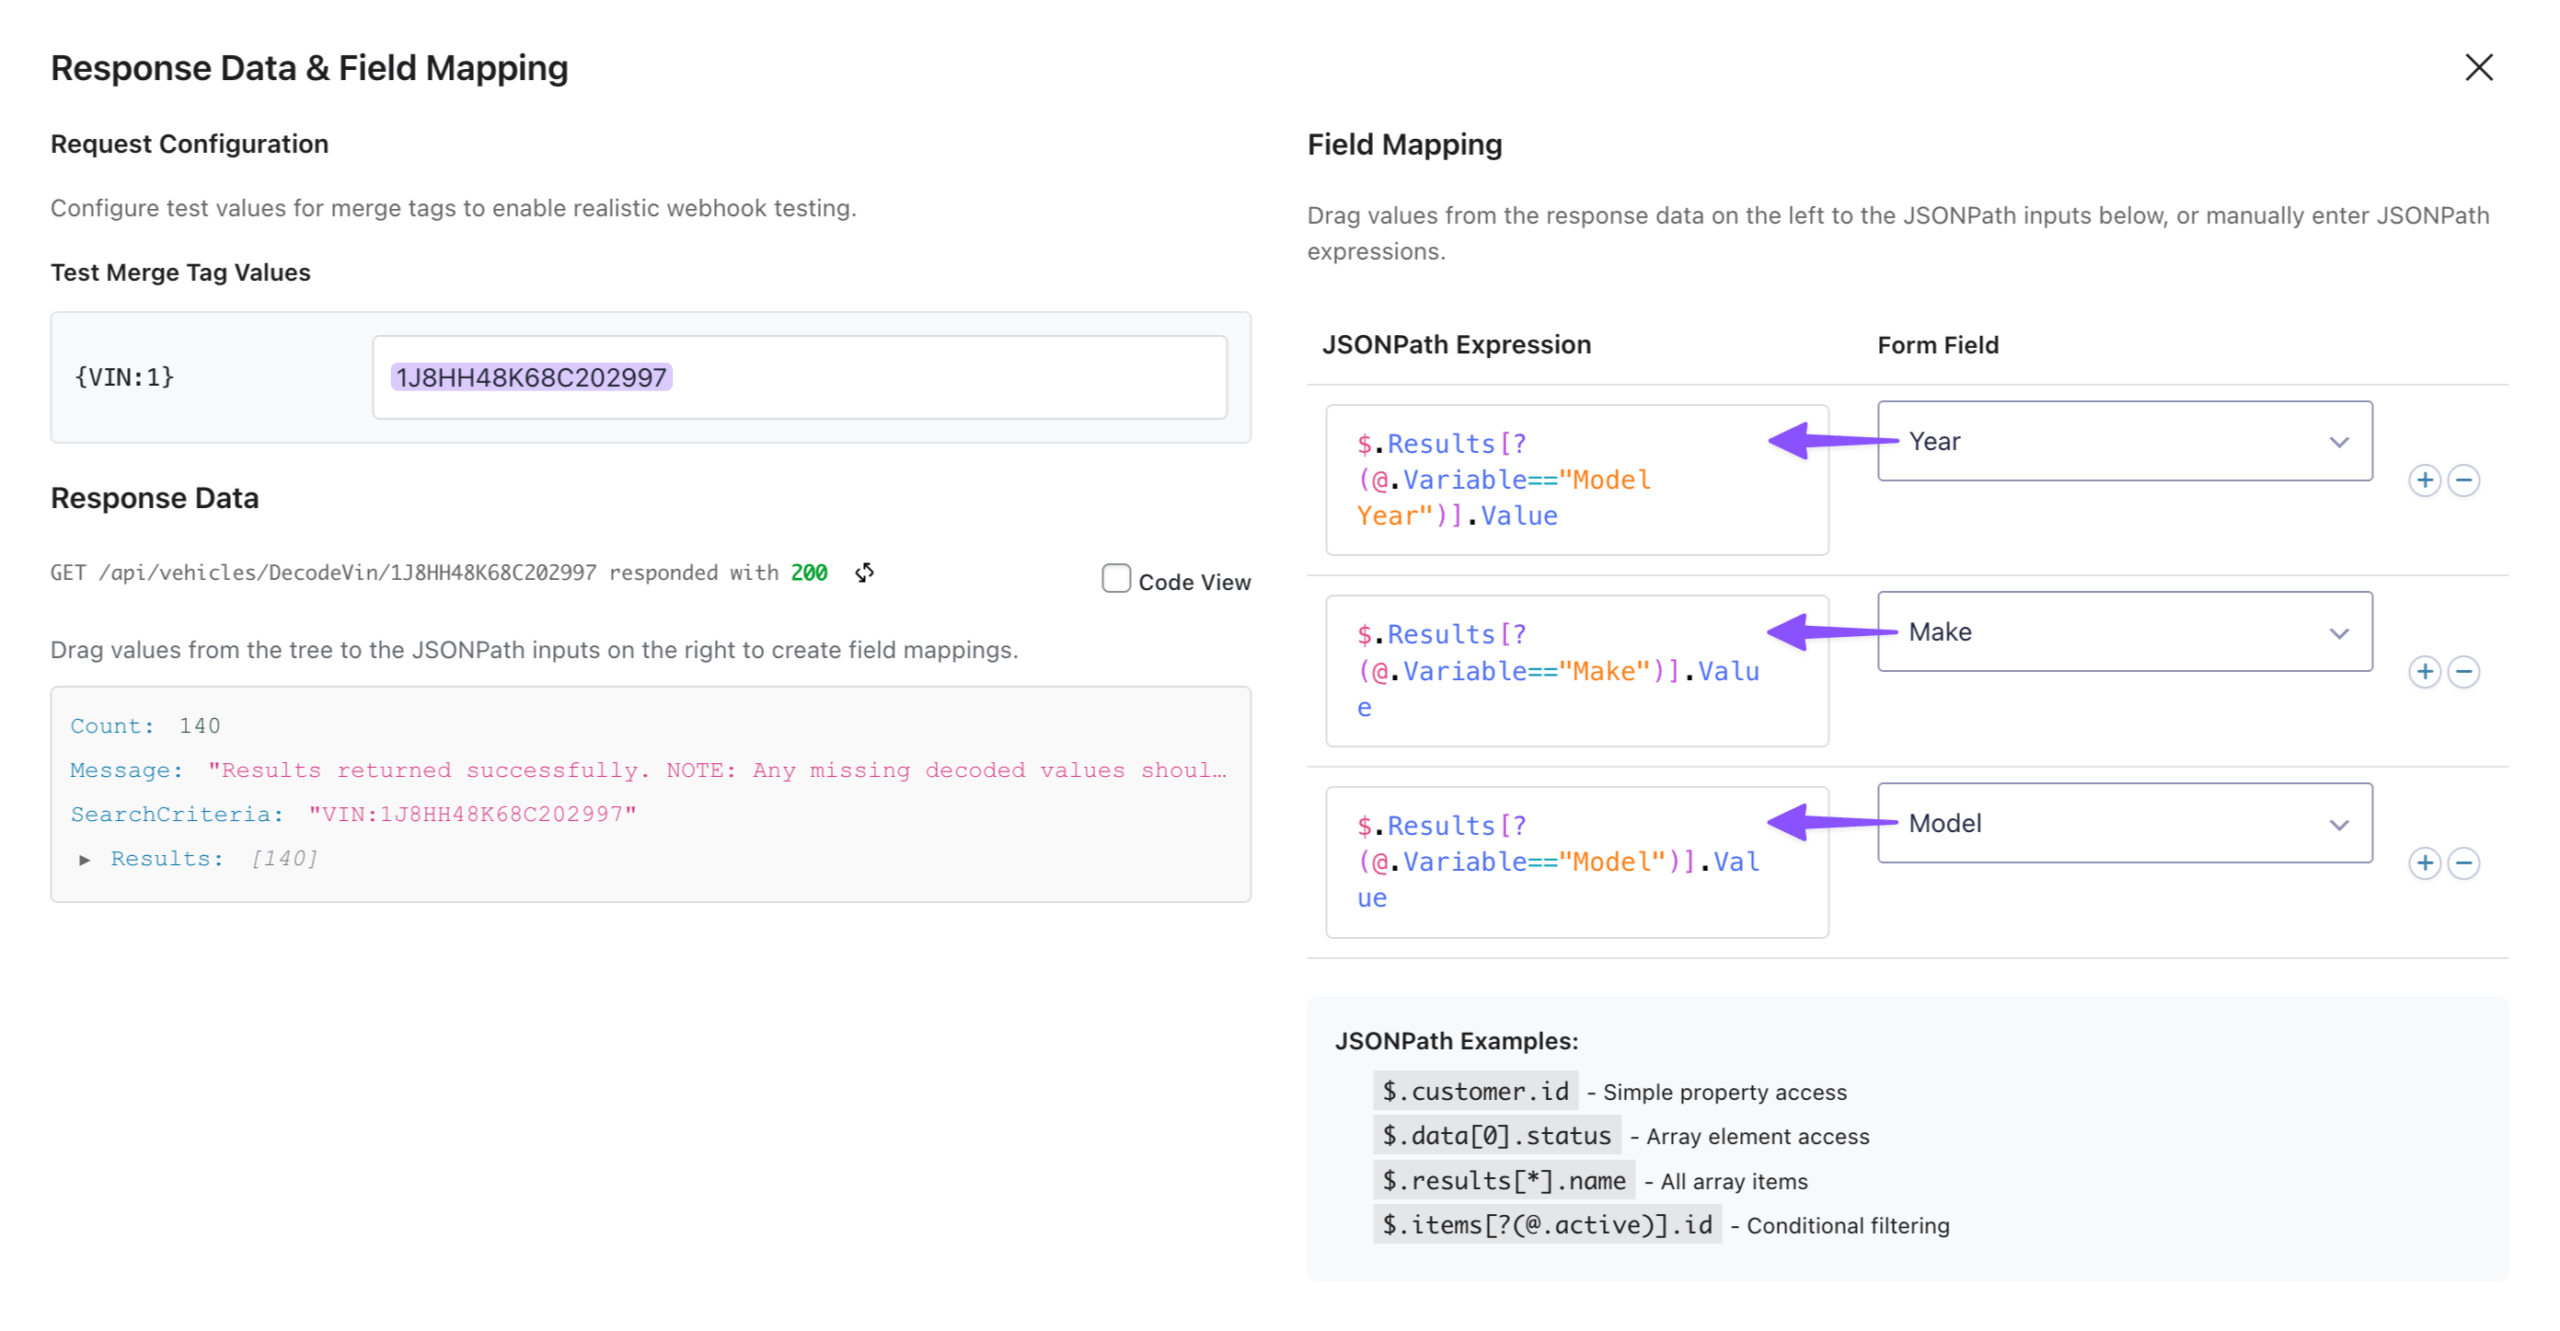
When you ask the NHTSA database for a vehicle’s data, it sends back around 140 pieces of data, way more than we need!
To grab just the year, make, and model, we’ll use a JSONPath. Think of it as a filter that picks out exactly what you’re looking for.
- Still in the feed settings › click Open Response Mapping Editor.
- Temporarily add a test value with a real VIN for testing purposes: try
1J8HH48K68C202997› click Test Request. - You’ll see the response data displayed as an interactive tree.
You can drag items to the right to map them, or simply copy/paste these ready-made filters under the JSONPath Expression column for each field:- Year:
$.Results[?(@.Variable=="Model Year")].Value - Make:
$.Results[?(@.Variable=="Make")].Value - Model:
$.Results[?(@.Variable=="Model")].Value
- Year:
- Close the window › click Save Settings.
Test it out! Preview the form, enter a VIN, and submit. When you check the entry, GC API Alchemist has already populated the Year, Make, and Model fields with the actual vehicle data.
Method 2: Live
This method populates vehicle data instantly as users type, no need to wait for the form to be submitted.
Here’s where GP Populate Anything comes in. It pulls in the data and displays it right away. You can then use that info to set up conditional logic, show or hide fields, or build workflows that adapt to user input.
In practice, this comes in handy for all sorts of scenarios: tracking a package with an order number, looking up a patient’s info by ID, checking stock with a product code, and more.
In our case, we’re displaying vehicle details as soon as the VIN is entered. We’ll use GC API Alchemist to fetch the data from NHTSA, and GP Populate Anything to map it to the fields in real-time.
VIN lookups are just one way to use live data—there are tons of other possibilities! Want to validate data from external services? Check out our guide on validating VAT numbers.
Activate GP Populate Anything
- Open your Spellbook › install and activate GP Populate Anything.
Edit API Connection Profile
Let’s head back to the VIN Decoder connection profile we created earlier and set up the live lookup endpoints. These will let each field in our form pull data in real-time.
- Navigate to Forms › API Connections › open VIN Decoder.
- Scroll to Populate Anything Endpoints › click + Create Endpoint.
- Name:
Year - API Endpoint:
vehicles/DecodeVin/{vin}?format=json
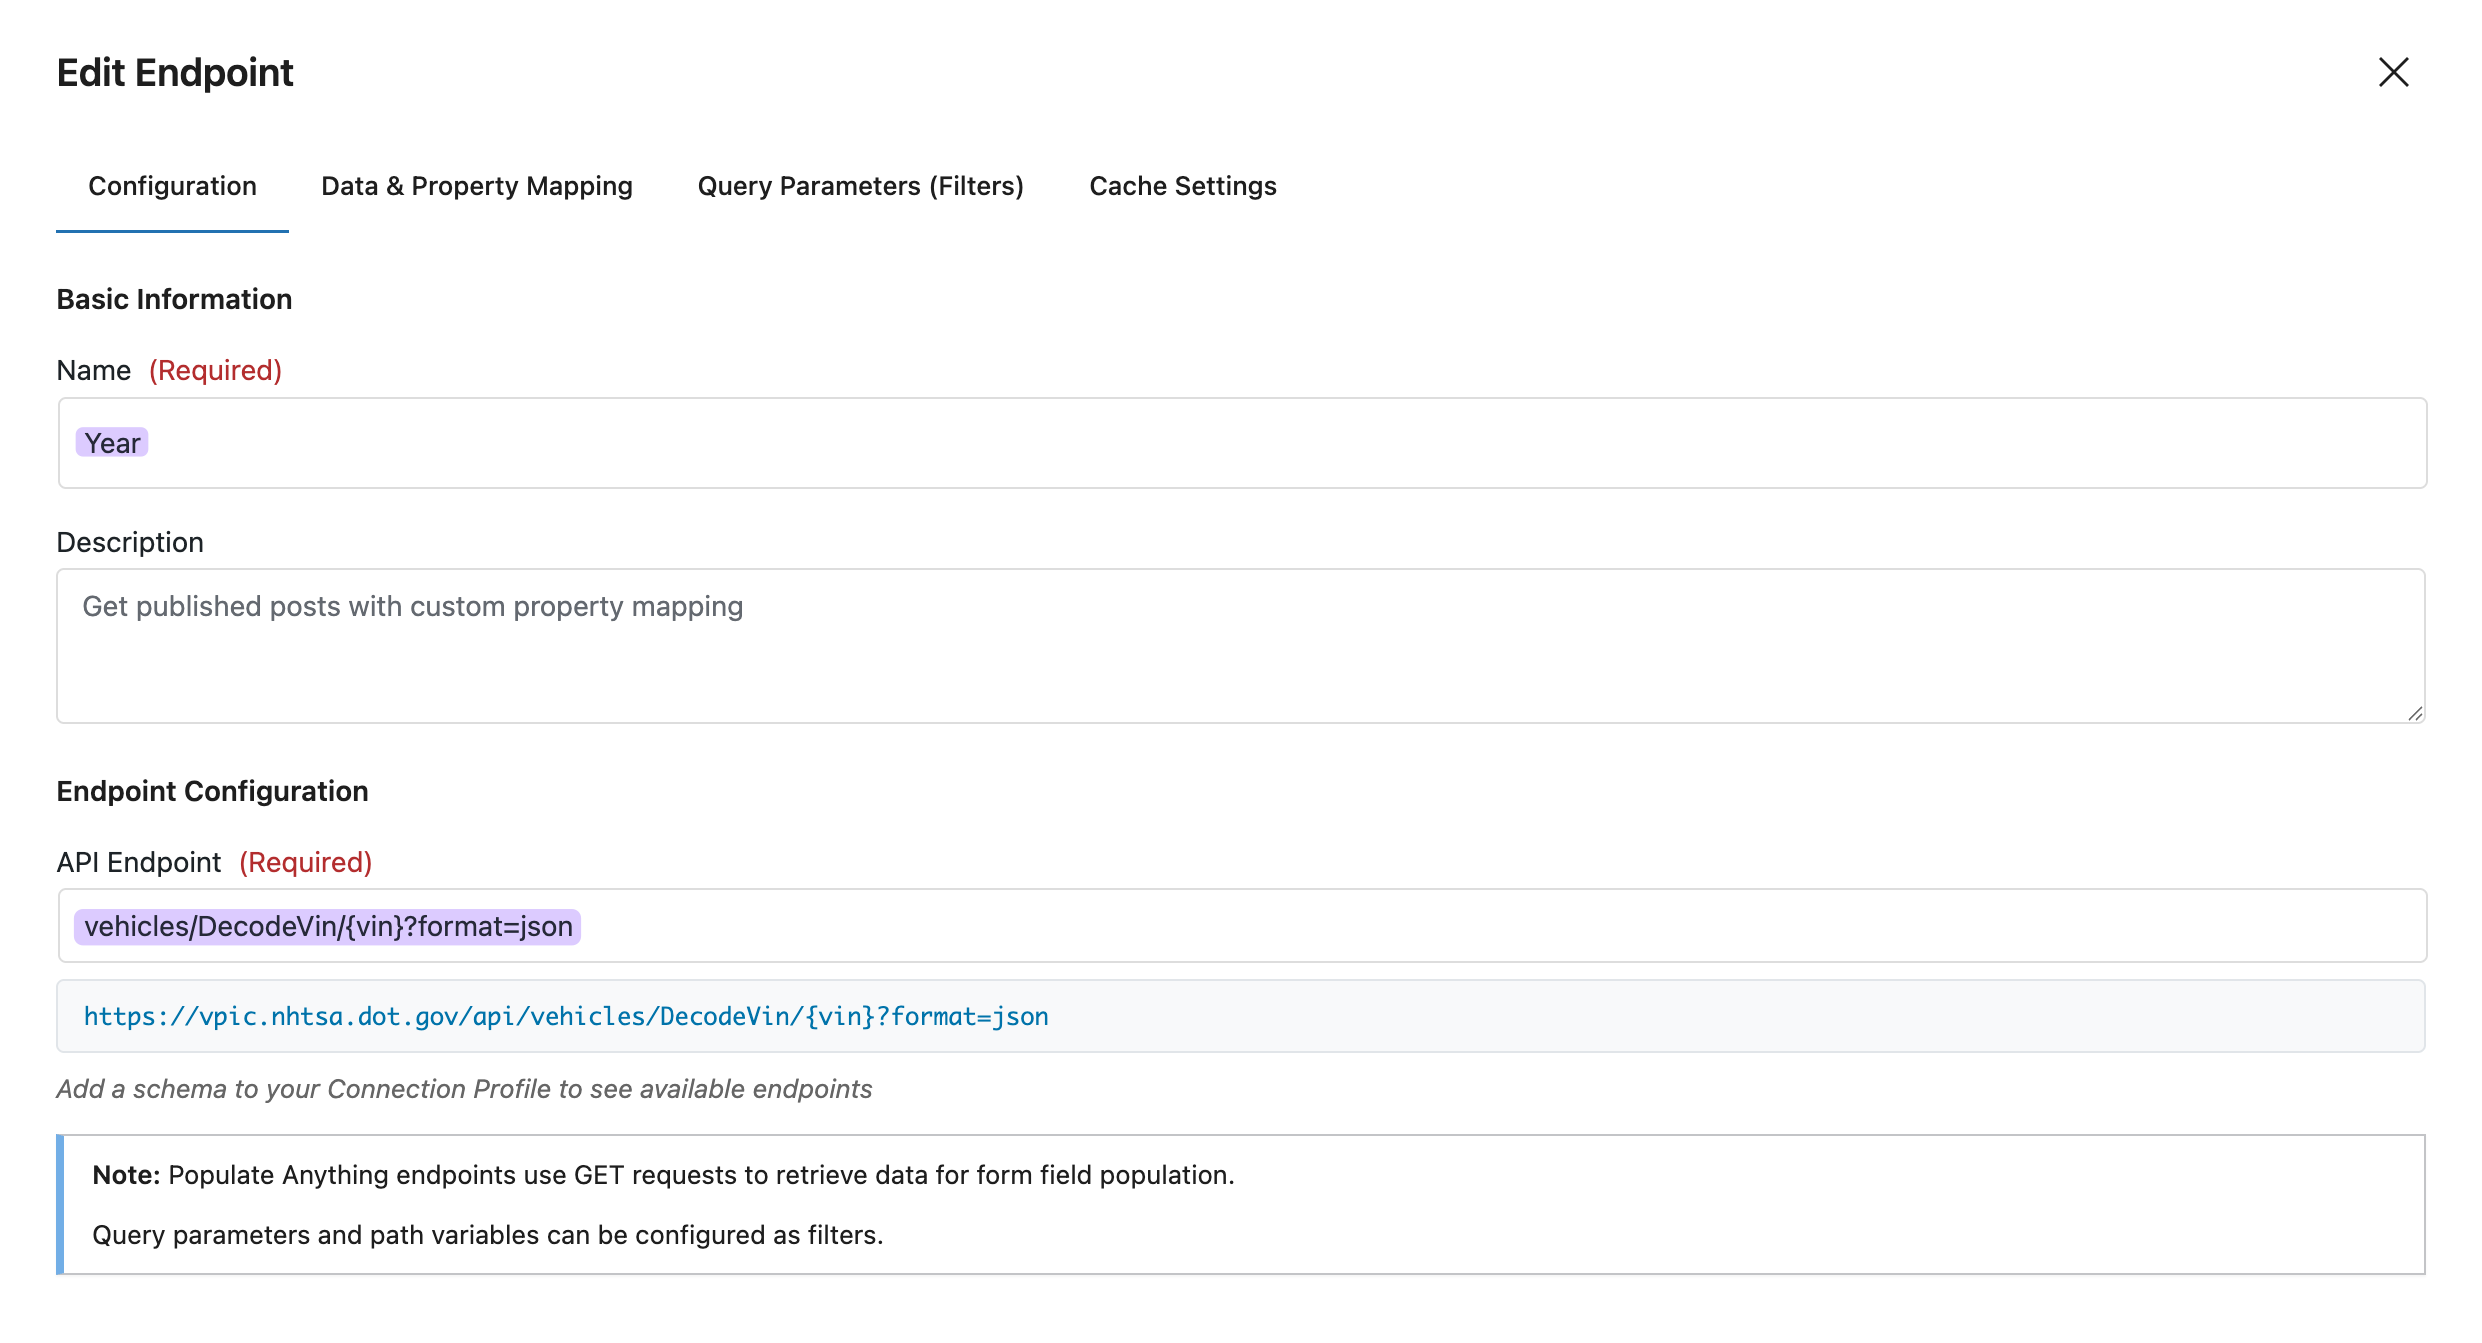
- Click Next — Data & Property Mapping.
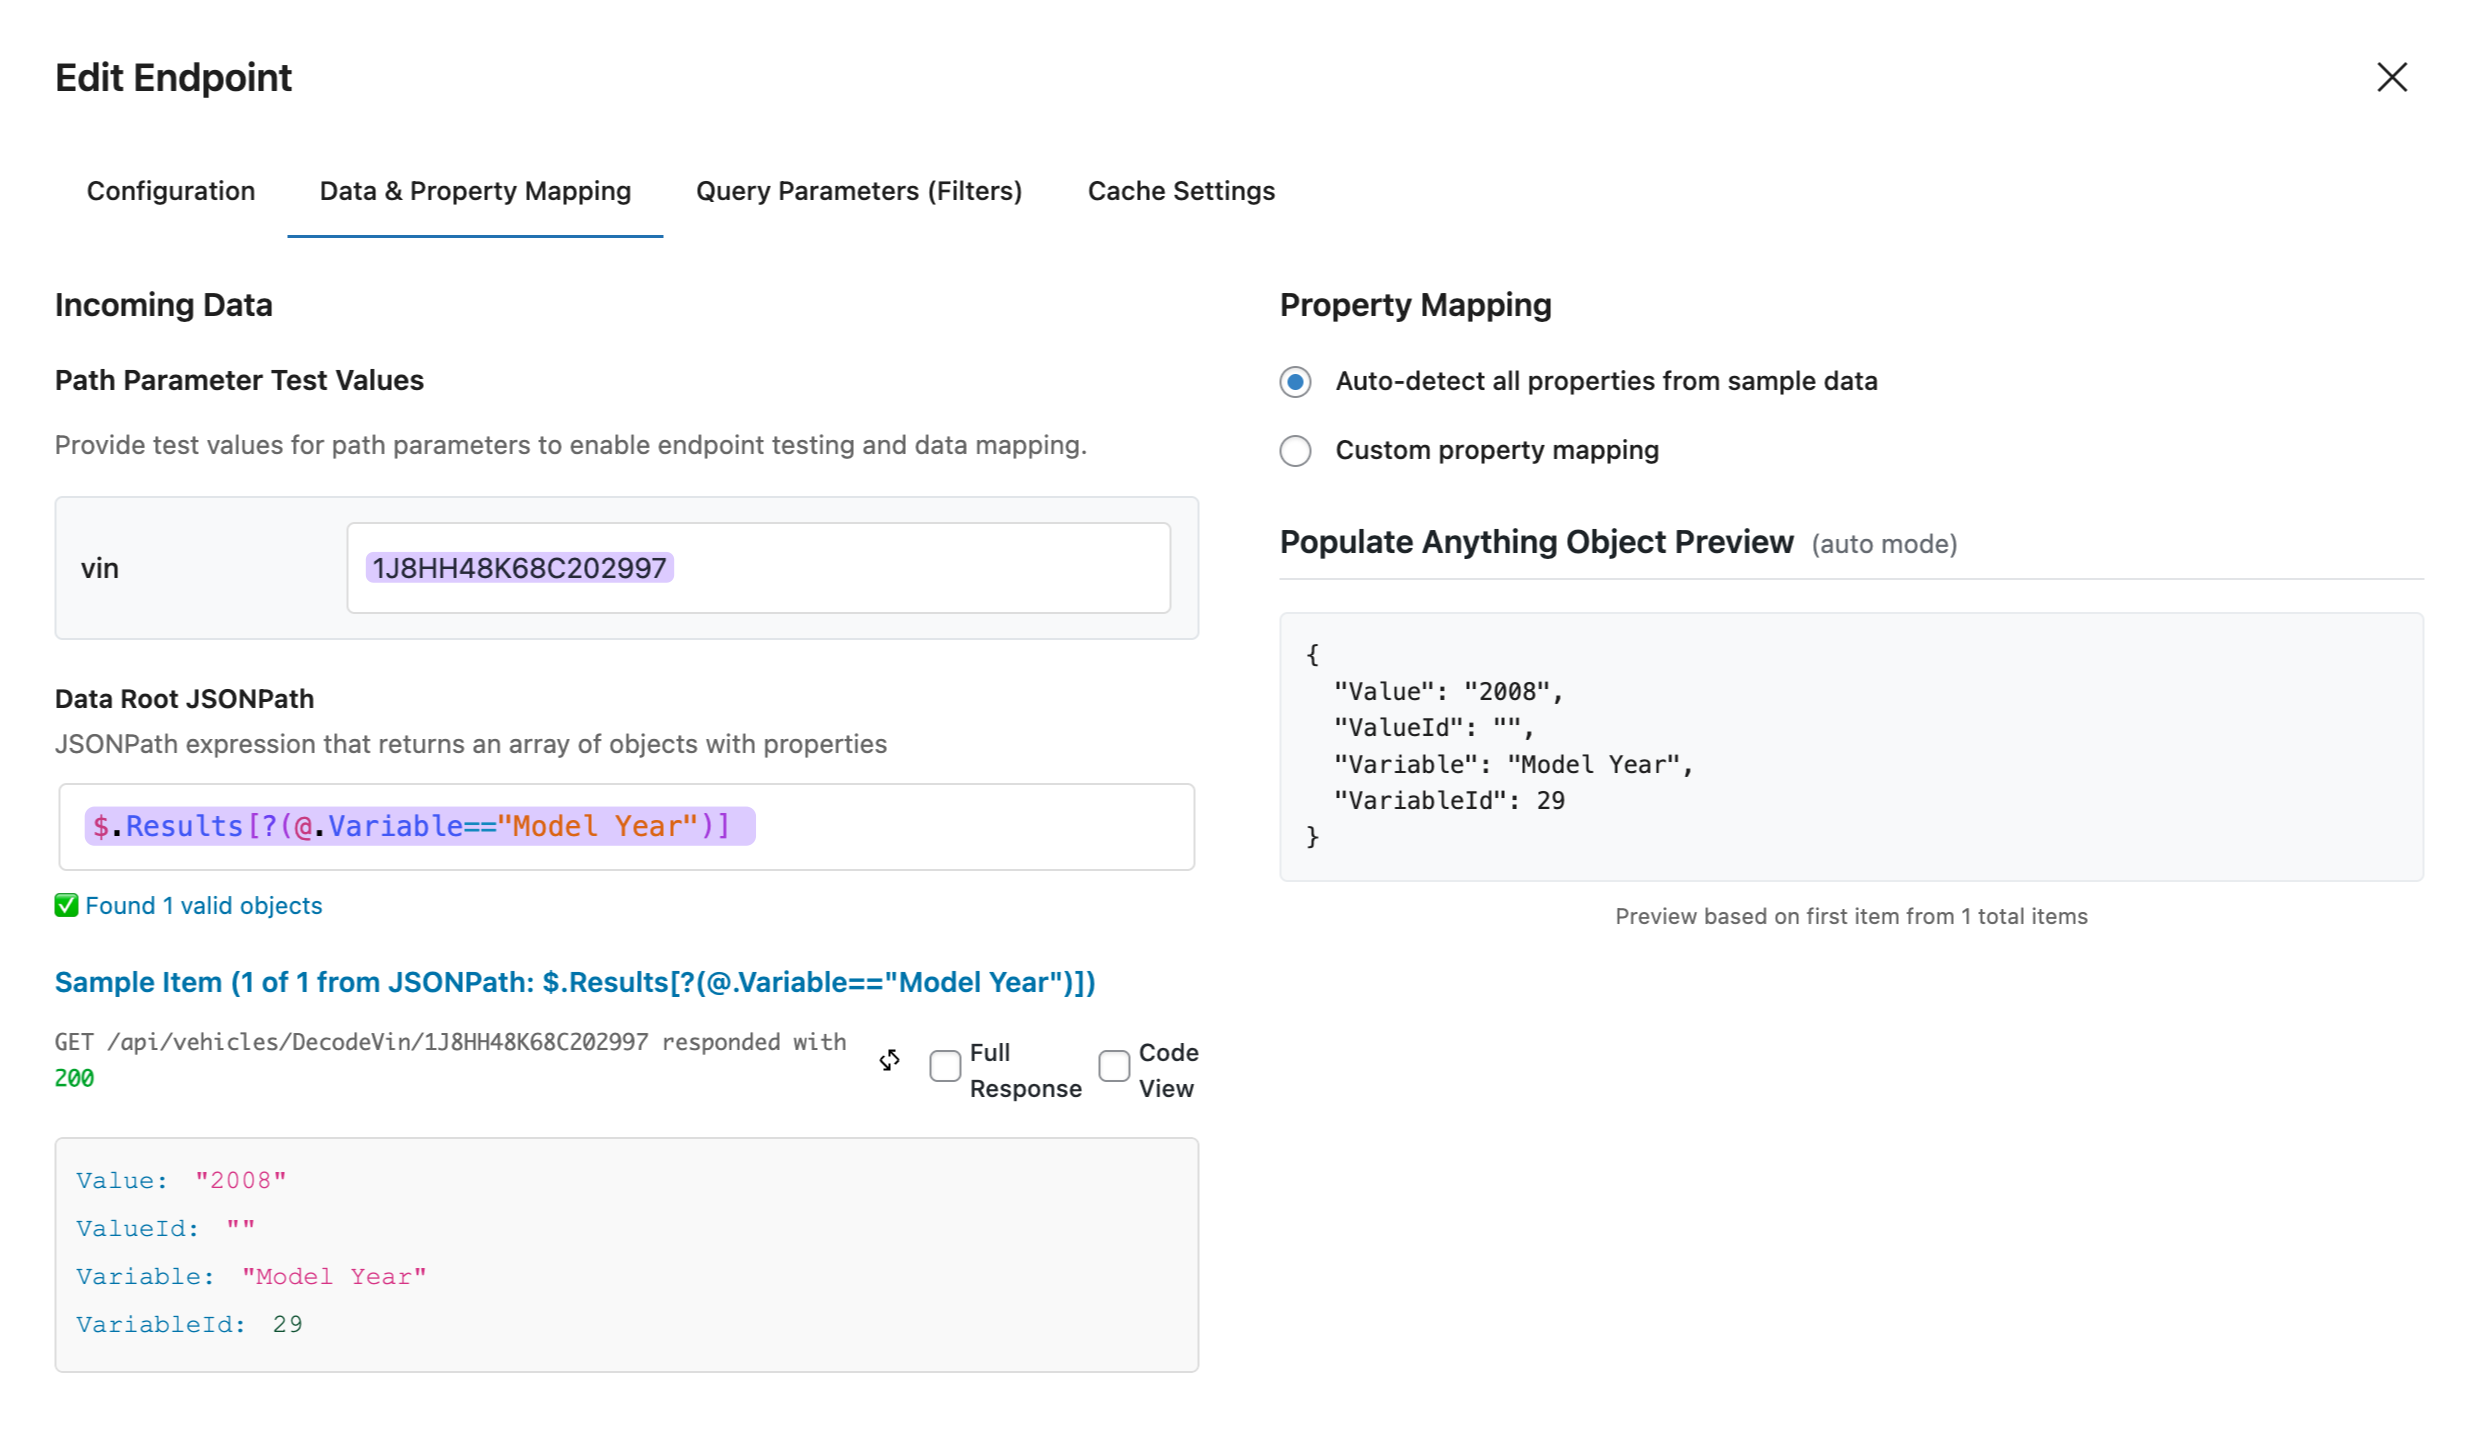
- In the vin field: enter a test VIN
1J8HH48K68C202997 - Click Test Request › a new field will appear with all the vehicle data.
- In the JSONPath field:
$.Results[?(@.Variable=="Model Year")]— which will pull up the year when the vehicle was made.
- Click Next — Query Parameters (Filters)
- Check the
vin(string) which will allow GP Populate Anything to filter the results by. - Click Next — Cache Settings › leave as is.
- Click Create Endpoint.
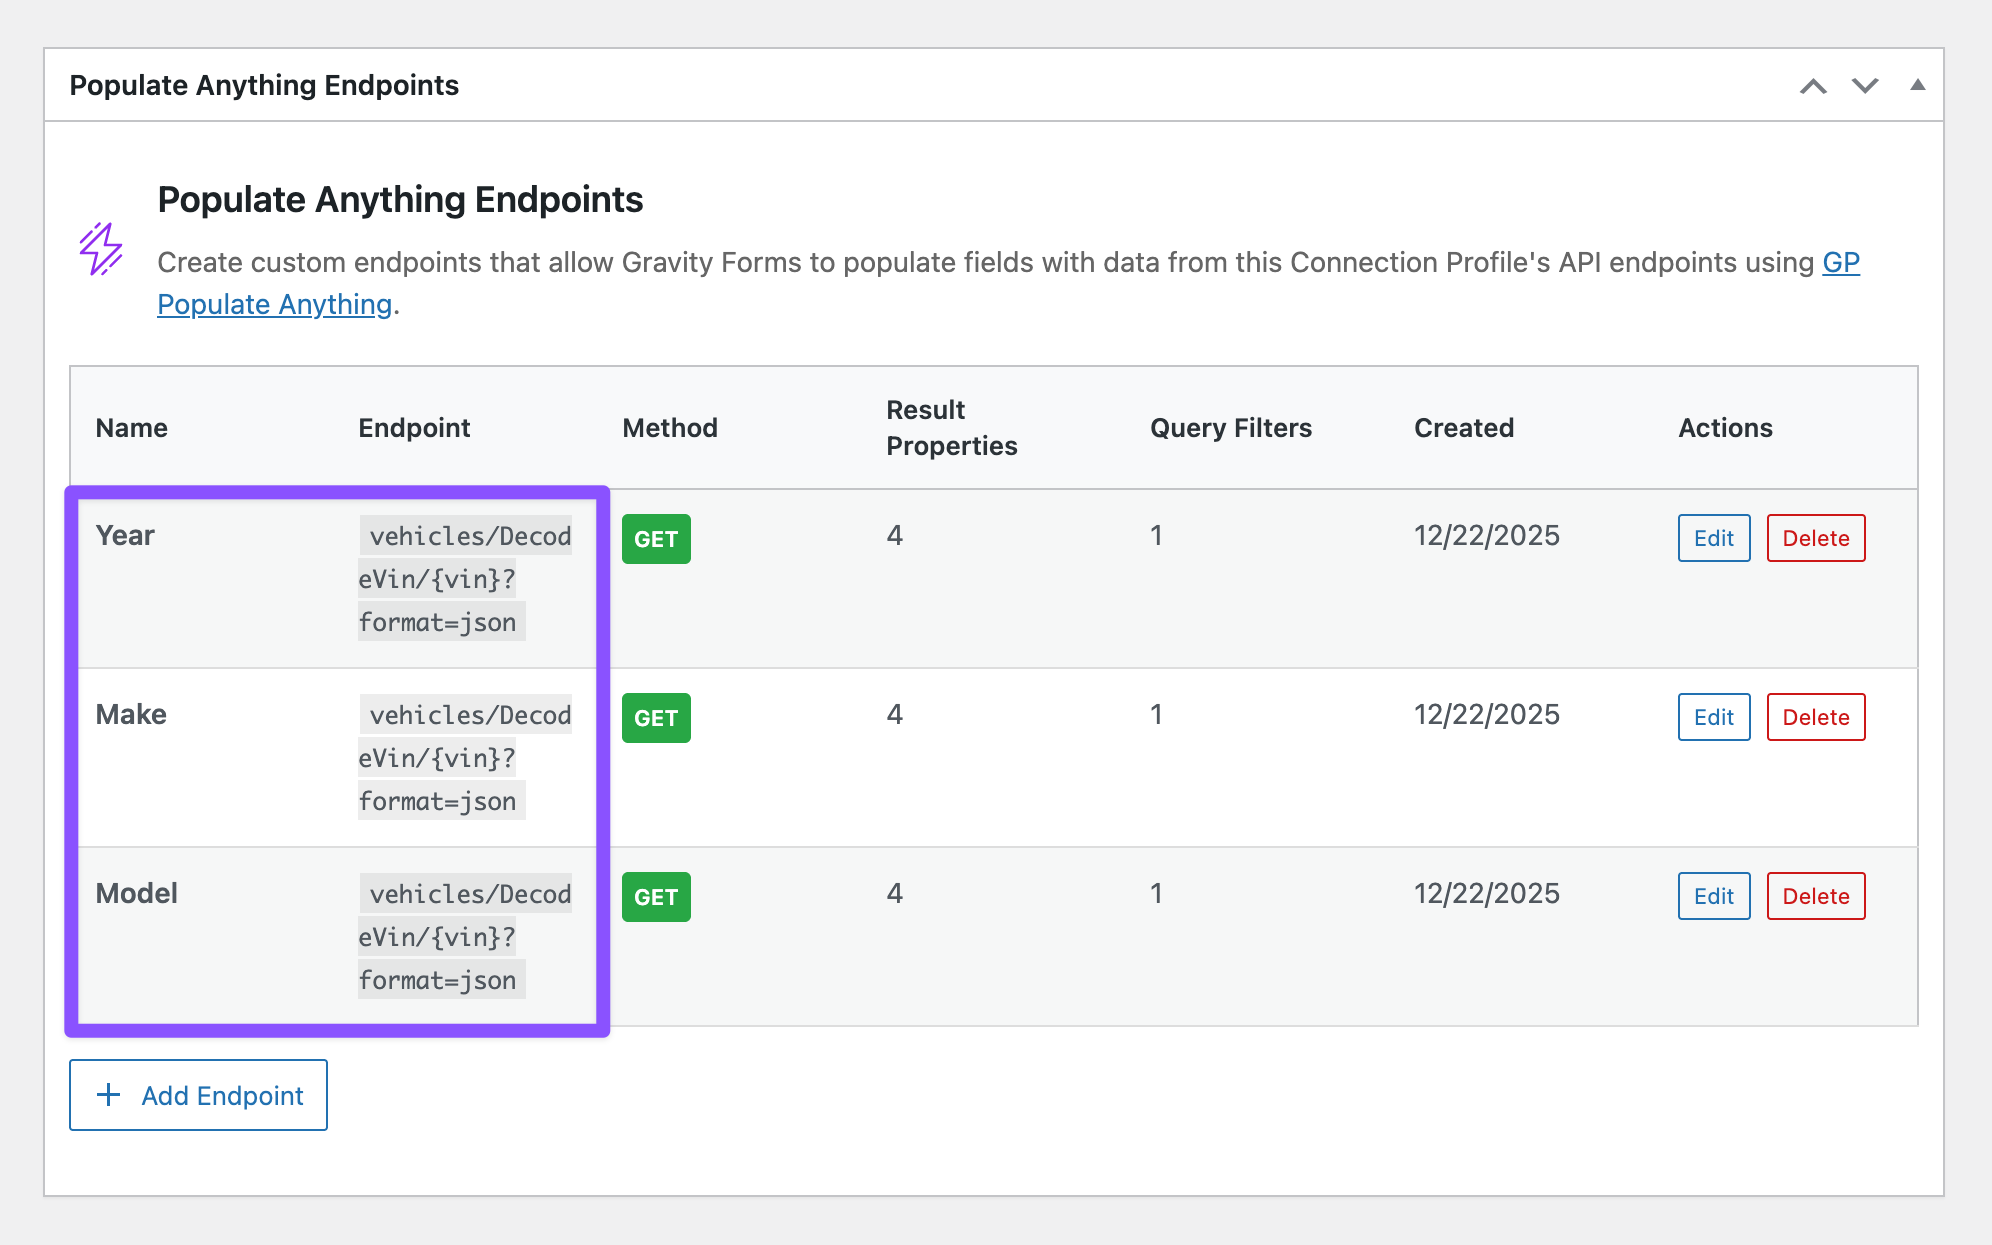
This is for the Year only. Repeat steps 3 to 11 for the Make and Model, changing only the name and its corresponding JSONPath:
- Make:
$.Results[?(@.Variable=="Make")] - Model:
$.Results[?(@.Variable=="Model")]
Map to Form Fields
Now let’s wire up your form fields to use this live data.
- Open the form › click Year field.
- Check Populate value dynamically.
- Type:
API Alchemist - Connection Profile:
VIN - Endpoint:
Year - Click Add Filter Group › set to Vin / is / VIN (the VIN field).
- Set Value ›
Value - Repeat steps 13 to 19 for the Make and Model fields, selecting the appropriate endpoint for each.
- Save form.

Now test it out. Enter a VIN, and watch the year, make, model auto-populate instantly. ✨
Pro Tip
When previewing your form, use the Show Hidden feature in GP Live Preview to reveal the hidden fields. No need to keep toggling visibility back and forth to check if they’re populating correctly—just like in the demo above.
Name Lookups: Australian Business Numbers (ABN)
You can apply this same approach to other searches, like finding an ABN. Instead of making users look up their ID number, let them type in their business name.
It’s basically a reverse lookup: you use the Name to find the ID.
The catch is that searching by name returns multiple results, so you’ll need a dropdown field instead of a text field. This way, users can pick their business from the list.
Here’s how it works:
- A user types their business name into a text field.
- GC API Alchemist takes that text and searches the external database (like the Australian Business Register).
- GP Populate Anything maps the results to the dropdown field:
- Label: Business Name (what users see)
- Value: ABN (what gets captured)
And just like that, your form becomes a live ABN lookup tool. Users search by name, pick their business, and the ABN is captured automatically.
This works great for customer searches, product catalogs, or anywhere users need to search by name to capture an ID. 🔎
Alchemy Complete
This same approach works for any API you want to connect your Gravity Forms to. GC API Alchemist handles the bridge-building, you control the magic.
That said, what will you automate alchemize next? 🎩