How to Limit Choices in Gravity Forms with GP Inventory
Looking to limit choices in Gravity Forms? GP Inventory has all the choice-limiting magic a wizard could need!
Looking for GP Limit Choices?
You have been redirected. Why? GP Limit Choices has been deprecated. GP Inventory will wear its mantle proudly.
GP Inventory can do everything Limit Choices does, but better, and then does more! This article provides a clear guide to walk you through using GP Inventory to limit choices in Gravity Forms.
Still want to see the GP Limit Choices documentation? We have additional resources, including a Migration FAQ, snippet coverage, and more, available here.
If you have any questions, let us know.
Nothing is infinite—especially your Gravity Forms choices, apparently! This tutorial shows you how to set up a selection limit for choices in any choice-based field using GP Inventory. We’ll also cover ways you can communicate limits to users: exhausted choices are automatically disabled, but you can display how many available choices are left and hide choices based on limits, set a daily limit, and cast unlimited other limiting spells. 🪄
This article requires the Gravity Forms Inventory perk.
Buy Gravity Perks to get this perk plus 48 other premium Gravity Forms plugins!
- Looking for GP Limit Choices?
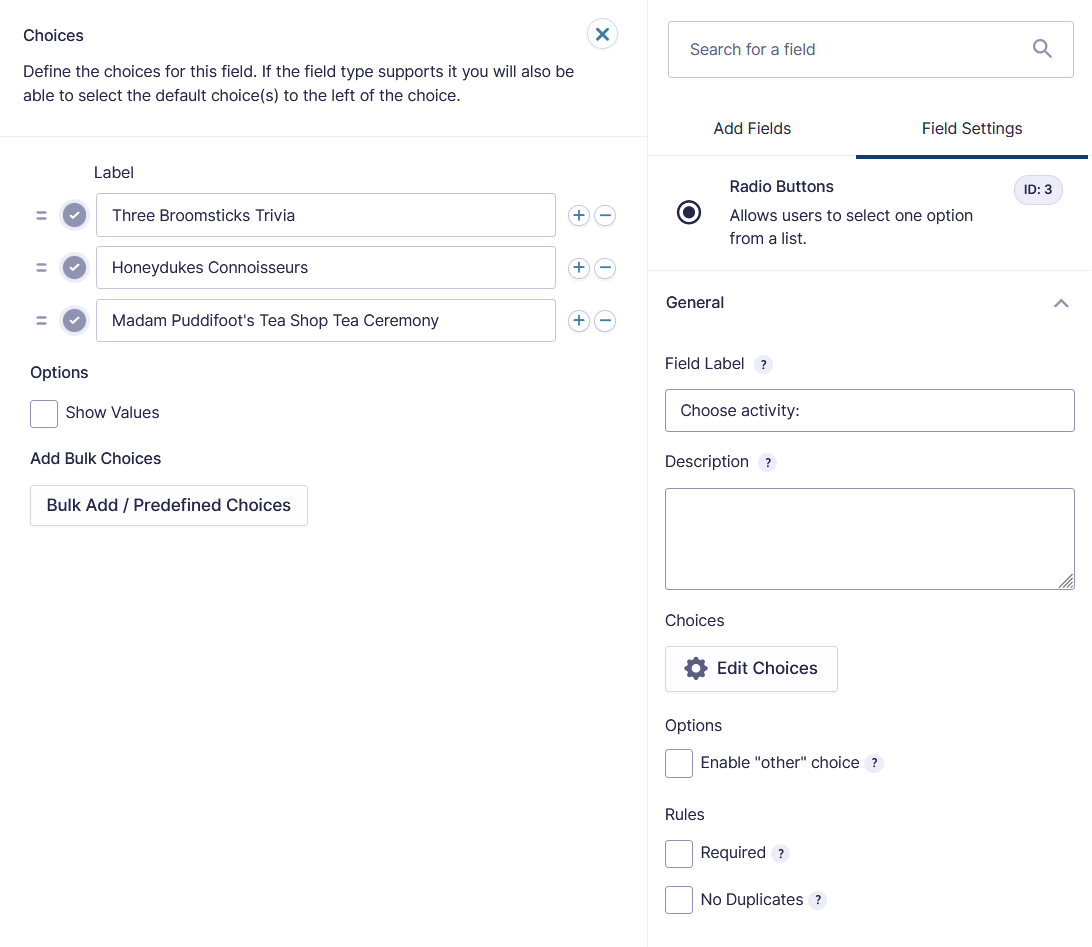
- Step 1: Create a Choice Field
- Step 2: Set Up Simple Inventory
- Step 3: Set Up Limits
- Product and Option Fields
- Taking It Further
Step 1: Create a Choice Field
Product, Option, and all choice-based fields are supported—i.e. Drop Down, Checkboxes, Radio Buttons, and Multiple Choice. Once the field is created, navigate to the field settings and click on Edit Choices to set them up.
Pro tip: Leave the Edit Choices flyout open.
Step 2: Set Up Simple Inventory
Scroll down to the Perks tab and select “Simple” under Inventory Type. If you left the flyout open, you will see a new “Inv.” column appear out of thin air!
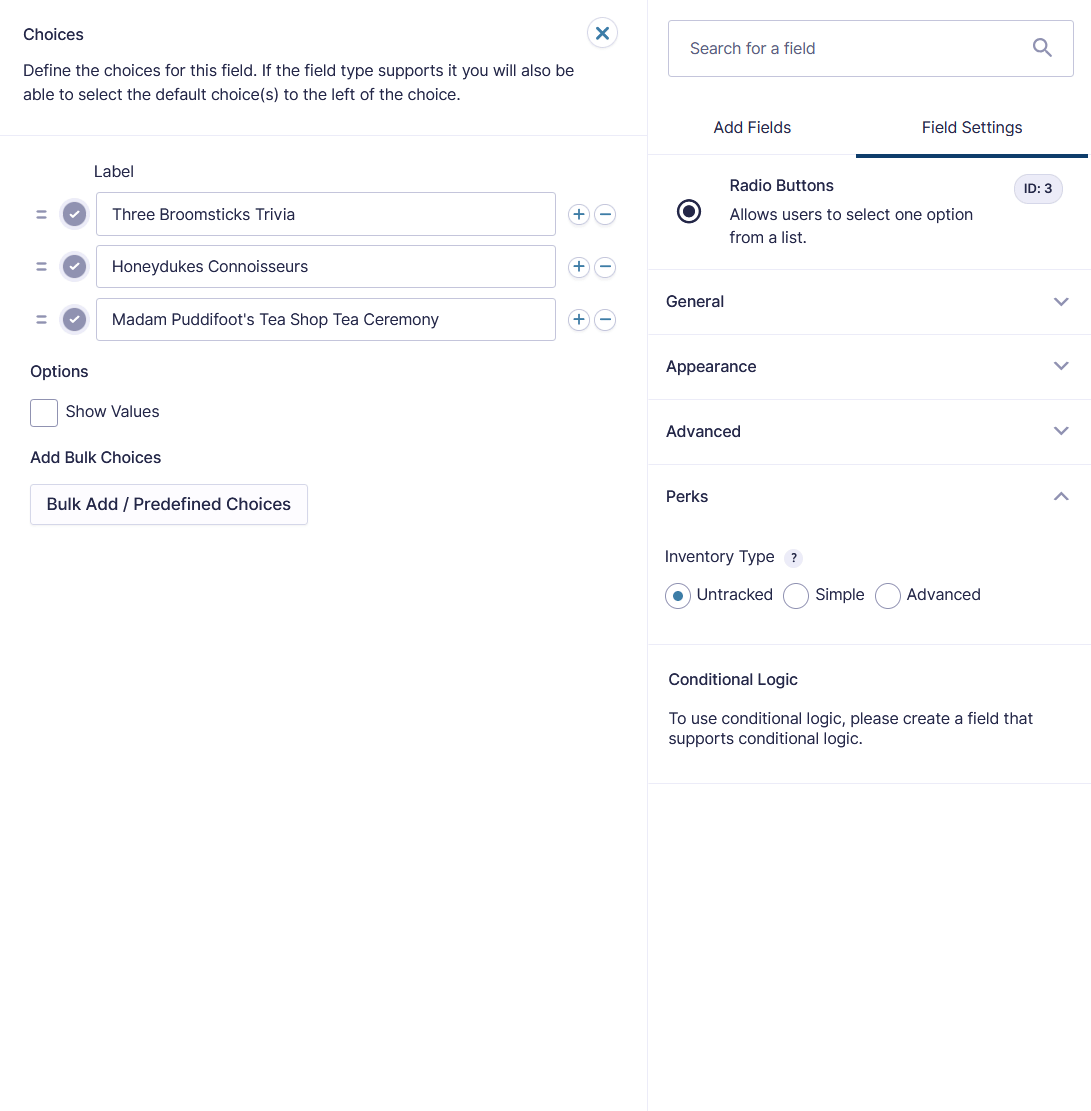
If you didn’t leave the flyout open, I see you. You can click on the handy Choices setting link right below Inventory and you’re good2go.
While you’re here, you can choose to:
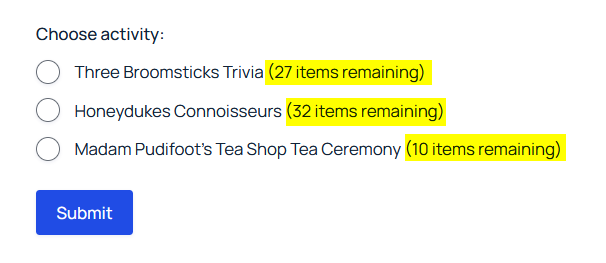
- Show how many more times each choice can be selected before the limit is reached by enabling Show available inventory. This will display an editable message next to each choice.
(Default:{available} {item|items} available.)
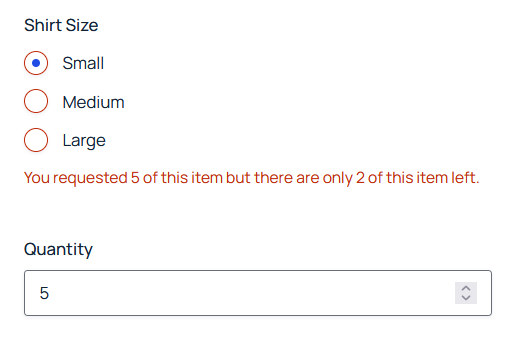
- If you’re dealing with quantities, edit the Inventory Insufficient Message, shown when the quantity requested is greater than the available limit.
(Default:You requested {requested} of this item but there are only {available} of this item left.)
Edit the Inventory Exhausted Message, shown when a field has reached all choice limits.
(Default: Sorry, there are no more of this item.)
- Hide the form when all limits have been reached by enabling Hide form when inventory exhausted.
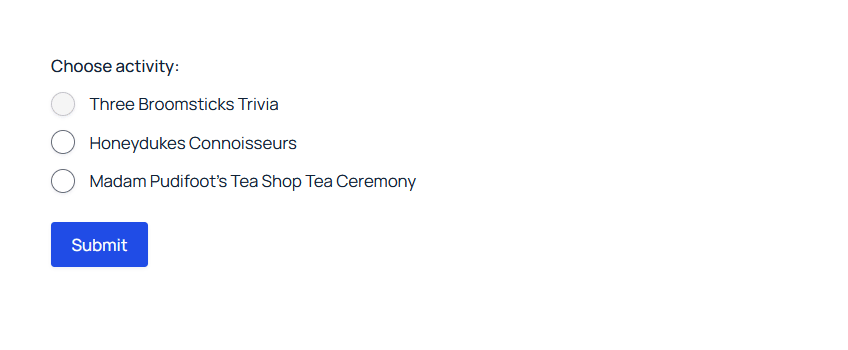
- Hide choices when their limit is reached by enabling Hide choice when inventory exhausted.
For more information on custom messages and a list of special inventory merge tags, check our GP Inventory documentation.
Step 3: Set Up Limits
In that new shiny “Inv.” column, input the amount of times each choice can be selected. Leave the limit blank for choices with no limit.
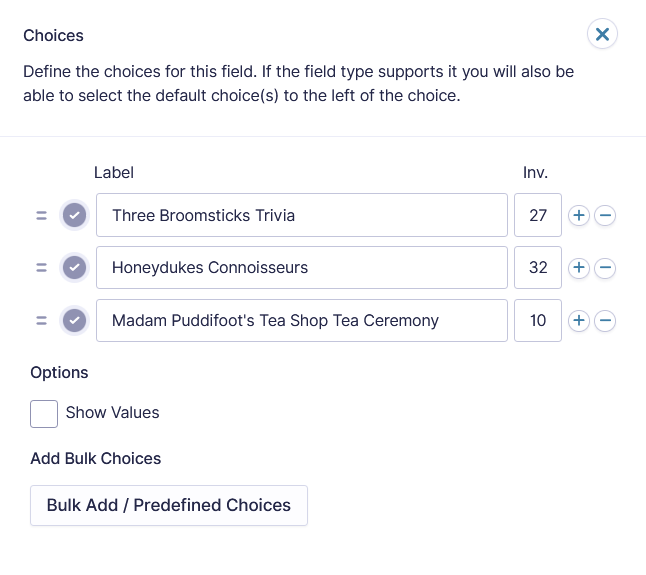
The number of choices in the Form Editor represents the total number of choices available and will not update as entries are submitted. Adjustments to the number of available choices should be set to the maximum number you want to make available. For example, if you initially set the maximum number to 10, and you want to make 2 more available, set the number to 12.
Product and Option Fields
Since the flexible little perk we’re using to limit choices is GP Inventory, you can also set limits to other fields like Product or Option. If a limit is applied to choices in a Product or Option field and there is a Quantity field associated with that Product field, the quantity ordered will be counted towards the limit.
Taking It Further
Limit choices across choice fields and/or forms
Depending on your use case, you might want to share the limit pool across two or more choice fields. Instead of Simple, set GPI’s Inventory Type to Advanced and add a Resource. All other choice fields that are set to that Resource will share the choice limit between choices that have the same choice values and “Inv.” limits. Read more on GP Inventory’s Resources.
Limit choices for a scope (like a daily limit)
You can also use Resources to limit choices based on another parameter, such as a Date field — for example, if you have a limited number of tickets available on a Friday, May 15th show. You just need to set GPI’s Inventory Type to Advanced, add a Resource and scope, and set the scope to other fields on that form. With shared scopes, you can even share these scopes across multiple fields and forms. Read more on GP Inventory’s Scoped Inventory.
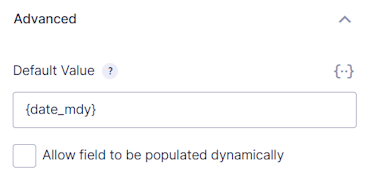
To set up limits that reset daily, you can create a Hidden field with {date_mdy} as the default value and scope the inventory to it.
Create a waiting list
For situations where you’d like to allow users to select an exhausted choice and create a waiting list, like with design commissions or products with limited batches, you can use the plug-and-play Waiting List for Exhausted Choices snippet. Exhausted choices will remain selectable and submittable with a “(Waiting List)” marker on them.
Send notifications when choice limit is reached
If you want to receive notifications based on choice limits, like when a choice limit is reached, GP Inventory adds a new (Available) conditional logic trigger. Read more on GP Inventory’s Conditional Logic.
Use shortcode for displaying remaining choices
If you want to display how many choices are left anywhere where shortcodes are supported, like a “There are 3 spots left for the Wicked Webinar” banner, GP Inventory offers that too.
How do I disable exhausted choices rather than remove them?
If you would like to disable rather than remove exhausted choices, use the gpi_disable_choices hook.