How to Create a Gravity Forms Survey and Enhance It With Gravity Perks
Learn how to use the Gravity Forms survey add-on — then, learn how to enhance it using Gravity Perks.

- How to Create a Gravity Forms Survey
- How to Enhance a Gravity Forms Survey With Gravity Perks
- Create a Gravity Forms Survey Today
Looking for help with how to create a Gravity Forms survey?
Understanding what your customers are thinking can help you get feedback on your existing efforts and shape your future marketing and product strategies.
For example, you can aggregate feedback on a potential new product idea or use satisfaction surveys to gauge the happiness of your existing customers with strategies like Net Promoter Score (NPS) or the Likert scale.
With the Gravity Forms Survey add-on, it’s easy to create these types of surveys on your WordPress website. But if you want to get the most from your Gravity Forms survey, you’ll also want to pair it with some of the 47 Gravity Forms add-ons that you get with Gravity Perks.
In this post, we’ll take you through how to use the Gravity Forms Survey add-on by itself. Then, we’ll show you how to enhance your survey forms with some of the add-ons from Gravity Perks.
How to Create a Gravity Forms Survey
To create a Gravity Forms survey, you’ll need to install both the core Gravity Forms plugin and the Survey add-on.
Once you’ve done that, follow this tutorial to create your Gravity Forms survey and set up your survey question.
1. Create a New Form
To get started, go to Forms → New Form in your WordPress dashboard to open the form builder and create a new form to act as your survey form.
If you want to collect basic details from survey takers, like their names and email addresses, you can add fields to collect that information just as you would in your regular contact forms.
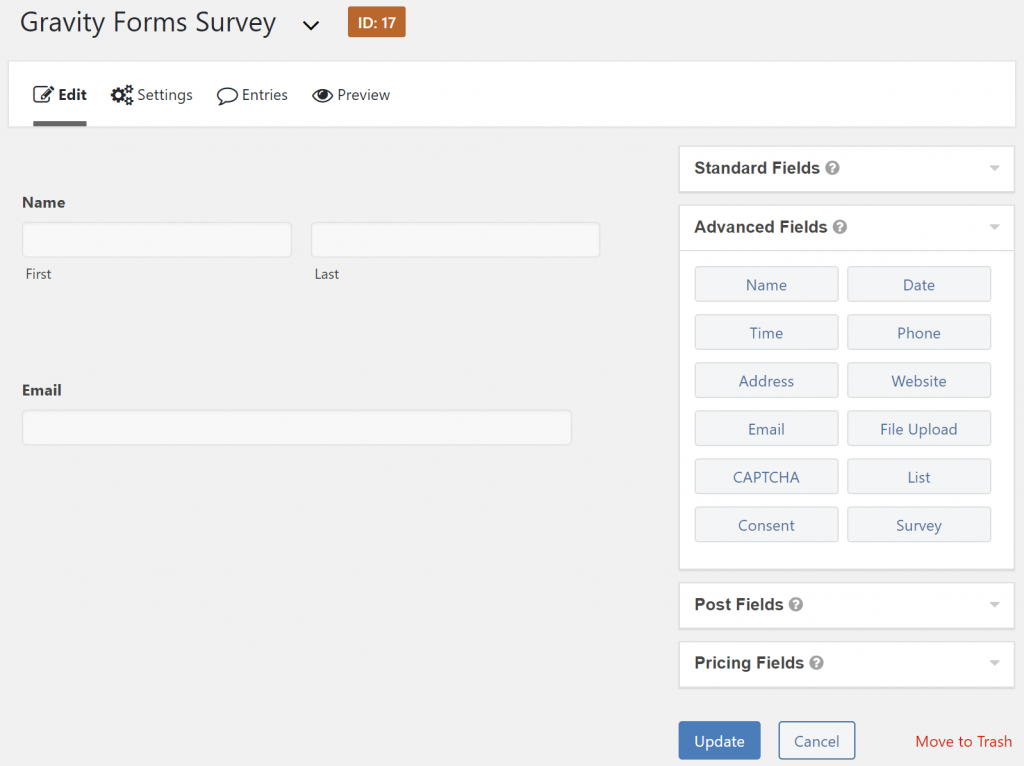
2. Add and Configure Survey Fields
Once you’ve added form fields for the basic information, you can add Gravity Fields Survey fields for the questions that you want to ask.
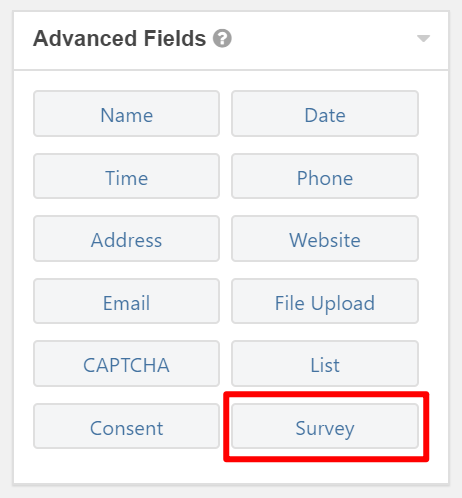
To add your first survey question, add a Survey field, which you can find in the Advanced Fields section of the form editor as long as you’ve activated the Gravity Forms Survey add-on:
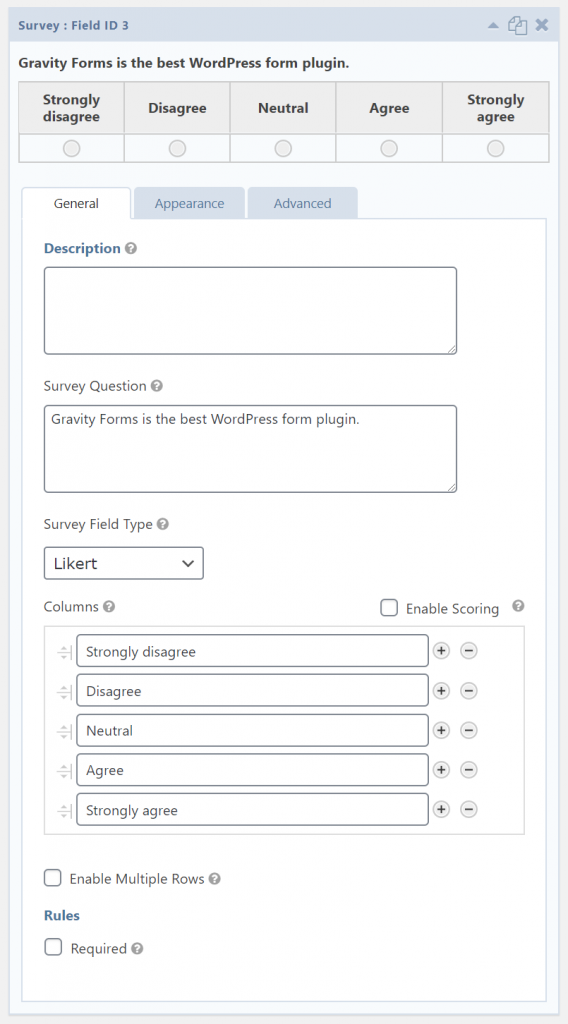
When you add a Survey field, the first thing that you’ll want to configure is the Survey Field Type, which defines the type of question to ask. You have eight options:
- Likert
- Rank
- Rating
- Radio Buttons
- Checkboxes
- Single Line Text
- Paragraph Text
- Drop Down
For example, if you choose Likert, you’ll get the standard five-point Likert scale (Strongly disagree, disagree, neutral, etc.). You can also use CSS for further customization of any of these fields.
Then, add the question that you want to ask in the Survey Question box.
If you chose a Survey Field Type with pre-set answers (rather than an open-ended question), you’ll also want to configure the response choices.
Finally, some field types also allow for automatic scoring, which lets you assign a numeric value to each choice. You can enable this by checking the box for Enable Scoring:
Repeat the same process to add additional survey questions.
3. Configure Basic Settings and Display Form
If you want to configure confirmation messages and email notifications, you can do that from the regular Settings area just like you would any other form.
Then, when you’re ready to make your survey live, you can display it on the front-end of your site using a shortcode or block.
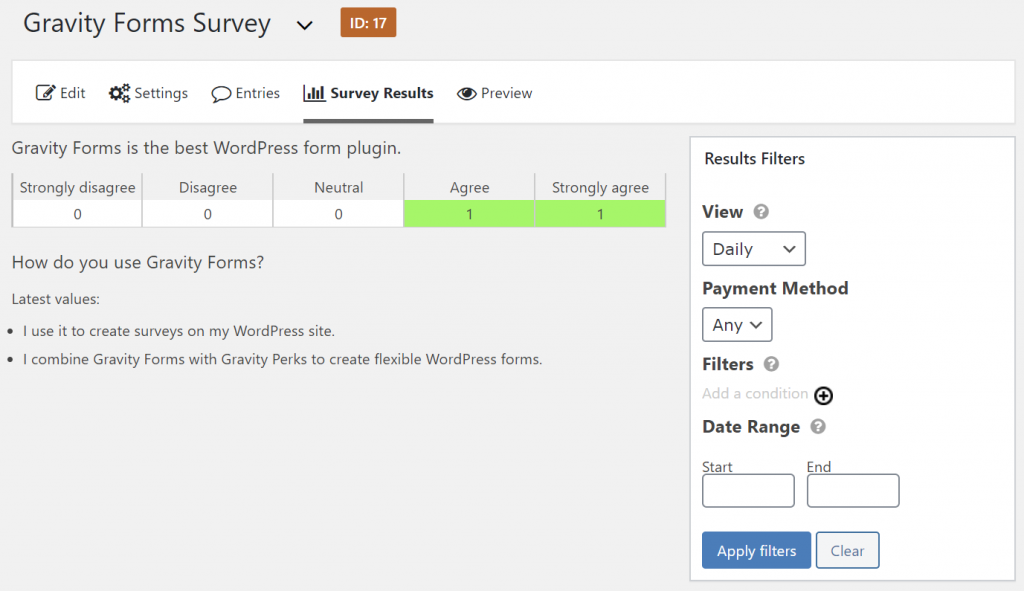
4. Analyze Gravity Forms Survey Results
Once you get some survey form submissions, you can analyze them from the Survey Results tab of your form’s settings.
Gravity Forms will display the answers to each question with an interface that’s optimized for each survey field type:
How to Enhance a Gravity Forms Survey With Gravity Perks
Gravity Perks is a collection of 47 different add-ons for Gravity Forms. Many of these add-ons can help you get more from the Gravity Forms Survey add-on.
Below, we’ll show you how to use eight specific add-ons to enhance your Gravity Forms surveys:
- Preview Submission — let people preview their survey answers.
- Limit Submissions — limit how many times people can take your survey.
- Easy Passthrough — automatically pass through survey information between different forms (like a user’s name and email from your registration form).
- Email Users — send a custom email to everyone who submitted a survey.
- Limit Checkboxes — set a min/max number of checkboxes in a checkbox survey field.
- Multi-page Navigation — split up long surveys into multiple pages and offer easy navigation.
- Word Count — require a min/max word count for an open feedback field.
- Advanced Save and Continue — automatically save form progress and automatically reload that progress whenever you return.
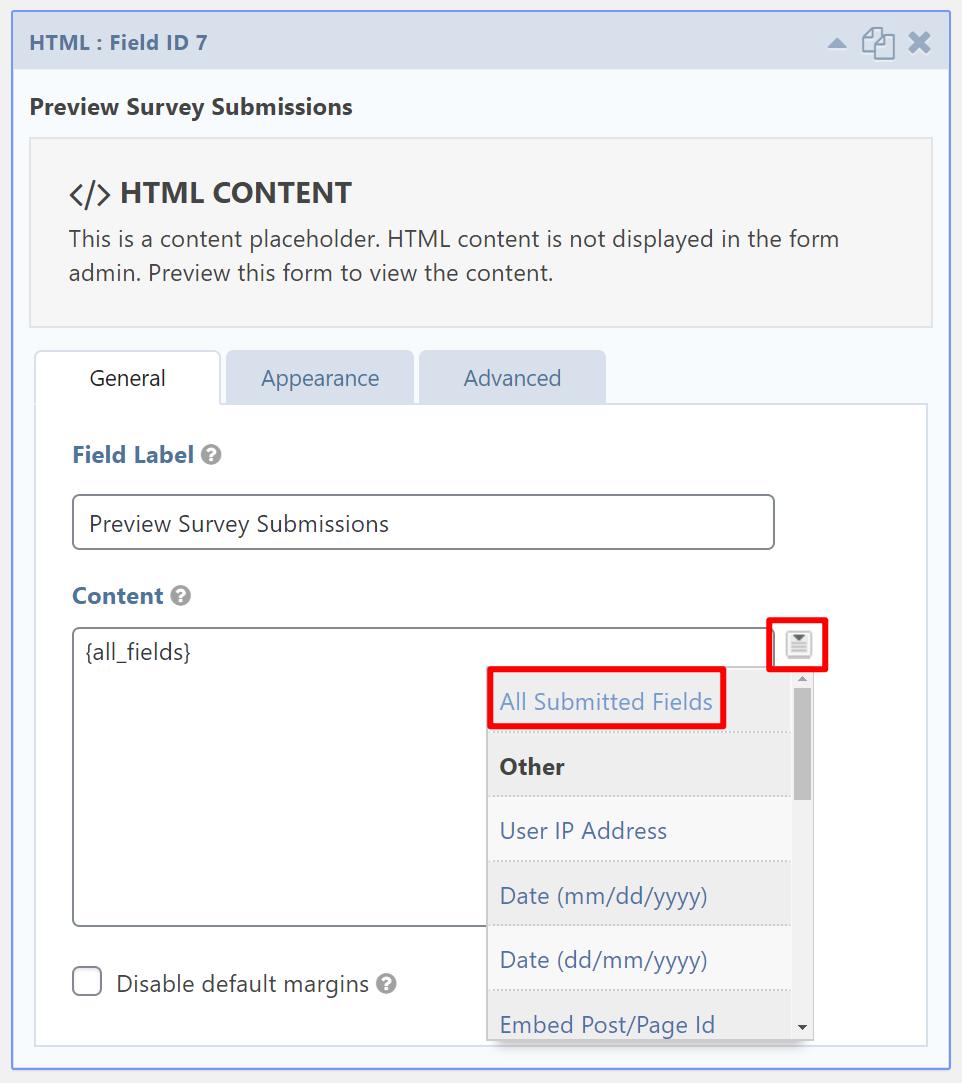
Let People Preview Submissions
With GF Preview Submission, you can let survey takers preview their answers before they submit the survey. This helps them avoid mistakes.
You can add a preview option by:
- Adding a new page to the end of your form.
- Adding an HTML field.
- Inserting the merge tag for All Submitted Fields
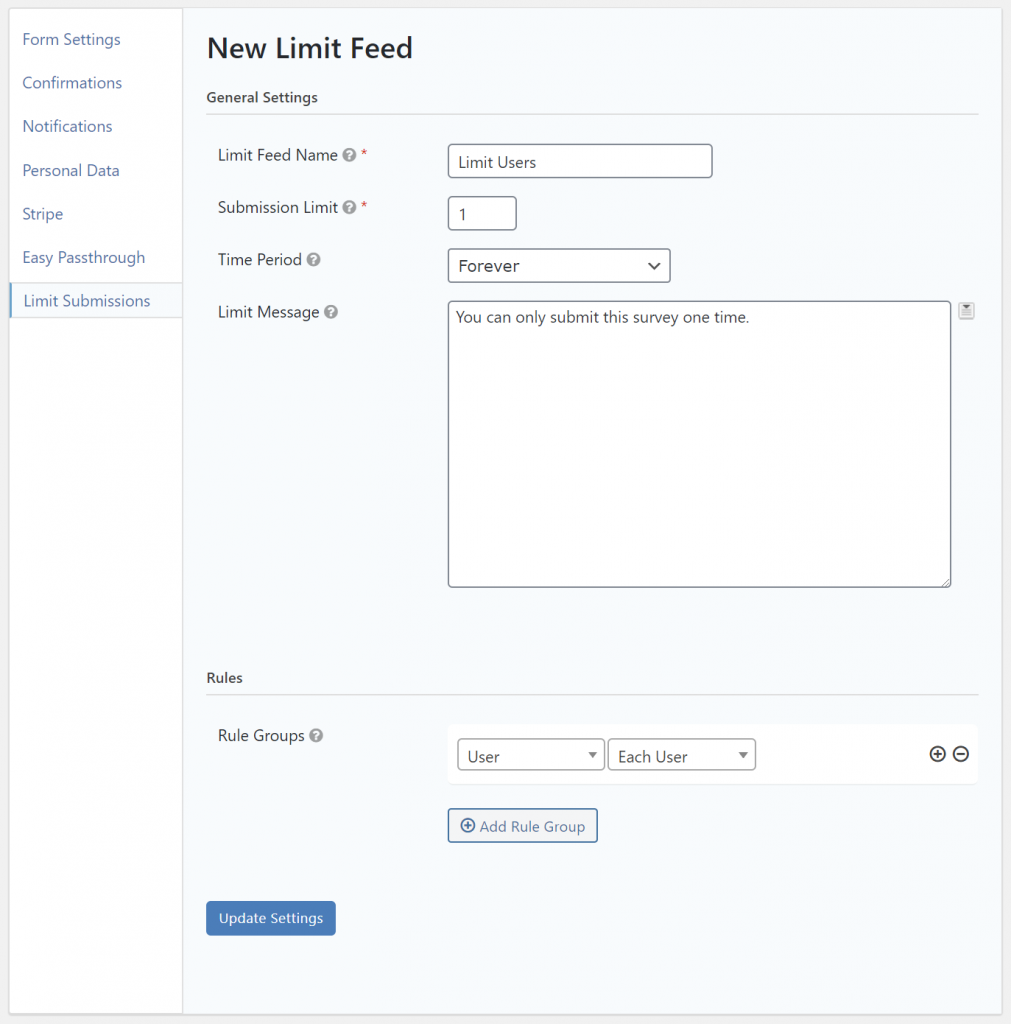
Limit Survey Submissions
For cleaner data, you might want to limit how many times people can submit your survey, like limiting each logged-in user to one submission. With GF Limit Submissions, you can easily set this up.
You’ll get a new Limit Submissions tab in the form settings where you can create rules:
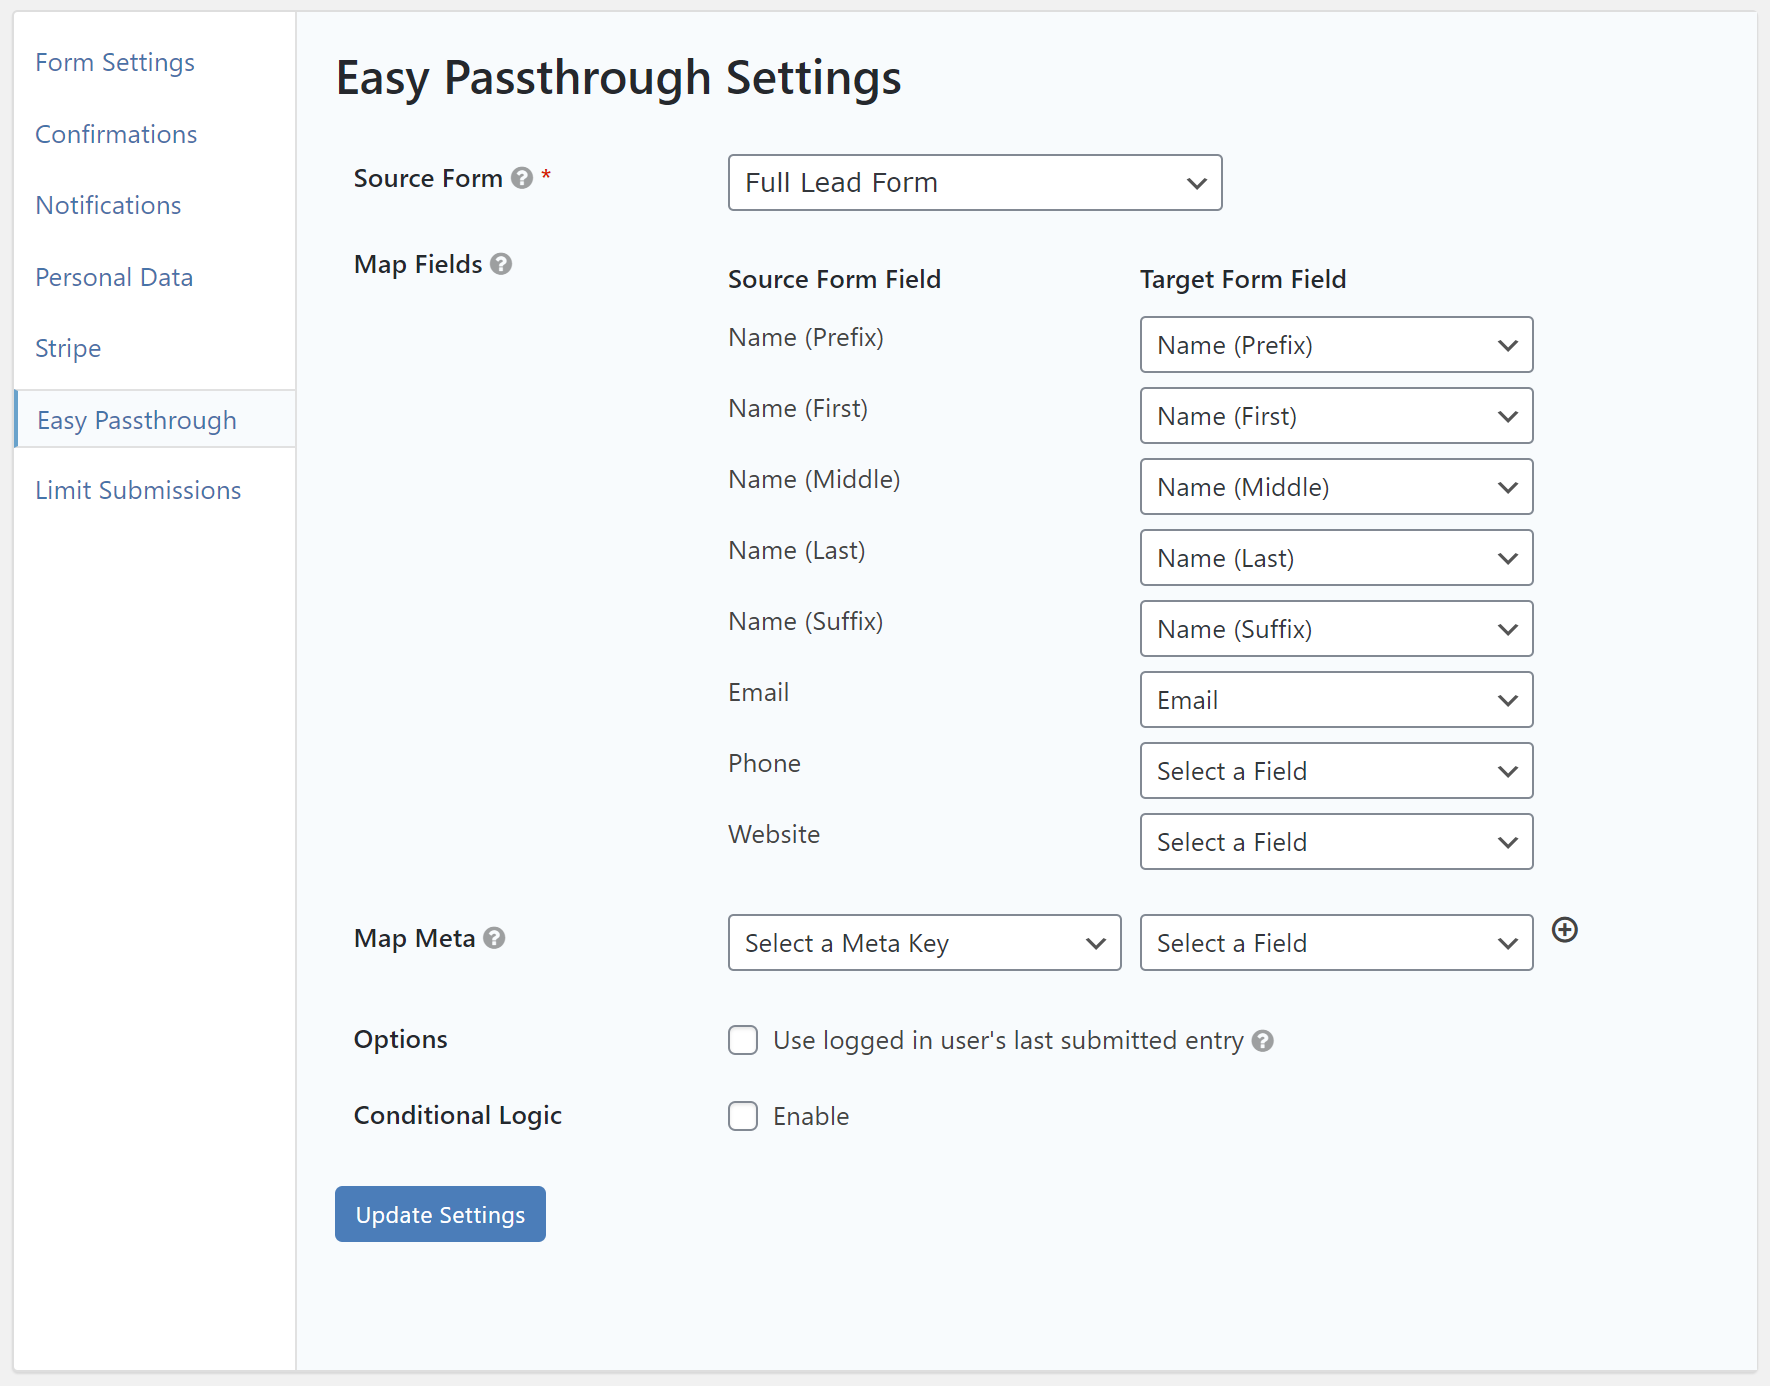
Pass Data Between Forms
With GF Easy Passthrough, you can pass data between separate forms. For example, if you’ve created a user registration form with Gravity Forms, you could pass a user’s name and email address to a welcome survey form that you display after they register. With conditional logic enabled, you can choose to only pass through entries that meet certain criteria.
You’ll get a new Easy Passthrough tab in the form settings where you can configure this:
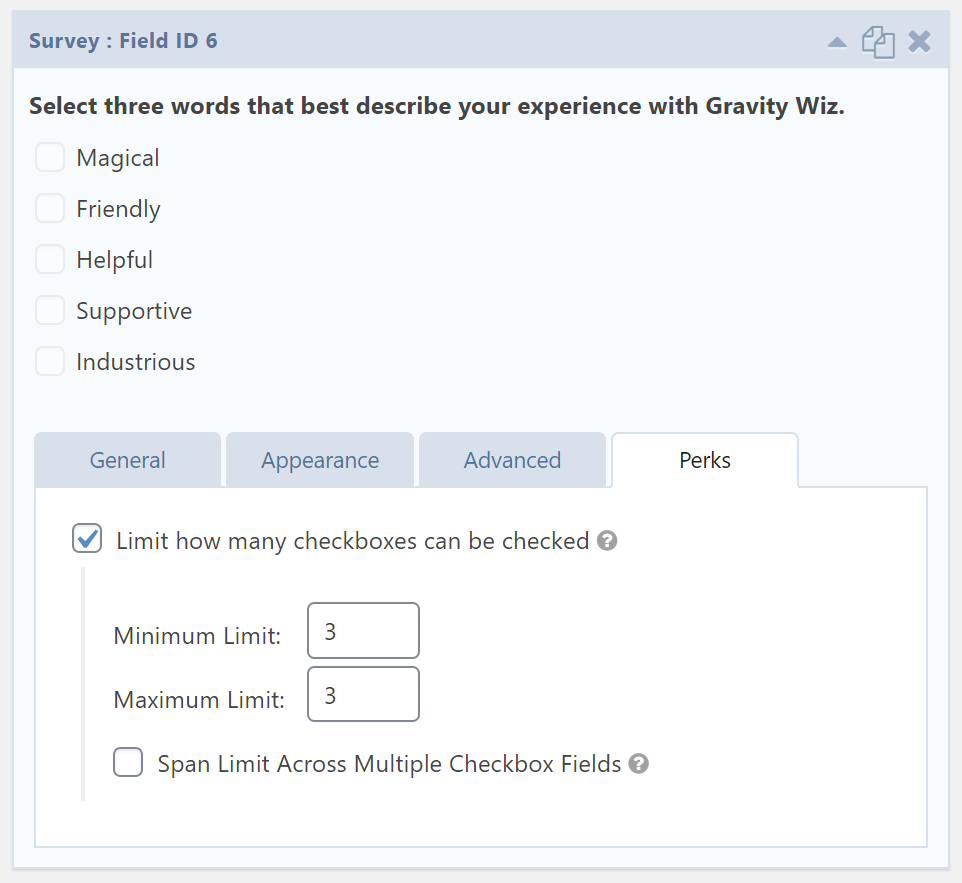
Limit Checkbox Selections
If you’re using the Checkboxes survey field type, you can use GF Limit Checkboxes to set a minimum or maximum number of checkboxes that a user can select. For example, you can ask users to select between 2-4 items.
You’ll get a new Perks tab in the Survey field settings where you can add these limits:
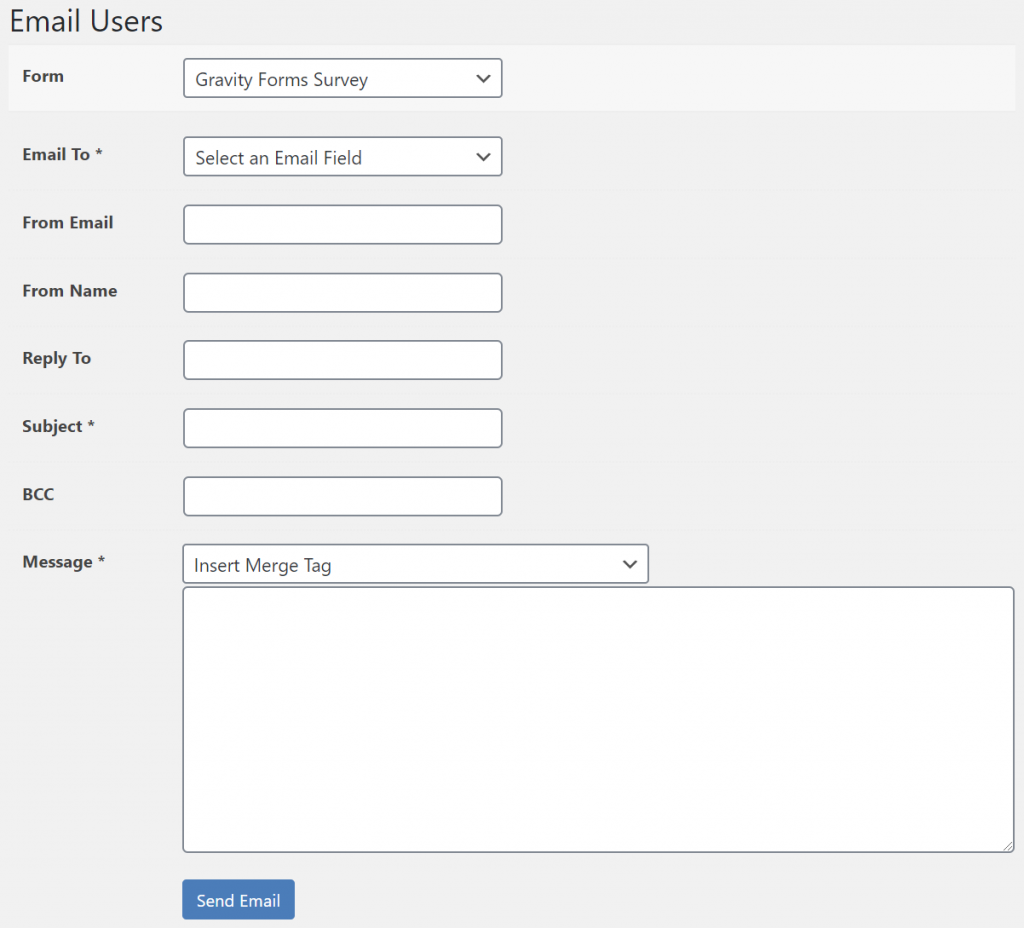
Email Your Survey Takers
Once you collect your survey data, you might have a situation where you want to stay in contact with survey takers.
With GF Email Users, you can easily send a custom email to all the people who submitted your survey. To send an email, go to Forms → Email Users and select your survey form:
Create Better Multi-Page Navigation
If you have long surveys, you might want to break them up into multiple pages for better usability. With GF Multi-page Navigation, you can make it easier for users to navigate between different pages on your survey, like adding a “Back to Last Page” option.
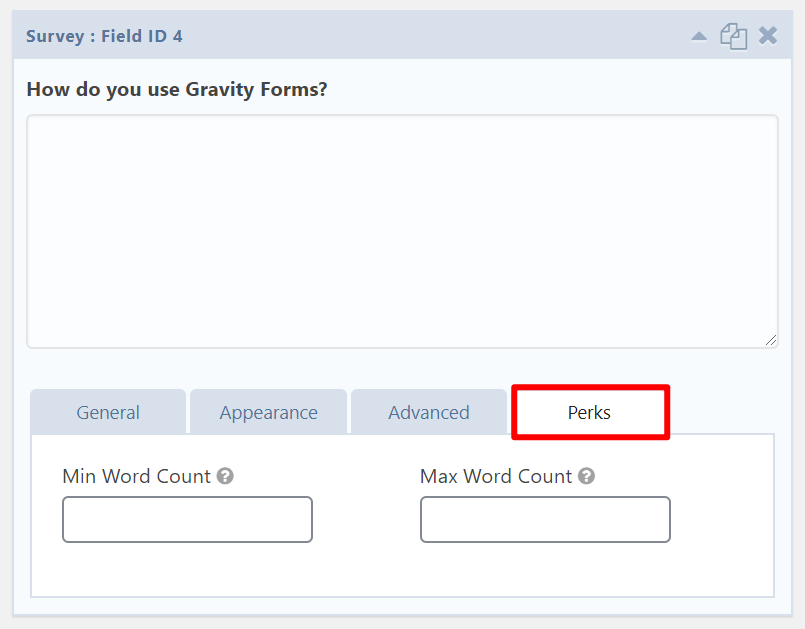
Set Word Count Limits
If you’re including open-ended survey questions, you can use GF Word Count to set a minimum or maximum word limit for your open-ended survey fields.
You can set up word count limits from the Perks tab of a text survey question:
Push and pull Gravity Forms data from Google Sheets
Optionally, manage survey responses inside Google Sheets. Gravity Forms to Google Sheets syncs Gravity Forms submissions with Google Sheets automatically, providing new ways to manage and report on survey data.
Automatically Save Form Progress
Gravity Forms Advanced Save and Continue provides the relief of never having to worry about forgetting to save a long submission or returning to see it has disappeared. Building off of core Gravity Forms Save and Continue functionality, Advanced Save and Continue makes the process automatic, without the need for sending a link by email. This works for logged-in or non logged-in users, like any website visitor filling out your survey.
Create a Gravity Forms Survey Today
With the Survey add-on for the Gravity Forms WordPress plugin, you can create flexible surveys on WordPress using a variety of different field types.
Then, you can use the 47 new perks that you get with Gravity Perks to enhance your surveys in a ton of useful ways.
To enhance the Gravity Forms Survey add-on, purchase Gravity Perks today.