How to Create Personalized Confirmation Pages
Finally, there is an easy way to create dynamic Gravity Forms confirmation pages for multiple forms, create permalinks for confirmation pages, and pass entry IDs anywhere. Thanks to GP Post Content Merge Tags, Gravity Forms confirmations are more powerful than ever!

This article requires the Gravity Forms Post Content Merge Tags perk.
Buy Gravity Perks to get this perk plus 48 other premium Gravity Forms plugins!
This tutorial will demonstrate how to display merge tag content within your Gravity Forms confirmation pages. This functionality can be used on any page and is made available by the GP Post Content Merge Tags plugin.
Here are just a few examples of how this could be useful:
- Single Confirmation Pages
Use a single confirmation page for multiple Gravity Forms. - Redirecting to External Locations
Pass the Gravity Forms entry ID to any location by using URL parameters. - Entry Permalinks
Generate permalinks to submitted Gravity Forms entries.
Ready to get started? Here we go!
Steps
- Install & activate GP Post Content Merge Tags.
- Add a page confirmation.
- Add merge tags to your confirmation page.
1. Install & activate GP Post Content Merge Tags.
Install and activate GP Post Content Merge Tags.
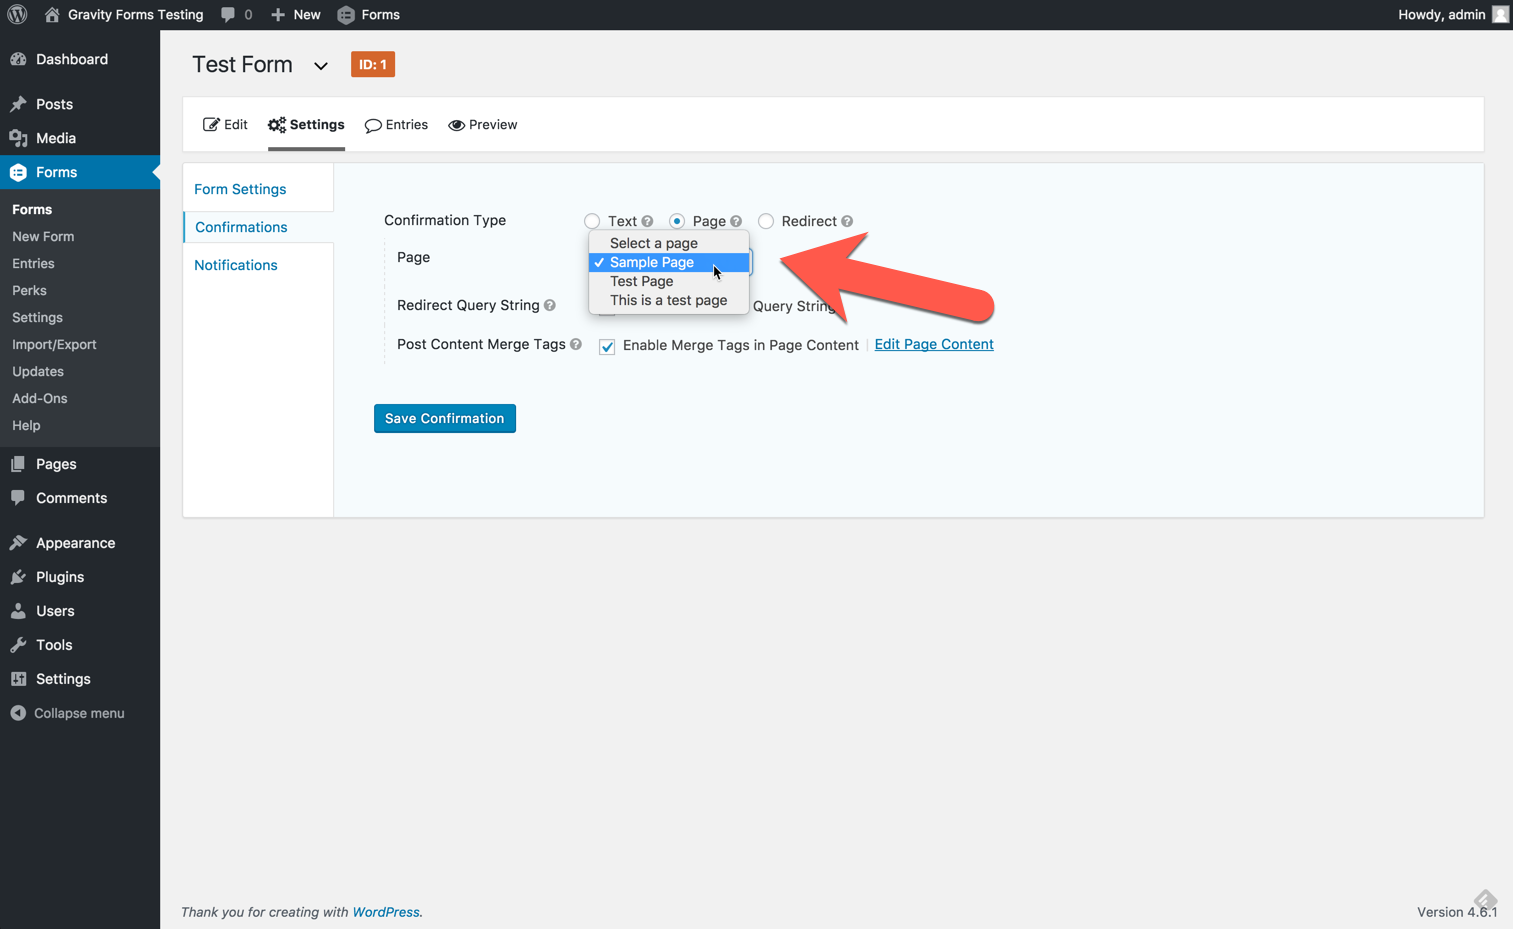
2. Create a Page confirmation.
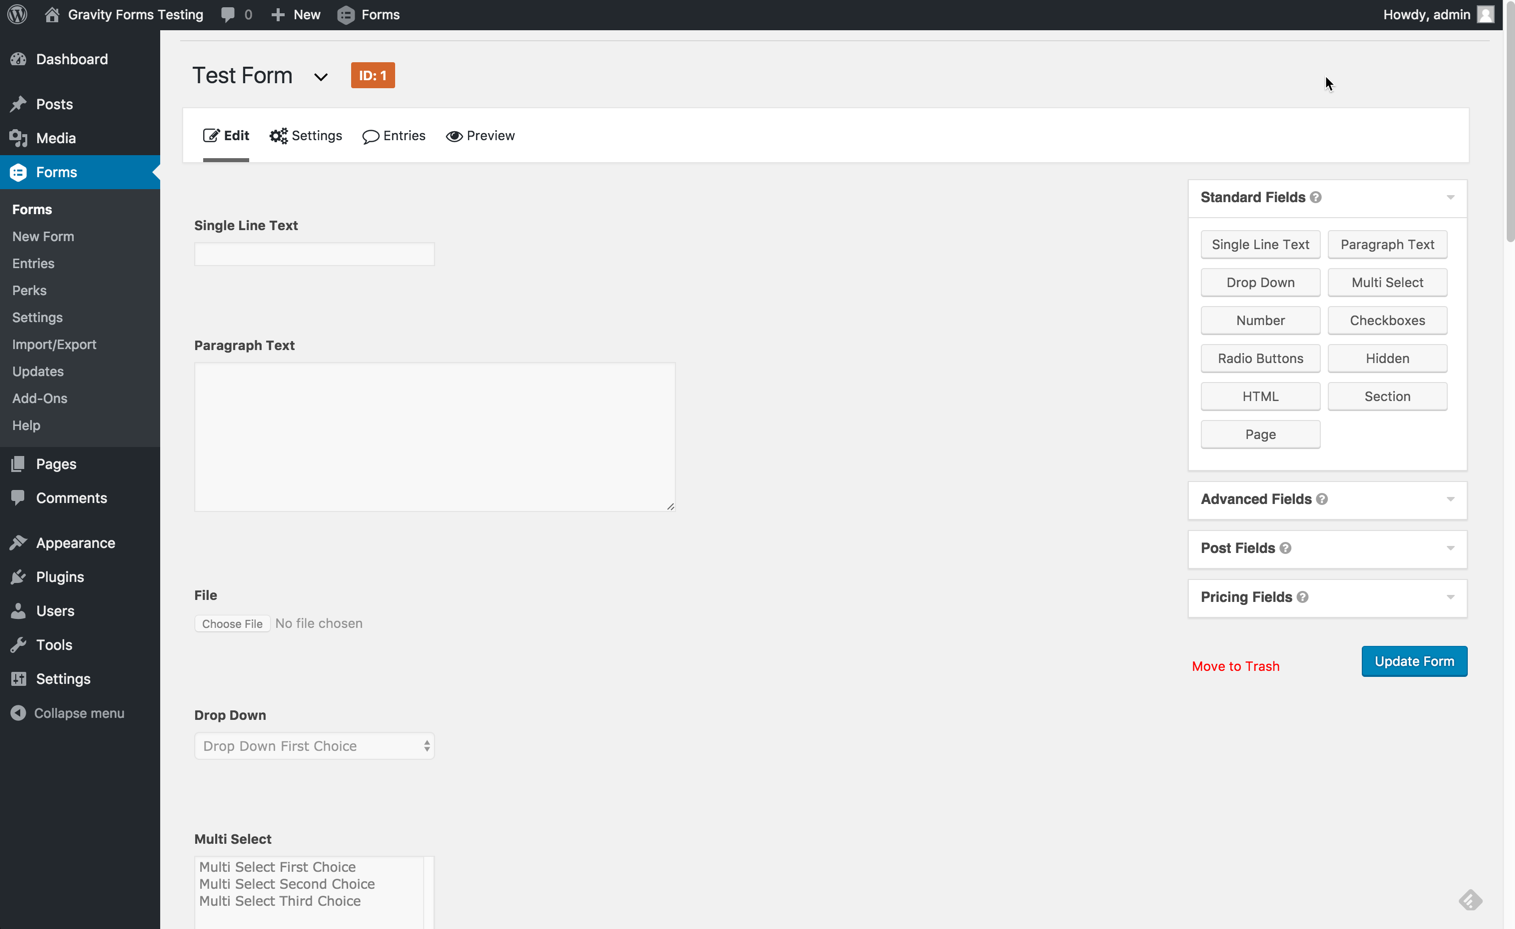
Open your form in the Gravity Forms Form Editor.
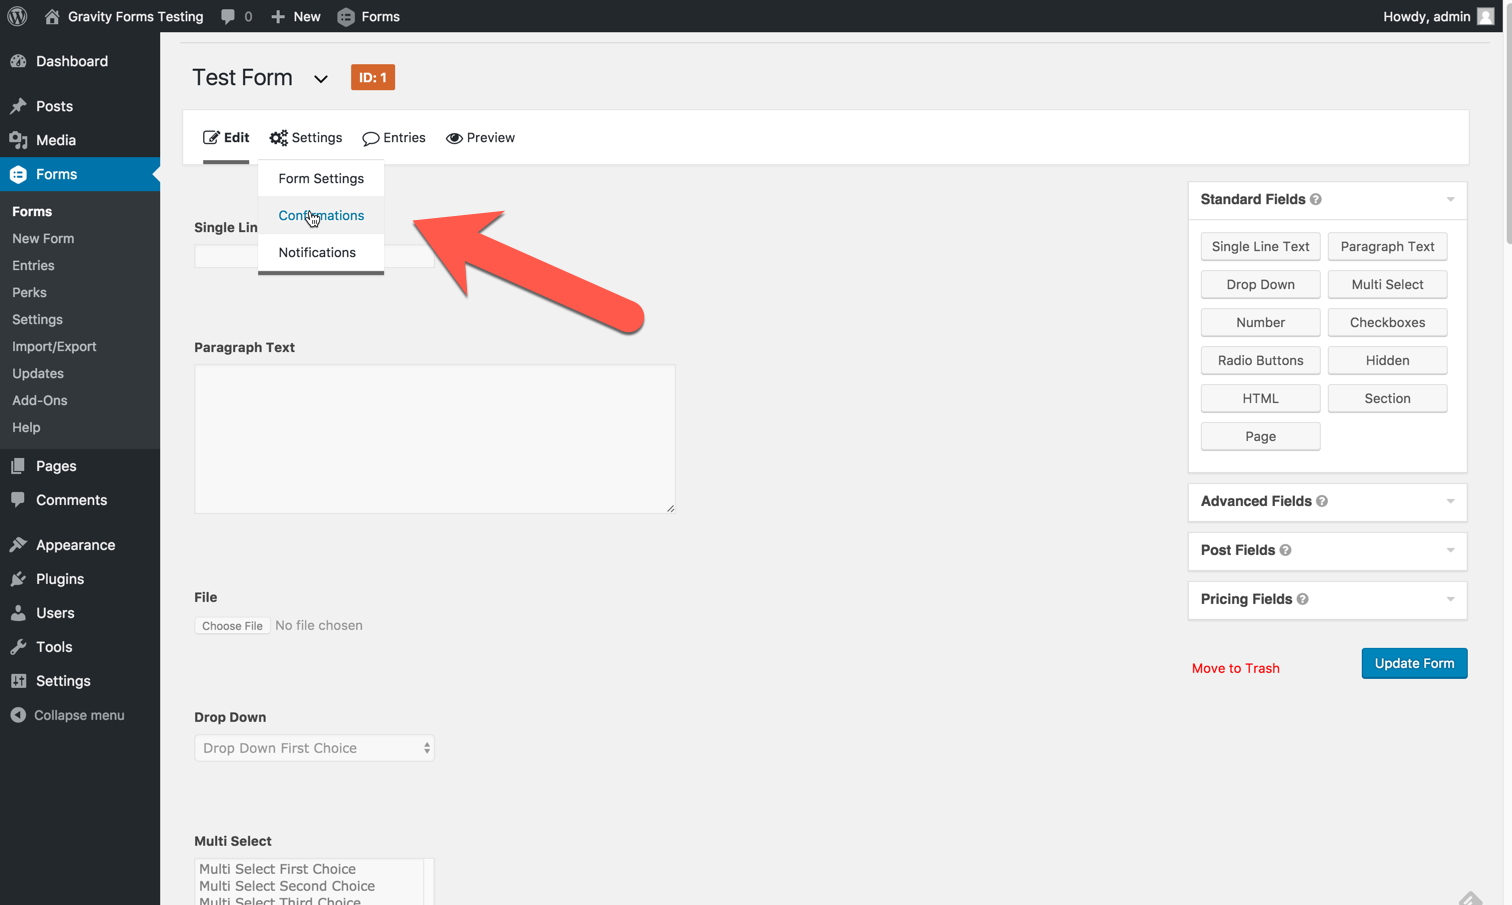
Access your confirmation by clicking on Confirmations on the top menu bar, then clicking on the confirmation that you want to edit. Additional confirmations can also be created by clicking on Add New.

Select Page from the Confirmation Type setting.
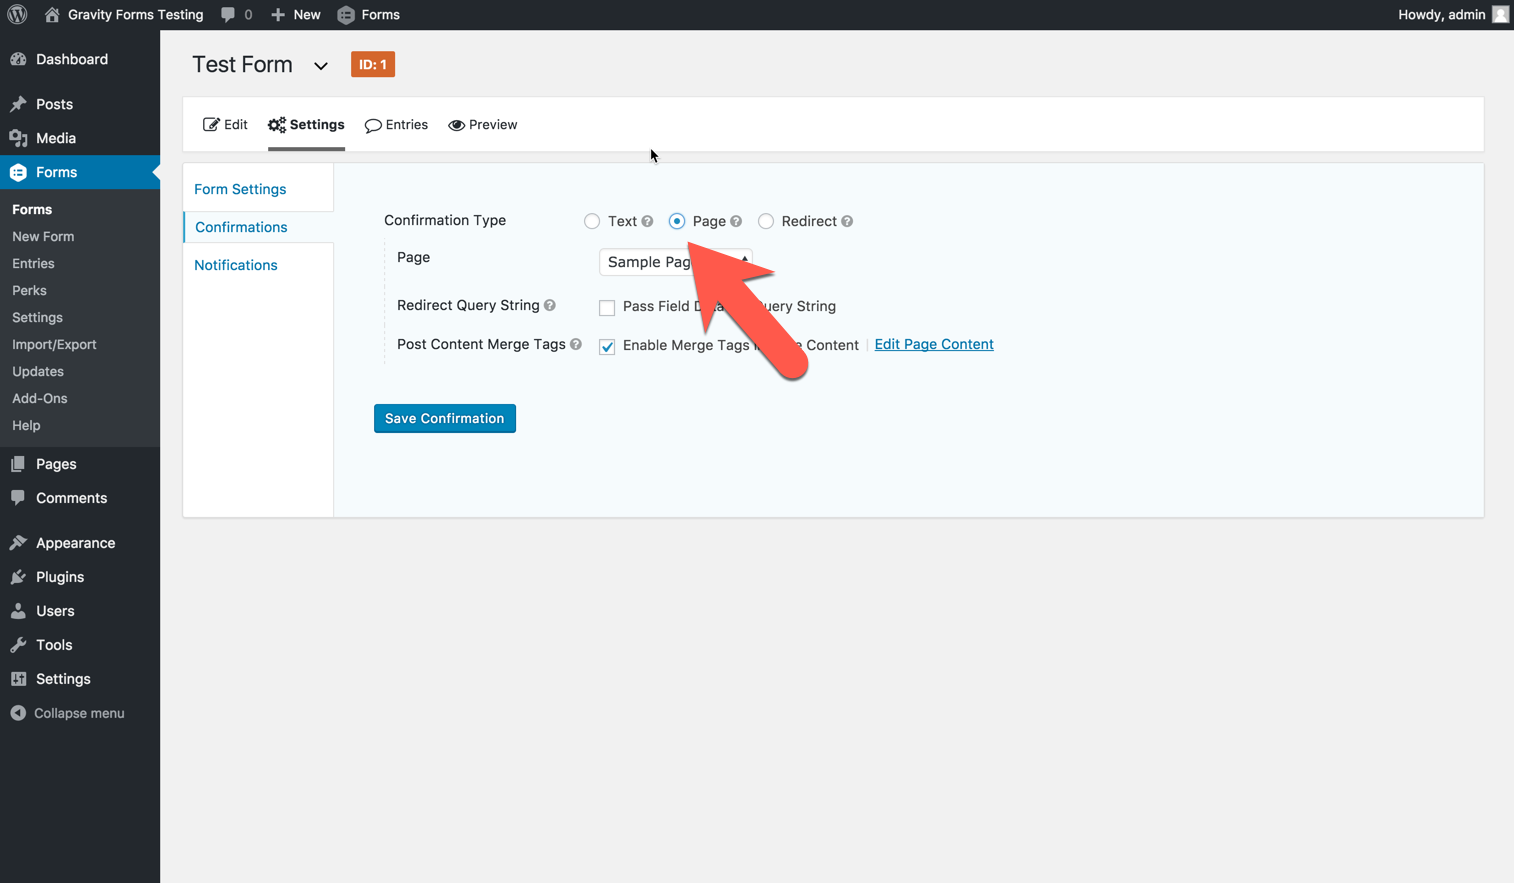
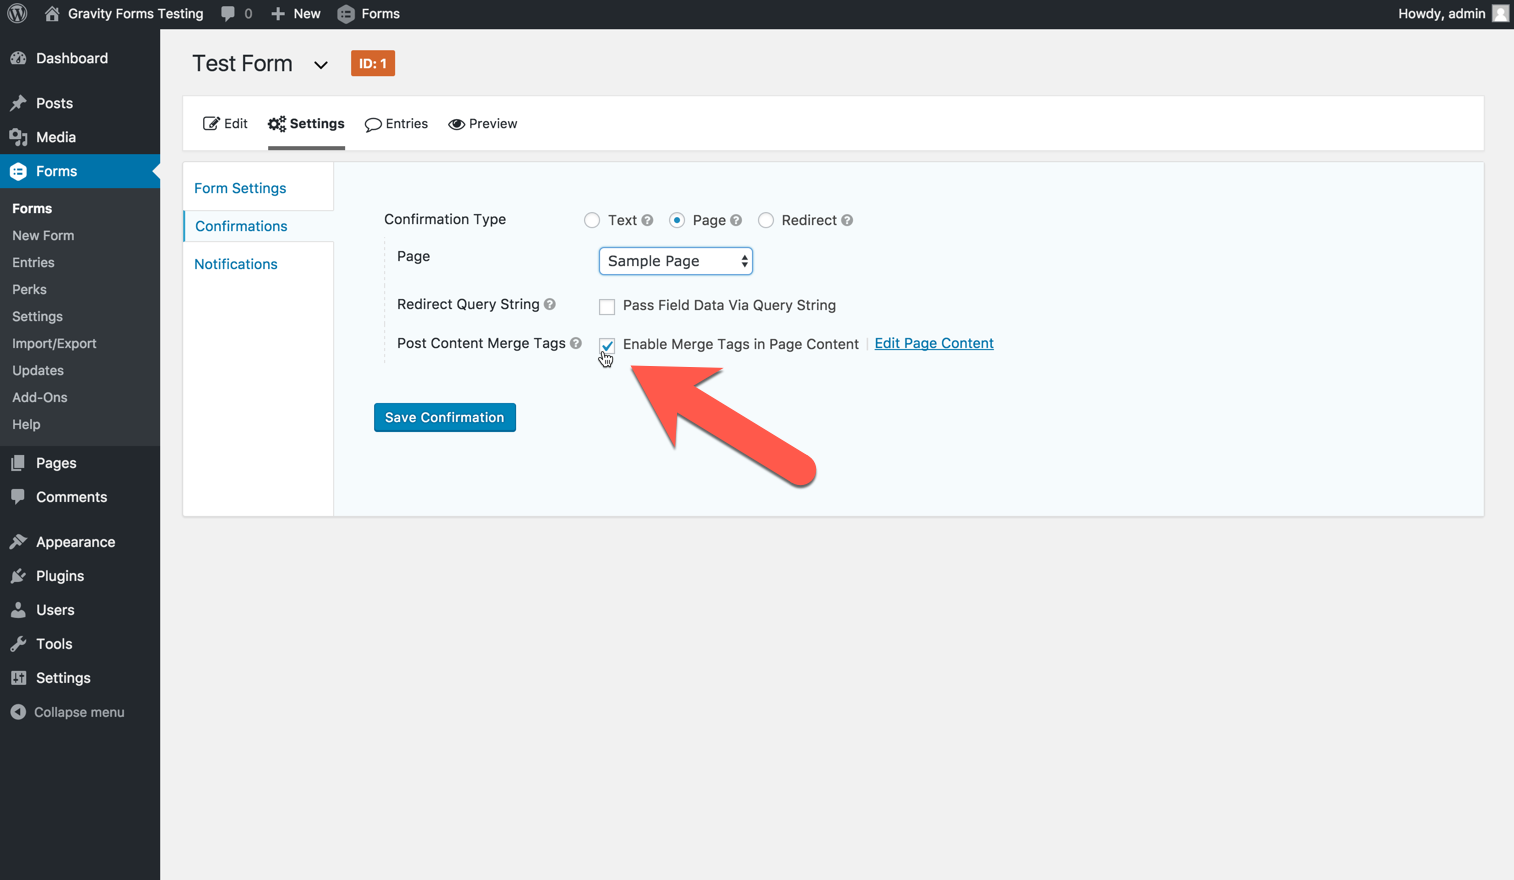
Choose the page that you want to use as your confirmation page by using the Page dropdown.
Enable the Post Content Merge Tags setting and save your confirmation.
3. Add merge tags to your confirmation page.
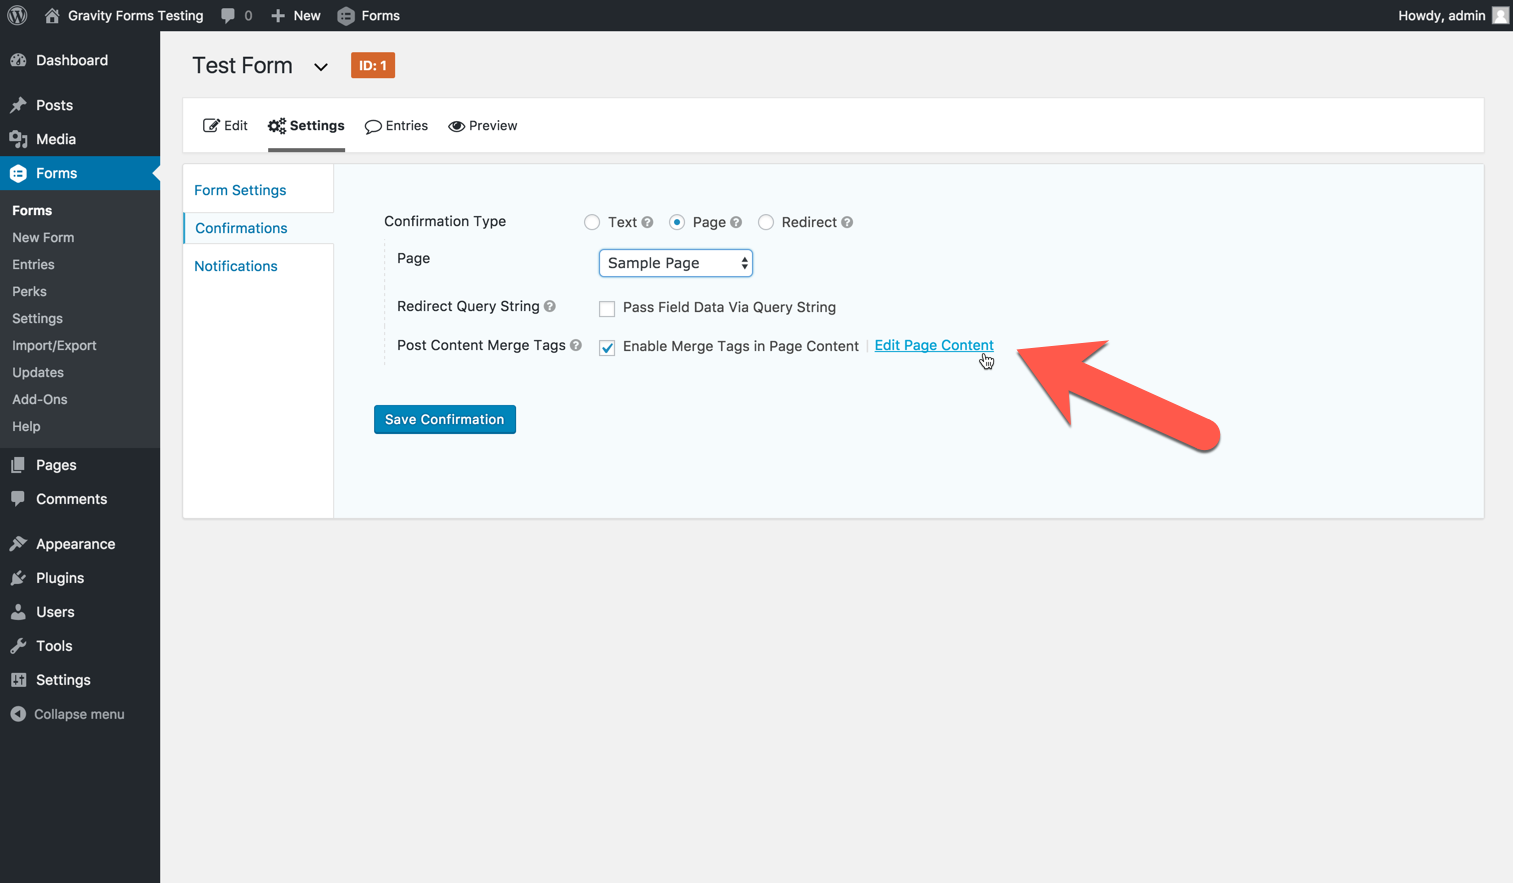
From the confirmation edit screen, click the Edit Page Content link to the right of the Post Content Merge Tags checkbox.
Your post will be opened within an additional browser tab. Begin editing your content.
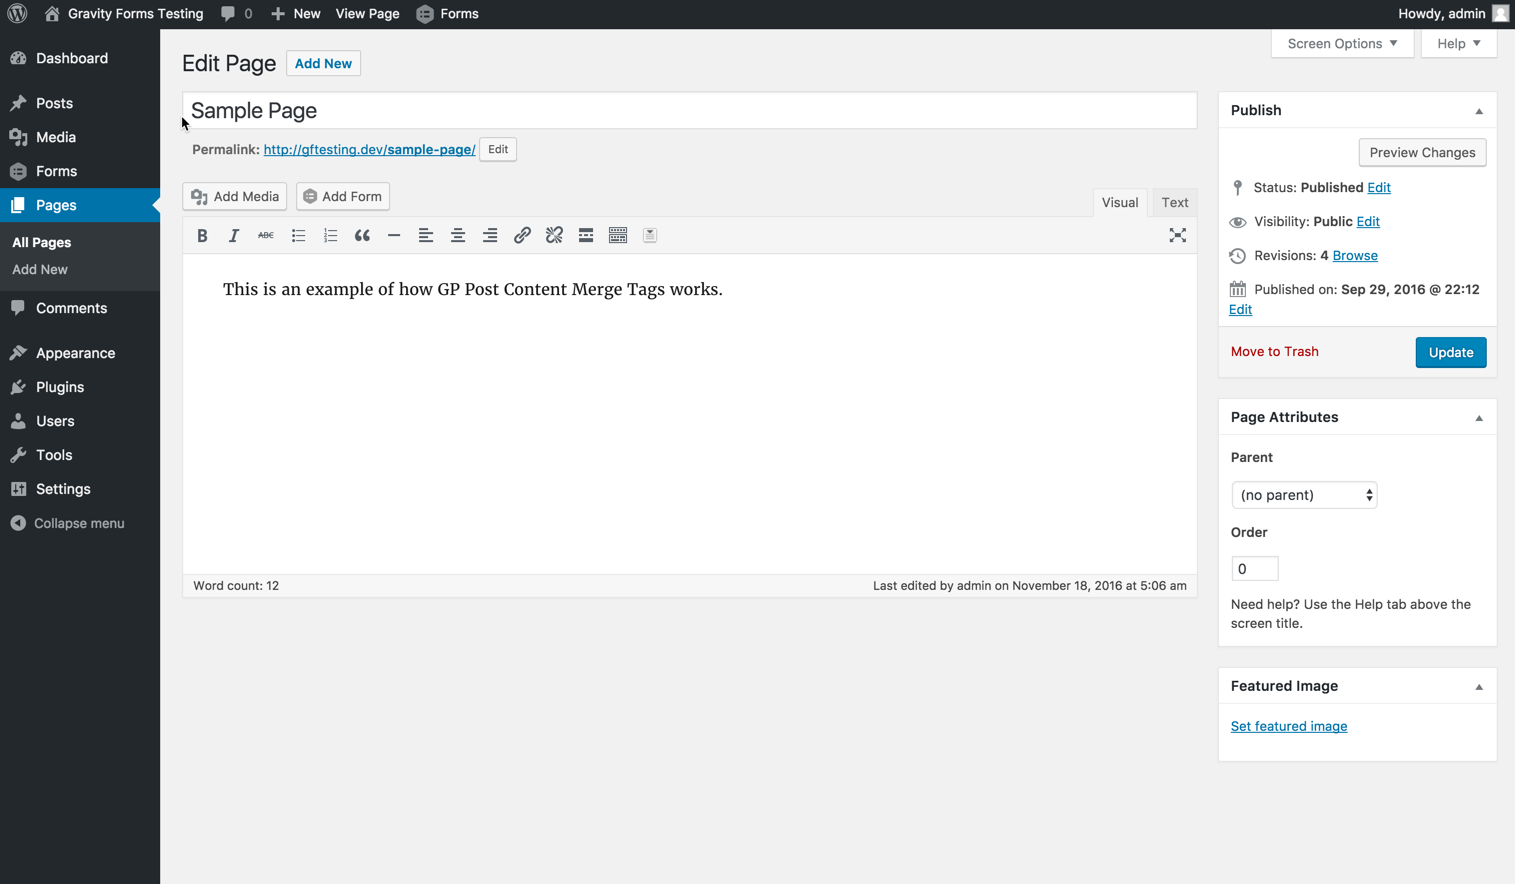
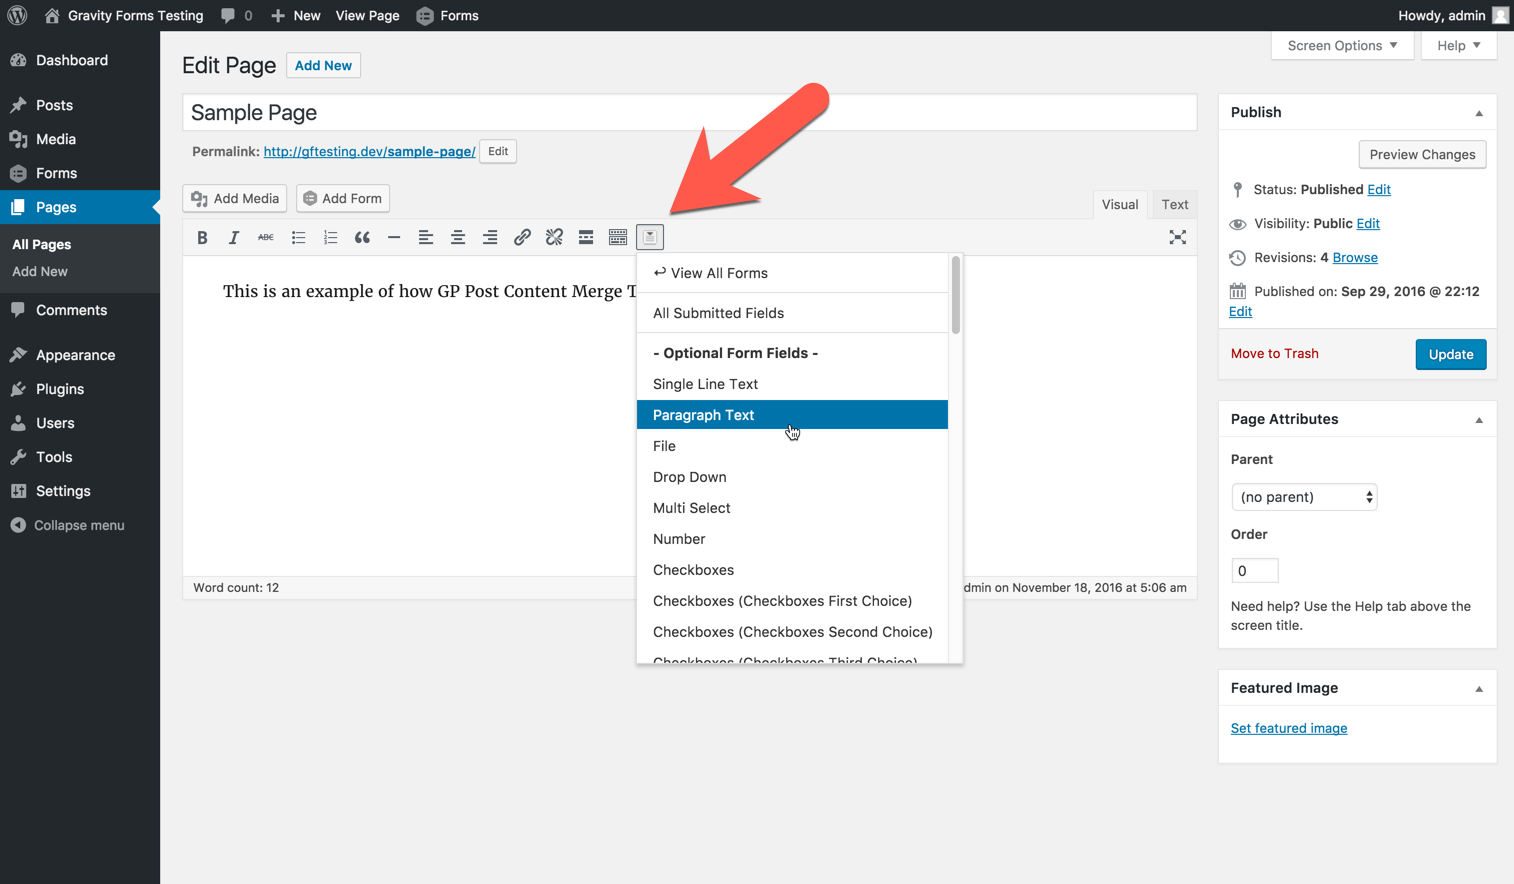
To insert a merge tag into the page, click the newly added merge tag button at the top of the editor, then on the merge tag that you want to insert.
Shortcodes are also supported. For more information on these shortcodes, see the GP Post Content Merge Tags documentation.
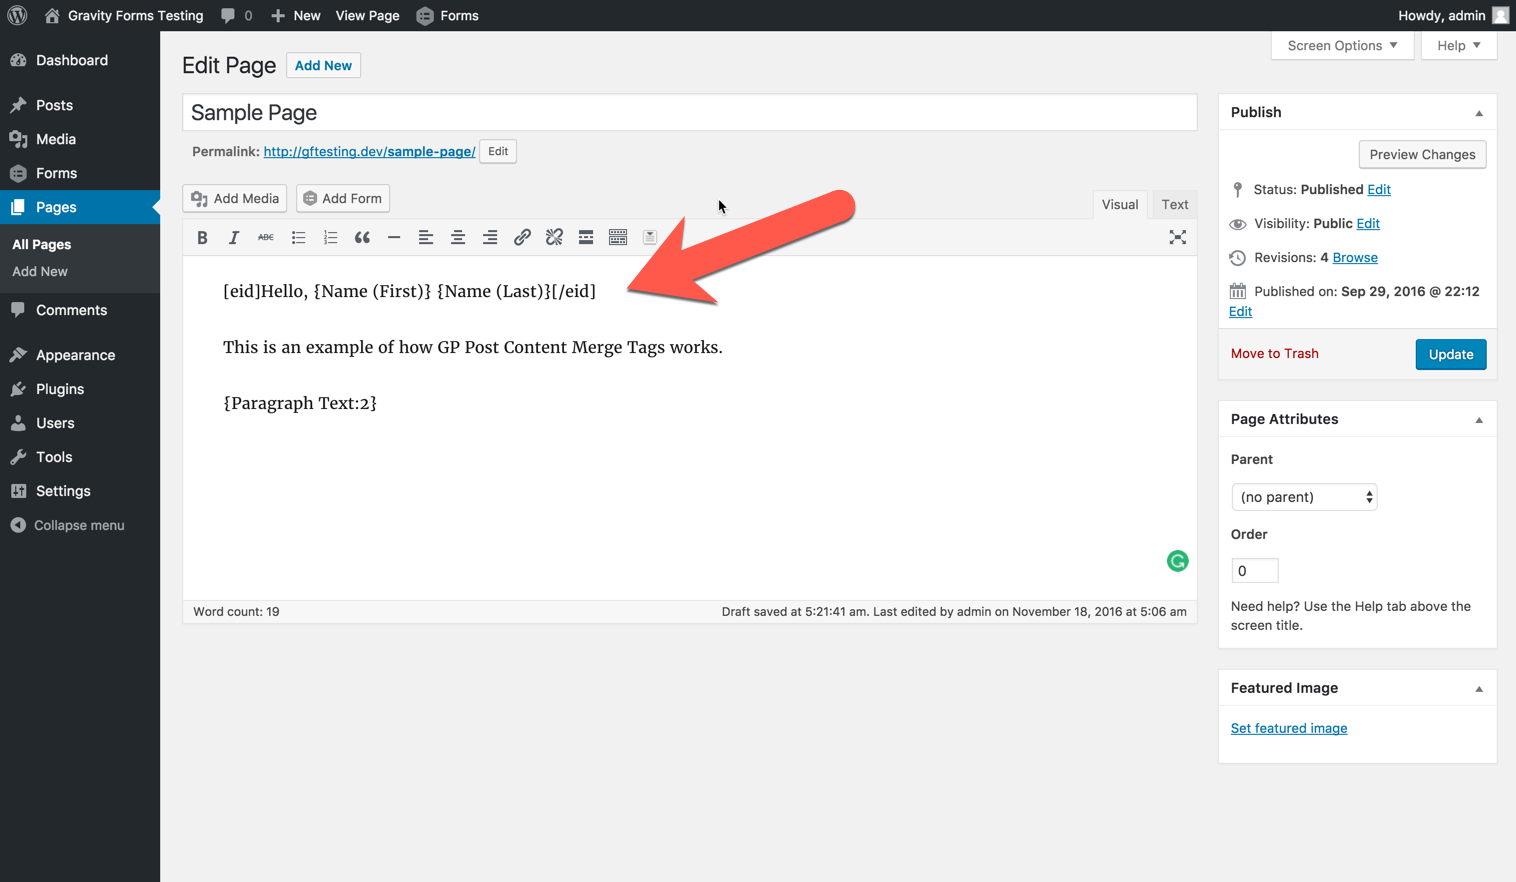
Creating personalized Gravity Forms confirmation pages is as simple as that! Any merge tags on the page will now be automatically replaced with their values.
Explore other methods to create personalized confirmation pages and more ways to utilize Gravity Forms data in the frontend in our How to Show Gravity Forms Data in WordPress article!


Is it possible to add merge tags if I’m using Elementor? Thanks!
Hi Cade,
Merge tags have been noted not to work within page builders, and the suggested solution is to use the [eid] shortcode to add the merge tags to the page.
https://gravitywiz.com/documentation/gravity-forms-post-content-merge-tags/#the-eid-shortcode
Please try this and see if this works for you.
Best,
Thanks for the quick reply. Works great!
Hi Cade,
You’re welcome. Enjoy Gravity Perks.
Best,