How to Subscribe Users to MailPoet from Gravity Forms
Learn how to automatically add subscribers to MailPoet lists from Gravity Forms.
- Step 1 — Install and Activate GC MailPoet
- Step 2 — Create a GC MailPoet Feed
- Step 3 — Set Up GC MailPoet Feed
- Step 4 – Test Connection
- Step 5 – Make Magic Happen with MailPoet
Want to grow your MailPoet subscriber list with Gravity Forms? Whether you’re collecting emails from your latest lead magnet or letting users subscribe to your newsletter during checkout, Gravity Connect: MailPoet makes it magically effortless to push Gravity Forms submissions directly to your MailPoet lists. WordPress FTW! 🧙
In this tutorial, we’ll show you how to connect Gravity Forms to MailPoet in just a few clicks. Let’s get started!
This article requires the Gravity Connect MailPoet plugin.
Buy Gravity Connect to get this plus other premium Gravity Forms plugins!
Step 1 — Install and Activate GC MailPoet
GC MailPoet is available through Gravity Connect and can be installed via Spellbook.
Step 2 — Create a GC MailPoet Feed
Head to the form you want to connect to MailPoet. In the Settings menu, click on MailPoet and it’ll take you to the GC MailPoet Feeds screen. From there, click on Add.
Step 3 — Set Up GC MailPoet Feed
MailPoet feeds can perform four different actions, with “Subscribe” being the default. So you can go straight to the Feed Action Settings and map the following fields:
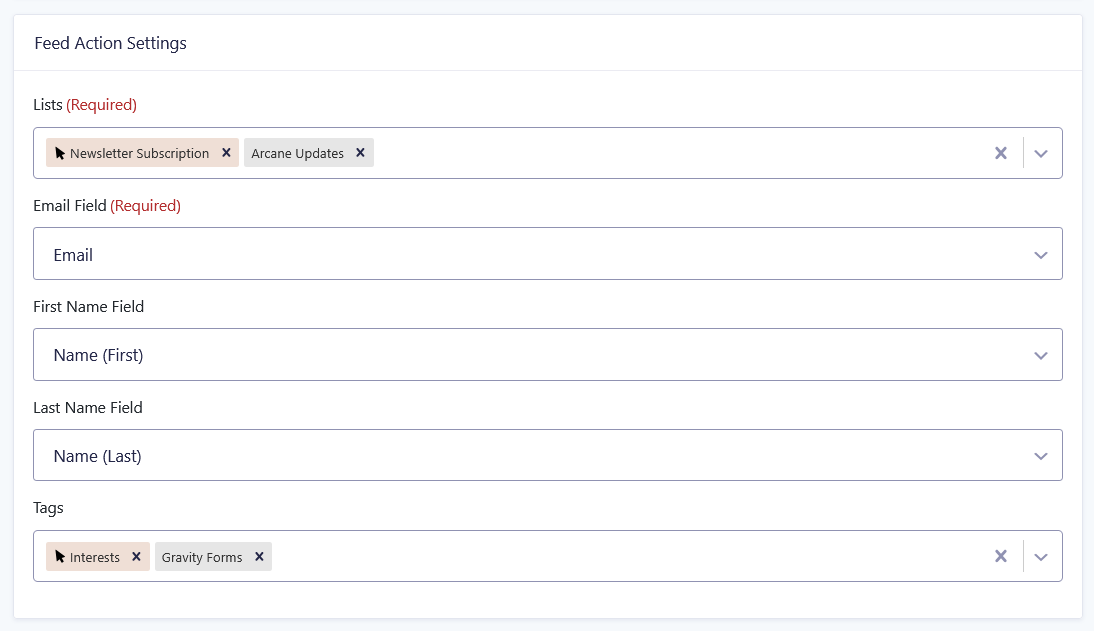
Lists: Choose which MailPoet list(s) new subscribers should be added to. You’ll see both your existing MailPoet lists and MailPoet Lists fields.
You can add the MailPoet Lists field directly from the form editor, letting users choose from your MailPoet lists as they fill out your form. For more details, check out the MailPoet Connection documentation.
Email Field: Link to the Email field in your form that will be added to the lists selected above.
First & Last Name Fields (Optional): Link Gravity Forms Name fields (First and Last) to MailPoet’s name fields.
Tags (Optional): Select from your MailPoet tags or any form field to tag subscribers as they are added. You can create new tags on the fly too.
If you’re using MailPoet Custom Fields, you can map those to any matching form fields right below the Feed Action Settings to keep subscriber information organized from the start.

Last, but certainly not least, you can enable conditional logic to only run a feed when certain conditions are met. For example, only run the MailPoet Connection feed if the user agreed to receive emails.
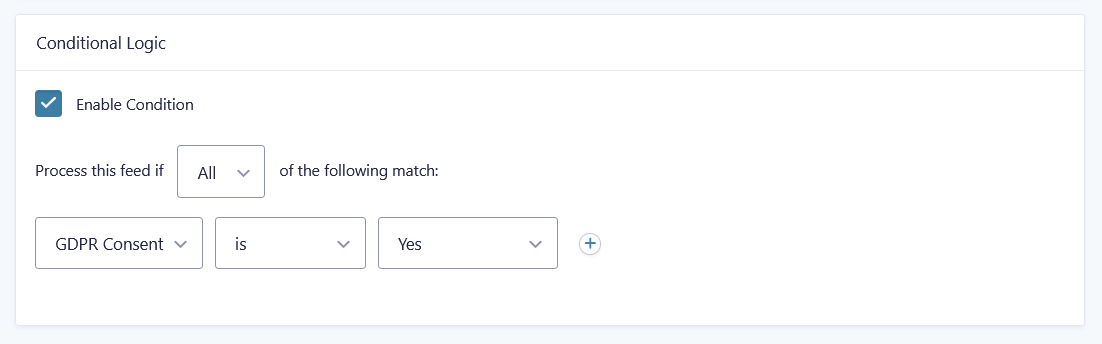
Tip: Pair conditional logic with multiple feeds to create conditional subscriptions!
Step 4 – Test Connection
Once your feed is saved and ready to go, run a test entry to confirm everything is set up correctly.
Step 5 – Make Magic Happen with MailPoet
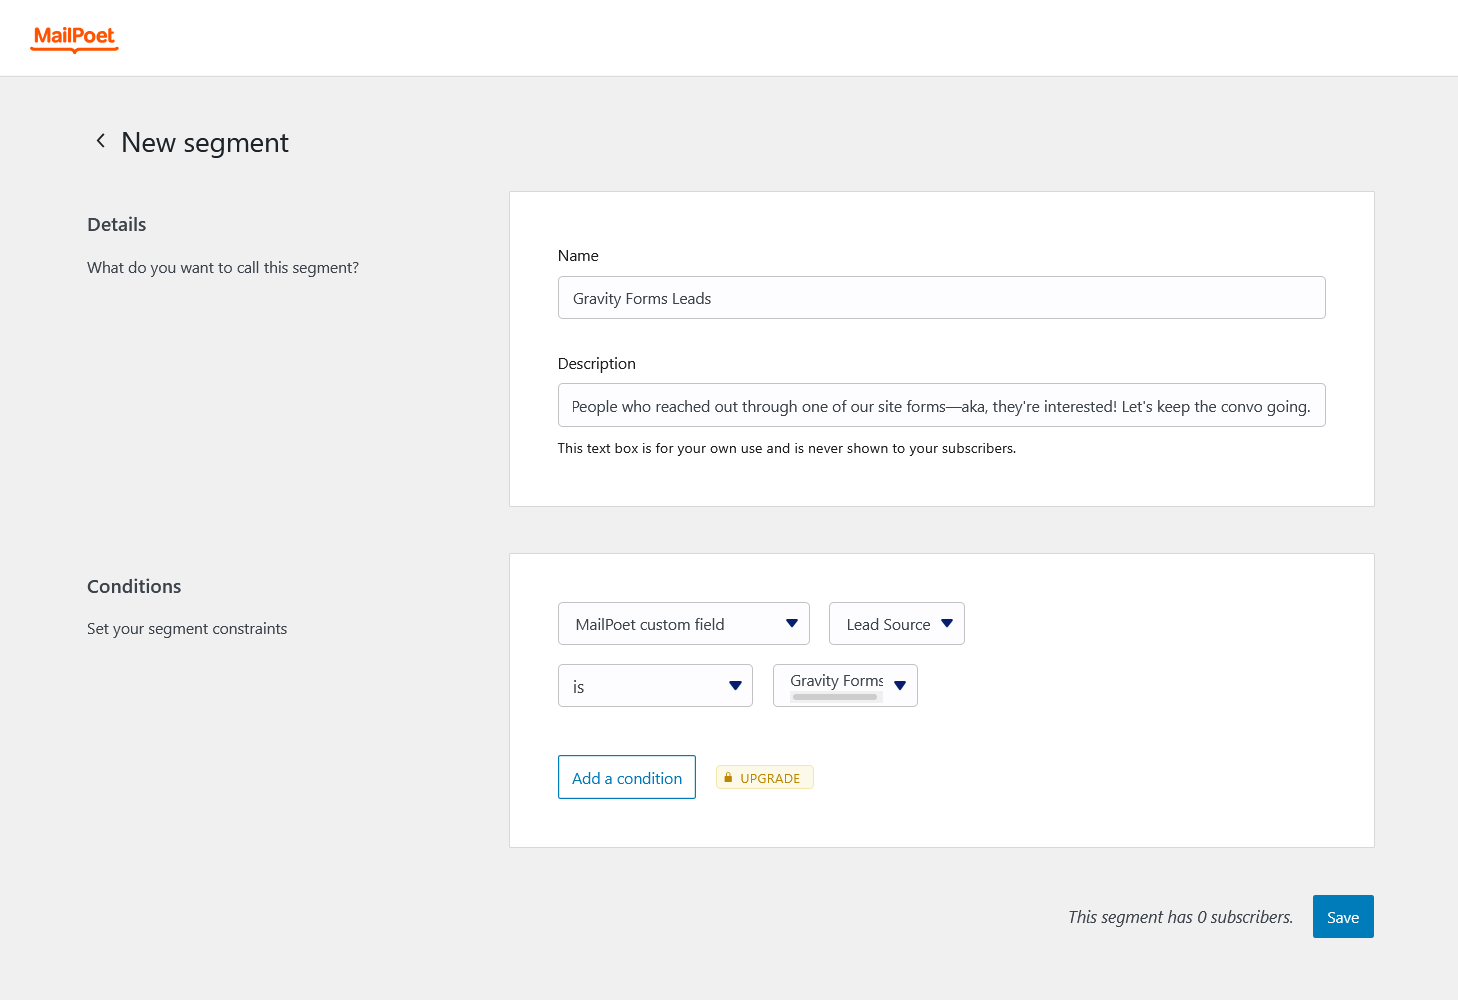
Now that you’re set up to have subscribers automatically added from Gravity Forms, you can put MailPoet’s features to use. For example, map a “Lead Source” custom field to a Gravity Forms hidden field, then link it to a segment just for leads that came through Gravity Forms — or a specific form — ready for targeted follow-ups or onboarding emails.
If later down the line you want to update their custom fields for targeted outreach or let subscribers update their personal info themselves, just use this same type of feed—if a submitted email matches that of an existing subscriber, the feed will update the existing subscriber instead of creating a new one. 😉
Eventually, you might also want to learn how to manage tags more granularly or how to let subscribers gracefully unsubscribe. But for now, enjoy your newcomers!
Feeling inspired to go the extra mile and ensure that you’re only adding real-deal emails to your lists? Check out GP Email Validator. 📨