How to Use Gravity Forms to Unsubscribe Users from MailPoet
Learn how GC MailPoet makes unsubscribing users from your MailPoet lists simple, flexible, and user-friendly.
- Step 1 — Install and Activate GC MailPoet
- Step 2 — Create a GC MailPoet Feed
- Step 3 — Set Up GC MailPoet Feed
- Step 4 – Test Connection
- You’re all set!
Giving users an easy way to unsubscribe from your MailPoet lists isn’t just considerate—it’s smart. Interests shift, inboxes get crowded, and letting someone go gracefully leaves a better impression than making them hunt for the exit.
And honestly? A smaller, more engaged list is better for everyone. It means your emails are landing where they’re wanted, keeping deliverability high and helping ensure your messages stay relevant—and out of the spam folder.
GC MailPoet allows you to create hassle-free forms that will automatically unsubscribe email addresses from your MailPoet lists. If you have multiple lists, you could also give the power to the user and let them select which lists to unsubscribe from (or add themselves to!) directly from the form using the MailPoet Lists field.
Let’s see how it’s done! 🧙♂️
Step 1 — Install and Activate GC MailPoet
GC MailPoet is available through Gravity Connect. You can easily install and activate it through Spellbook.
Step 2 — Create a GC MailPoet Feed
Head to the form you want to connect to MailPoet. In the Settings menu, click on MailPoet and it’ll take you to the GC MailPoet Feeds screen. From there, click on Add.
Step 3 — Set Up GC MailPoet Feed
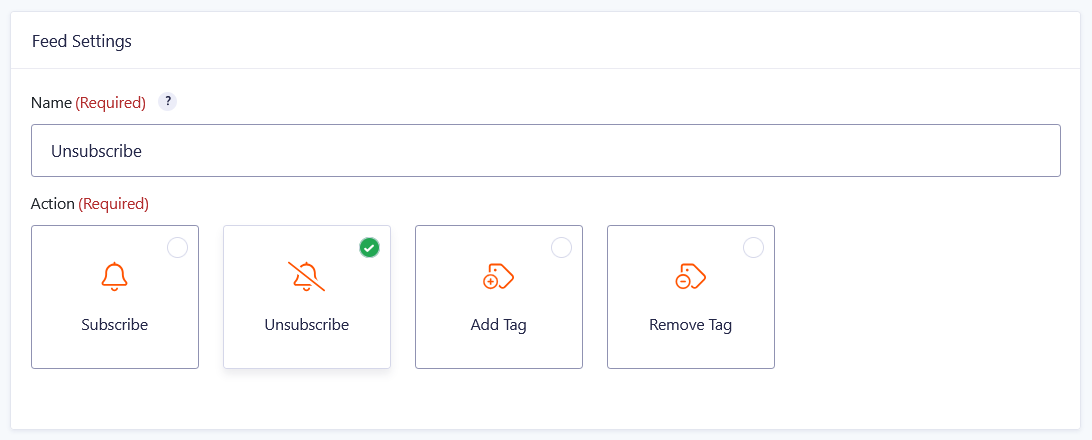
First, in the Feed Settings, set the feed’s Action to “Unsubscribe.”
Second, head to the Feed Action Settings and map the following fields:
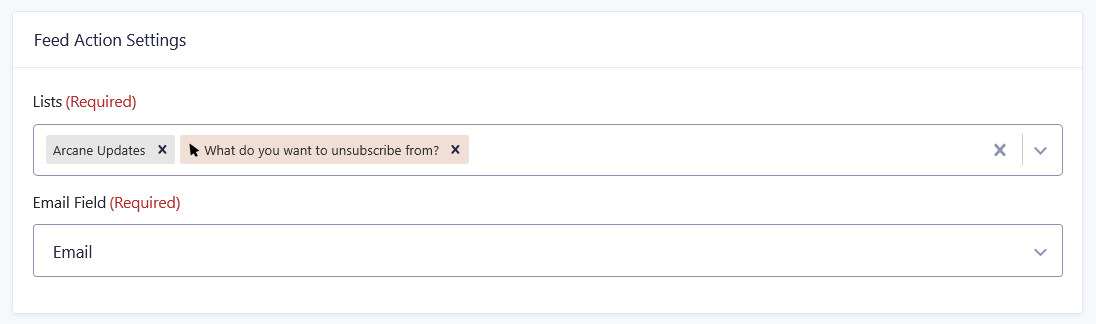
Lists: Choose which MailPoet list(s) to unsubscribe the user from. You’ll see both your existing MailPoet lists and MailPoet Lists fields.
The MailPoet Lists field lets users select from your MailPoet lists. Read more details in the MailPoet Connection documentation.
Email Field: Link to the Email field in your form that will be unsubscribed from the lists selected above.
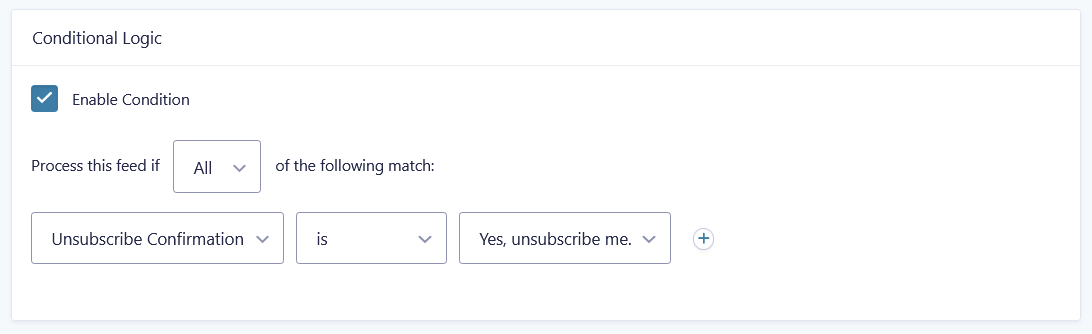
Third, you can use conditional logic to run a feed only when certain conditions are met. For example, only run the unsubscribe feed if the user checks a box to confirm they really want to opt out—ideal for hybrid forms that handle things like profile updates, feedback, or other email preferences, where not every submission means “unsubscribe me.”
Step 4 – Test Connection
Once your feed is saved and ready to go, run a test entry to confirm everything is set up correctly. Since this is an unsubscribe form, you might need to add a test subscriber first.
You’re all set!
Before sending your subscribers away, consider: is there other content you provide that might still fit their interests? A spell that can help you find out is leveraging MailPoet tags through Gravity Forms.
If you have any questions about this connection, let us know in the comments! Before you go, here’s a tip for keeping your lists clean: validate emails before they make it to your lists with GP Email Validator. 😉