How to Use Merge Tags in Field Labels with Gravity Forms
An easy method to use most Gravity Forms merge tags in your field labels.

This article requires the GP Populate Anything perk.
Buy Gravity Perks to get this perk plus 48 other premium Gravity Forms plugins!
GF Populate Anything is most commonly used to populate choices and values into a field.
Did you know it can also be used to replace merge tags in field labels?
In this article, we’ll demonstrate how to create Drop Down field on the first page of a form and how to populate the selected value of that Drop Down into the label of a Product field. This functionality can be applied to any field type.
Steps
- Create the Form
- Add Live Merge Tag to Field Label
- View Form and Confirm
1. Create the Form
Let’s start by creating our form. For this article, we’ll be creating a simple three-page donation form.
On page one, we add a Name field and a Drop Down field with a list of non-profit organizations. On page two, we add a Product field and set it to “User Defined Price.” The final page is optional but demonstrates how GF Preview Submission can be used to give a full preview of the entry before it is submitted.
2. Add Live Merge Tag to Field Label
We want to display the selected value from the organizations drop down on the first page in the label of the User Defined Product field on the second page.
Since merge tags are not supported in field labels by default, we won’t have access to the handy merge tag button that appears next to merge-tag-supported settings.
Don’t worry. It’s easy to write merge tags by hand. All you need is the field or input ID. If you want to include the label as well for easier identification, you can, but it is optional.
Here’s what our field label looks like with the merge tag in place:
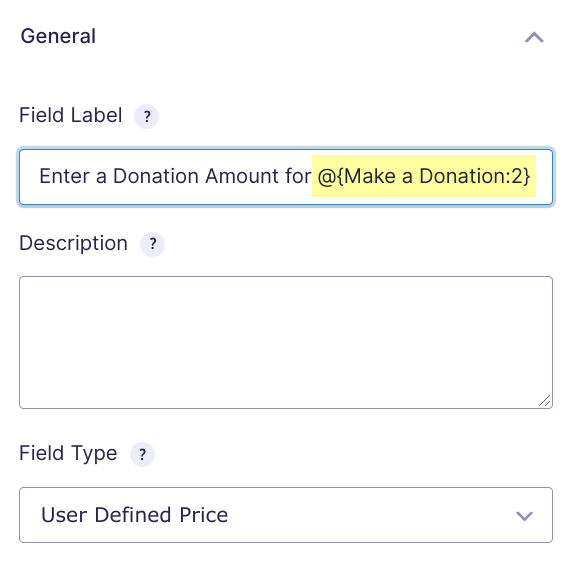 Add Merge Tag to Field Label
Note the @ symbol in front of the merge tag. This is what makes it a Live Merge Tag.
Remember, the merge tag in the screenshot is specific to our demo form. You will need to write your own merge tag based on the Drop Down field you created on the first page.
3. View Form and Confirm
Let’s make sure everything is working as expected.
Open your form in Preview (or Live Preview). Select an organization from our drop down and submit the first page.
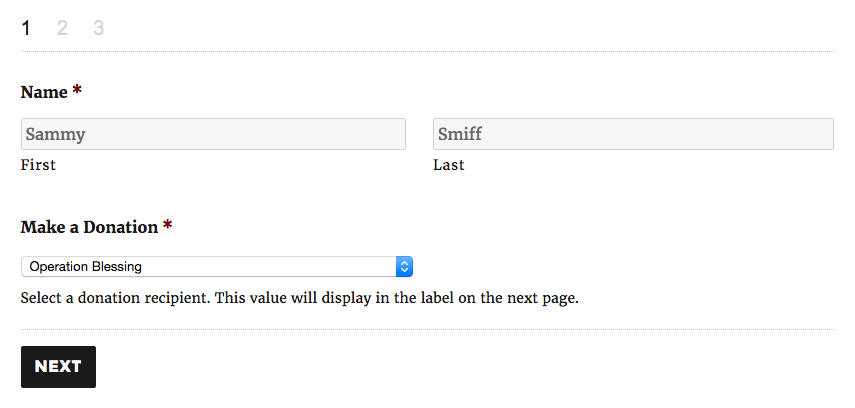 Select an Organization
On the second page, you should see that our merge tag has been replaced in the Product field label.
 View Donation Recipient in Label
On the last page, we can confirm the donation recipient and amount are correct before submitting the form.
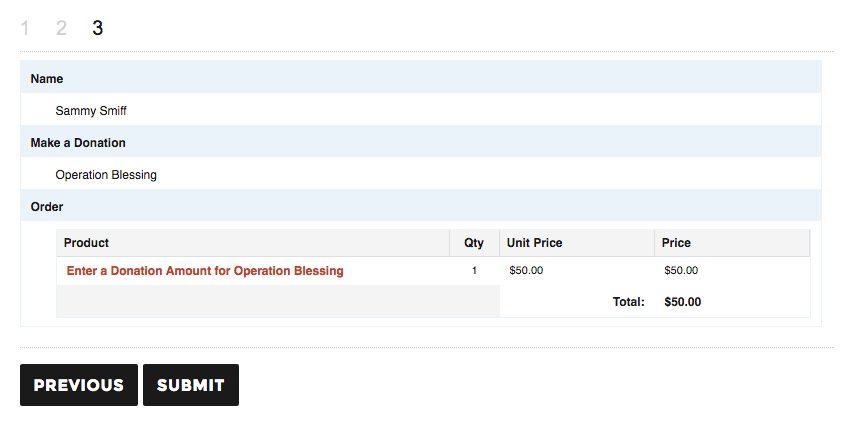 Confirm Donation Recipient and Amount
What questions do you still have?
Do you still have any questions about this process? We’d love to know what they are.