Embedding Gravity Forms in Divi: The Quick-Start Guide
Learn how to quickly embed Gravity Forms into Divi with this 6-step guide. Create new forms, set up fields, customize the look and more!

The Divi theme and visual page builder, one of the most popular and versatile WordPress combinations, contains a ton of features for creating stunning websites without any coding knowledge.
With a user base of over 2 million, Divi by Elegant Themes has a powerful visual page builder and sleek templates that empower users to customize every aspect of their website’s appearance, from layout to child themes, to typography and beyond. It’s a comprehensive solution for website building.
One issue. Integrating Gravity Forms (only the go-to form plugin for creating advanced forms in WordPress 😬), into the theme can be a bit challenging.
So let’s discuss two simple ways to add and style Gravity Forms in Divi while ensuring full compatibility. We will explore these two methods and provide step-by-step instructions on how to embed your Gravity Forms using a shortcode and a third-party plugin.
How do you embed Gravity Forms in Divi?
If you’ve used Divi, you probably already know that Divi doesn’t have default functionality for embedding Gravity Forms.
So, let’s explore two straightforward methods that you can use to embed your forms quickly and easily.
All you need to get started is:
- The Divi Builder and
- The Gravity Forms plugin (Gravity Forms 2.5 or later, if you’re using the plugin method)
Setting up your first form with Gravity Forms? Check out this guide on how to create a simple contact form to get started.
Method 1: Using a shortcode
Using a shortcode is the quickest and simplest method to embed a Gravity Form with Divi. Gravity Forms shortcodes unlock a wide range of functionality beyond embedding forms into your WordPress site, making them a versatile option.
Here’s how to do it.
Step 1: Generate your form shortcode
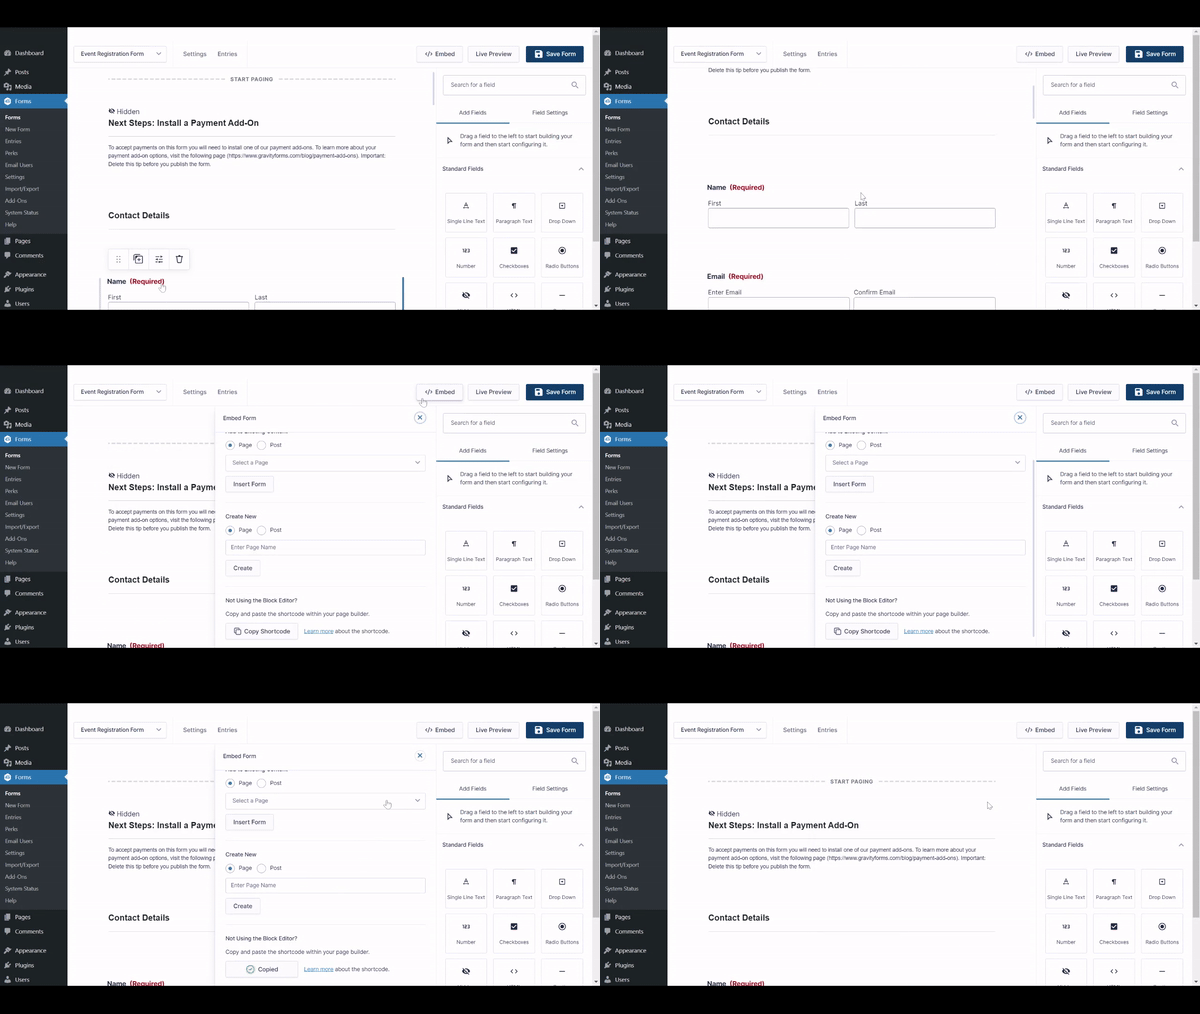
- To generate your form shortcode, navigate to the Form Editor for the form you wish to embed and click Embed.
- From here, you can copy the shortcode from the Embed Forms flyout by clicking Copy Shortcode to add the form’s dedicated shortcode to your clipboard.
- Alternatively, you can manually create the shortcode yourself. A basic Gravity Forms shortcode will always be in the format
[gravityform id=”form id” title=”true/false” description=”true/false” ajax=”true/false”]- Here “Form ID” will be replaced by the ID of the form you want to embed.
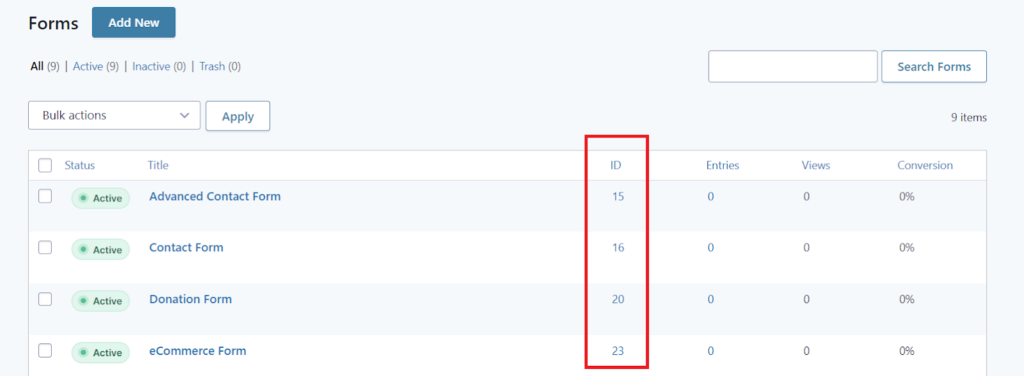
- You can also choose either “true” or “false” for “title”, “description”, and “ajax” to determine whether or not to display the form title or description and whether or not to use AJAX when submitting the form.
Step 2: Embed your form shortcode with Divi
Once you have your shortcode, you can use it to easily embed your form into a post or page using the Divi Code Module.
Here’s how:
- From the page or post you want to add the form to, click Use Divi Builder. This will open up Divi’s visual builder, from which you can add modules to your page or post.
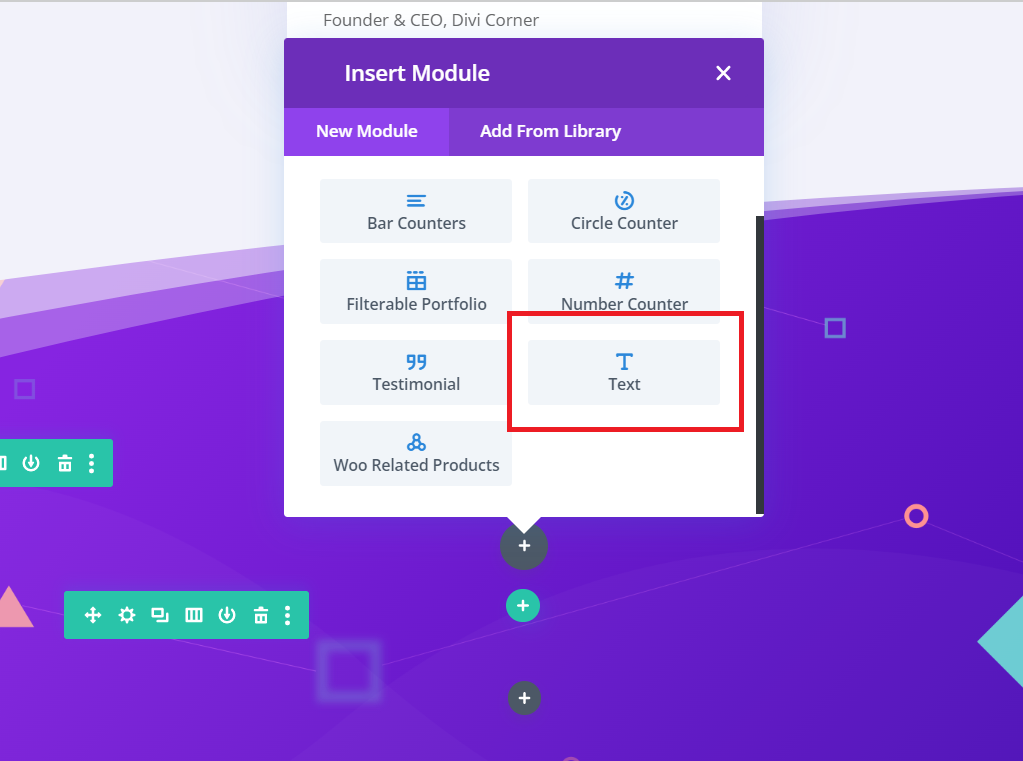
- Click the + icon to open up the list of modules, then search for the Code module and add it to your page or post.

- Paste your shortcode into the Code box and save it. A preview of your form will be loaded in the Divi page builder.
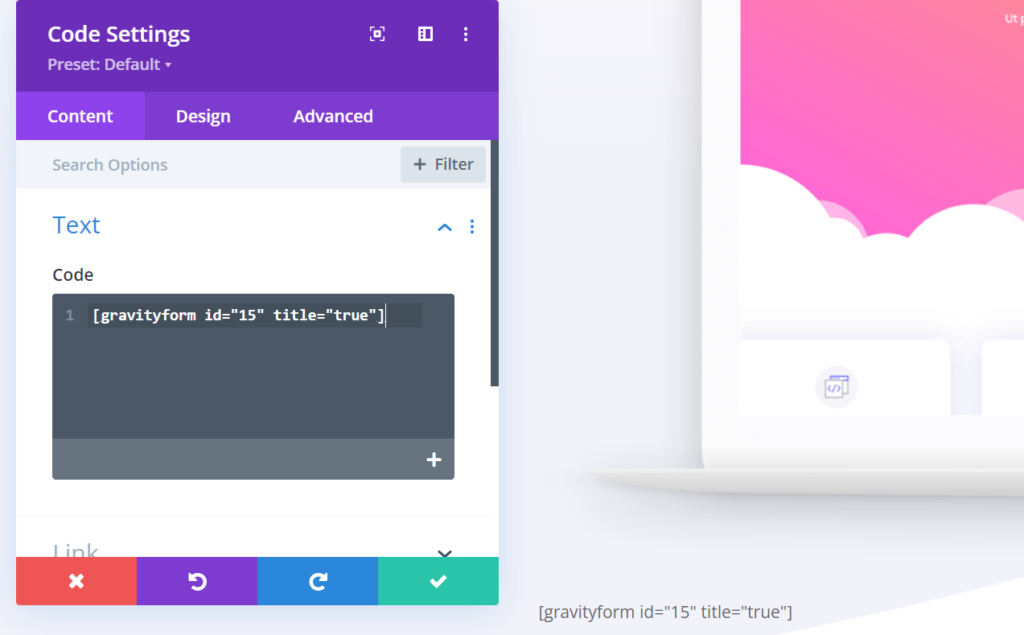
- You can also use the above method to embed your shortcode into a Text module, which is a great solution if you want to include text or images above or below your form.
Method 2: Using a plugin
If you want more options for styling your form, using a plugin to add a dedicated Gravity Forms module to Divi might be a better option.
Here’s a short tutorial demonstrating how to use the freemium WP Tools Gravity Forms Divi Module plugin.
We recommend this WordPress plugin because of its solid reviews from happy customers, backed by a developer who is dedicated to its success.
| “I’ve worked with multiple coding platforms for 15+ years, with focus on WordPress for the last 13+. I created this plugin four years ago because my specialization lies particularly in sites which use Divi and Gravity Forms in combination. I’m committed to continue finding solutions to problems that people might have when using these tools together.” – Jayant, WP Tools |
Here’s how to use it.
Step 1: Download and install the plugin
Download and install the WP Tools Gravity Forms Divi Module plugin. This will add a Gravity Forms module to your Divi builder.
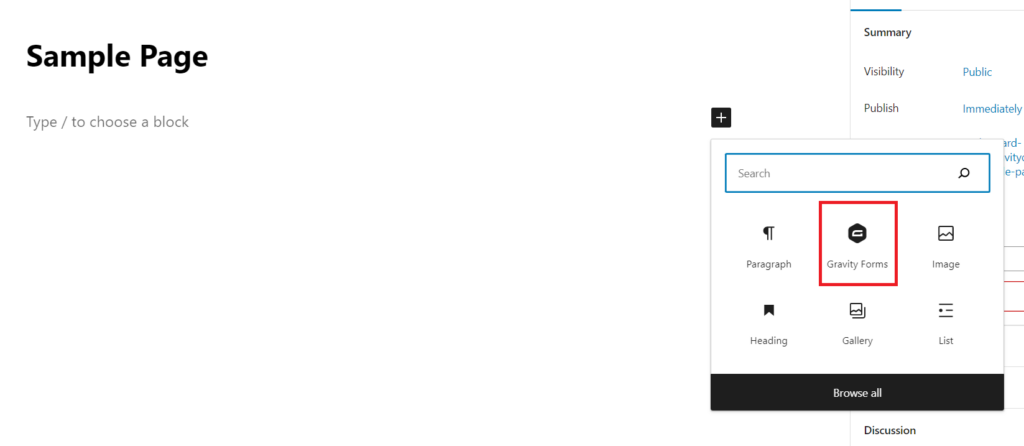
Step 2: Add the Gravity Forms module to your page or post
From the page or post you want to embed your form into, click + to open the list of modules, then search for the Gravity Forms module.
Step 3: Select the form you want to embed
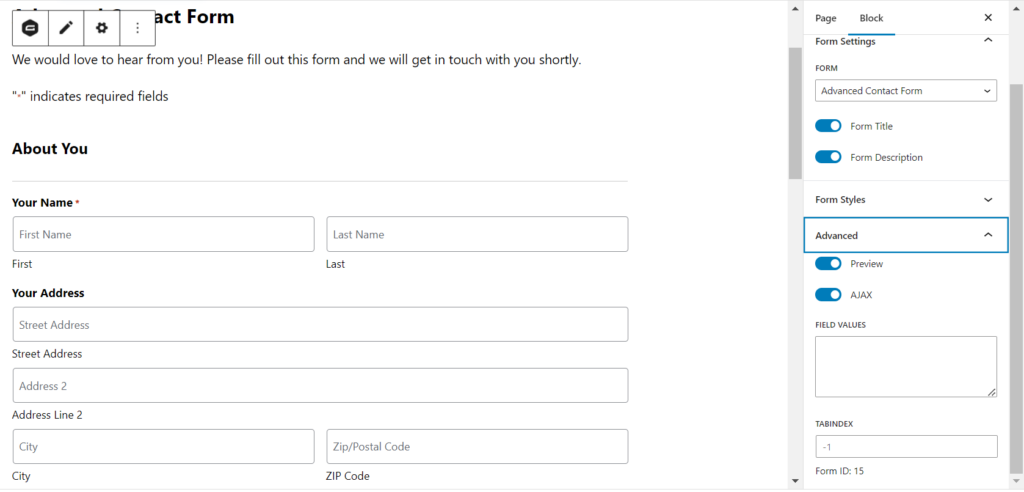
Select the form you want to embed from the Content tab. From here, you can also adjust the following parameters for your form (similar to how you can adjust the form shortcode):
- Display form title/description.
- Enable AJAX.
- Set default field values.
Step 4: Adjust form style and appearance (optional)
If you are happy with the default Gravity Forms styling for your form, that’s it – simply save your changes and a preview of your form will appear in the Divi builder.
However, if you want to make more adjustments to your form style and appearance, you can do so by clicking on the Design tab.
Here, you can change the layout and style of your form using Divi’s intuitive design options.
How do you style Gravity Forms in Divi?
If you use the shortcode method to embed your Gravity Forms with Divi, the only way you can style your forms as you see fit is by using custom CSS, which will require some coding experience.
Here’s how to do it using WP Tools Gravity Forms Divi Module:
Step 1: Install the plugin and add the Gravity Forms module to your page
As described in the previous section, download and install the WP Tools Gravity Forms Divi Module plugin.
Note that to get access to a wider range of styling options for your forms, you’ll need the premium plugin.
Add a Gravity Forms module to your page or post, and choose the form you want to embed.
Step 2: Make adjustments to the form background color
From the Content tab, you can make adjustments to the form background color. Simply select your desired color from the Background Color dropdown and save your changes.
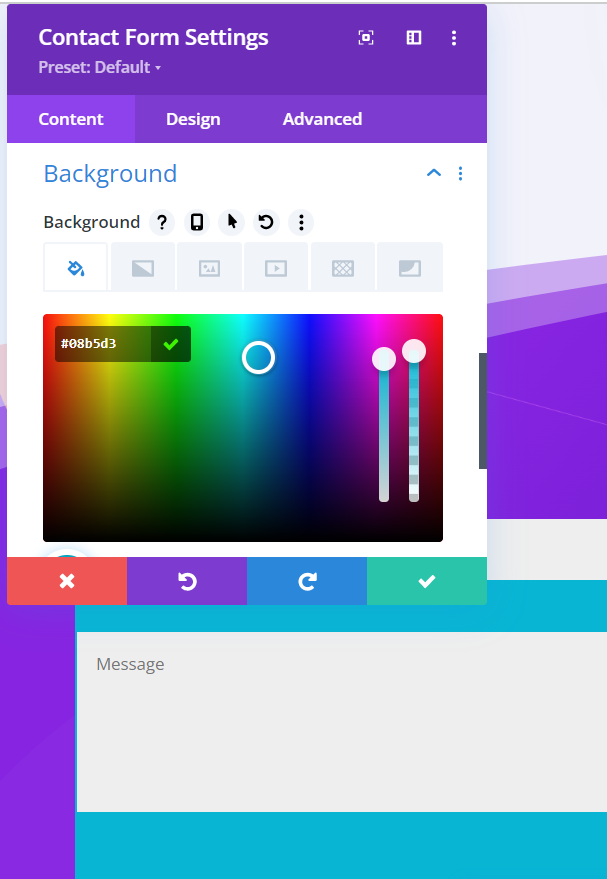
Step 4: Style your form using the Design tab
To style all other elements of your forms, navigate to the Design tab.
Here, you can adjust the appearance of all aspects of your form, including the title, spacing, input fields, labels, checkboxes, submit button styling, form submission confirmation messages, field validation messages, placeholder text, footer text, and much more.
Using Divi’s intuitive design options, you can easily customize your form to your liking.
Step 5: Use custom CSS (optional)
If you want to customize your forms even further beyond the huge range of options available with the plugin, you can still use custom CSS settings to take even more granular control over the appearance of your Gravity Forms.
However, this requires some coding experience.
Enhance your Gravity Forms in Divi with Gravity Wiz
Adding Gravity Forms to your Divi website isn’t rocket science, even if you aren’t a coding expert.
We’ve discussed a few styling options for both methods in this article. Worth noting, if you’re looking for more styling, functionality, or customization in Gravity Forms, Gravity Perks is a suite of nearly fifty Gravity Forms add-ons intended to do just that — provide you with the tools you need to configure and customize Gravity Forms to your exact needs.
Gravity Perks let you do things like:
- Create seamless transitions between form pages
- Populate Gravity Forms fields or values dynamically from nearly any source
- Nest forms within forms, create Gravity Forms Repeaters
- Generate QR Codes from Gravity Forms field values, or scan QR codes to insert values into fields
- Send and sync Gravity Forms data with Google Sheets
- 45+ others
Have questions? Let us know in the comments!

