How to Gate Content with Gravity Forms Page Redirects
Learn how to gate any WordPress content, redirect visitors to a separate form page, and automatically redirect them back after they’re done.

GP Submit to Access gives you multiple ways to gate content—a specific block, wrap a section in a shortcode, or gate an entire page with an inline form.
Inline forms work great for most situations. They’re quick, simple, and keep visitors where they are. But sometimes, you might want to redirect visitors to a separate form instead of showing the form directly on the content.
But why send them away?
Let’s look at why page redirects make sense and how to set them up. ✨
Already know if page redirects are the right approach for you? Jump straight to the setup here!
This article requires the Gravity Forms Submit to Access perk.
Buy Gravity Perks to get this perk plus 48 other premium Gravity Forms plugins!
Why Use Page Redirects?
While inline forms work great for low-friction asks, here are a few use scenarios where sending users to a dedicated form page might be useful:
Beefy Forms Need Space
Inline forms work great when you just need the basics—name, email, done. But what about those longer forms like membership registrations or surveys with multiple steps? Those can feel cramped on an already beefy page.
Redirecting to a dedicated form page keeps your content looking clean while giving the form room to breathe.

Pro Tip
If you’re using a form with multiple pages, use GP Multi-Page Navigation to make navigating between pages much smoother.
One Form, Infinite Gates
Got dozens of gated resources? Instead of setting up a form on every single page, you can send them to one centralized “master form” page. If you need to update your form, do it once and you’re done.

Make Your Case
Sometimes the signup experience deserves a proper landing page. Maybe you’re offering access to an entire library, or you want to show off testimonials, or just explain what it actually means for them to… sign up.
A dedicated page gives more room to make your case in a way an inline form just can’t.

Legal or Compliance Requirements
For things like age verification or liability waivers, a redirect acts as a “hard gate,” physically removing visitors from the protected URL until they’ve filled out the form and agreed to your terms.
Taking It Further
Looking to gate your best content behind a payment form? We’ve got you covered! Check out our guide on gating content behind a payment form.
How to Set it Up
GP Submit to Access takes care of the whole flow: from gating the content, redirecting to the form page, and bringing visitors back once they’re done.
Step 1: Redirect to Form Page
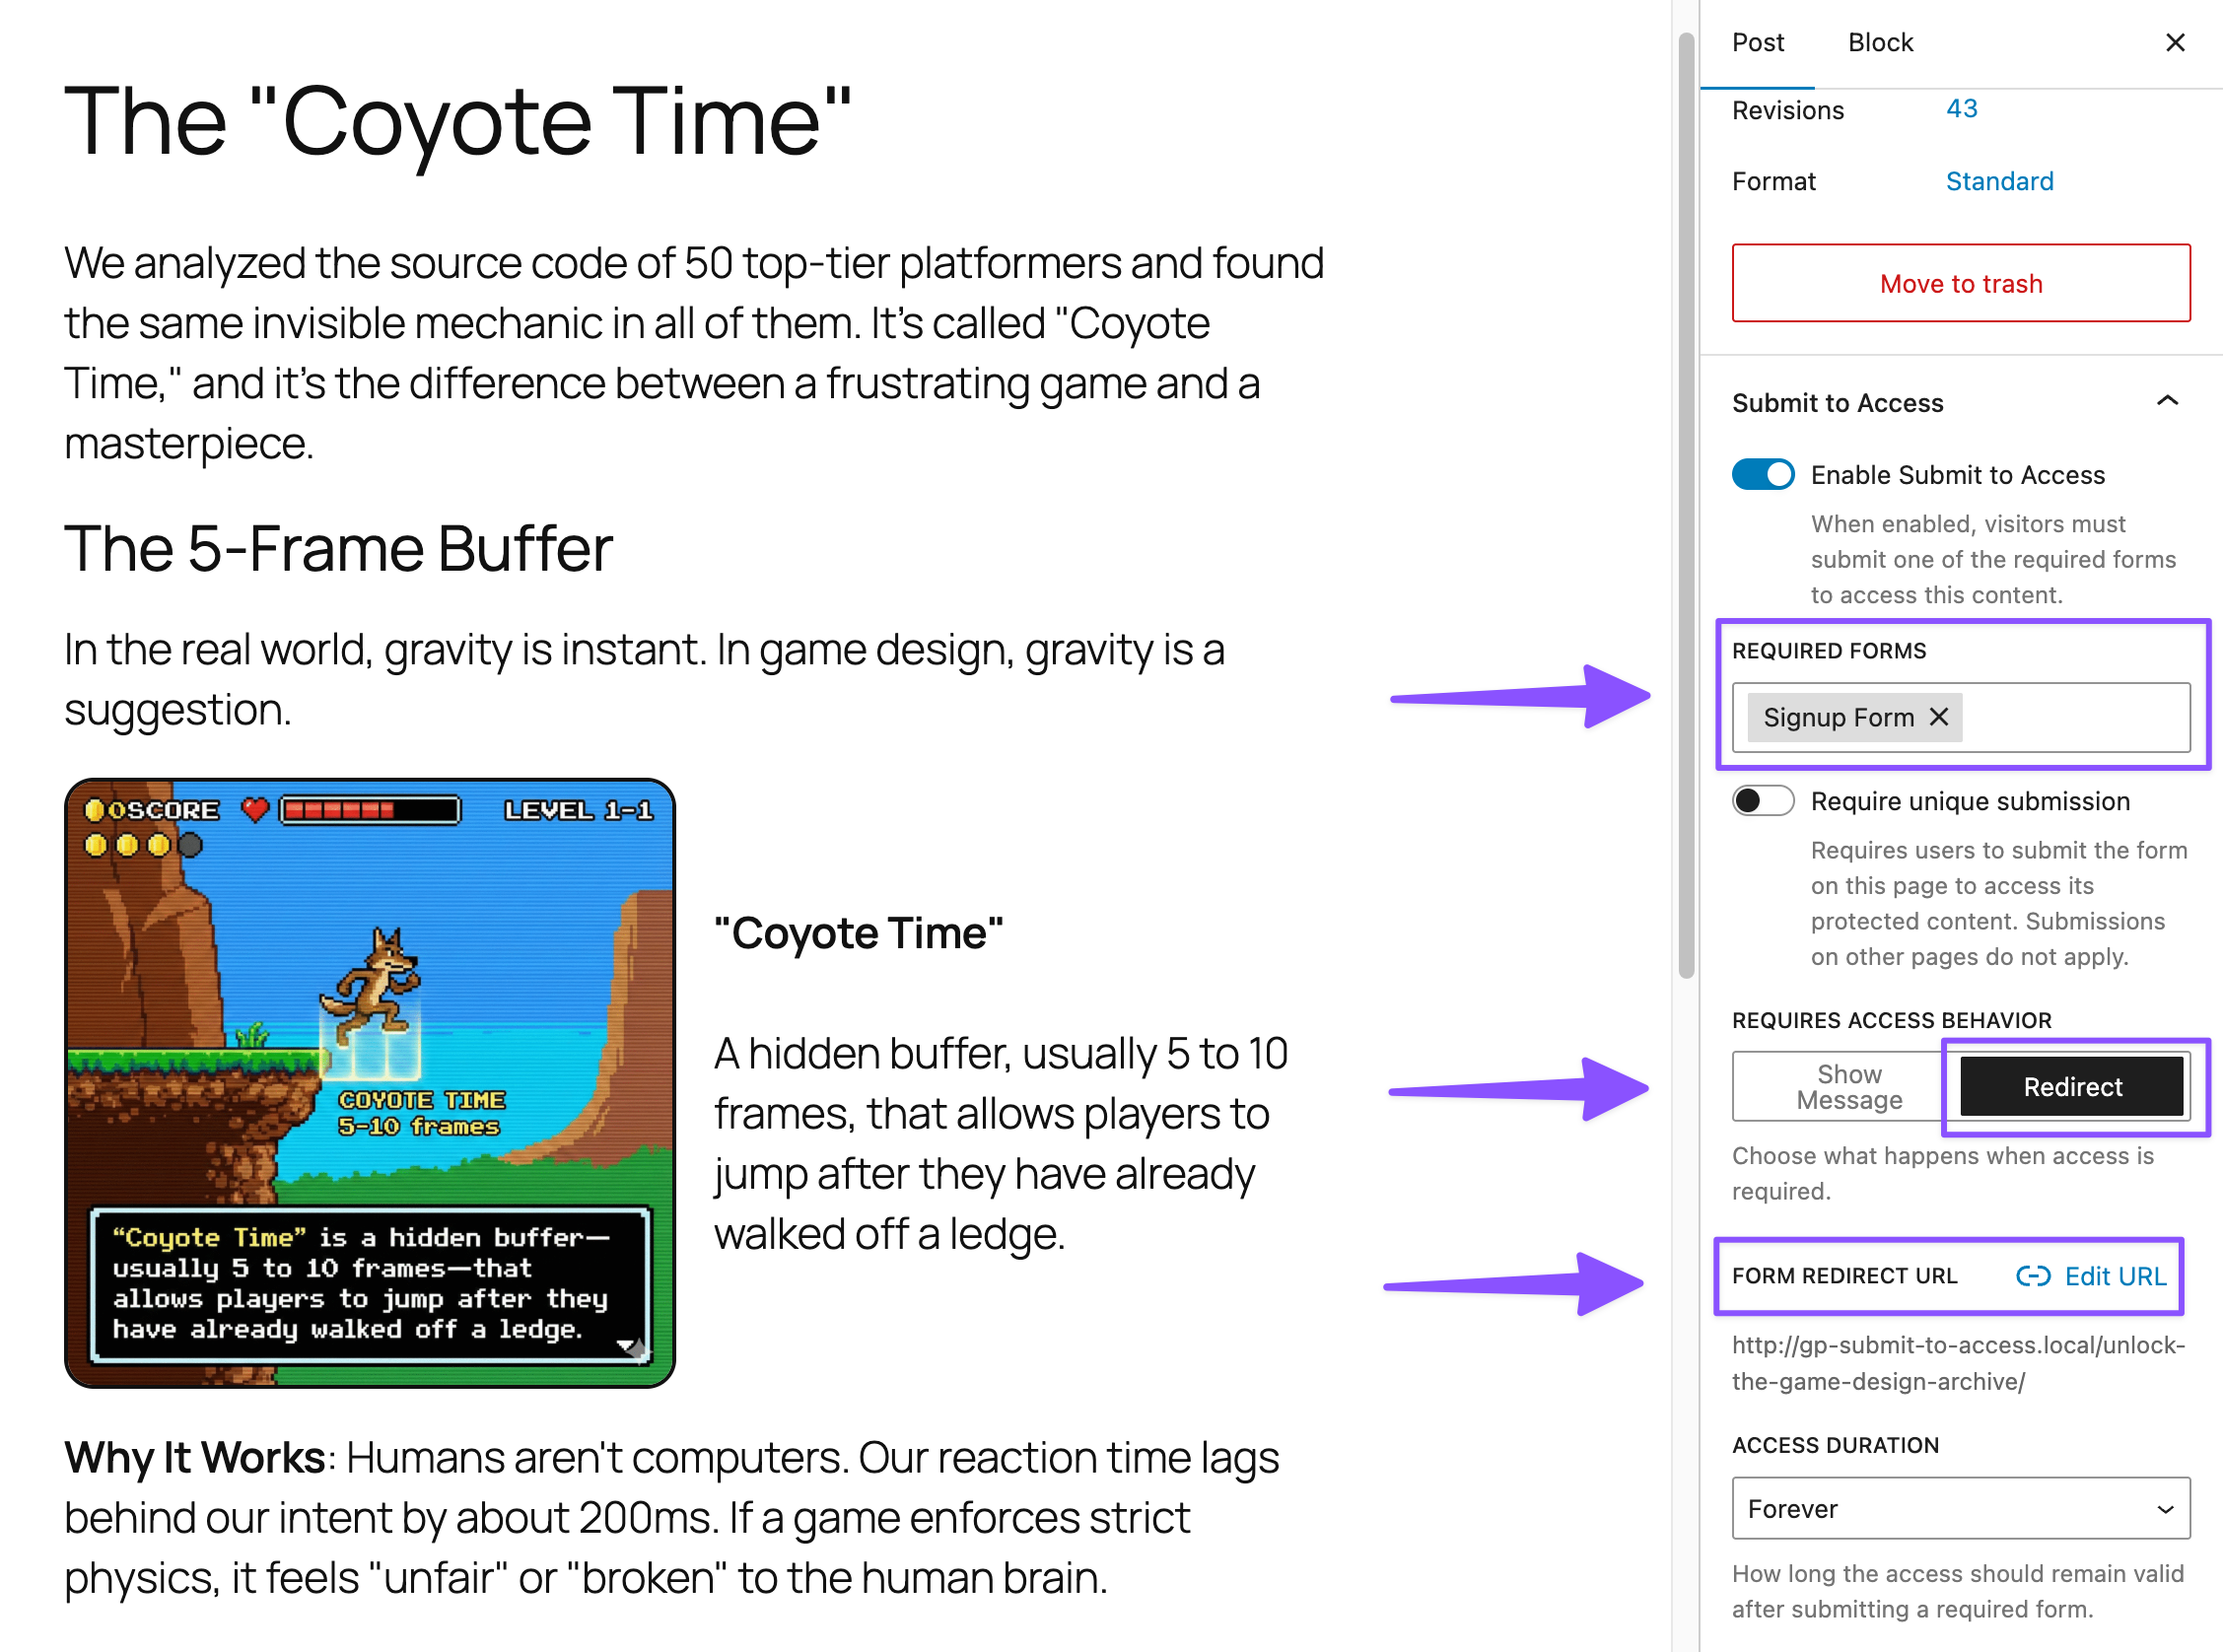
First, gate your content and choose where to send visitors when they try to view it.
- Open Spellbook › activate GP Submit to Access.
- Navigate to the page or post you want to gate.
- In the editor sidebar › Enable Submit to Access.
- Under Required Forms › select the form.
- Under Requires Access Behavior › select Redirect.
- Click Add URL and search for the page where your form lives.
- Select form page and save.
Step 2: Return After Submission
GP Submit to Access automatically tracks where visitors came from using the {gpsa_gated_url} merge tag. We’ll use it to automatically redirect them back after submission.
Here’s how:
- Navigate to the form you used to gate the content.
- Go to Settings › Confirmations.
- Edit the Default Confirmation (or create a new one).
- Under the Confirmation Type › select Redirect.
- In the Redirect URL field, enter
{gpsa_gated_url}. - Save the confirmation.

The Result
- Visitor lands on gated content › redirected to the form page.
- Visitor fills out and submits form › GP Submit to Access recalls where they came from.
- Visitor is redirected back › content is now unlocked.

Pro Tip
The {gpsa_gated_url} merge tag sends visitors back to the gated content, but remember, you aren’t limited to this! You can also redirect visitors anywhere after submission—a welcome page, a thank you message, a product tour, or even a completely different site.
To do this, just replace {gpsa_gated_url} with any URL you want.
Your Content, Your Flow, Your Choice
Try it out! And see what gating strategy works best for you. 🗝