How to Trigger Gravity Forms Popups Based on Website Referrer
Learn how GP Popups lets you show a Gravity Forms popup only to visitors arriving from a specific website or link.
- Short Answer
- Does Gravity Forms Support This Natively?
- How GP Popups Solves This
- What You’ll Build
- What You’ll Need
- How GP Popups Targeting Works
- How to Set Up a Targeted Popup in GP Popups
- Edge Cases & Limitations
- Real-World Ways to Use This Setup
- Troubleshooting
Have you ever wanted a popup to appear only for visitors coming from a specific website or link, and stay hidden for everyone else? Maybe you’re capturing leads from a partner referral, or showing a special offer to visitors from a specific campaign.
While Gravity Forms doesn’t support this natively, that’s where Gravity Forms Popups (aka GP Popups) comes in. It lets you show any form in a popup and control exactly who sees it based on where they came from or what’s in their URL.
In this guide, I’ll show you how to use GP Popups to show a Gravity Forms popup only to visitors arriving from a specific website or link.
This article requires the Gravity Forms Popups perk.
Buy Gravity Perks to get this perk plus 48 other premium Gravity Forms plugins!
Short Answer
GP Popups’ Referrer targeting rule lets you show a Gravity Forms popup only for visitors arriving from a specific website domain.
If you want to target visitors arriving via a specific URL instead, the URL Contains rule is the better fit. It matches any string in the visitor’s landing URL, for example a UTM-tagged link.
Keep in mind both targeting rules only work on the page the visitor lands on. Once they navigate away, the popup won’t fire.
What’s a UTM-tagged link?
A URL with short tracking tags added to the end. They let you track which campaigns, ads, or partner links are driving visits to your site. When a visitor arrives with one of these links, GP Popups can detect it and use them to target who sees the popup.
Does Gravity Forms Support This Natively?
Gravity Forms doesn’t come with a popup system, and there’s no built-in way to show or hide a form based on where a visitor came from. Without a dedicated solution, the most common path is custom JavaScript, which works but means writing and maintaining new code for every campaign.
How GP Popups Solves This
GP Popups is part of the Gravity Perks suite. It lets you show any Gravity Form in a popup with targeting rules that control exactly who sees it, based on where they came from or what’s in their URL.
For this use case, we’ll walk through how to use the Referrer rule to target visitors from a specific website, and the URL Contains rule for visitors arriving via a specific link or UTM parameter.
What You’ll Build
By the end of this guide, you’ll have:
- A Gravity Forms popup that shows only when a visitor arrives from a specific website or link
- A simple form inside the popup that captures their response
What You’ll Need
- Gravity Forms (any license)
- Gravity Perks (via Spellbook)
- Includes: GP Popups
- A form to show inside the popup
- The referring website URL or URL parameter you want to target
How GP Popups Targeting Works
When a visitor lands on your site, GP Popups checks your targeting rules before anything fires. These rules decide who sees the popup based on where they came from or what’s in their URL. For this setup, we’ll use one of two rules:
- Referrer checks where the visitor came from
- URL Contains checks whether a specific string appears in their landing URL
Once a visitor dismisses the popup, GP Popups saves that dismissal in a cookie. The popup won’t show again until the cookie expires.
How to Set Up a Targeted Popup in GP Popups
Step 1 — Build Your Form
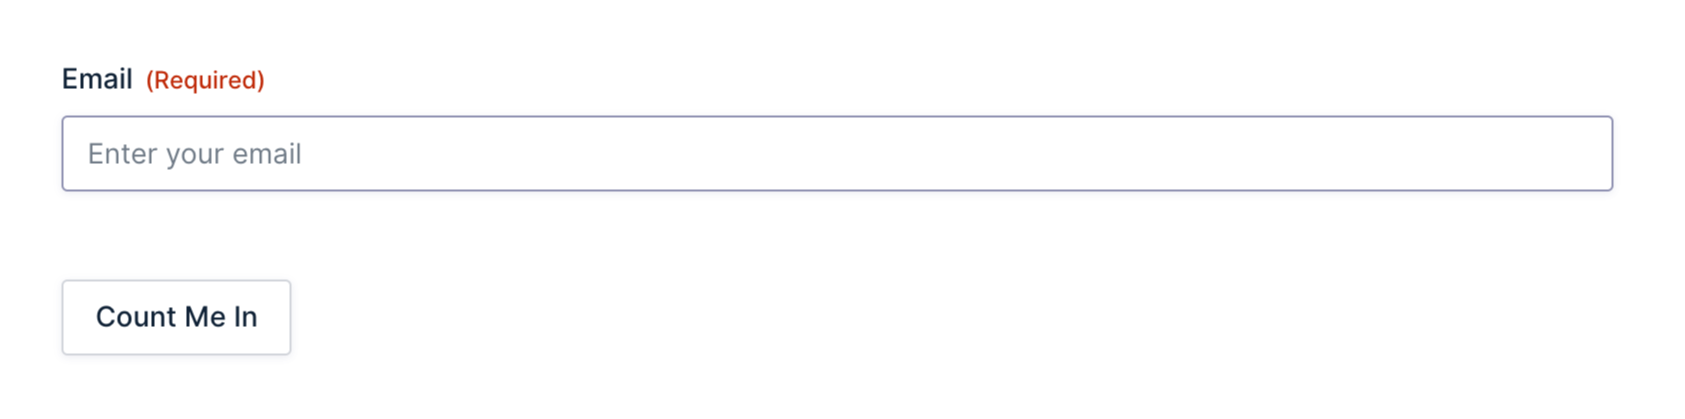
Start by creating the form you want to show in the popup.
- In your WordPress admin, go to Forms and click Add New.
- Add the fields relevant to your use case. For a simple opt-in, an email field and a submit button is all you need.
- Save the form.
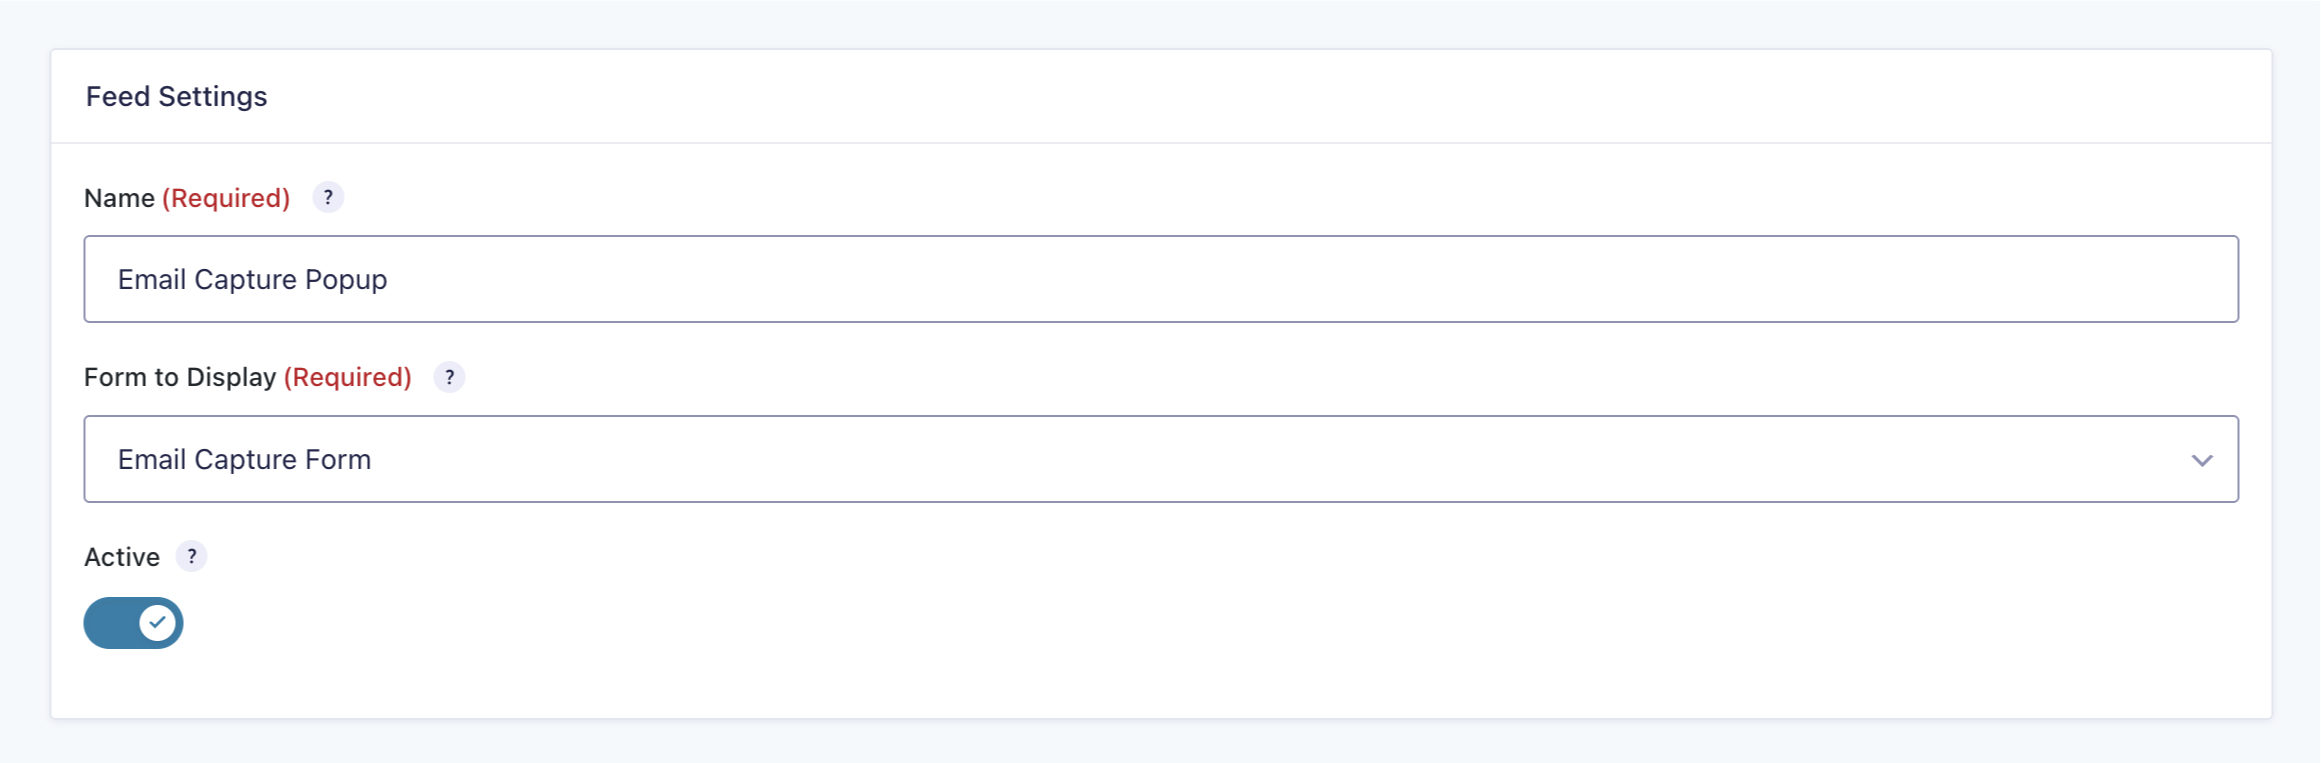
Step 2 — Create a New Popup Feed
A popup feed is how GP Popups connects a form to a popup. It’s where you control how the popup looks, when it fires, and who sees it.
- Open your Spellbook › install and activate GP Popups.
- In your WordPress admin, go to Forms › Popups.
- Click Add New.
- Select the form you just created from the dropdown.
Step 3 — Set Your Trigger and Display Mode
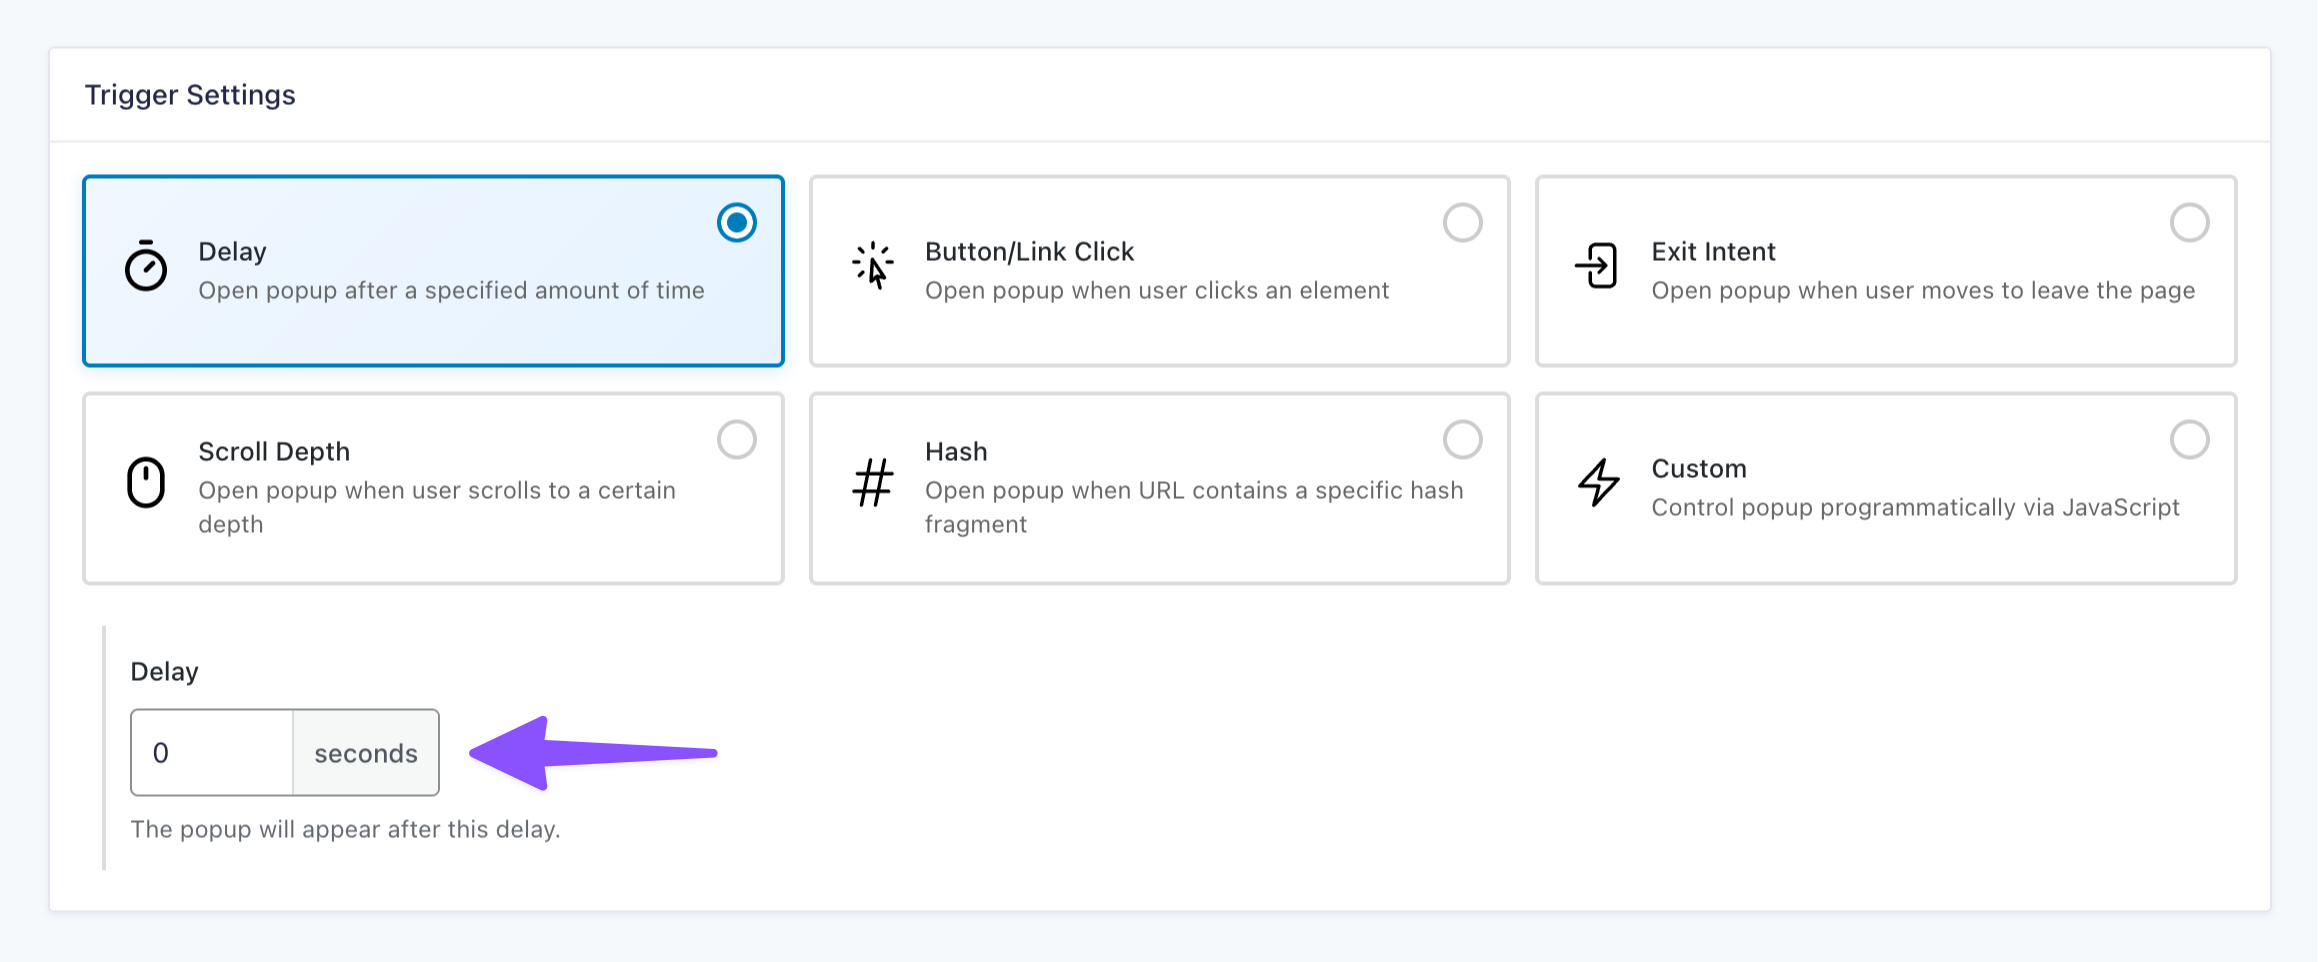
The trigger controls when the popup fires, and the display controls how it looks on screen.
- In the popup feed, click the Trigger Settings tab.
- Select Delay as the trigger type.
- Set the delay to
0for an immediate on-load trigger. - Click the Display Settings tab.
- Set the Display Mode to Popup or Fullscreen depending on how prominent you want the popup to be.
- Once saved, GP Popups will use this mode every time the popup fires.
Step 4 — Add Your Targeting Rule
This is where you tell GP Popups exactly who should see the popup.
- In the popup feed, click the Targeting tab.
- Click Configure Targeting Conditions.
- In the sidebar, find the URL & Navigation group and drag your preferred rule into the conditions area.
- To target visitors from a specific website, drag Referrer and enter the domain you want to match (e.g.
testsite.com).
- To target visitors from a specific website, drag Referrer and enter the domain you want to match (e.g.
- To target visitors arriving via a URL parameter, drag URL Contains and enter the string you want to match (e.g.
blackfriday2026).
- Save the feed.
Pro Tip
Need to match multiple URL values? Add more URL Contains rules and combine them with AND/OR logic.
Step 5 — Configure Cookie Settings
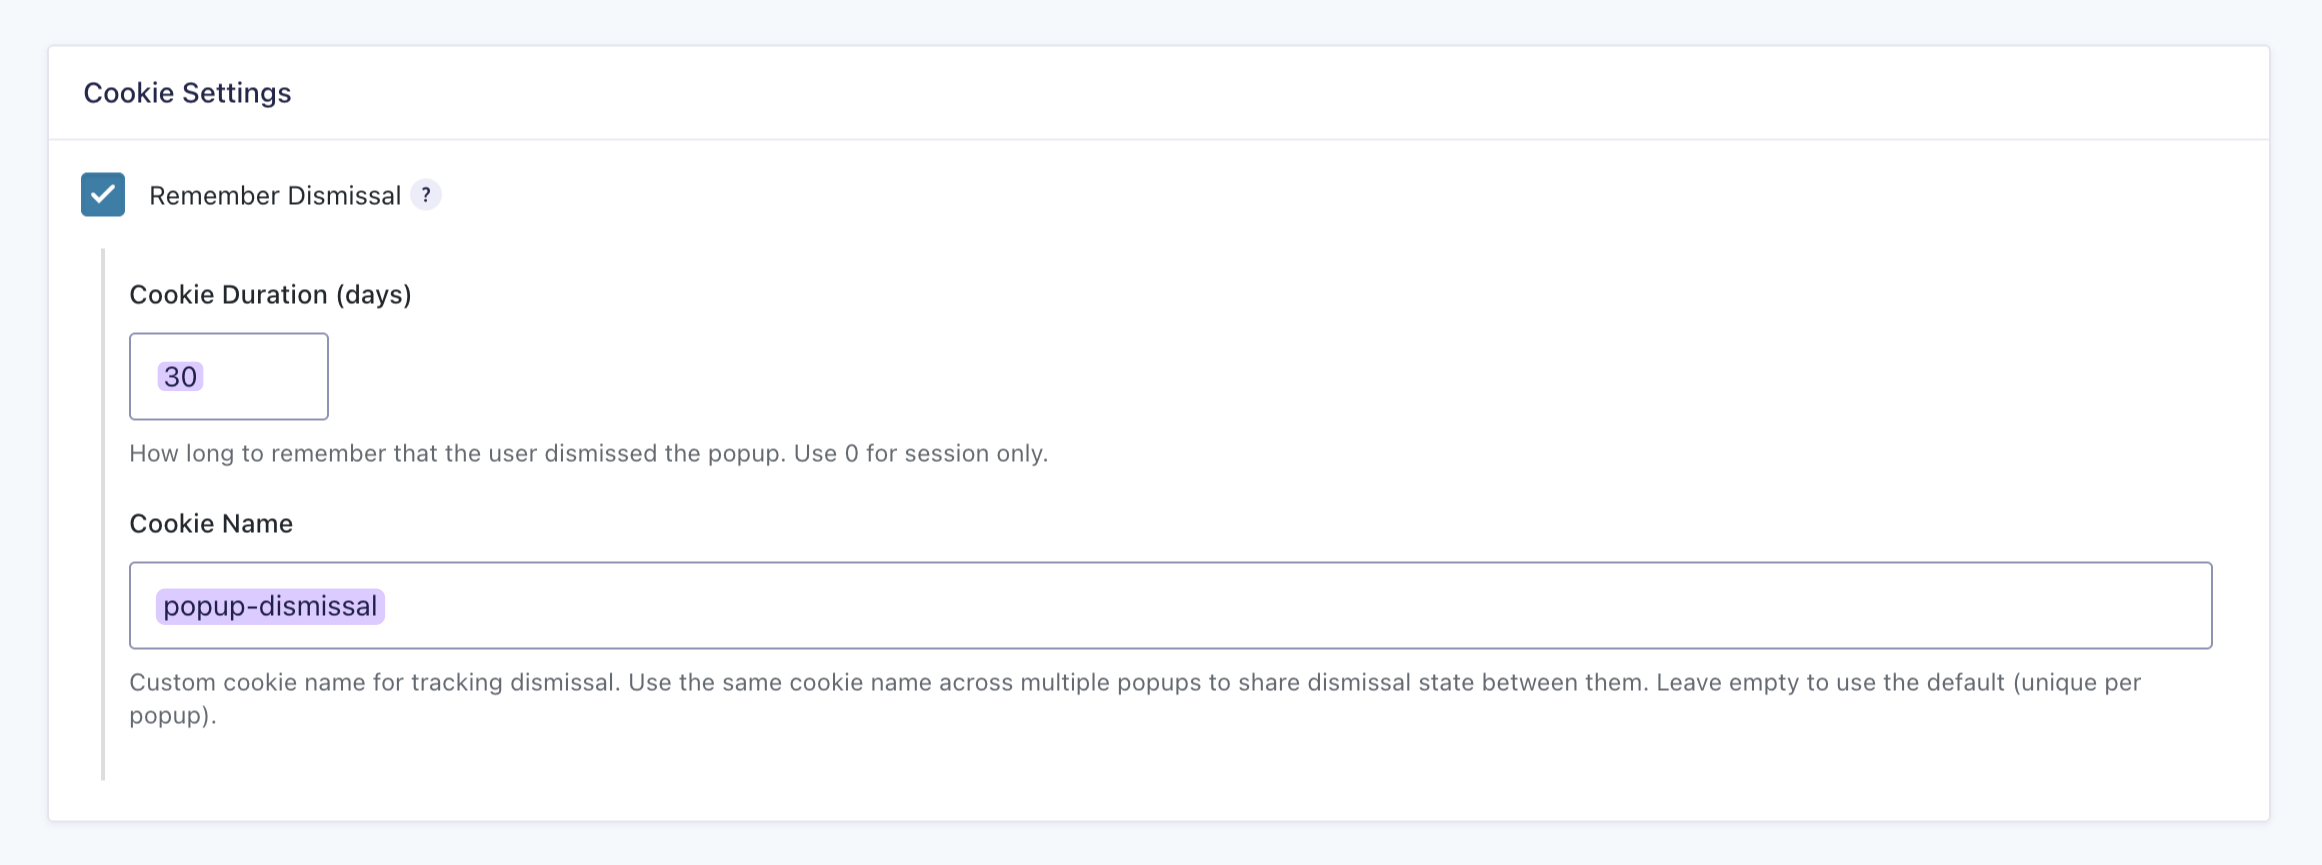
Once a visitor dismisses the popup, GP Popups can remember that so it doesn’t come back on their next visit.
- In the popup feed, click the Cookie Settings tab.
- Check Remember Dismissal.
- Set Cookie Duration (days) — enter the number of days, or
0to only remember the dismissal for the current browser session. - Optionally, enter a custom Cookie Name (e.g.
popup-dismissal) to share the dismissal state across multiple popups. Leave it empty to use the default.
Step 6 — Test the Setup
Before going live, it’s worth taking a few minutes to confirm everything is working as expected.
- Open a fresh incognito window
- If testing the Referrer rule, click through to your site from the referring website.
- If testing URL Contains, visit the page with your target string appended (e.g.
yourdomain.com/your-page/?utm_campaign=blackfriday2026). - Confirm the popup fires on load.
- Visit the same page without the referrer or URL string and confirm the popup doesn’t appear.
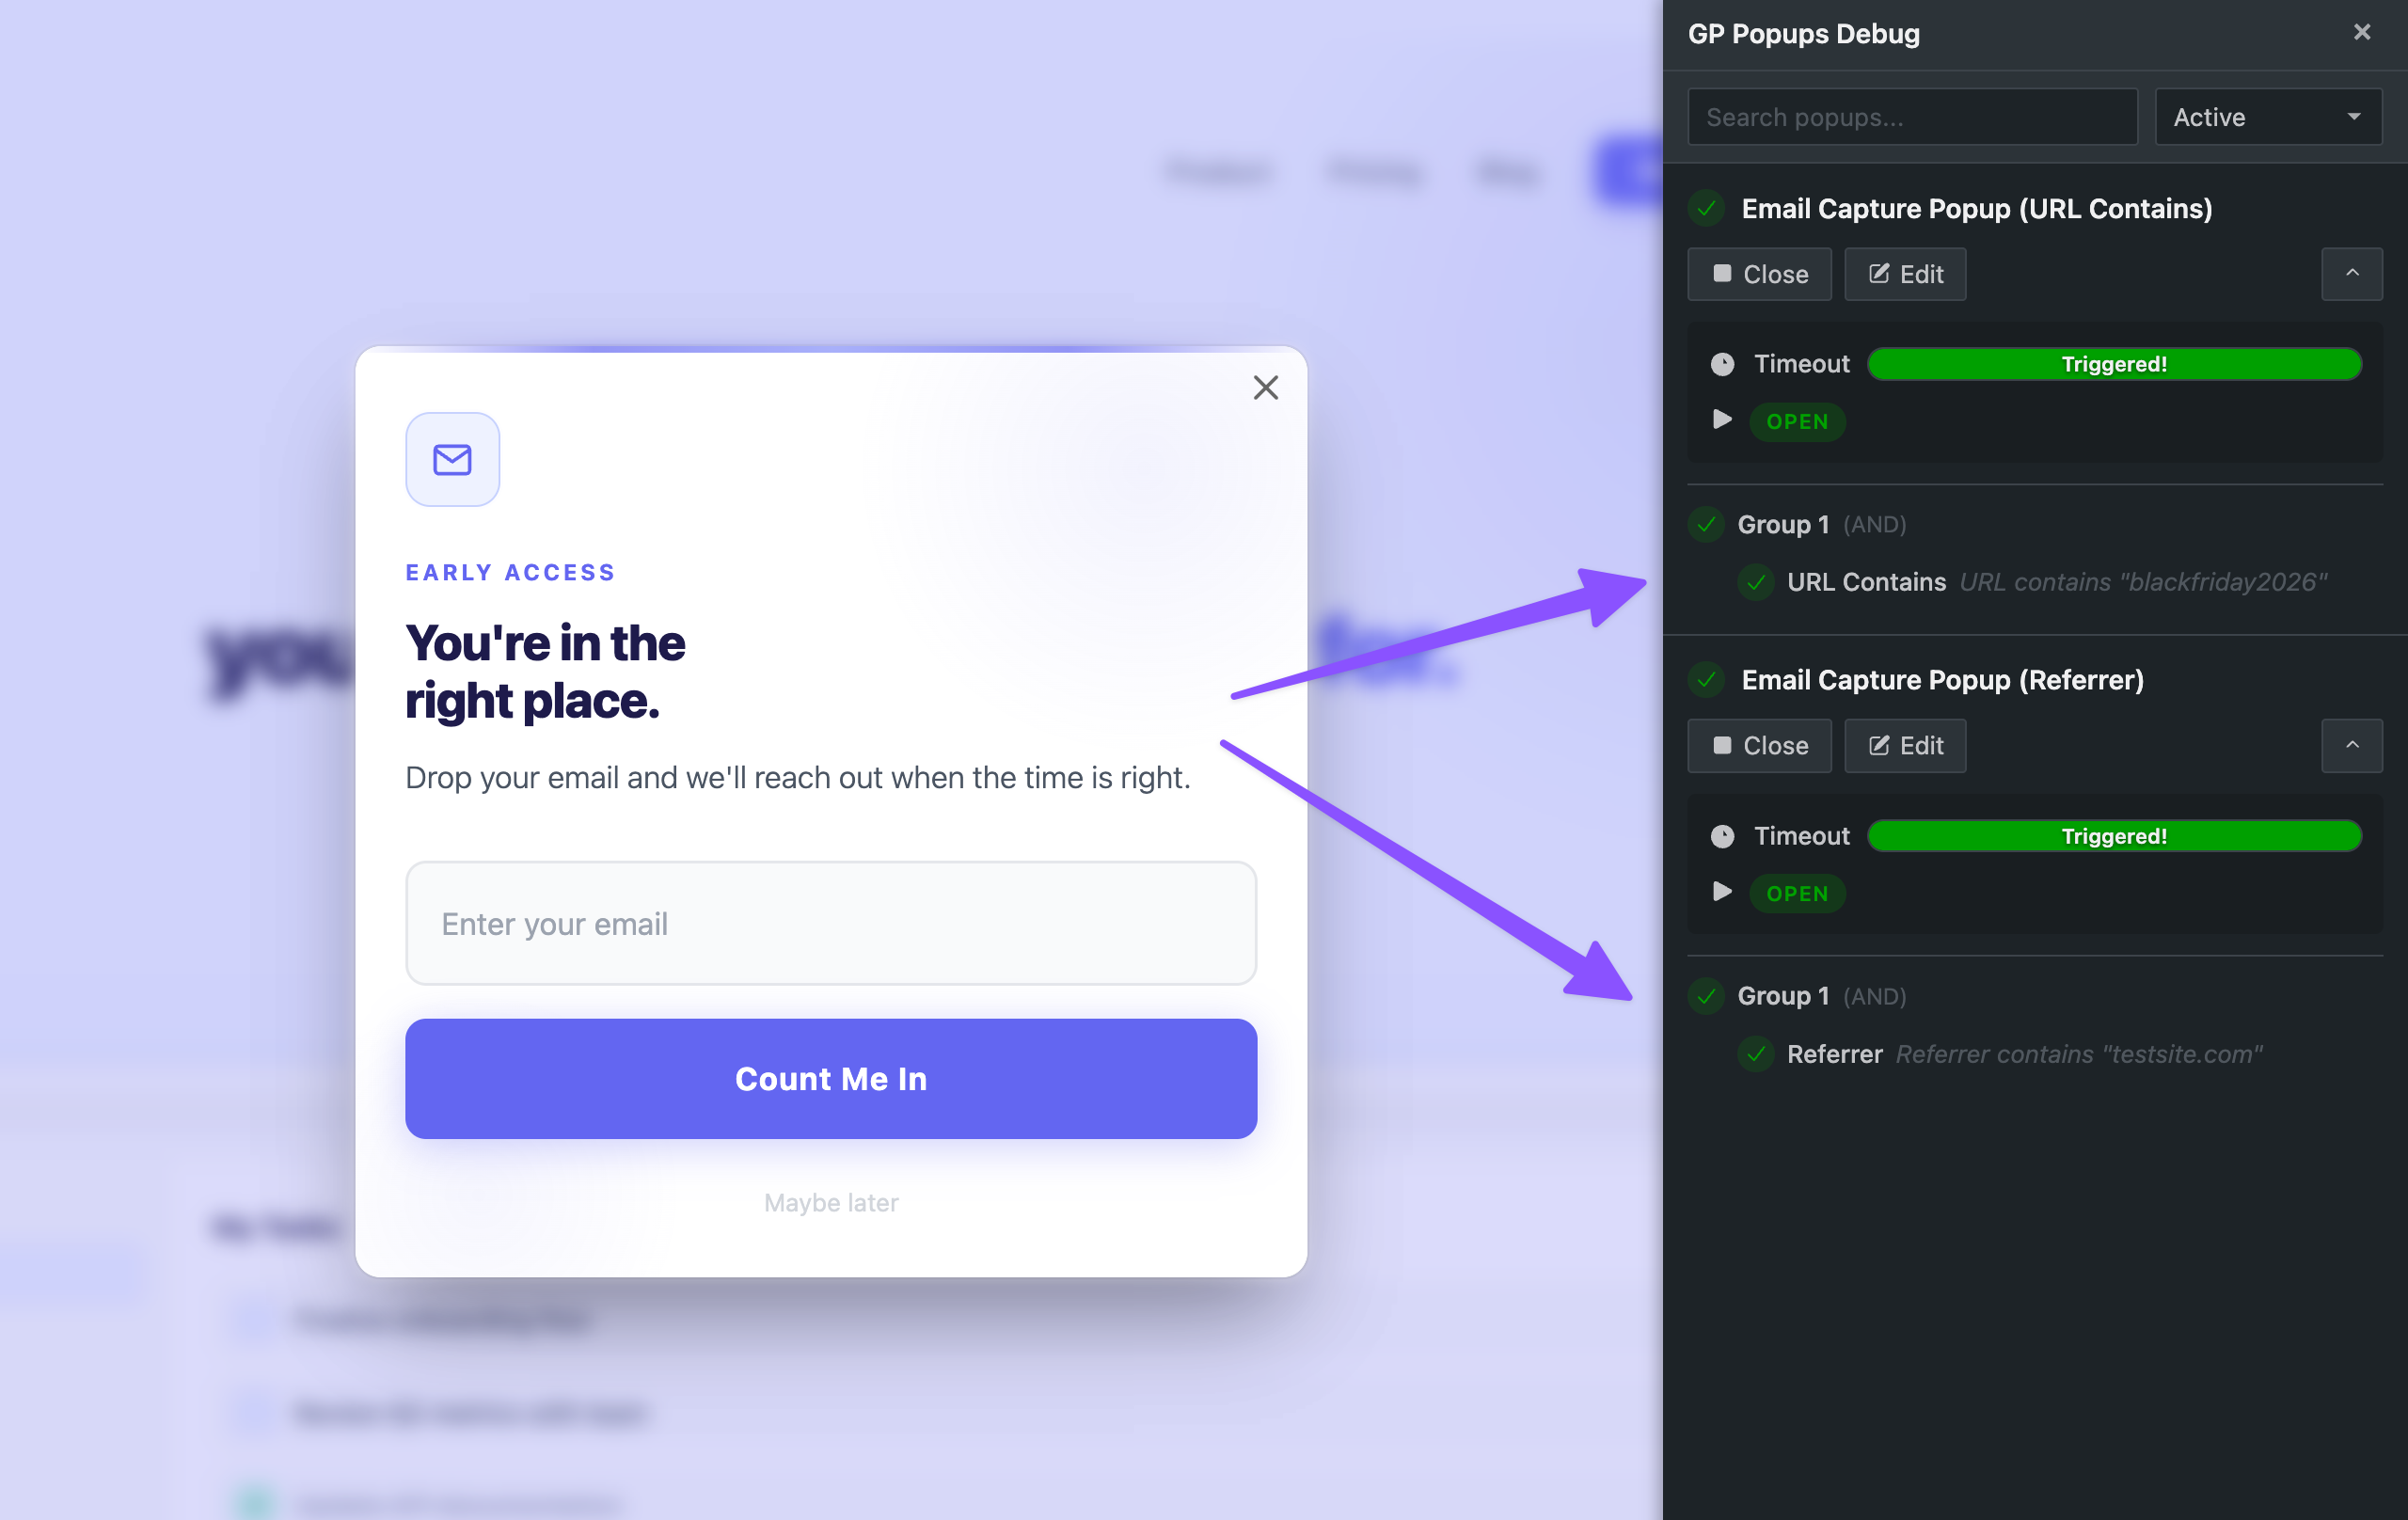
- While logged in as admin, open the GP Popups Debugger from the WordPress admin bar to inspect targeting rule states in real time.
Pro Tip
Clear the dismissal cookie between test runs by opening a fresh incognito window each time.
Edge Cases & Limitations
Here are a few quick things to keep in mind as you build.
- Targeting only applies on the landing page. Both rules are evaluated on the page the visitor lands on. Once they navigate away, the popup won’t fire even if the original referrer or URL parameter is still valid.
- URL Contains can match too broadly. A short string like
blackcould match unintended URLs like/blackout-sale/. Use the most specific string that uniquely identifies your campaign. Enable the Case Sensitive toggle in the targeting rule if you need an exact match.
Real-World Ways to Use This Setup
How We Use GP Popups at Gravity Wiz
Every year, Gravity Forms promotes our Black Friday sale on their site with UTM-tagged links, but the timing doesn’t always line up with when we’re ready to announce it on our end. So we use GP Popups to show a targeted popup only to visitors who click through from that link on their website.
We set up a URL Contains targeting rule to match the UTM in their link, and the moment they land on our site, the popup appears letting them know our sale isn’t live yet.
Other Ways to Use This Setup
- Lead capture from an external site. When an external site links to yours with a UTM-tagged link, use URL Contains to match that UTM and show a popup to those visitors the moment they land. A simple way to capture their email before they leave.
If you’re using Mailchimp to capture email signups from referral traffic, you’ll want your popup form connected to your email marketing list. Learn how to set it up with our complete guide to Gravity Forms and Mailchimp.
- Referrer-based welcome popup. When visitors arrive from a partner or affiliate site, use the Referrer rule to detect which domain they came from and show them a tailored popup the moment they land.
The targeting rules in this guide work with any trigger type. If you haven’t settled on one, check out our guide that walks through the five ways to trigger popup forms.
Troubleshooting
- Popup fires when it shouldn’t. Check if another popup feed on the same form has no targeting rules set. A feed without rules fires everywhere. Also make sure your Referrer domain or URL Contains string is specific enough not to trigger unintended matches.
- Popup doesn’t fire with the correct referrer or URL. Use the Test Pattern button in the targeting rule to confirm your string matches, then open the GP Popups Debugger to see exactly why the rule is passing or failing.
- Popup isn’t showing on repeat visits. This is expected. Remember Dismissal is doing its job. Open a fresh incognito window to retest.
Key Takeaways
- Gravity Forms doesn’t natively support conditional popups. GP Popups handles this with targeting rules that control exactly who sees the popup, based on where they came from or what’s in their URL.
- GP Popups includes Page Targeting rules that control exactly who sees your popup. For targeting visitors based on where they came from, use Referrer to target visitors from a specific website, or URL Contains to target visitors arriving via a specific link.
- Once a visitor dismisses the popup, GP Popups remembers it. It stores that dismissal in a cookie for the duration you set, so the popup won’t reappear until it expires.
- The entire setup lives inside GP Popups. No custom JavaScript or developer needed.