Complete Guide: Gravity Forms payment and pricing fields
- When you might need to add pricing fields to Gravity Forms
- Supercharge Gravity Forms eCommerce Features
- How to set up Gravity Forms payment and pricing fields
- Start accepting Gravity Forms payments today
As a small business owner, you might need to create Gravity Forms payment forms with pricing fields to accept payments, especially if you don’t have a proper storefront set up. For larger companies, having a payment form is essential.
In this article, we’ll explain how you can add payment and pricing fields to your Gravity Forms and use a range of powerful Gravity Perks to make your forms more user-friendly.
By adding payment forms and pricing fields to Gravity Forms, you can display pricing information, total payment amount, accept payments, offer discounts, create custom order forms, and adjust tax-specific details.
When you might need to add pricing fields to Gravity Forms
There are tons of use case scenarios where it makes sense to set up Gravity Forms payment and pricing fields rather than use a full-blown eCommerce plugin like WooCommerce. It’s a quick and easy way to accept payments (including recurring payments) through various payment gateways, including credit card payments, PayPal, and Stripe. It’s particularly useful if you need to offer online payment methods.
Even if you want to organize a Black Friday or end-of-season sale, you can use Gravity Forms to accept payments, check discounts, and calculate revised prices at checkout rather than setting up an eCommerce WordPress plugin for a limited time only.
GF eCommerce Fields
You can also use Gravity Forms payment and pricing fields to set up pricing variations such as for selling products by weight or offering optional 2-day delivery. You can set this up with the GF Conditional Pricing perk to enable conditional logic in order to create flexible pricing levels.
If you sell products to different types of customers, you can use GF eCommerce Fields to apply discounts on the form. For example, if you’re selling to retail customers and B2B buyers, you could offer your B2B customers a percentage discount.
I bought Gravity Perks and installed the GP eCommerce Fields, which gave me the ability to add the discount that I wanted to include on the form.
Amy Masson
If you’re running a charity or a business where customers can choose to pay what they want or leave tips, you can use Gravity Forms Price Range along with User Defined Price form fields to specify minimum and/or maximum price ranges.
WordPress’s post-based format makes it perfect for blogs with user-submitted content. With Gravity Forms you can easily publish posts directly from user entries on the front end of forms. You can then take this one step further by paying writers per word – including setting a minimum fee for a base word count.
Whether you’re running a jewelry store, online bakery, or international clothing brand, you could benefit from simplifying the way your business accepts online payments. And the easiest way to do this is by using the Gravity Forms plugin with GF eCommerce Fields.
Supercharge Gravity Forms eCommerce Features
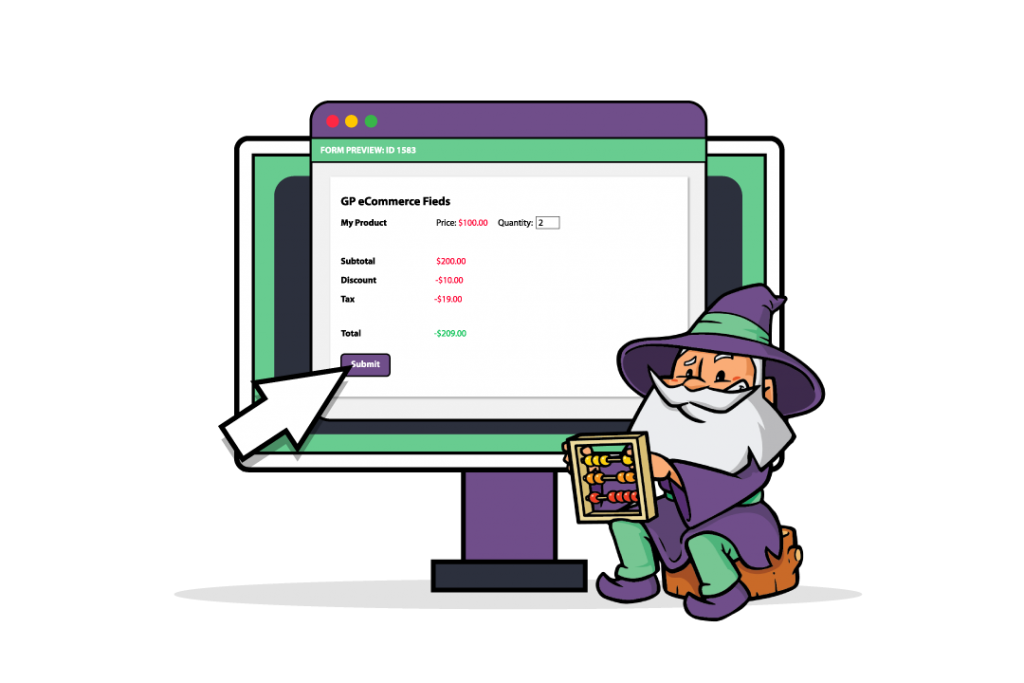
The GF eCommerce Fields perk helps you make Gravity Forms more eCommerce-friendly. You can use it to offer customers discounts on their orders or charge tax.
You can configure the Discount form field to apply flat discounts or percentage discounts to the total order value or to specific products. Similarly, you can configure the Tax form field to calculate and apply percentage-based tax amounts. This is particularly useful for online business owners that sell to overseas customers.
In addition to this, you can use its handy merge tags to display the order summary in your notifications and confirmations.
How to set up Gravity Forms payment and pricing fields
Setting up Gravity Forms pricing fields and payment add-on is pretty easy. For this tutorial, we’ll assume you have the Gravity Forms plugin installed and activated on your WordPress website. To accept payments, you’ll also need to have a PayPal account or a Stripe account.
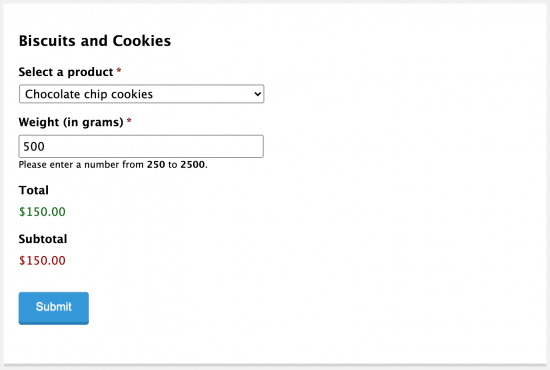
Let’s say you run an online bakery and want to set up a Gravity Form with payment and pricing fields to accept payments for biscuits and cookies sold by weight. Here’s what you need to do:
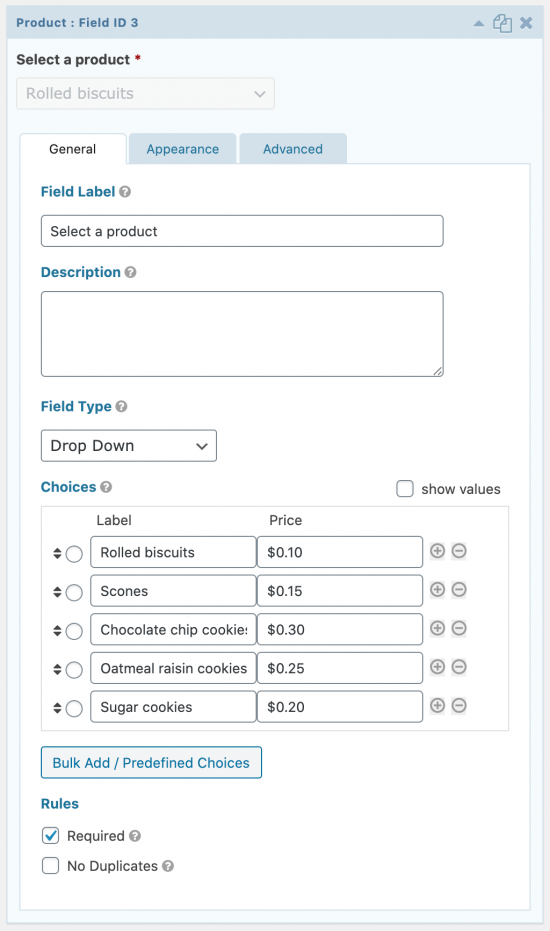
To get started, head over to Forms from the WordPress admin panel and click the Add New button for a new form. Add a Product field to the form and set the Field Type to Drop Down. Add the products you’d like to sell by weight as options along with the base price.
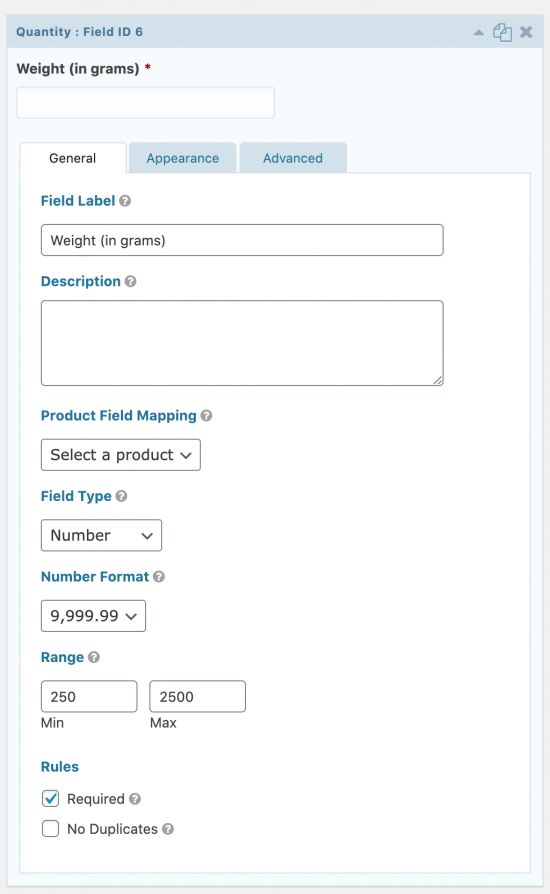
Next, add a Quantity field to the form. In the field settings page set the Product Field Mapping field to Select a product, Field Type to Number, and set the Range.
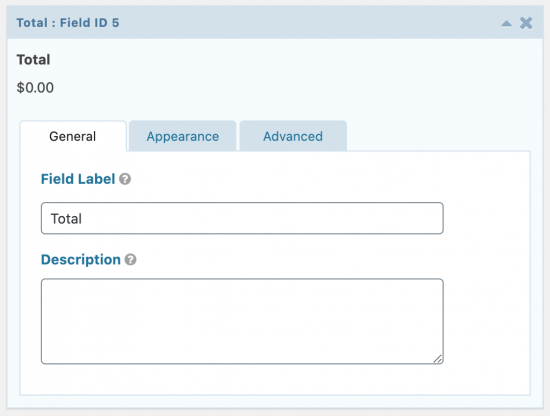
Finally, add a Total field to your form. Click the Update button to proceed.
Click the Preview button to see the form in action on your site’s front-end.
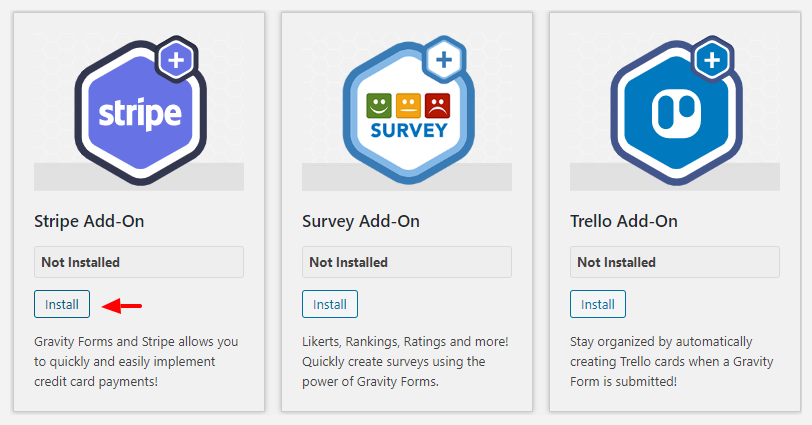
Finally, you’ll need to set up a payment processor – either Stripe or PayPal – to accept payments. For this, navigate to Forms > Add-Ons and install the latest version of the Stripe Add-On or PayPal Add-On.
Follow our in-depth guide on setting up Gravity Forms to accept Stripe payments and PayPal payments.
Adding more eCommerce functionality to your Gravity Forms
Discounts and tax
You can use GF eCommerce Fields to offer discounts or charge tax for international orders.
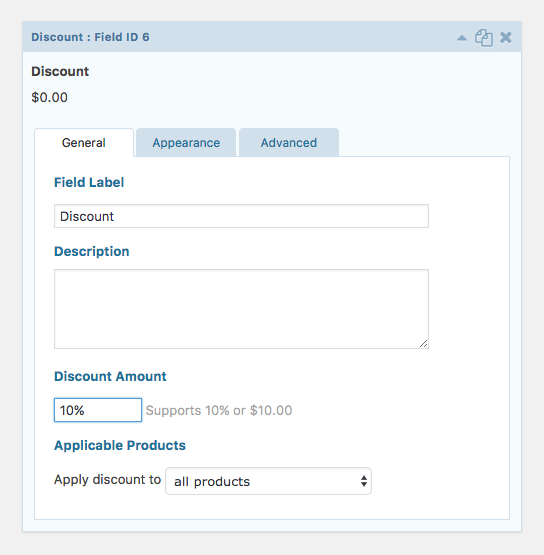
The Discount field lets you apply either a flat discount or a percentage discount to the total. For example, you can offer customers a 10% discount on their order.
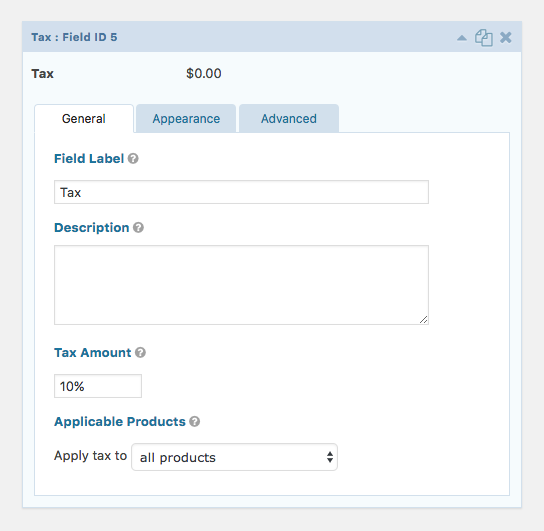
Similarly, you can add a Tax field to your Gravity Forms to add a preconfigured tax to your order form. All you have to do is specify the Tax Amount (in percentage) and set the Apply tax to option to all products.
Add conditional or dynamic pricing
Rather than setting up a large number of different Product fields all with different prices, you can instead set up a single Product field with a variable price, conditional on other form fields.
With Gravity Forms Conditional Pricing or Gravity Forms Advanced Calculations, you can build complex pricing rules easily, creating an unlimited number of flexible and powerful pricing levels conditional on any user input or other data – from drop-downs to radio buttons.
Conditional Pricing is best suited for static pricing levels (like bulk or early-bird pricing), while Advanced Calculations shines with dynamic pricing, adapting to multiple user-specified variables. No matter what transaction type you’re building, you’re sure to be able to streamline it with one of these powerful perks.
Let users pay what they want
Sometimes it makes sense to ask users how much they’d like to pay – whether for a charitable donation, or for more community-oriented products and services.
Gravity Forms lets you do this with the User Defined Price product field, but it has its limitations – or rather, it doesn’t. Users can enter any value they like, which might leave your system open to abuse (e.g. scammers getting lots of your products for free and then selling them on). With Gravity Forms Price Range you can set minimum or maximum values for Gravity Forms payments, allowing you to put a floor on how much people can pay – and a cap, in case people accidentally type one too many zeroes into the field!
Start accepting Gravity Forms payments today
Setting up Gravity Forms payment and pricing fields is a great way to accept payments online without having to install a full-blown eCommerce plugin. You can offer customers different payment options and accept payments via Stripe or PayPal. It’s perfect for businesses that need to sell products a couple of times throughout the year, or sell a few specific products.
GF eCommerce Fields
If you need to kick things up a notch to generate more revenue, you can use Gravity Perks alongside Gravity Forms to offer discounts or charge tax. Gravity Perks can also help you offer conditional pricing, user-defined pricing, and more.
Do you have any questions about how to set up Gravity Forms payment and pricing fields? Let us know in the comments section below.




Great breakdown! Gravity Forms with GF eCommerce Fields is a game-changer for small businesses like mine that don’t need a full eCommerce setup but still want flexible payment options.
Hi Abdul!
We’re so glad to hear you found it helpful! We’d love to hear more about your setup and how you’re using it. Let us know if you’d like to share, or if there’s anything else we can help with. 🙏