Guide: Two-Way Connect Gravity Forms with Google Sheets
Learn how to send Gravity Forms data to Google Sheets and populate data from Google Sheets into Gravity Forms, even within the same form.

Think of the potential Gravity Forms and Google Sheets have for unlocking new ways to use your data: collect data in Gravity Forms, then automatically send and sync with Google Sheets to take advantage of all the functionality Sheets provides. Use Sheets as a database, CRM, or to just get meaningful insights from your data. This also opens the door to other Google Sheets integrations, like Looker Studio.
This is our hunch behind why Gravity Connect Google Sheets has quickly become one of our most popular plugins.
So, what if you wanted to populate that same data back into Gravity Forms, once you’ve worked your magic in Sheets? Using GP Populate Anything, this two-way connection can become effortless. You can go as far as to populate data from a Gravity Form into Google Sheets, then back into the same form.
This article is all about doing just that: creating a two-way connection between Gravity Forms and Google Sheets to seamlessly send data both ways.
This article requires the GC Google Sheets connection and the GP Populate Anything perk.
Gravity Connect connects Gravity Forms to top-tier services. 🔮 Gravity Perks enhances Gravity Forms to magical heights. 🪄
Getting Started
To get started, make sure you have both GC Google Sheets and Populate Anything installed and activated.
For this tutorial, we’re going to use an example of attendees registering for a gala event. We’ll create a registration form for guests to fill out when registering, and we’ll export the guest details to Google Sheets. Then, we’ll create an attendee sign in form that will populate the guests into a drop down list for the event organizer to confirm and sign each guest in.
Build the Guest Registration Form
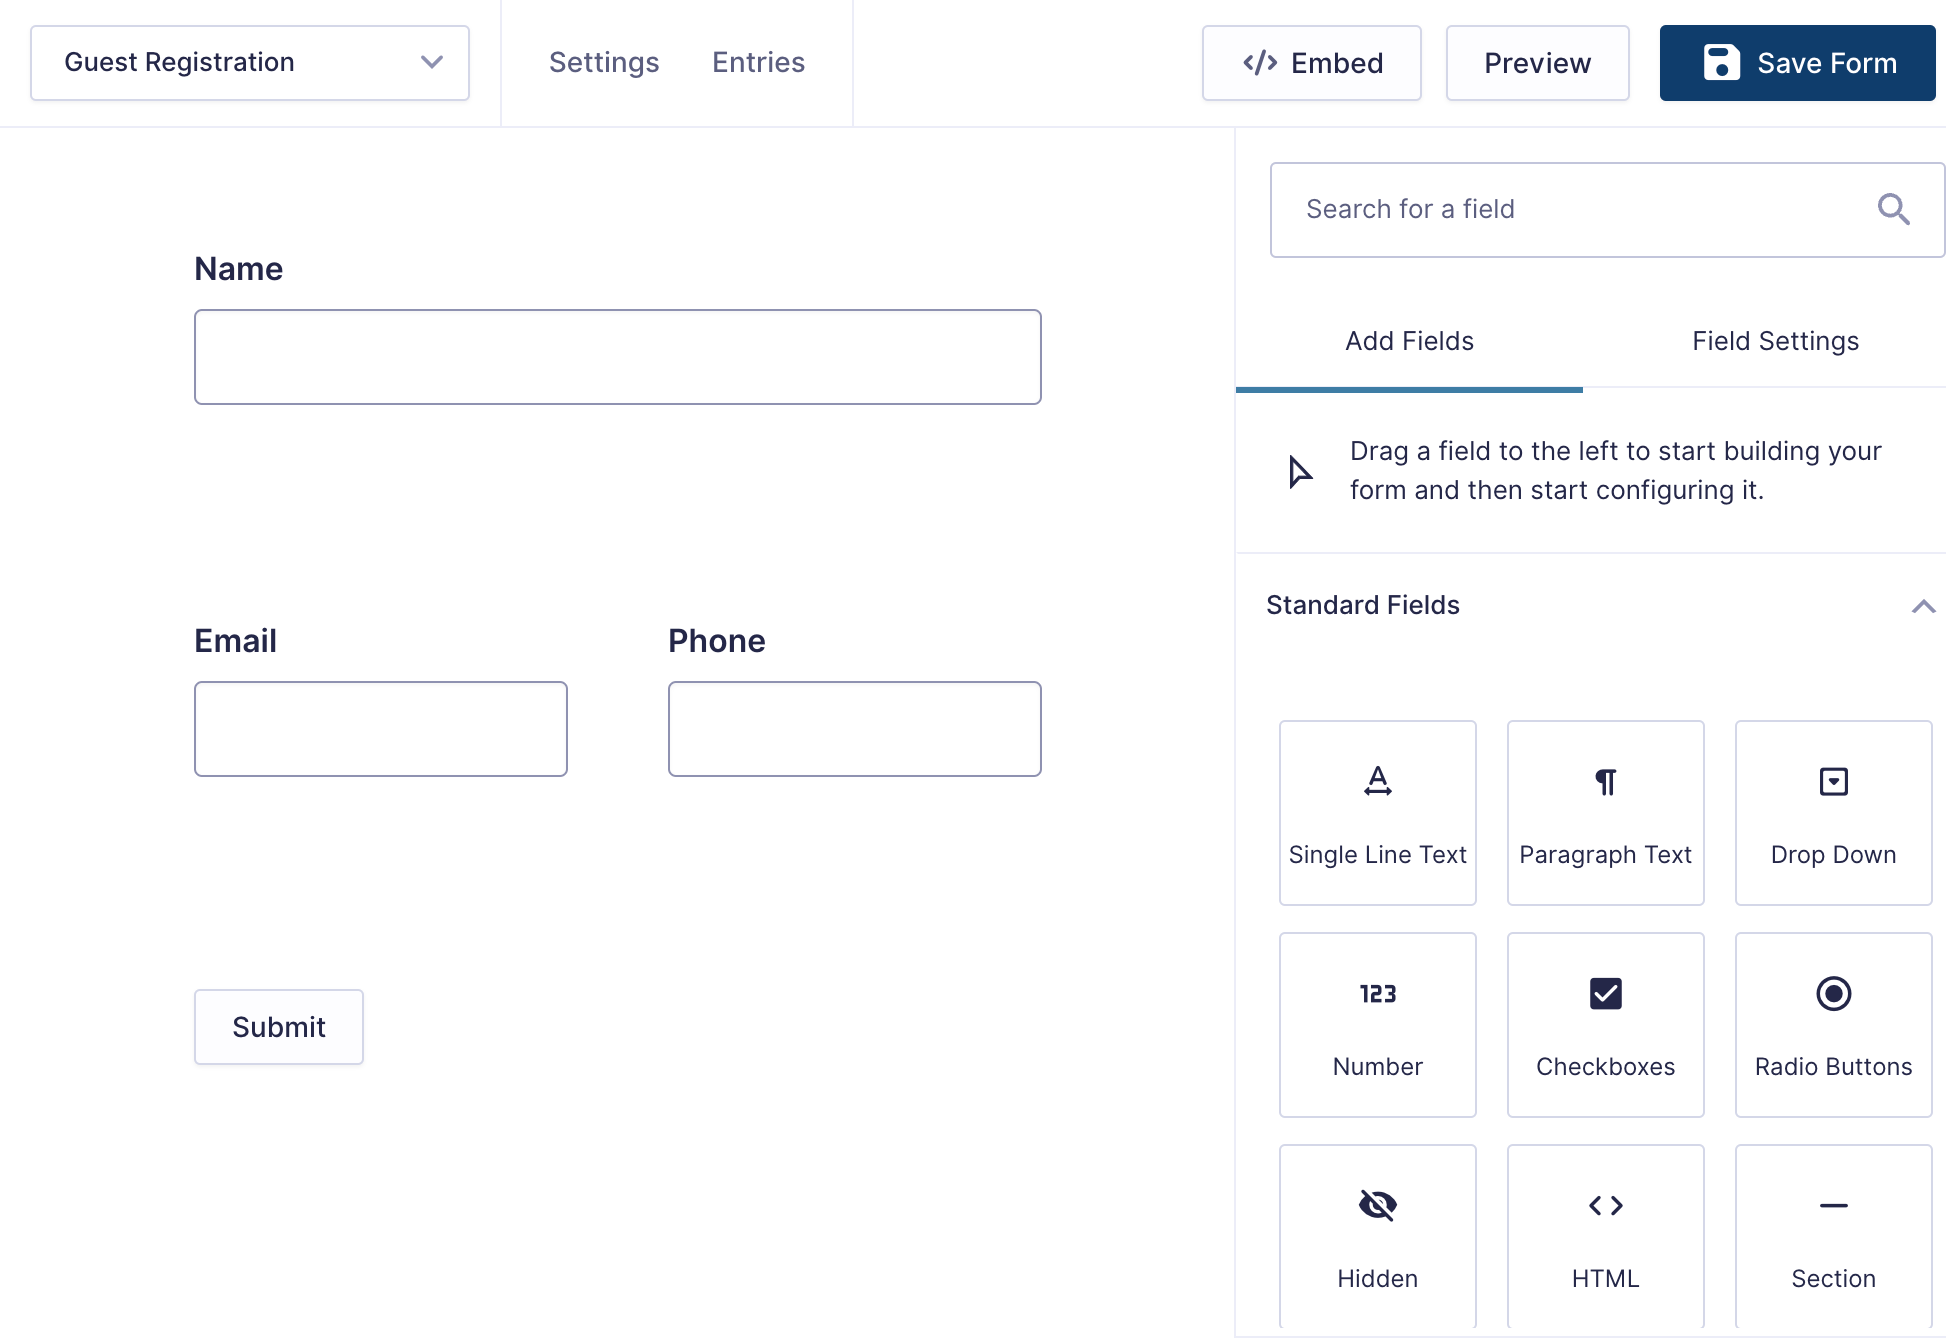
We’ll start by building a simple guest registration form. Create a new form called “Guest Registration” and add the following fields:
- Name
- Phone
Connect the Registration form to Google Sheets
Next, it’s time to link your Google Account to Gravity Forms. Under Forms in the WordPress sidebar, click on Settings › Google Sheets. Under Google Account, click Connect, and follow the prompts to sign in to Google.
Create a new Google Sheets Feed
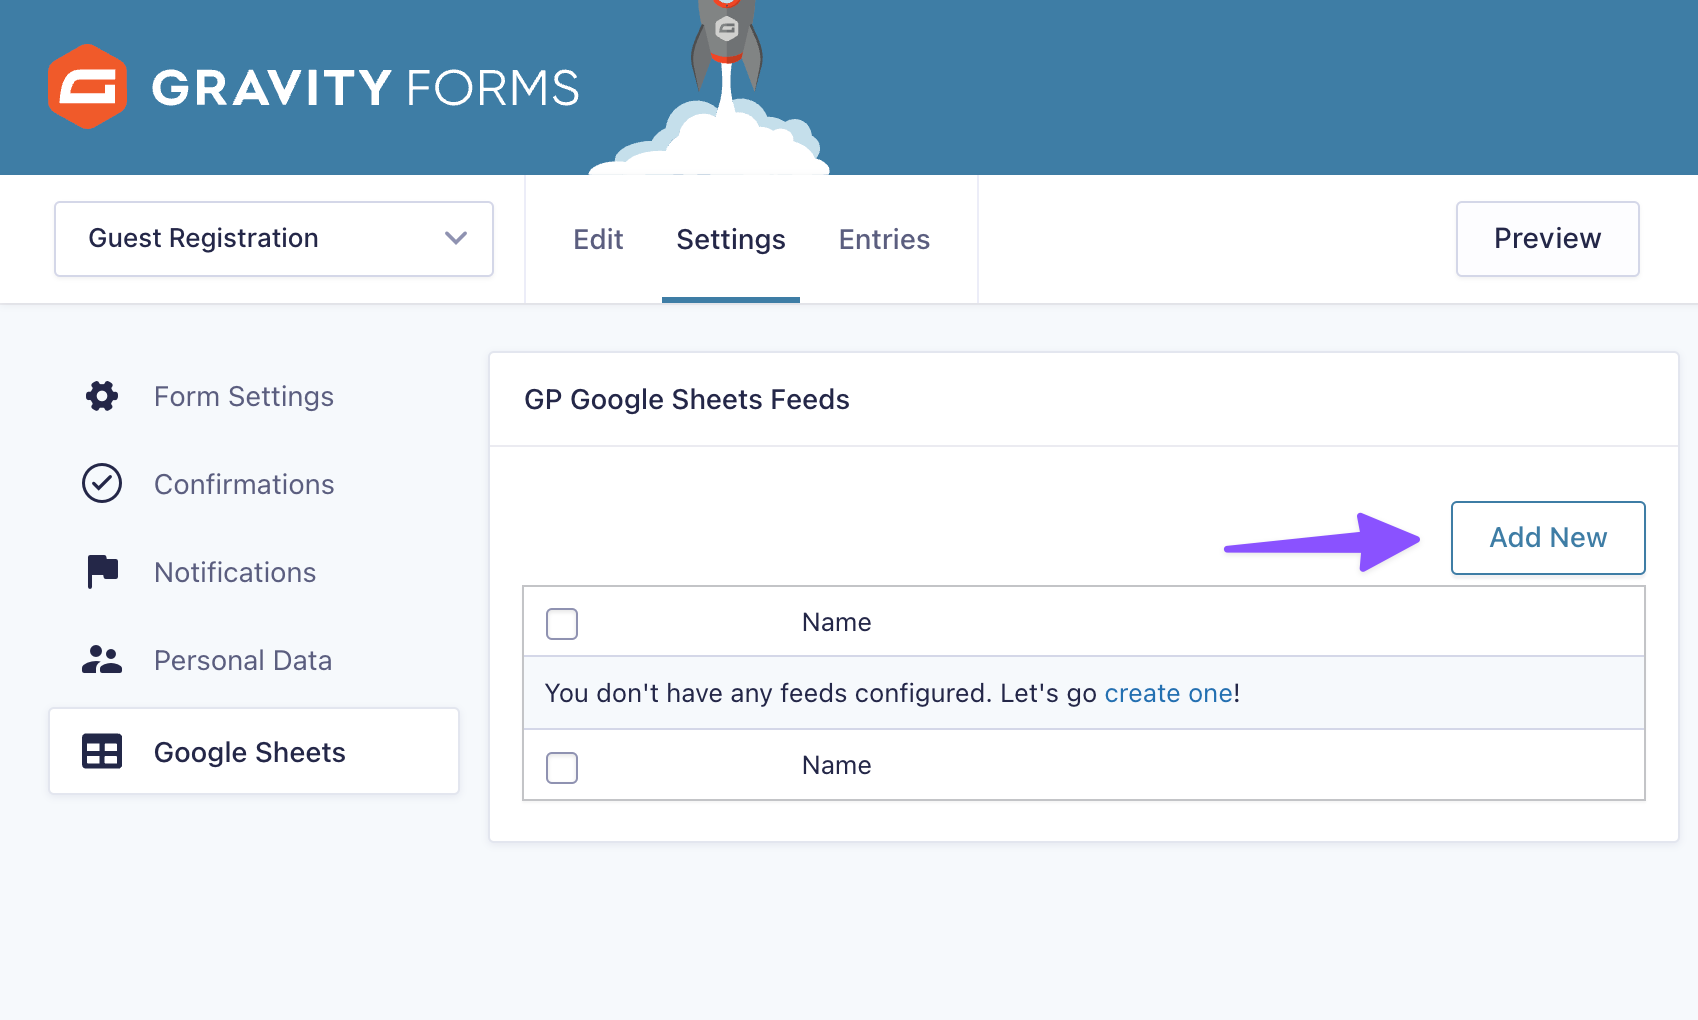
Now that your Google Account is connected, it’s time to connect the guest registration form to Google Sheets. With your form open, navigate to your Settings › Google Sheets. You should see the GC Google Sheets Feed table. Click Add New to create a new feed:
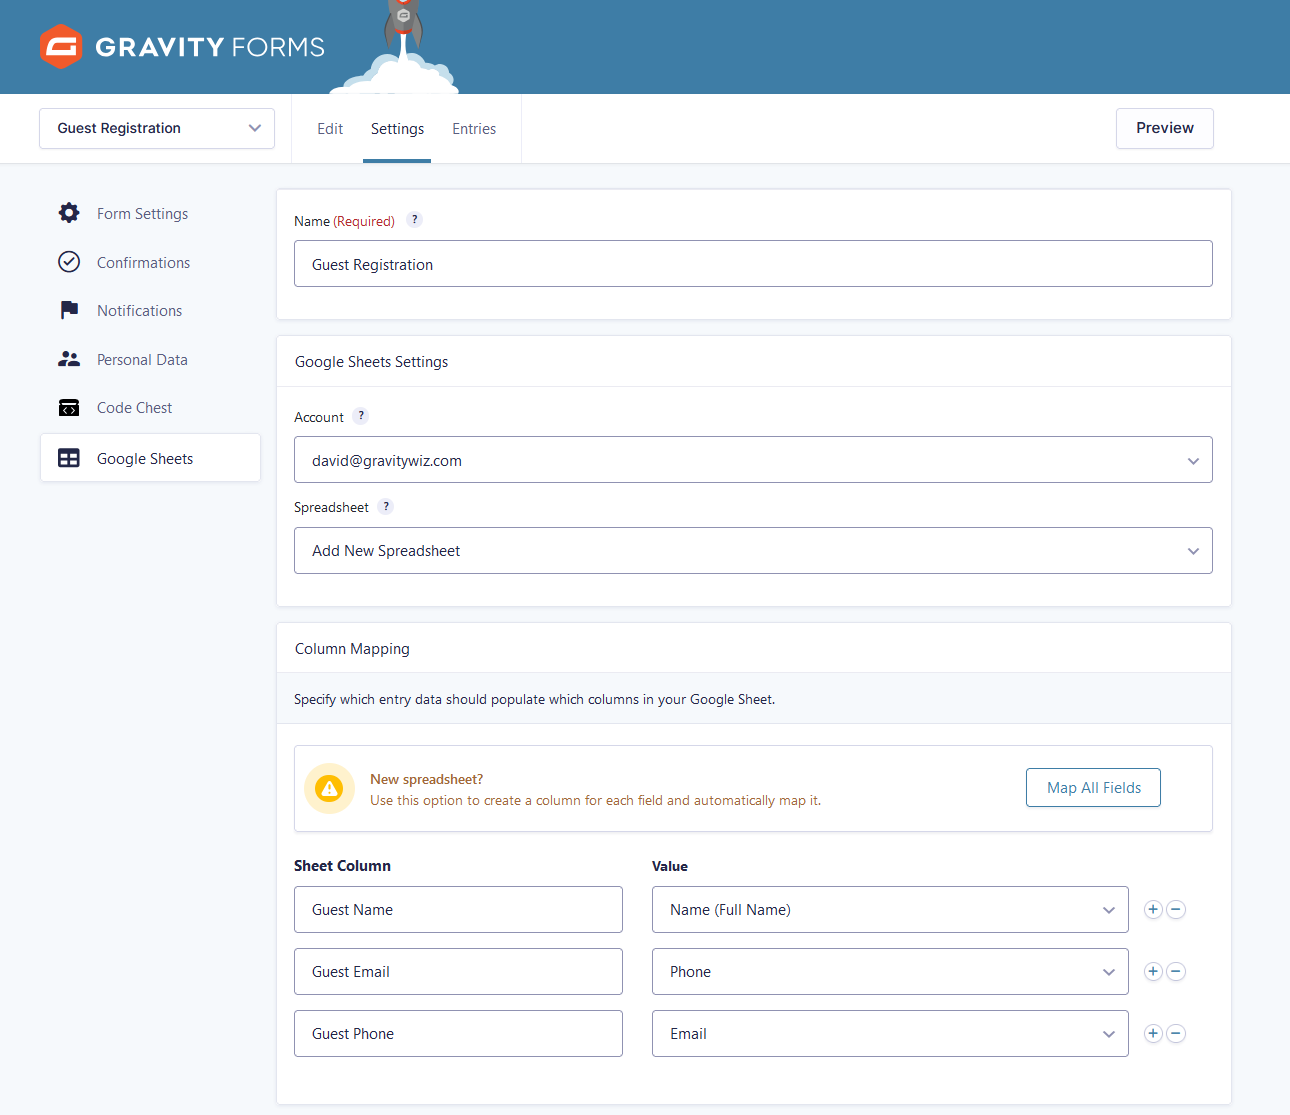
Create a new Google Sheets feed with the following fields filled out:
- Name: Guest Registration
- Google Sheets Settings:
- Account: Select the account you want to create the new spreadsheet in.
- Spreadsheet: Add New Spreadsheet
- Column Mapping: Click on the Map All Fields button and change the Sheet Column names to:
- Guest Name: Name
- Guest Email: Email
- Guest Phone: Phone
If you already have an existing Google Sheet, feel free to use that instead!
Insert a test row
Click Save Settings at the bottom to save your changes. To test out the sync with the guest form fields, click on Insert Test Row next to the connected sheet.
Build the Guest Sign In Form
Once the guests are all registered, let’s make it easy for the gala coordinator to sign everyone in during the event. We’ll build a form for the coordinator where they can select each guest and record the time of when they signed in.
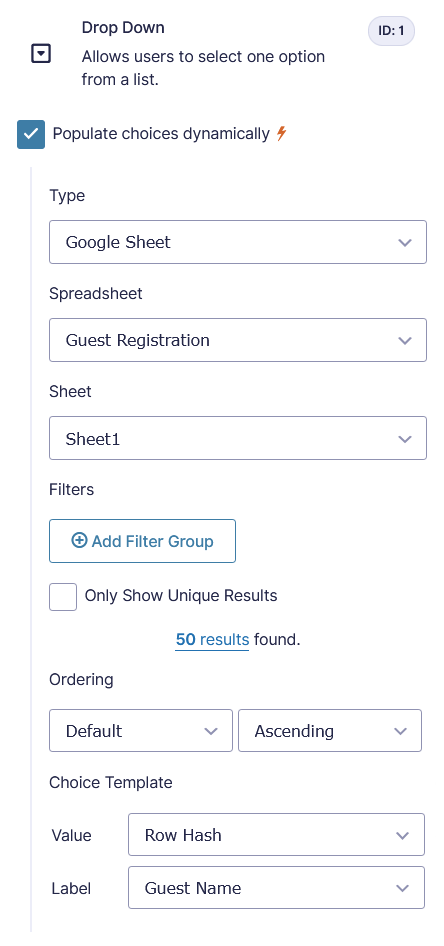
Start by creating a new form called “Guest Sign-in”. We’ll add a new Drop Down field called “Choose Guest”. Make sure the Field Settings are configured as follows:
- Check Populate choices dynamically
- Type: Google Sheet
- Spreadsheet: Choose your Guest Registration spreadsheet
- Sheet: Choose your sheet
- Value: Row Hash
- Label: Guest Name
Next, we’ll add a Checkbox field called “Sign-in Status”, with one choice called “Arrived”. When the event coordinator fills out the form, they’ll check “Arrived” to indicate that the guest is signed in.
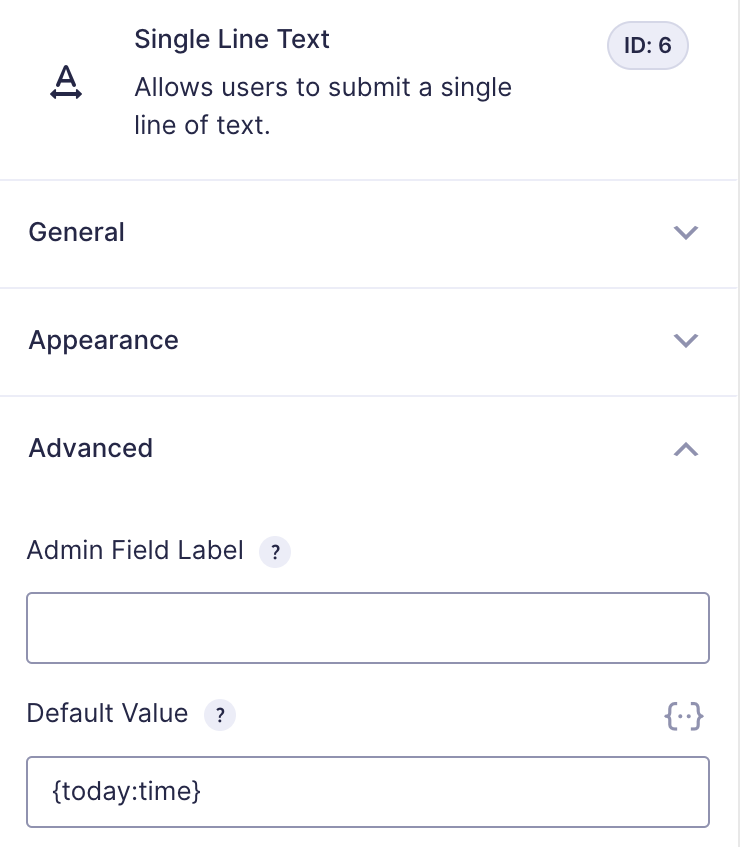
Finally, we’ll record the exact time that the guest signs in for audit purposes. Add a new hidden Single Line Text field called “Sign-in Timestamp”. To automatically record the current time and , we’ll navigate to Field Settings › Advanced › Default Value and add the following: {today:time}
Create a new Google Sheets Feed
Once the coordinator signs the guest in, we’ll send a record of the data to Google Sheets. Following the same steps as the registration feed, navigate to your Settings › Google Sheets. You should see the GC Google Sheets Feed table. Click Add New to create a new feed:
Create a new Google Sheets feed with the following fields filled out:
- Name: Sign-in List
- Google Sheets Settings:
- Account: Select the account you want to create the new spreadsheet in.
- Spreadsheet: Add New Spreadsheet
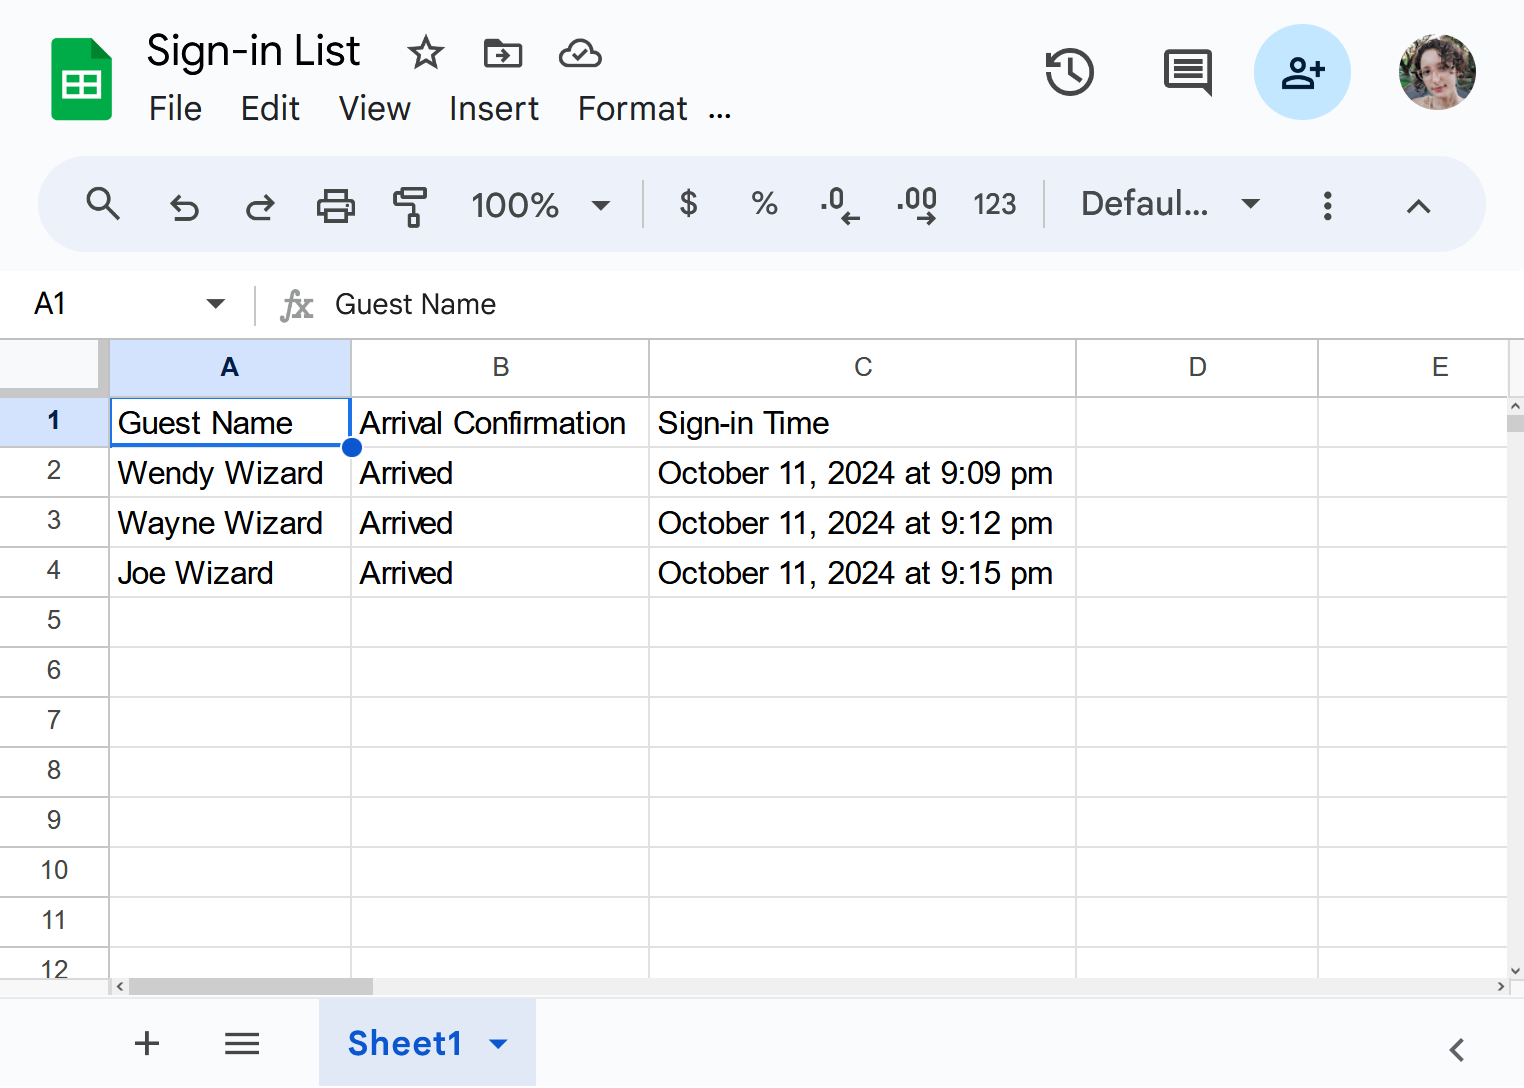
- Column Mapping: Click on the Map All Fields button and change the Sheet Column names to:
- Guest Name: Choose Guest
- Arrival Confirmation: Sign-in Status
- Sign-in Time: Sign-in Timestamp

That’s it! You now have a smooth, seamless event registration process that’s fully integrated with Google Sheets.
Taking it Further
Display Guest Details on the Front End using GP Entry Blocks
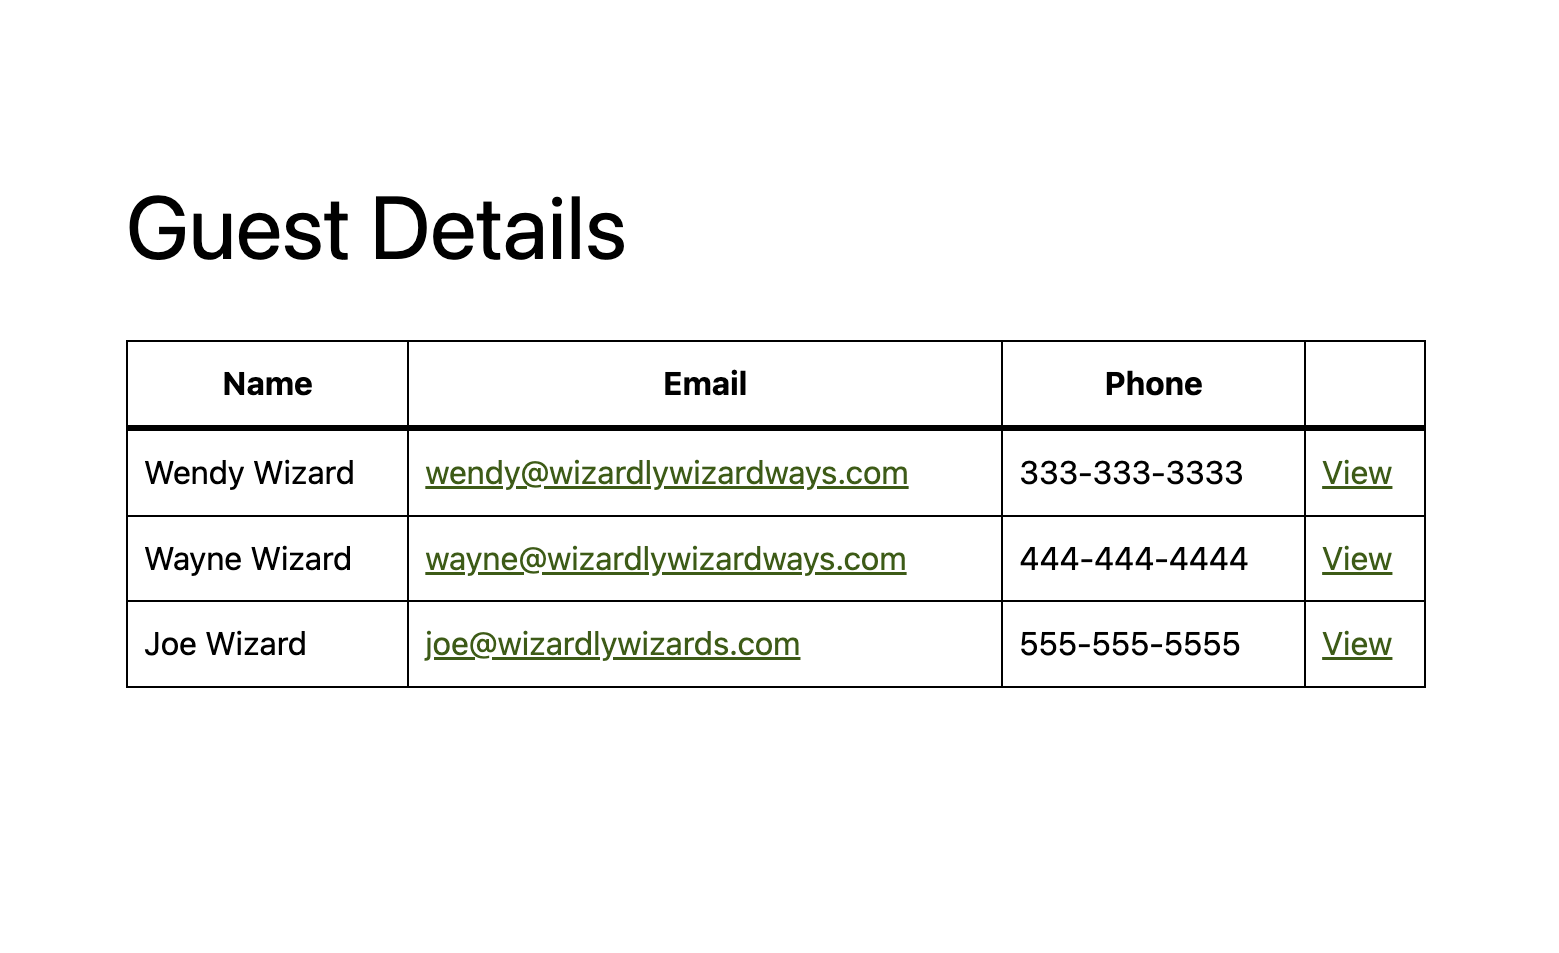
To make it easy for the event coordinator, you can use the power of GP Entry Blocks to display your guest registration form entries on the front end.
With Entry Blocks installed and activated, create a new page and choose the Guest Registration form. You should see your guest details displayed in a table like this:
For more information on how to set up the entry block, check out our Entry Blocks documentation here.
Trying to decide between Entry Blocks and GravityView? Check out our article comparing both plugins.
Add available tickets or seats with GP Inventory
What if the gala only has a limited number of tickets or seats for guests? GP Inventory is the perfect tool to manage tickets, seats, or any type of bookable resource.
Check out our full documentation here to learn how you can incorporate Simple, Choice-based, Shared, or Scoped Inventory into your guest registration form.
Create digital codes with GP QR Code
Once your tickets are created, you can use GP QR Code to generate a unique code for each guest. The QR code can be included in an email notification once the guest finishes registering.
When it’s time for the guest to sign in, just add a Single Line text field to your form, enable the QR code scanner, and you’ll have the ability to scan the guest’s code as part of the sign in process.
Learn more about how to generate and scan QR codes here.