How to Create a Content Paywall using Gravity Forms
Gate your best content, like courses, videos, guides, or exclusive downloads, behind a payment form. No logins needed.
Gating content is a great way to capture leads and grow your email list. Take it a step further and you can use that same gating power to sell your best work, like courses, ebooks, video tutorials, or exclusive guides.
Sure, some people think paywalling content means setting up a complex membership system with logins, passwords, and a bunch of plugins. But with Gravity Forms, there’s a simpler way.
Pop in GP Submit to Access and you can gate just about any content on your site. Want to lock it behind a payment form? Absolutely. Let me walk you through it.
This article requires the Gravity Forms Submit to Access perk.
Buy Gravity Perks to get this perk plus 48 other premium Gravity Forms plugins!
1 – Set Up the Payment Form
Before you can gate any content, you’ll first need a payment form connected to a payment gateway.
When it comes to payment gateways, Gravity Forms is incredibly flexible. Whether you use Stipe, PayPal, Square, etc., the magic works all the same. If you’re not sure which one to go for, we’ve got a comprehensive guide to Gravity Forms payment gateways that’ll help you choose your best fit.
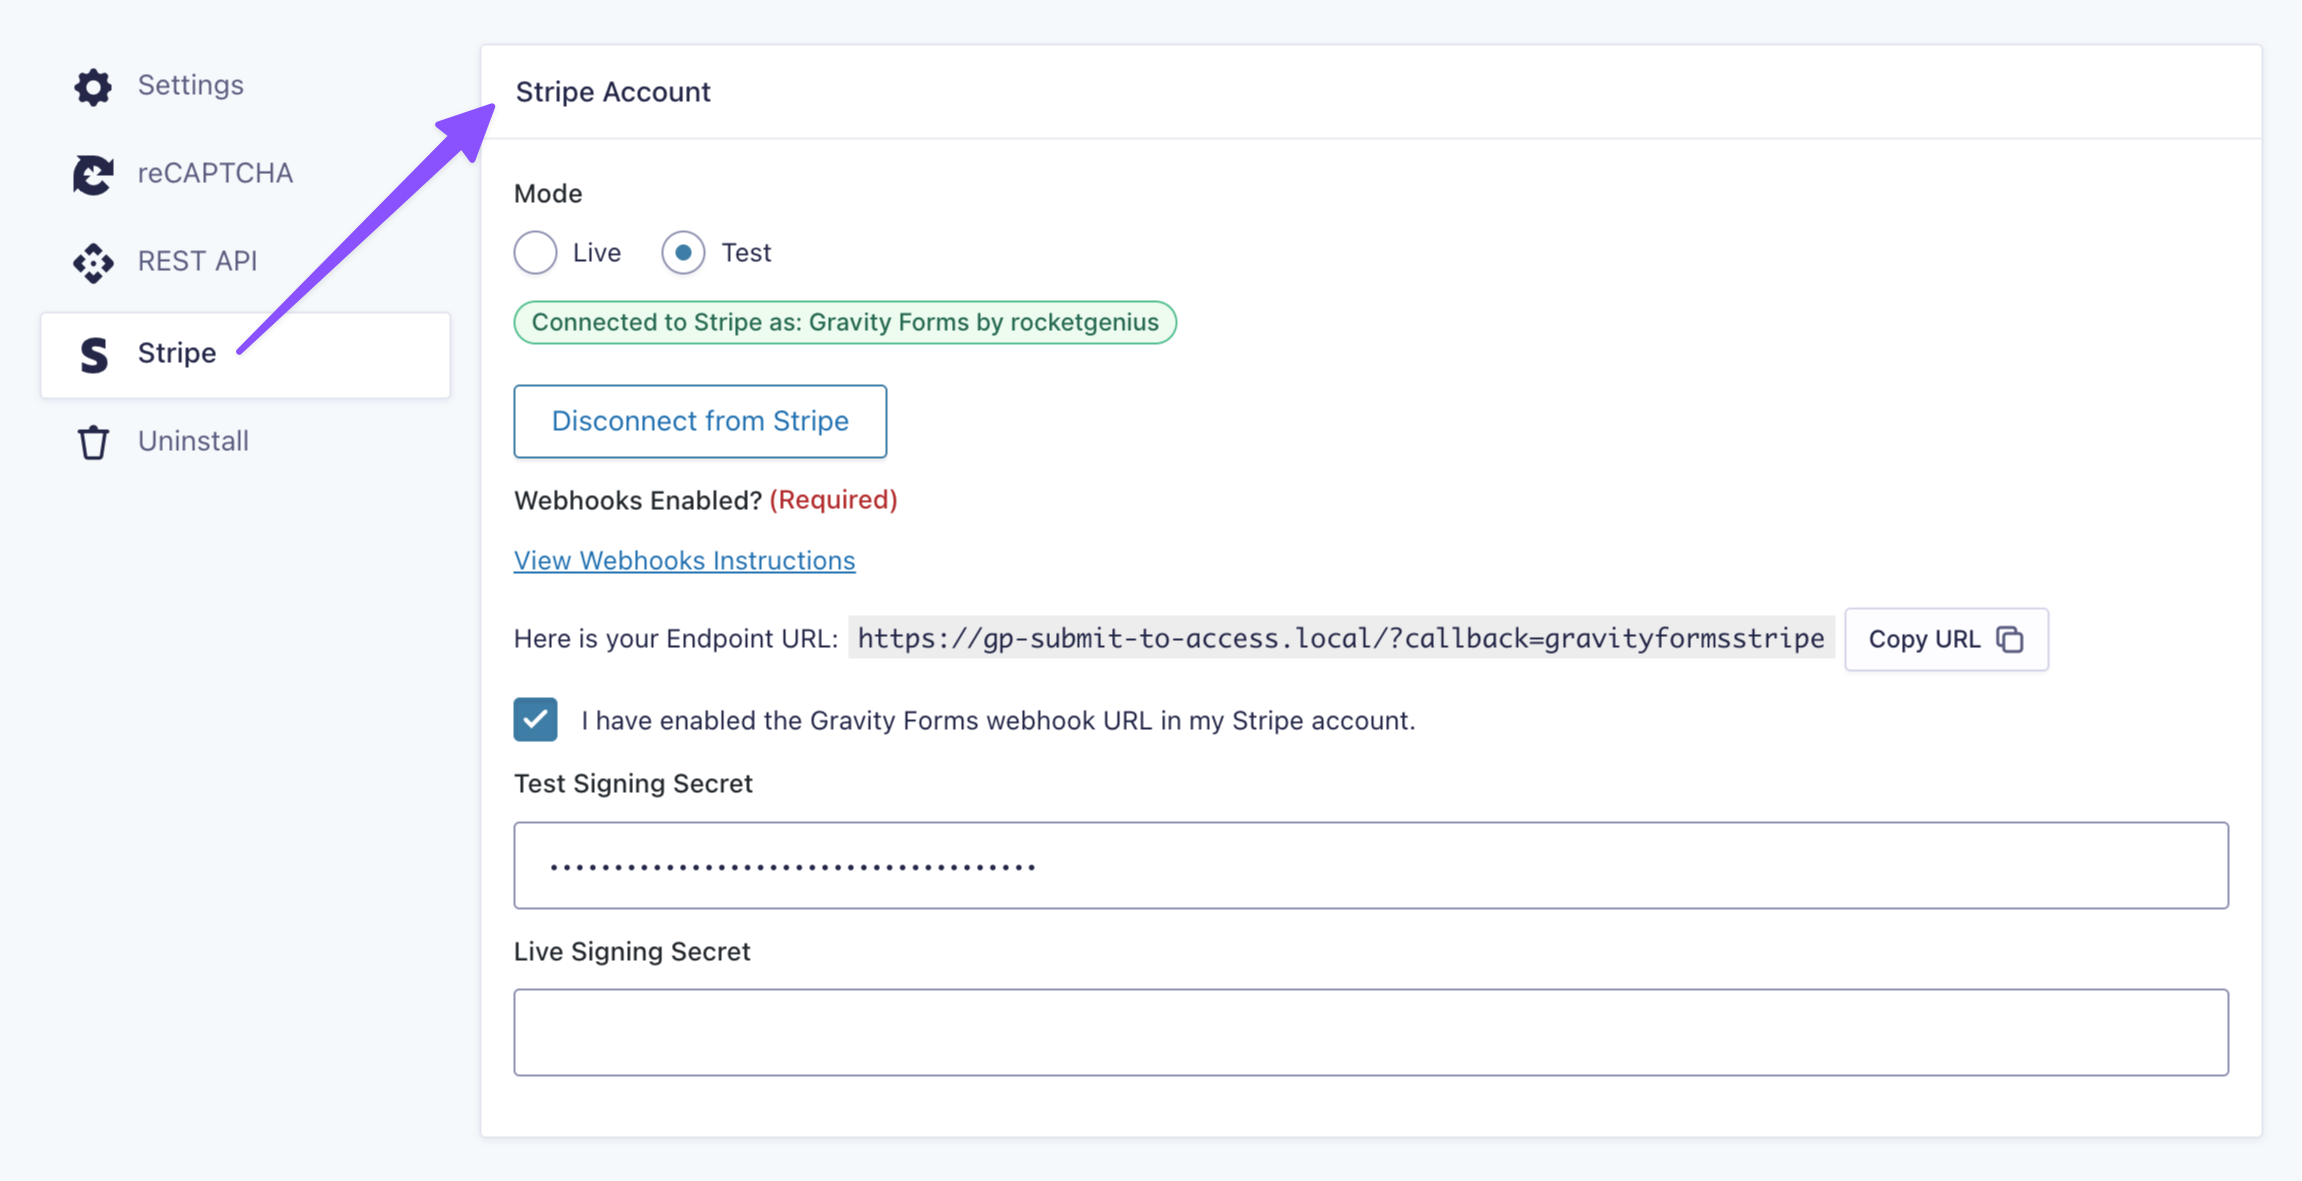
For this tutorial, we’ll use the official Gravity Forms Stripe add-on. But feel free to swap in your preferred gateway.
- Go to Forms › Add-Ons and install the payment gateway of your choice.
- Go to Forms › Settings and check if your payment gateway is now connected.
- Create a new form (or use an existing one).
- Add a Product Field. If you’re charging for a single piece of content, set your price and Disable quantity field.
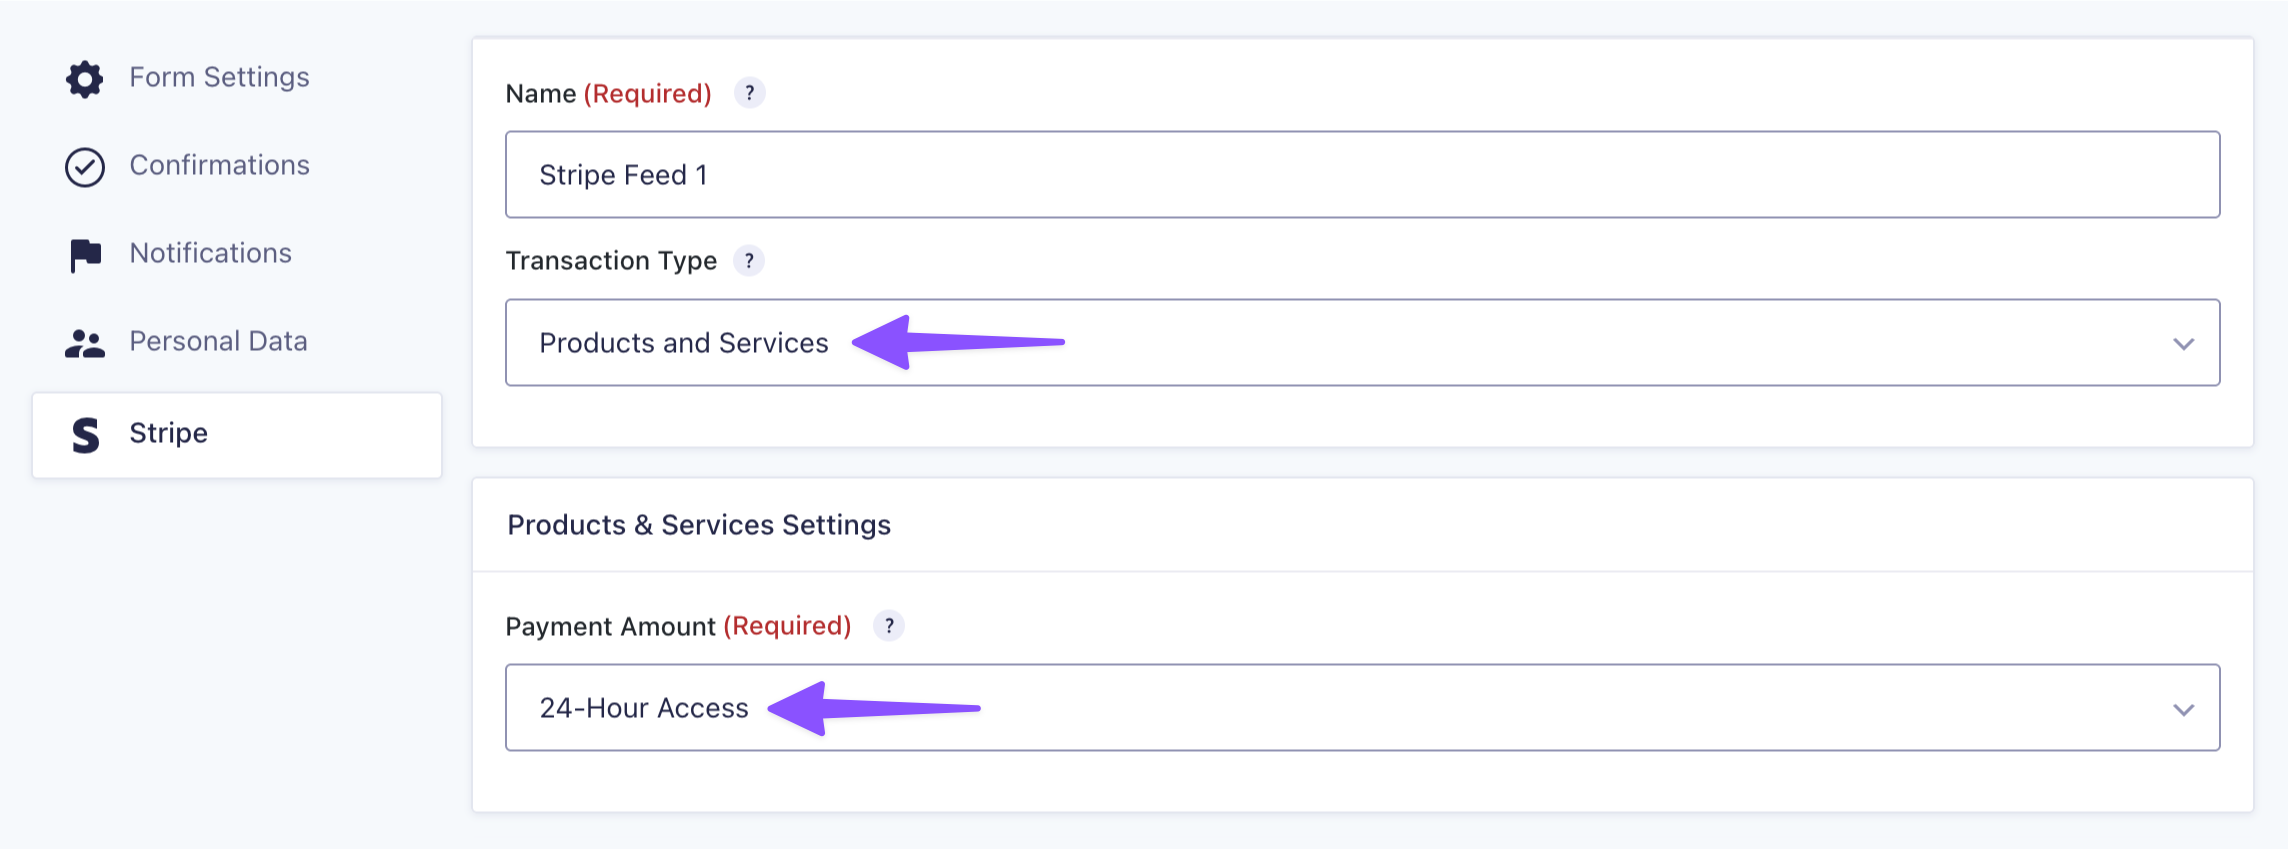
- Add the Payment Field for your payment gateway.
- Add any other fields you need: Name, Email, etc.
- Save the form, then go to the forms Settings › set up a payment feed.
If you need help connecting and setting up feeds for your payment gateway, check out our step-by-step guide for setting up payment gateways in Gravity Forms.
2 – Gate Content
GP Submit to Access offers three ways to gate content: an entire page, by specific blocks, or behind a shortcode.
For this guide, we’ll gate a specific block. This method works great if you want to keep some content free and only charge certain sections.
- Open your Spellbook › activate GP Submit to Access.
- Navigate to the page where the content lives › select the block you want to gate.
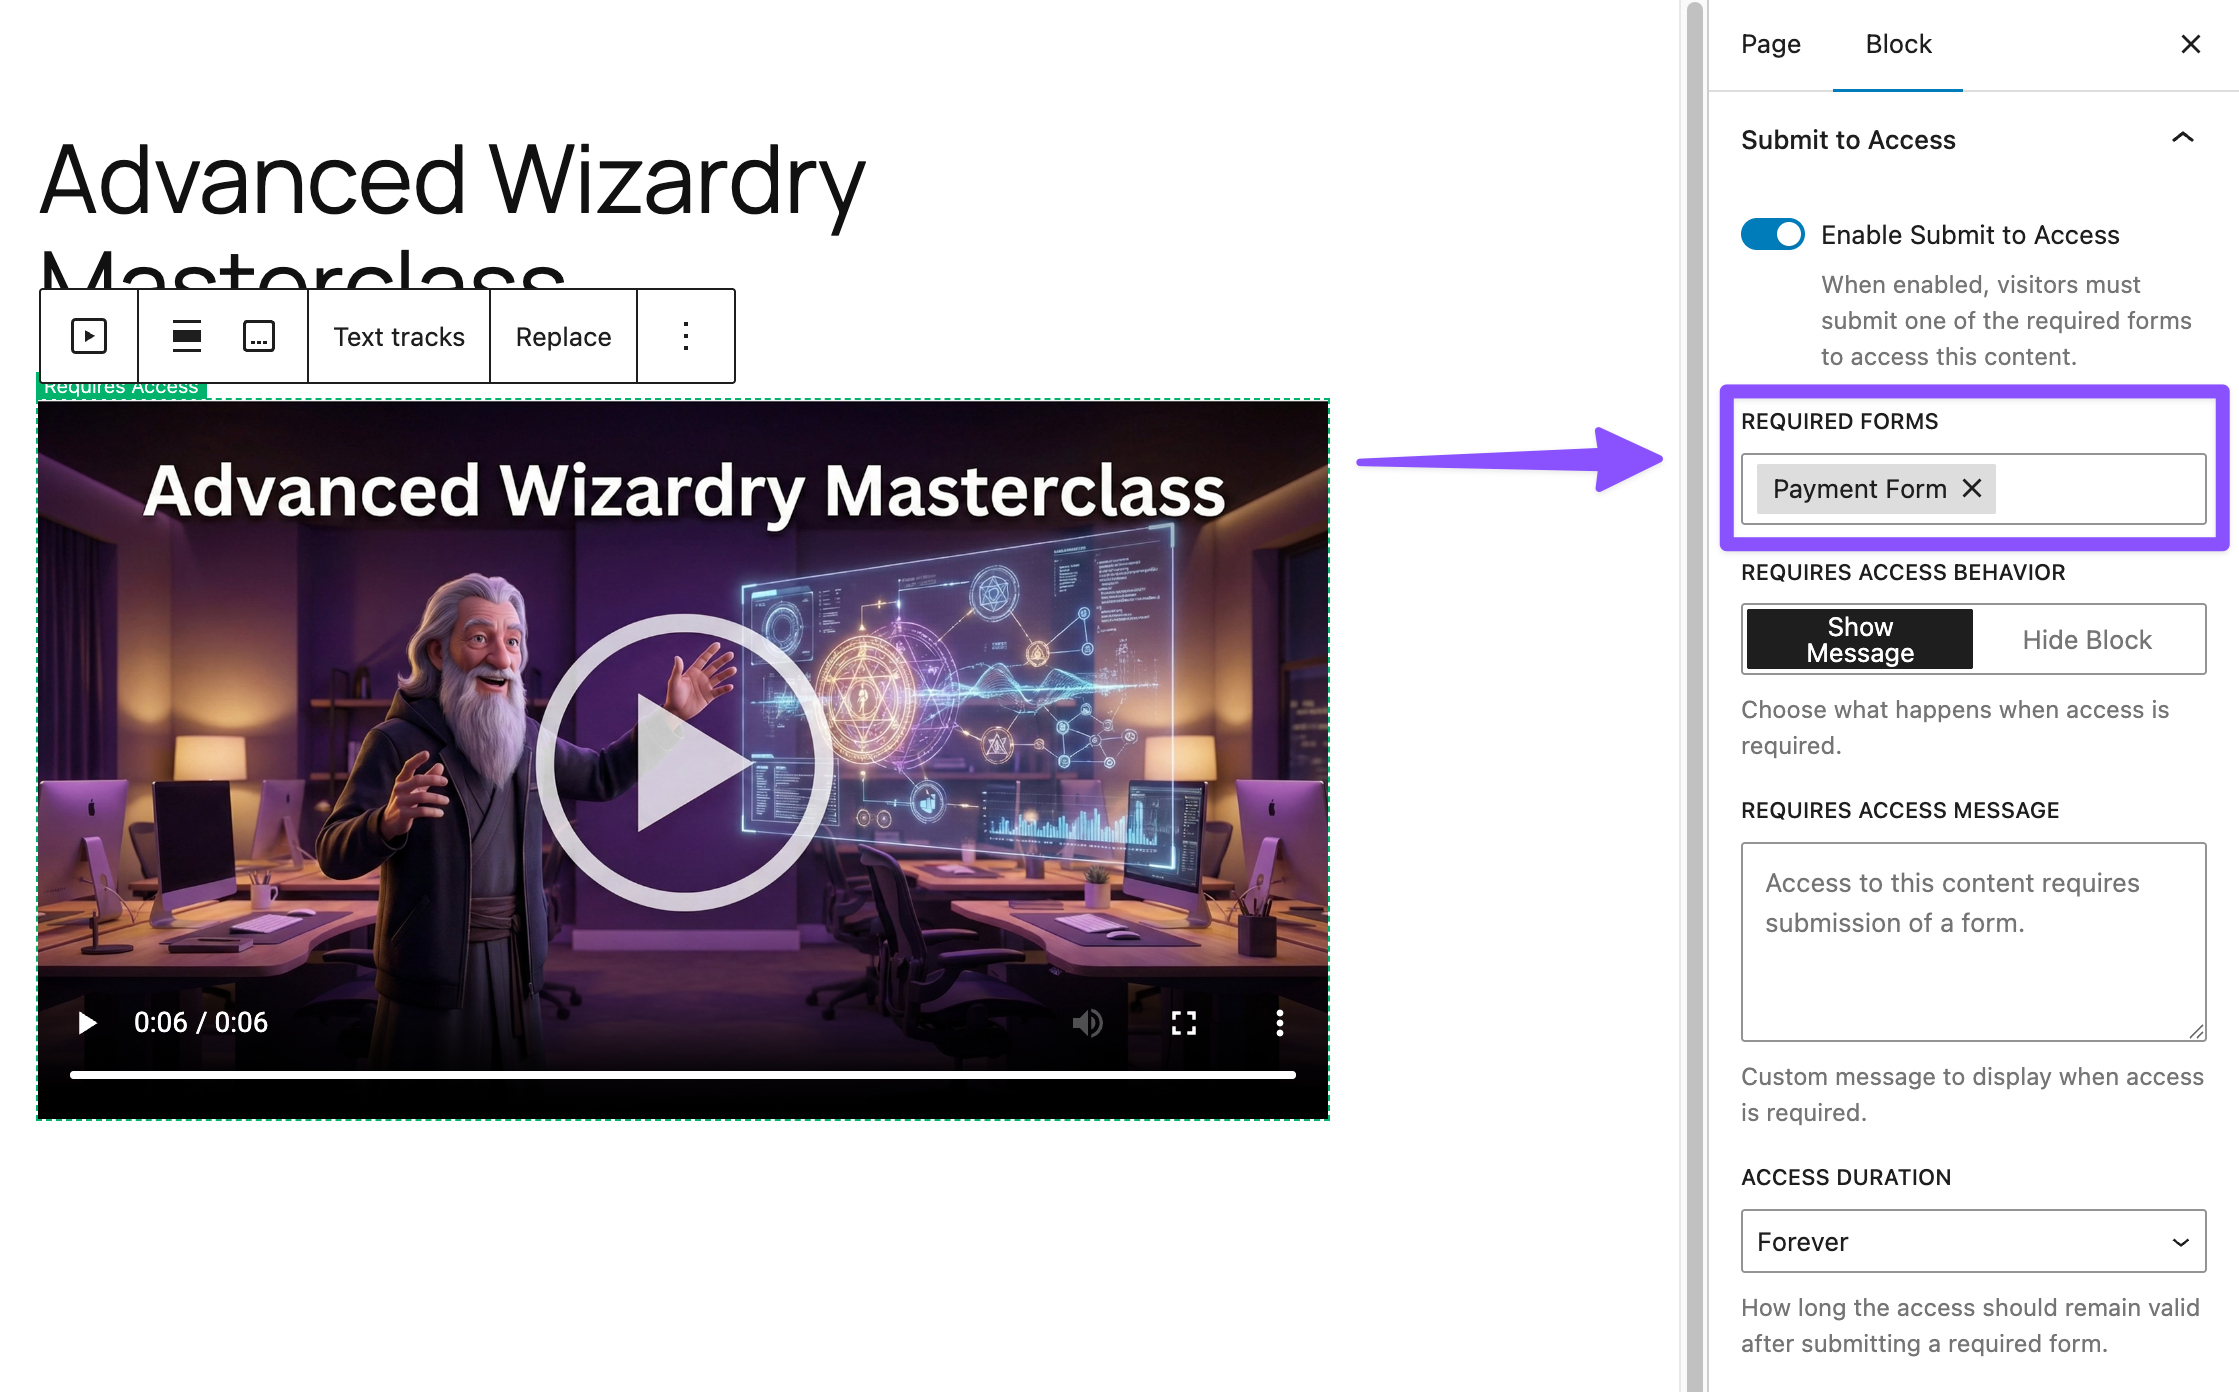
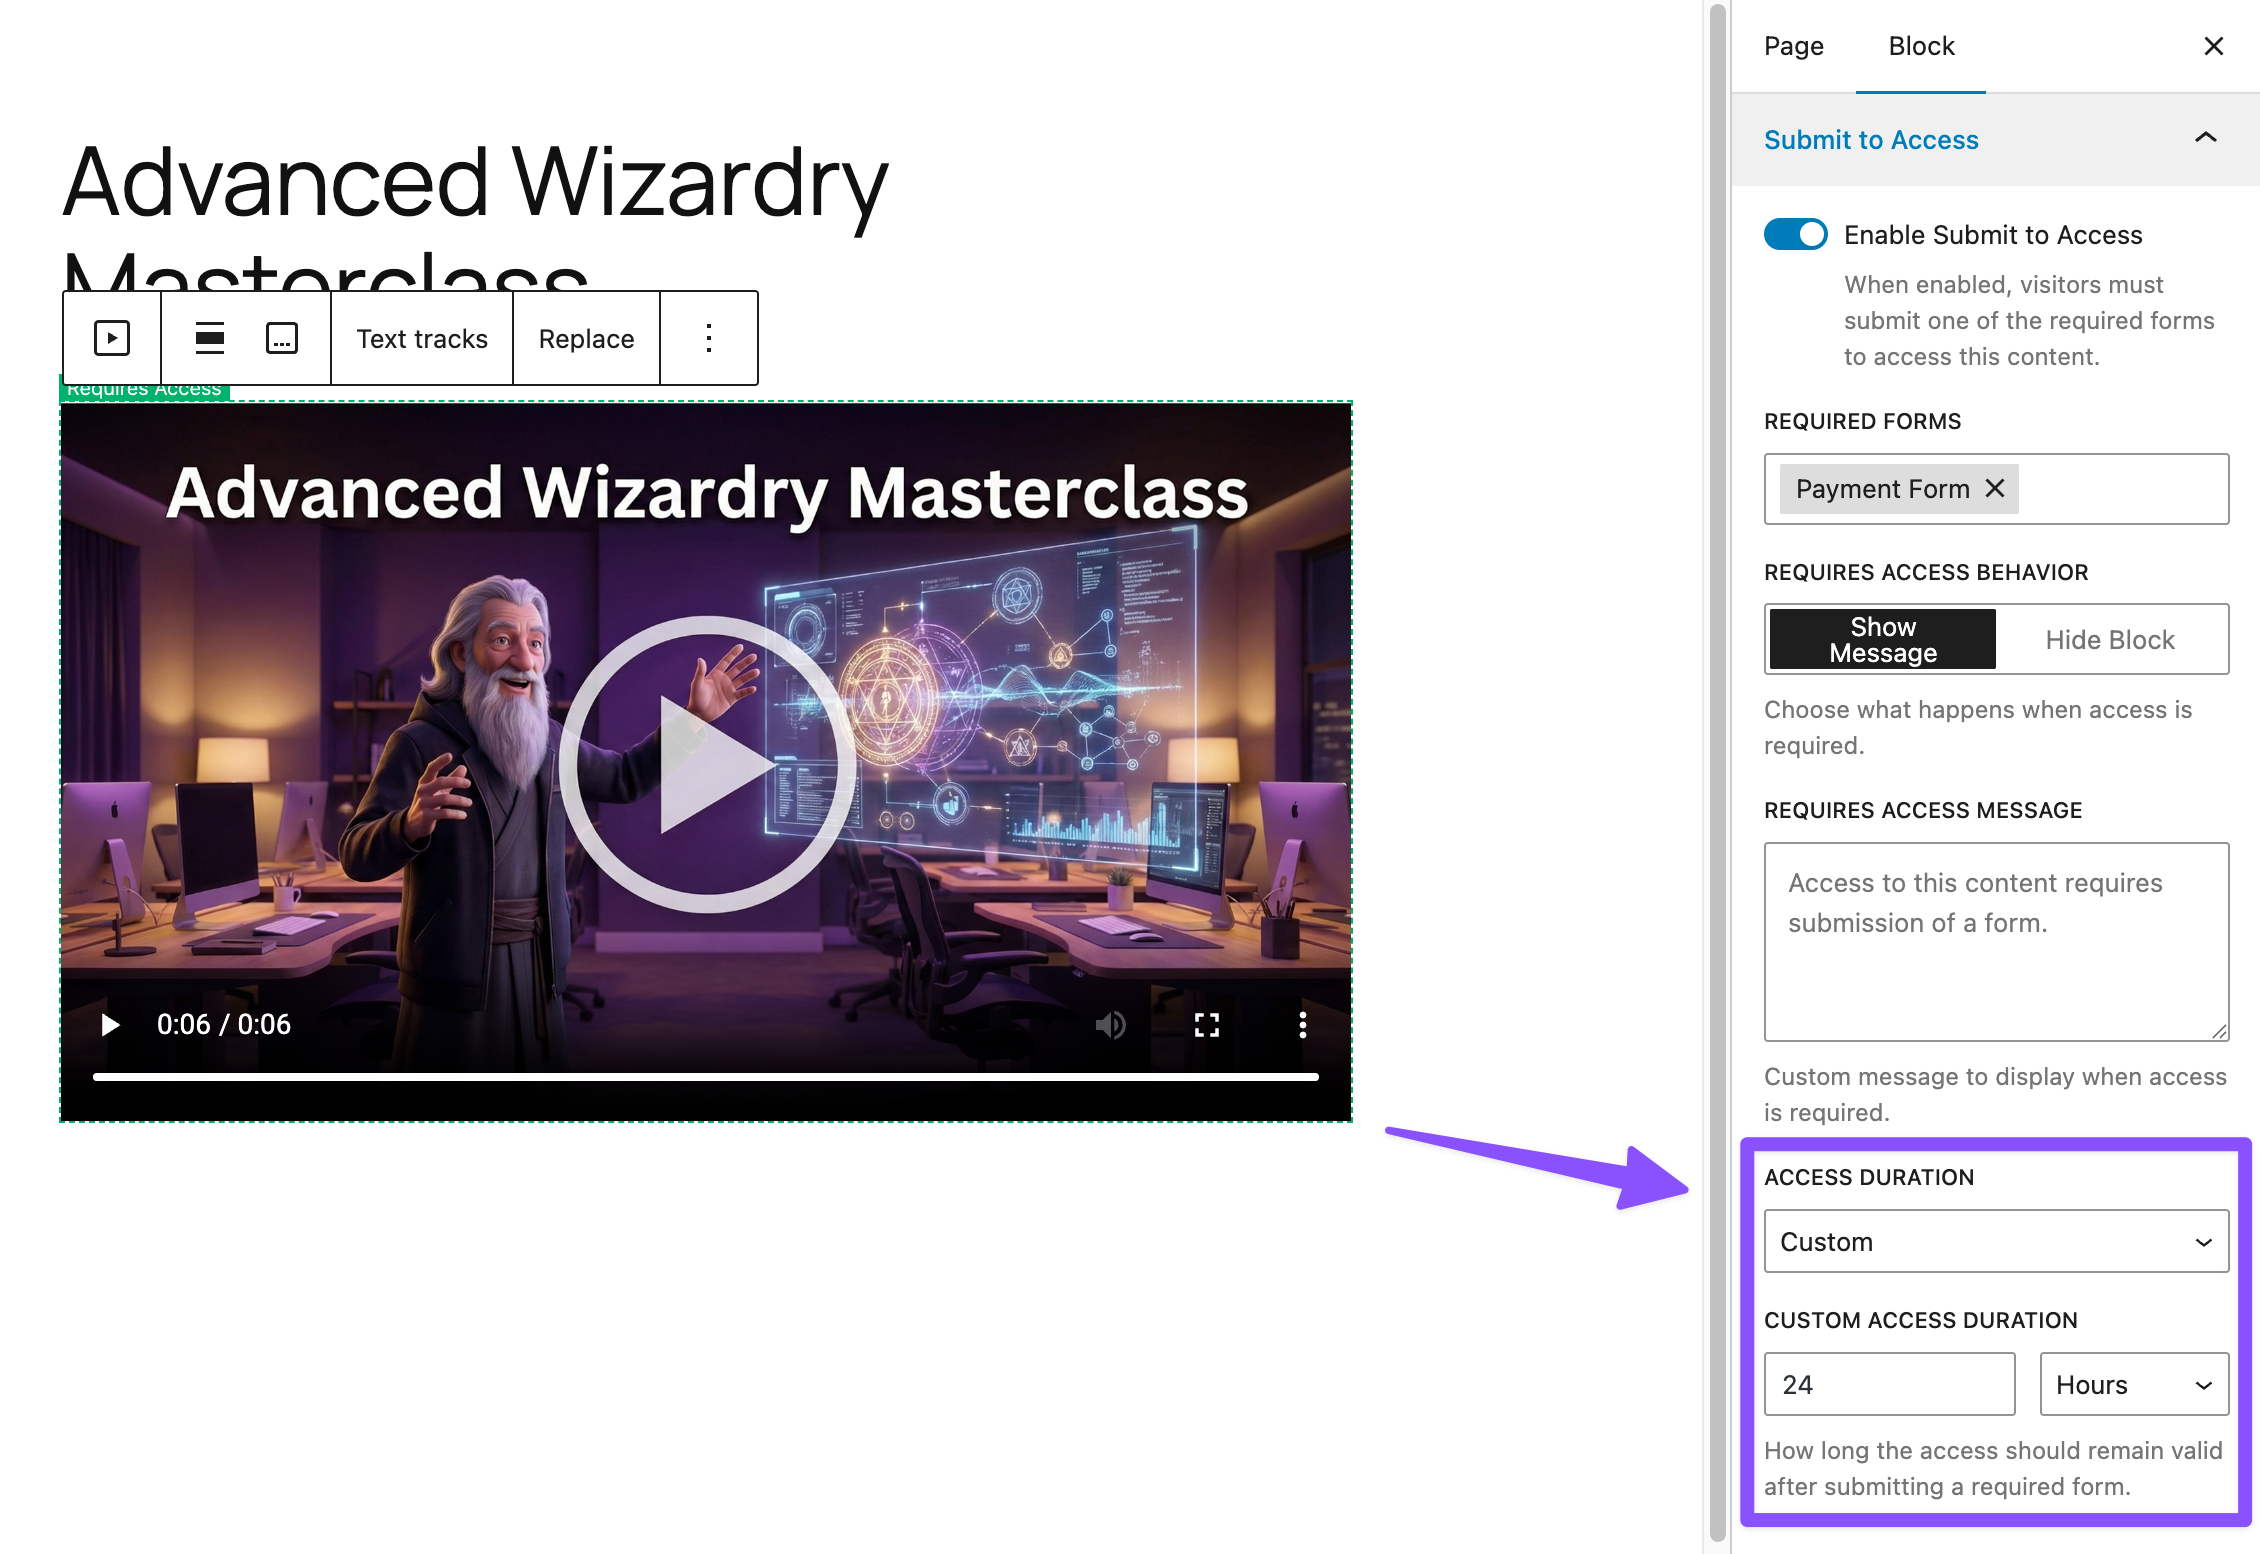
- Open the block’s settings › Enable Submit to Access.
- Under Required Forms › select the payment form › Save.
3 – Set Access Duration
After someone pays, how long can they access the content? That can be up to you! For example, a 24-hour video rental would need different settings than a course with lifetime access.
GP Submit to Access lets you control exactly how long access lasts after payment.
To do this, open the gated block’s settings › click Access Duration, and choose from three options:
- Browser Session: Expires as soon as the visitor closes their browser.
- Forever: Lasts indefinitely (as long as the user’s browser cookies aren’t cleared).
- Custom: You set the minutes, hours, days, weeks, or months.
Other real-world examples:
- If you’re selling a limited-time course, you can set Custom access for 30 days.
- Offering a lifetime access to a resource library? Choose Forever.
4 – Customize Paywall Message
Without clear communication, a paywall can feel like a dead end rather than a door. A simple, friendly message goes a long way in explaining what’s behind a paywall and why it’s worth unlocking.
Here’s how:
- Navigate to the block you’ve gated on your page.
- Open the blocks’s settings › go to Requires Access Behaviour › select Show Message.
- Write your message in the Requires Access Message field.
Pro-tip
You can move the form’s position inside the message. Just add the {form} tag exactly where you want it to appear.
Global Defaults
You can set site-wide defaults for Access Duration and Paywall Message. These apply to all gated content on your site unless you override them individually.
To do this, go to Forms › Settings › Submit to Access.
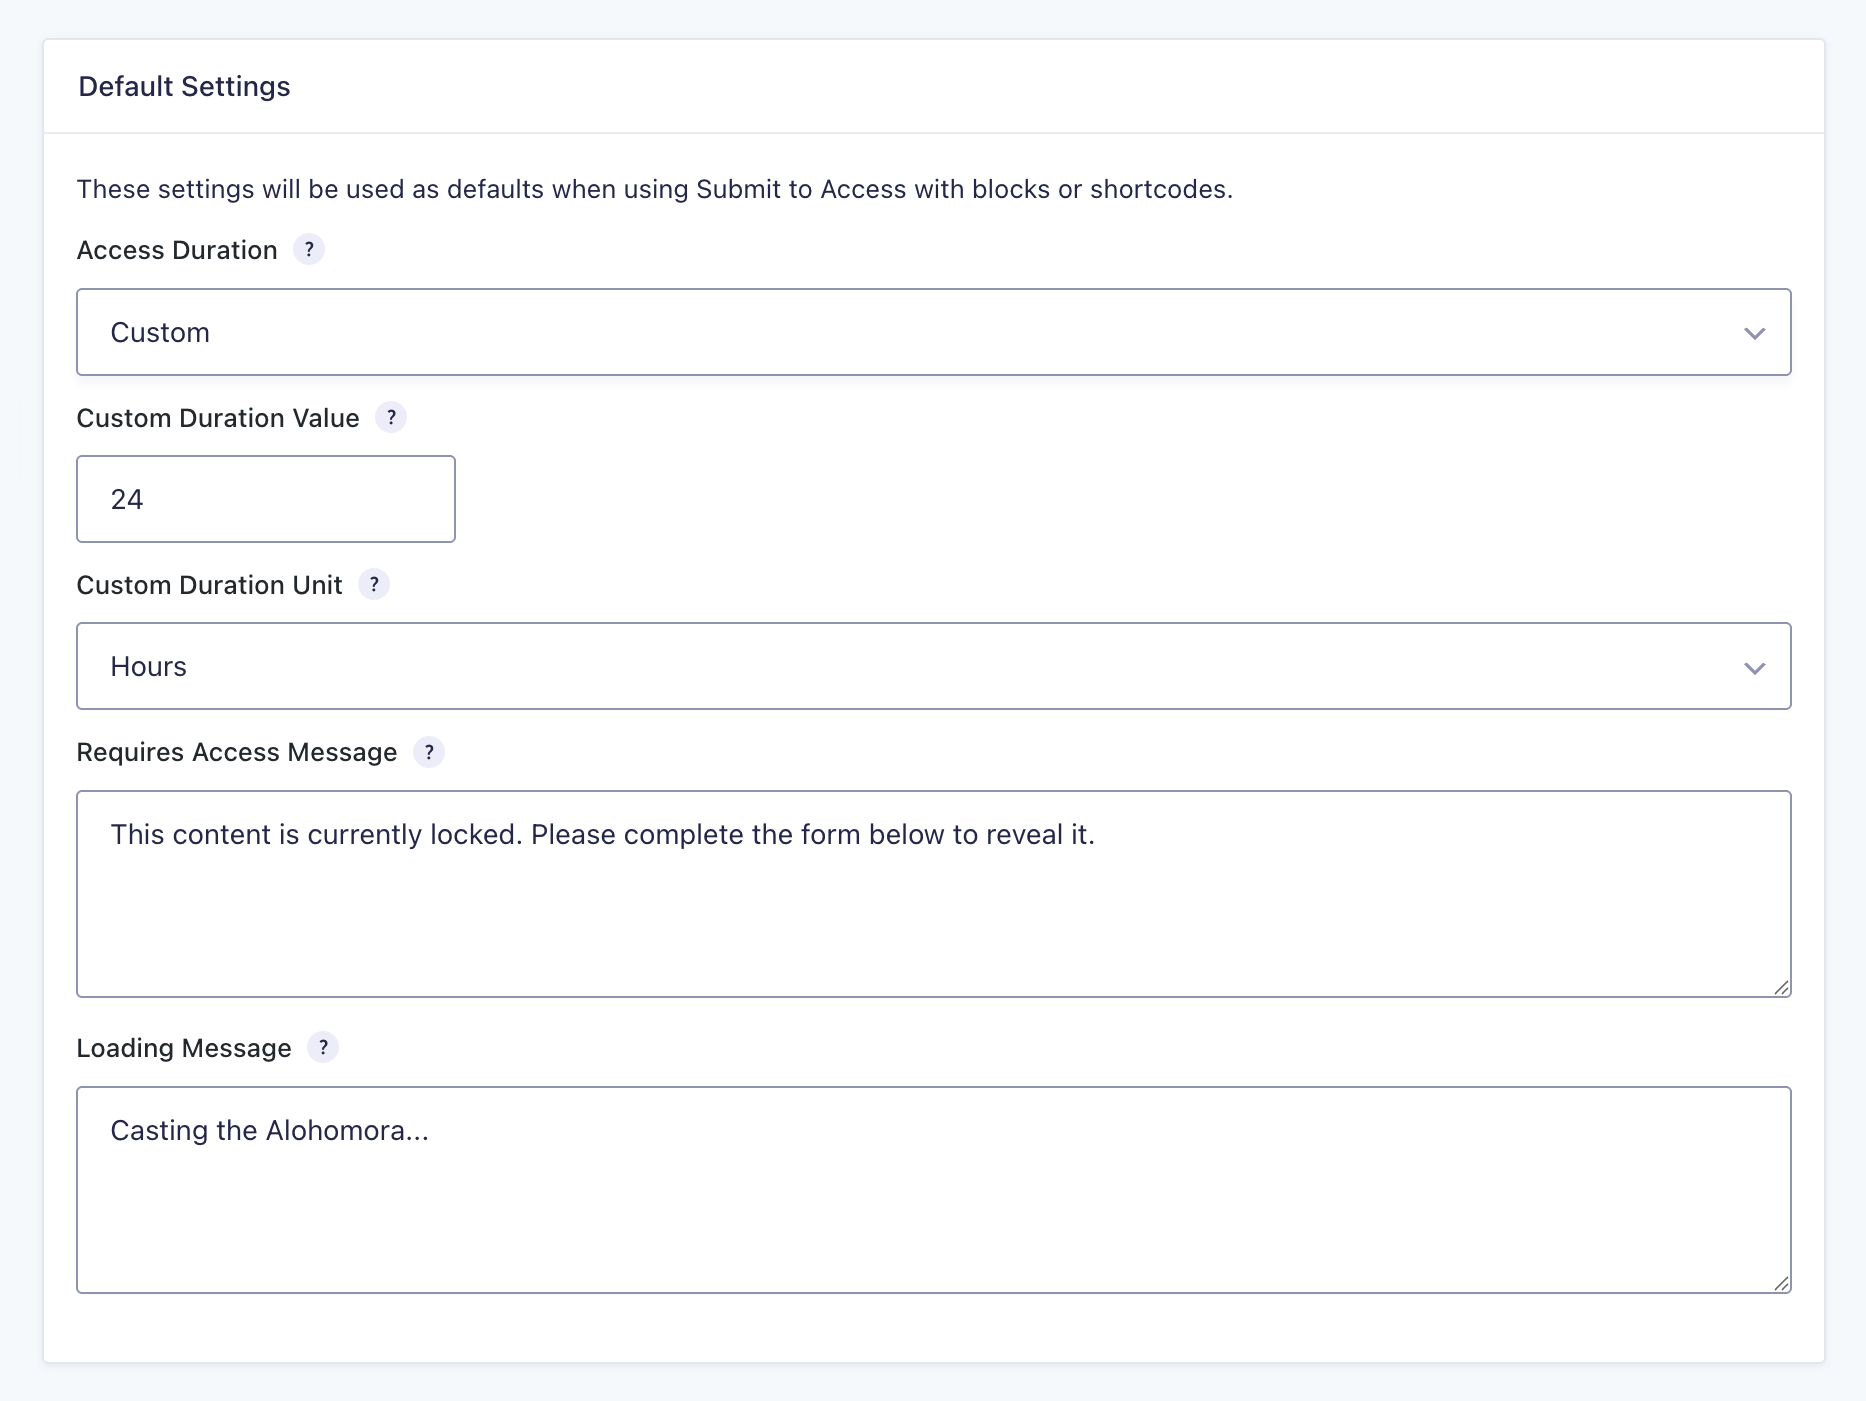
Here, you can also change the Loading Message, which is the brief message people see while the content is loading.
Taking It Further
Here are some more handy tricks to level up your content paywalls:
- Tiered Pricing with GP Conditional Pricing: Offer multiple access levels on a single form. For example, visitors can pay $19 for 30-day access or $49 if longer.
- Access by User Role: Use the “has access” filter to automatically grant access to logged-in users depending on their role (Subscriber, Customer, etc.). This bypasses the paywall.
- Managed Limited Inventory with GP Inventory: Reduce stock every time a payment is made. For example, selling limited course seats or workshop tickets.
- Gate and Redirect: Keep your main page clean by using the “page redirect” option to send visitors to a standalone form page. Once they pay, they’ll land right back on the gated content.


Can this be used with page builders like Beaver Builder? How is the access actually restricted? Are you using a cookie? Sounds like users need to be logged in?
Hi Jordan,
Yes, you can set up this up on page editors like Beaver Builder and Elementor via the shortcode feature. Yes, it uses Cookies, but it also has the option to store access for logged-in users, in the user meta via this filter.
Best,