How to Consolidate Event Registrations from Multiple Forms at Once
Using multiple forms at once for event registrations? Learn how to automate data exports from all forms at once and consolidate data for easy analysis.
- Why Consolidate Data from Multiple Forms?
- Step 1: The Forms
- Step 2: Set Up Entry Automation
- Step 3: Fully Automate the Export Process
- Multi-Form Data Analysis On Your Terms
This article is written by our friends at CosmicGiant! Learn more about CosmicGiant products here.
If you run a website that organizes multiple workshops, conferences, or classes, chances are you have several registration forms running at once. Since each event has its own form (or set of forms), exporting and analyzing data across multiple reports can quickly become tedious. Boring. Robotic.
Gravity Forms does offer an export option, but it’s limited—you can only export one form at a time. And if you need to share specific data with different people, you’ll find yourself repeating the process over and over. Ugh, that’s a whole lot of manual work.
But don’t worry! I’m going to show you a much more efficient method to handle multi-form event registrations that’s also completely automated.
Why Consolidate Data from Multiple Forms?
You might be wondering why you’d need to export and consolidate multiple event registrations in the first place. Let’s say you want to analyze specific data across all your events—like demographics. You might want to know the age and gender of your various attendees to get a feel for where your marketing campaigns are landing. Wouldn’t it be easier to gather that data from all your forms into one concise document?
With CosmicGiant’s Entry Automation, it becomes possible. You can export your data into one tidy file, in the format that suits your workflow—CSV, Excel, JSON, or PDF.
Ready to learn how? Let’s dive in!
Step 1: The Forms
The first step of exporting data is to collect it! Gravity Forms makes it easy to set up simple forms, but you can significantly amp up your registration process by allowing registrants to sign up multiple attendees at once. This is where the magic of GP Nested Forms, a plugin that essentially helps you create forms within forms, comes in.
Start by installing and activating Nested Forms. Then, create a main registration form and a separate form to collect guest information. They can be as simple or as complex as you’d like.
Once your guest form is ready:
- Head back to the main registration form.
- Add a Nested Forms field.
- Go to the field settings and select your guest form from the drop down.
- Under Display Fields, select all the fields you want to include from your guest form.
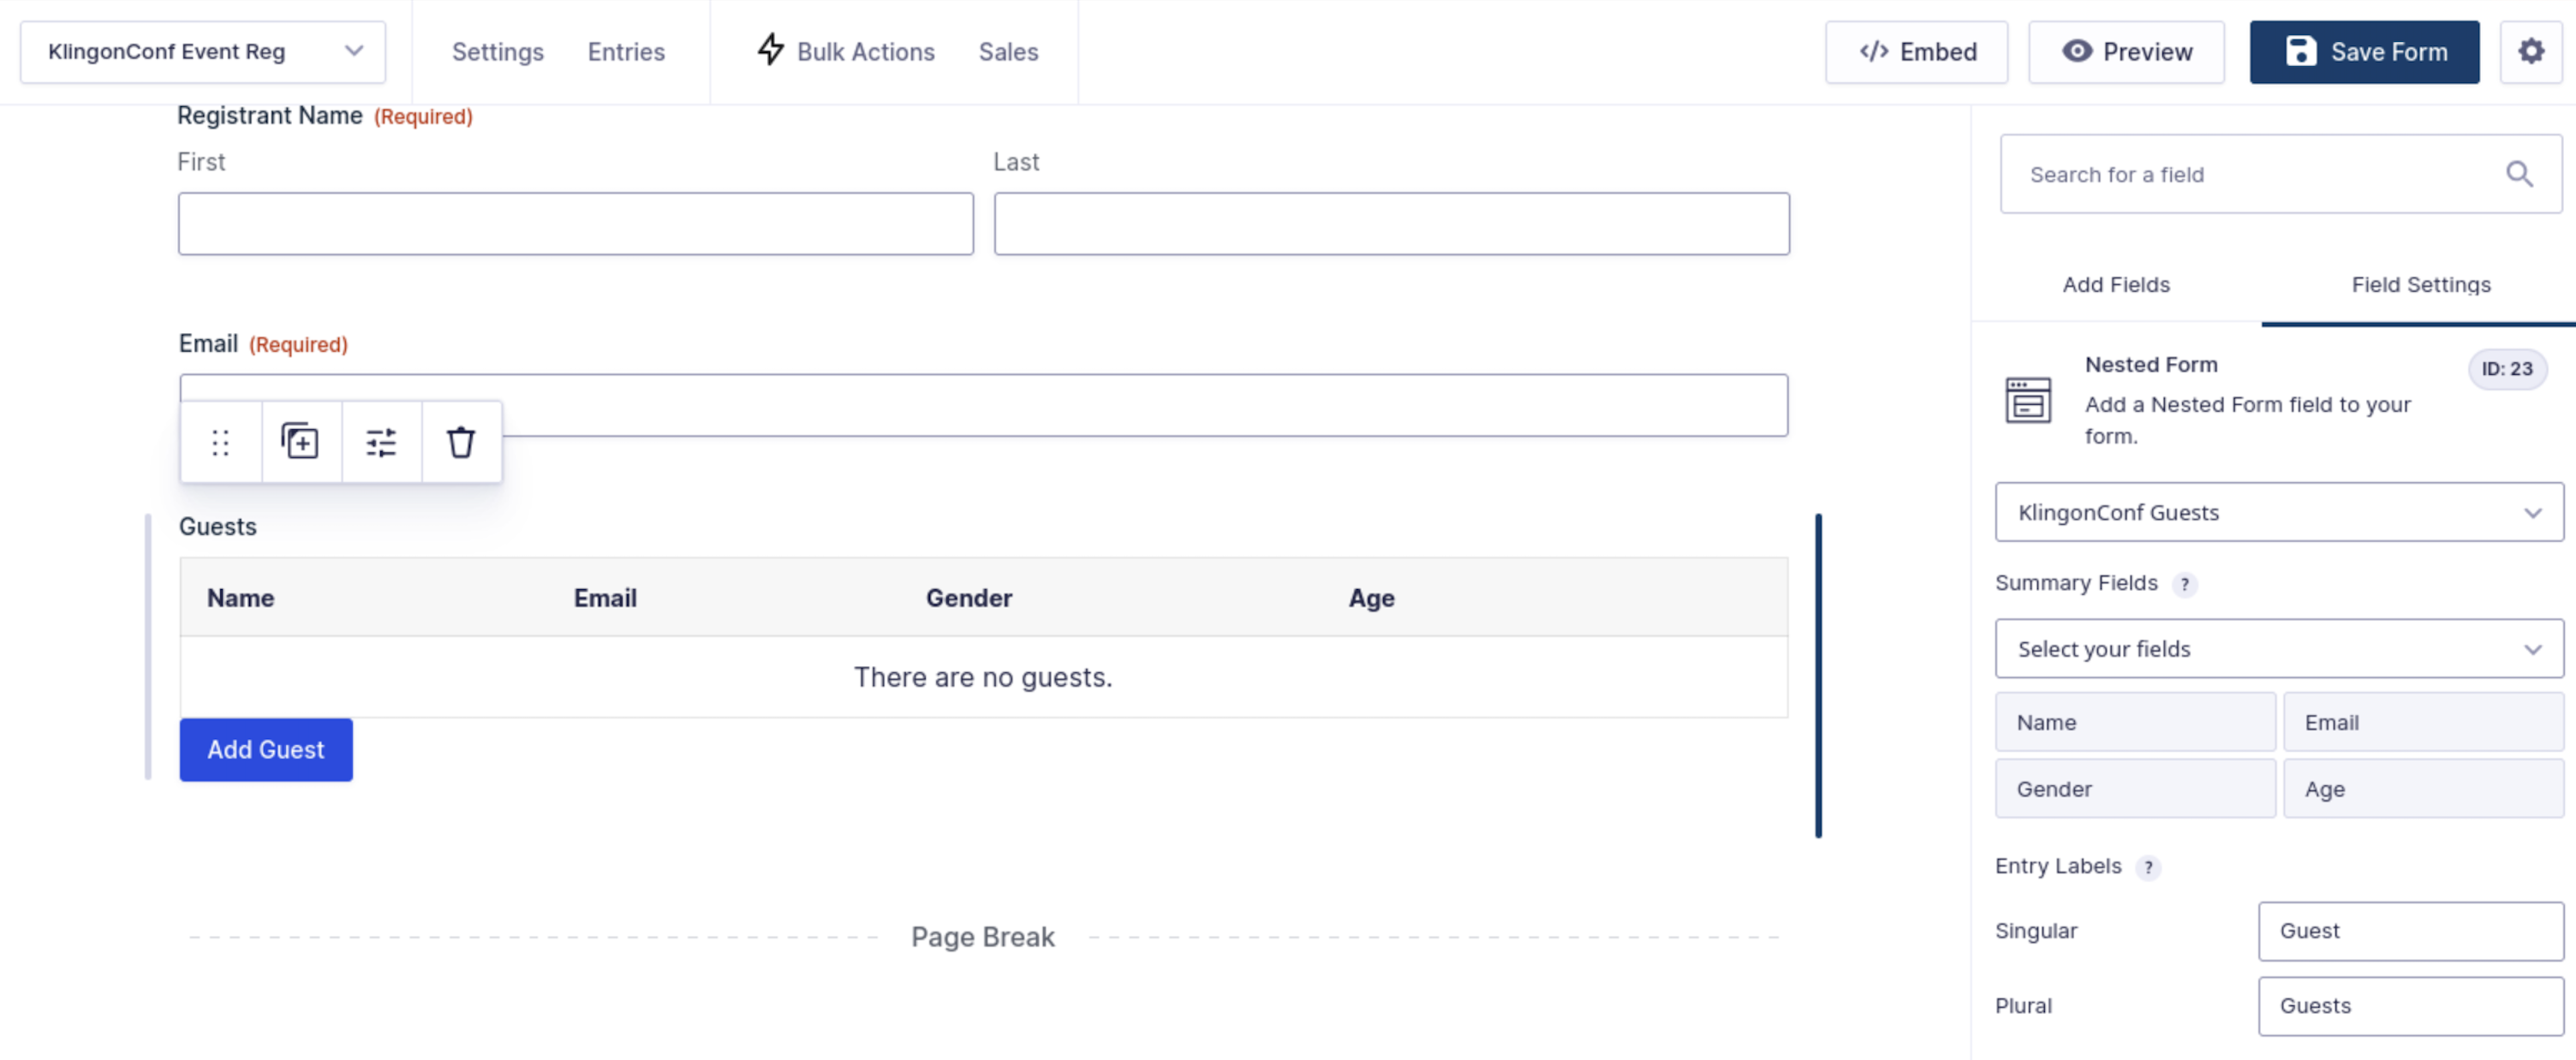
When users fill out the main form, they’ll be able to add guest information within the same registration. It’s that simple!
Step 2: Set Up Entry Automation
Now that you know how to create complex nested registration forms, let’s set things up for ultimate efficiency in your data exports.
CosmicGiant’s Entry Automation add-on simplifies repetitive tasks like exporting entries, deleting specific data, and sending reminder notifications. With Entry Automation 6.0 (and an Agency or Pro license), exporting entries from multiple forms becomes seamless with the Multiple Forms Extension. You’ll feel right at home navigating through the menus.
After installing and activating Entry Automation and the Multiple Forms Extension, go to your WordPress Admin, navigate to Forms → Entry Automation → Multiple Forms Tasks, and click Add New to create a Task to handle multiple form entry exports.
Create different Tasks for different data sets—demographics, sales, contact info, etc.
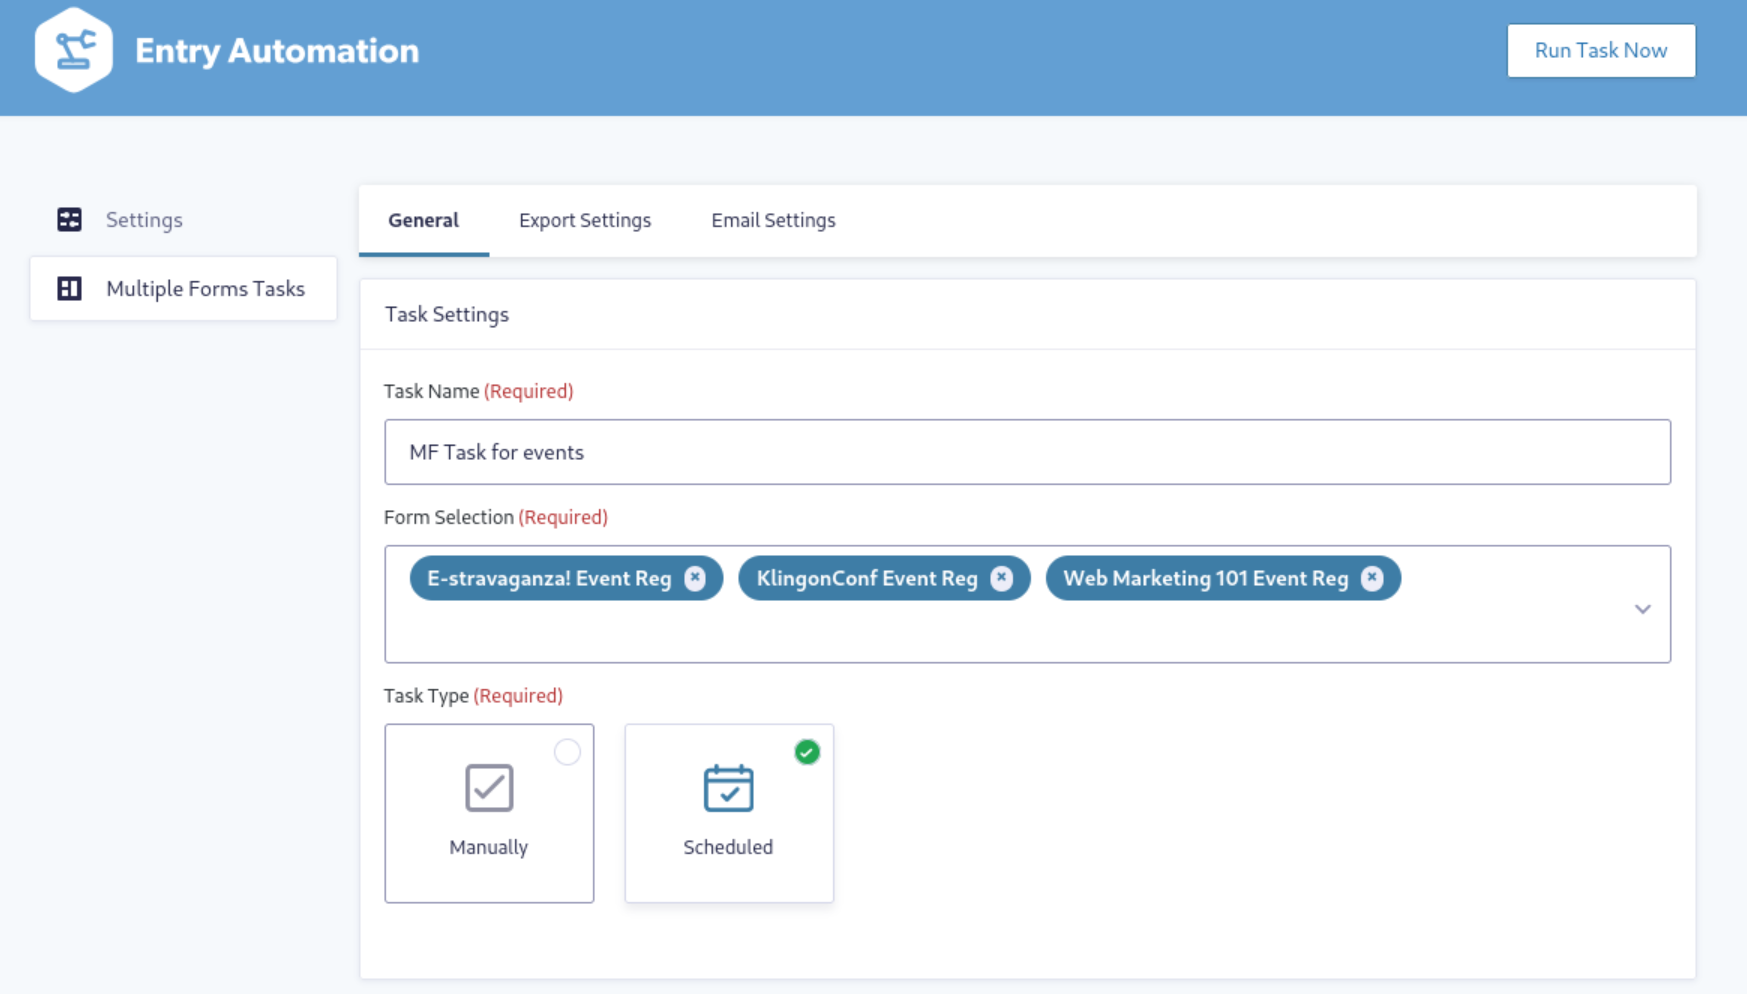
Step 2.1: General Tab Configuration
Under Task Settings:
- Name your Task.
- Choose the forms you want to include in the export in the Form Selection.
- Set the Task Type to run manually or on a schedule. Setting up a schedule will make this Task completely automated.
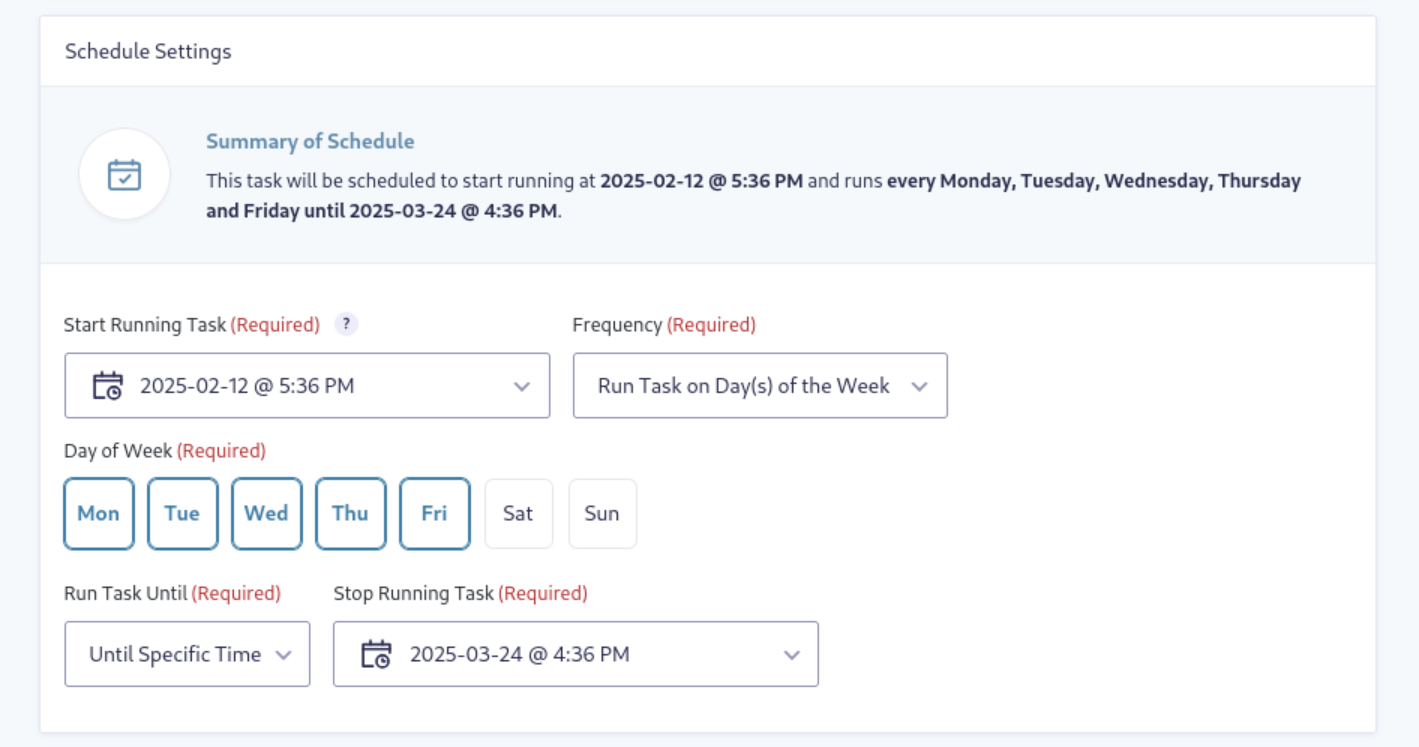
If you choose Schedule, the Schedule Settings menu gives you a few options.
- Start Running Task: when it should run the first time.
- Frequency: how often it should run.
- Run Task Every: several options for hour, day, week, and month.
- Run Task Until: when it should stop running.
Under Target Entries Settings:
- Decide which entries should be targeted for the export. There are choices for:
- All Entries
- All Entries Since Last Task Run
- Custom Date Range
- Choose the Entry Status(es) from which you want to export
- Active, Unread, Read, Trash, or Spam.
With Custom Date Range you have several options for beginning and ending dates. You can use plain English phrases such as “Yesterday,” “5 hours,” or “3 weeks.”
Step 2.2: Export Settings Tab
File Settings is where you can select the export format (CSV, XLSX, JSON, or PDF) and configure the sort order for entries in the Export Order Settings. Then, the Field Selection Settings section is where the magic happens.
Here, you’ll set up your file export using the forms you previously selected under the General tab.
Start by creating one column. It helps to imagine that you’re setting up columns in a spreadsheet, no matter what file type you’re exporting. For our example, we can configure the first column as Registrant First Name.
Moving to the right under Source Fields, we then select the form fields from where we want to pull the data.
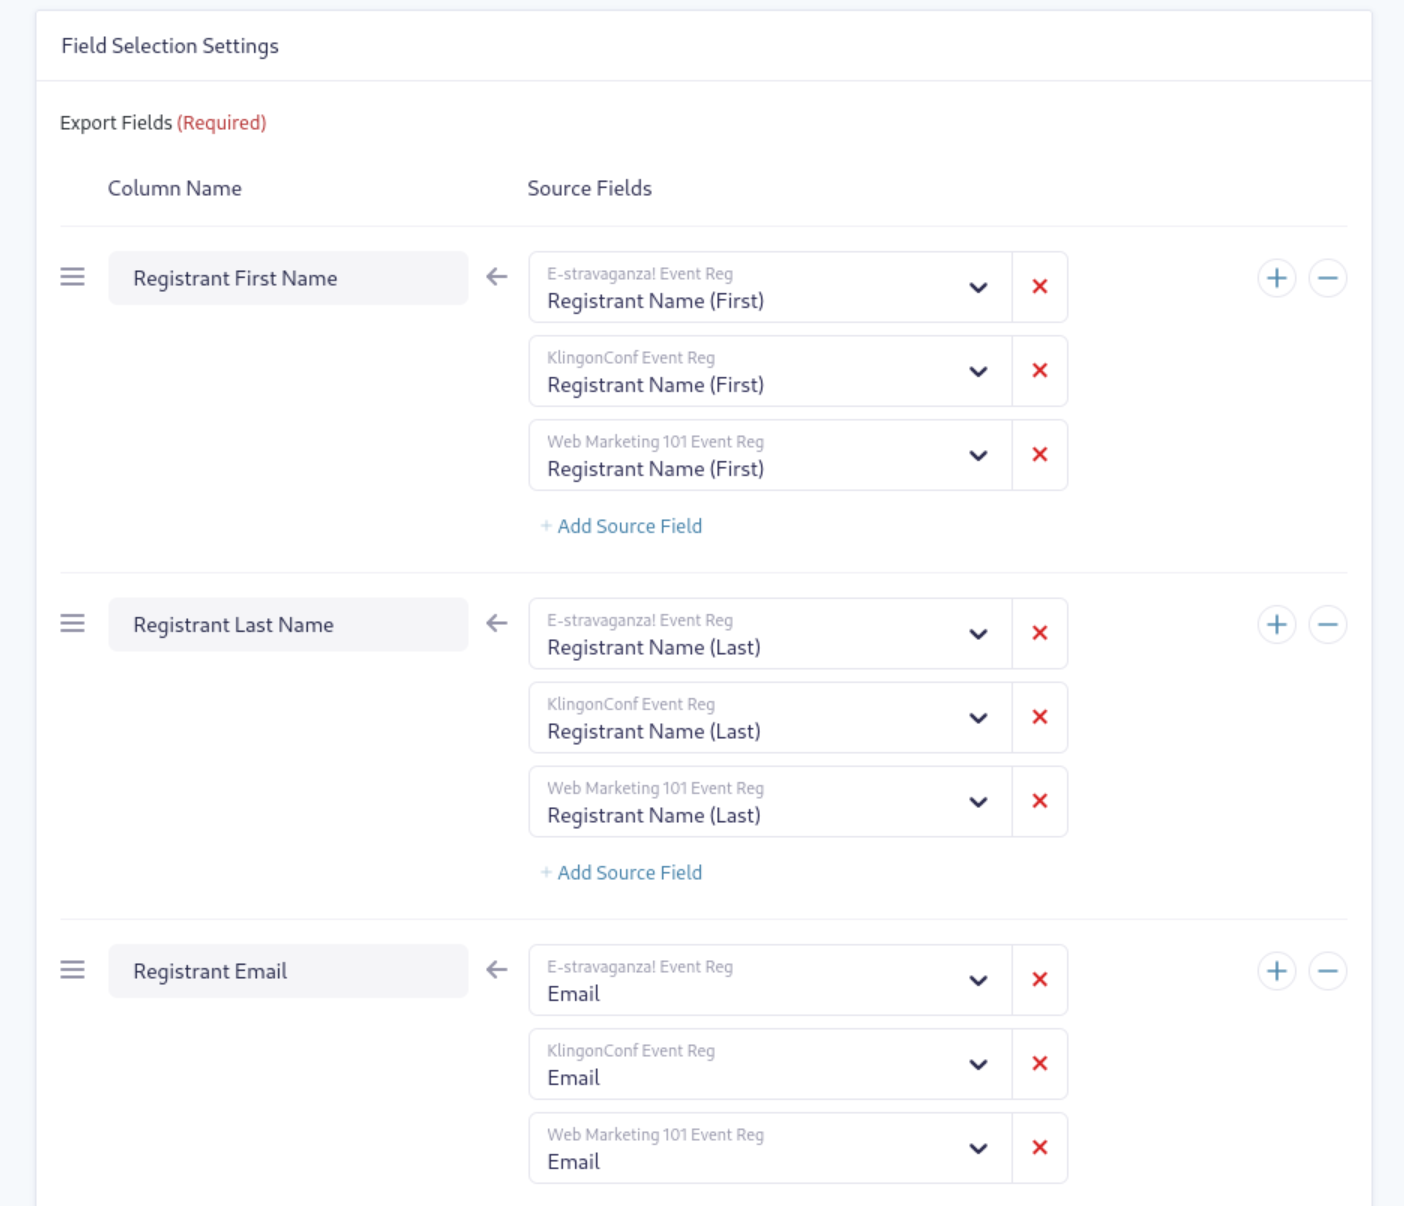
We can add as many Source Fields as we like, but for our purposes, it makes the most sense to only pull the registrant’s first name from each form. The first two columns might look something like this:
| Column Name | Source Fields |
| Registrant First Name | E-stravaganza Event Reg Registrant Name (First) |
| KlingonConf Event Reg Registrant Name (First) | |
| Web Marketing 101 Event Reg Registrant Name (First) | |
| Registrant Last Name | E-stravaganza Event Reg Registrant Name (Last) |
| KlingonConf Event Reg Registrant Name (Last) | |
| Web Marketing 101 Event Reg Registrant Name (Last) |
I could continue adding as many columns and existing source fields as I want to include in my export file, which also includes data from any Nested Forms I’ve added. I can select those fields from the drop down just as I would any other.
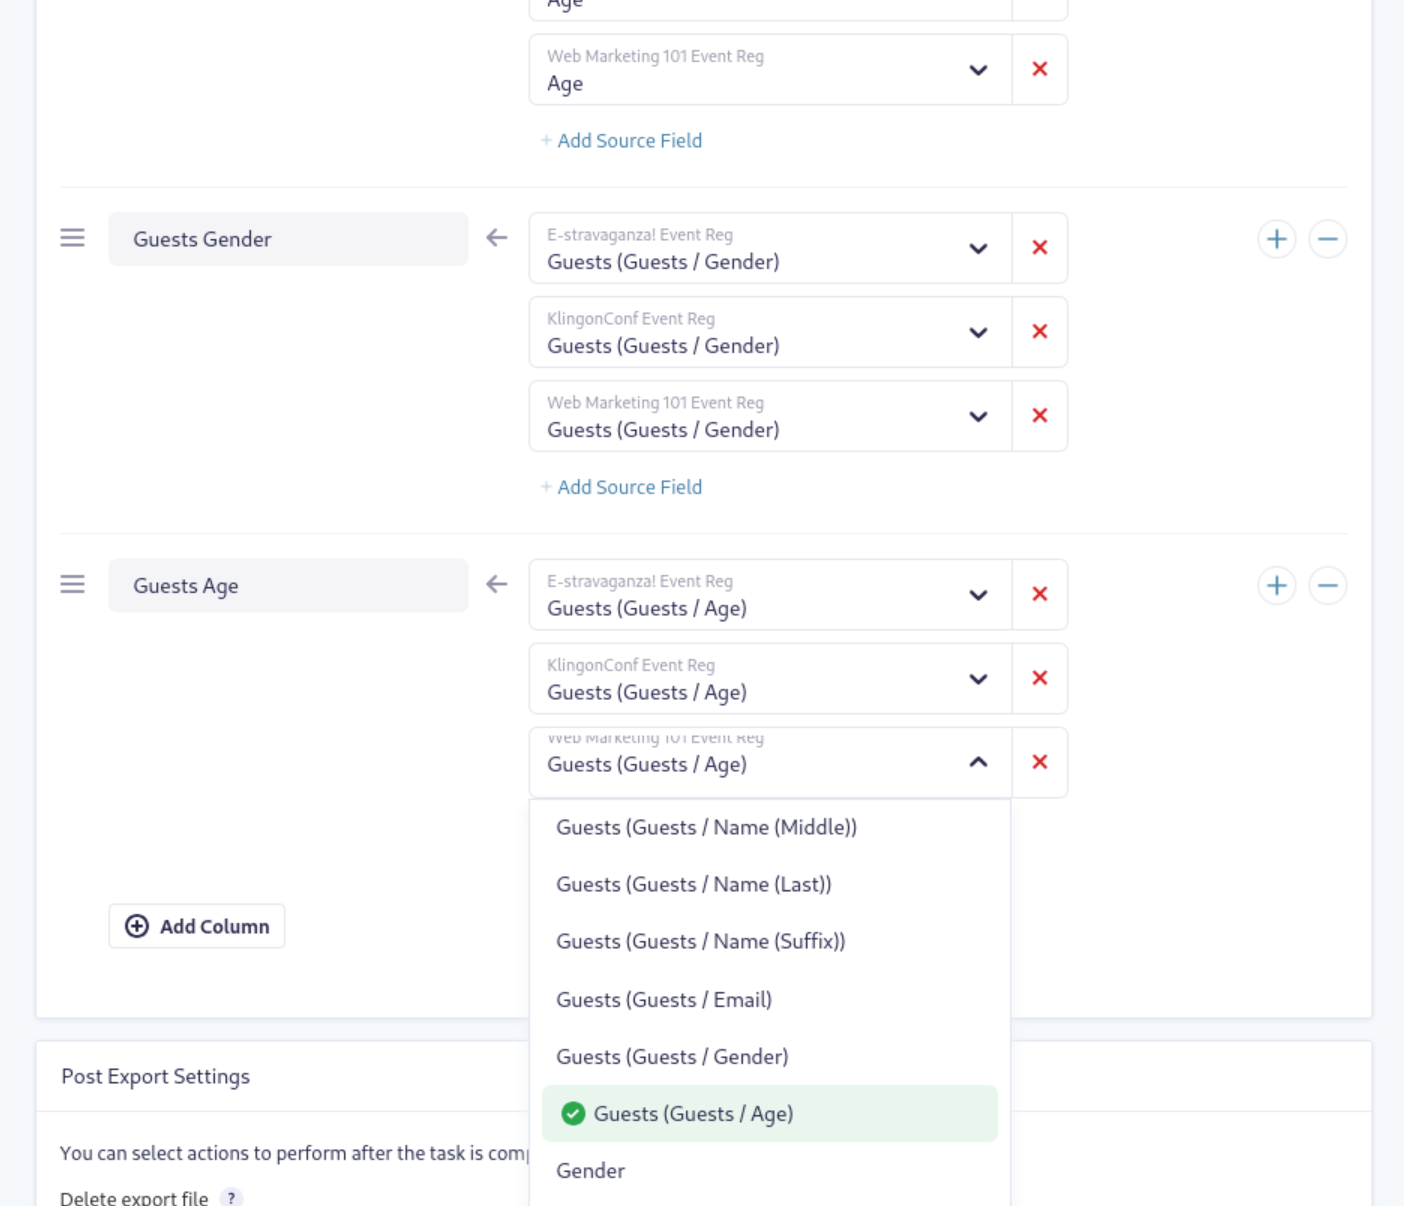
Once you’re done, save your settings.
Step 3: Fully Automate the Export Process
To make the process completely hands-off, head to the Email Settings tab and configure your export to be automatically emailed to you or your team.
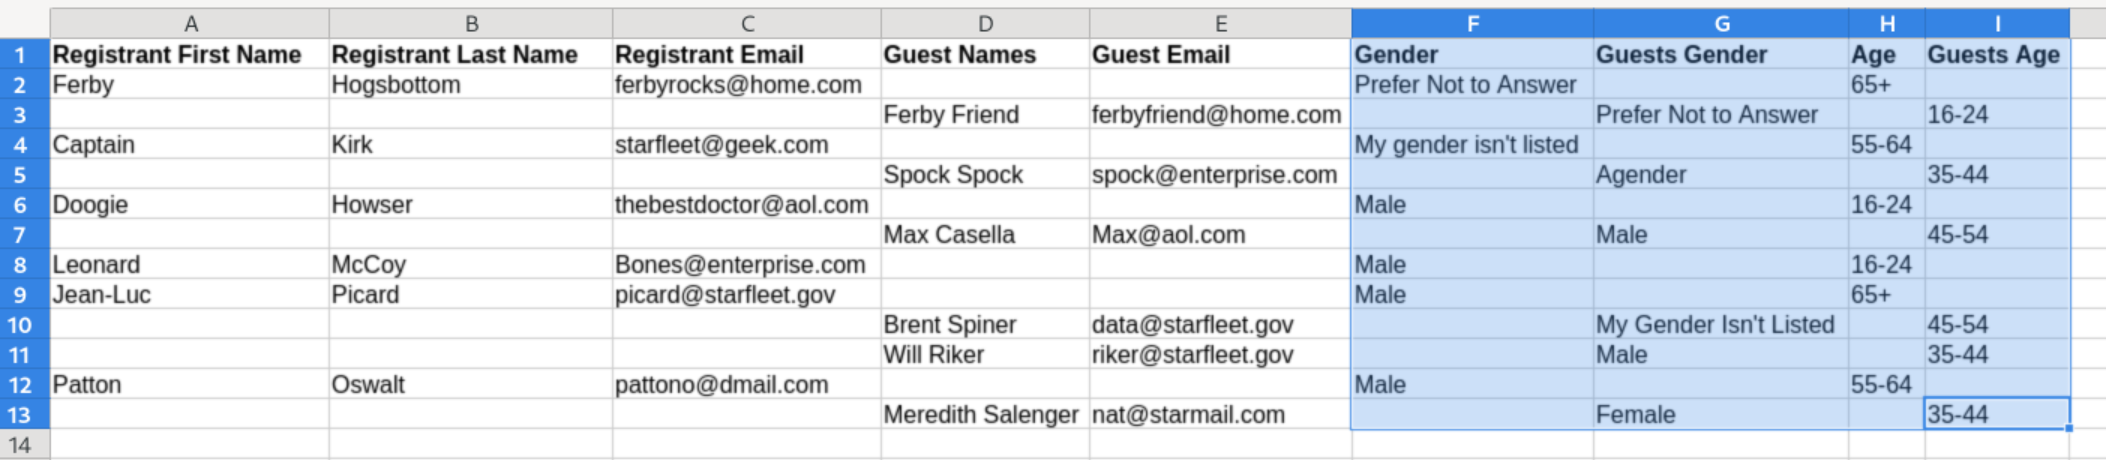
And just like that, your multi-form entry data exports will come right to you! You can analyze your form data across multiple forms much more efficiently and set up various tasks to focus on contacts, sales, demographics, or anything else you like.
Multi-Form Data Analysis On Your Terms
Managing multiple event registrations, even with plus-ones, doesn’t have to be a chore. With GP Nested Forms, your registration forms will be more professional and feature-rich. And when you automate data exports with CosmicGiant’s Entry Automation, you’ll spend less time exporting and more time analyzing. Whether you’re working solo or with a team, sharing data is a snap.