How to Update People in Drip from Gravity Forms
Update Drip people right from Gravity Forms—add them to workflows, update their personal info, and manage tags without lifting your wand. 🪄
- Step 1 — Install and Activate GC Drip
- Step 2 — Create a GC Drip Feed
- Step 3 — Set Up GC Drip Feed
- Step 4 — Test Connection
- You’re all set!
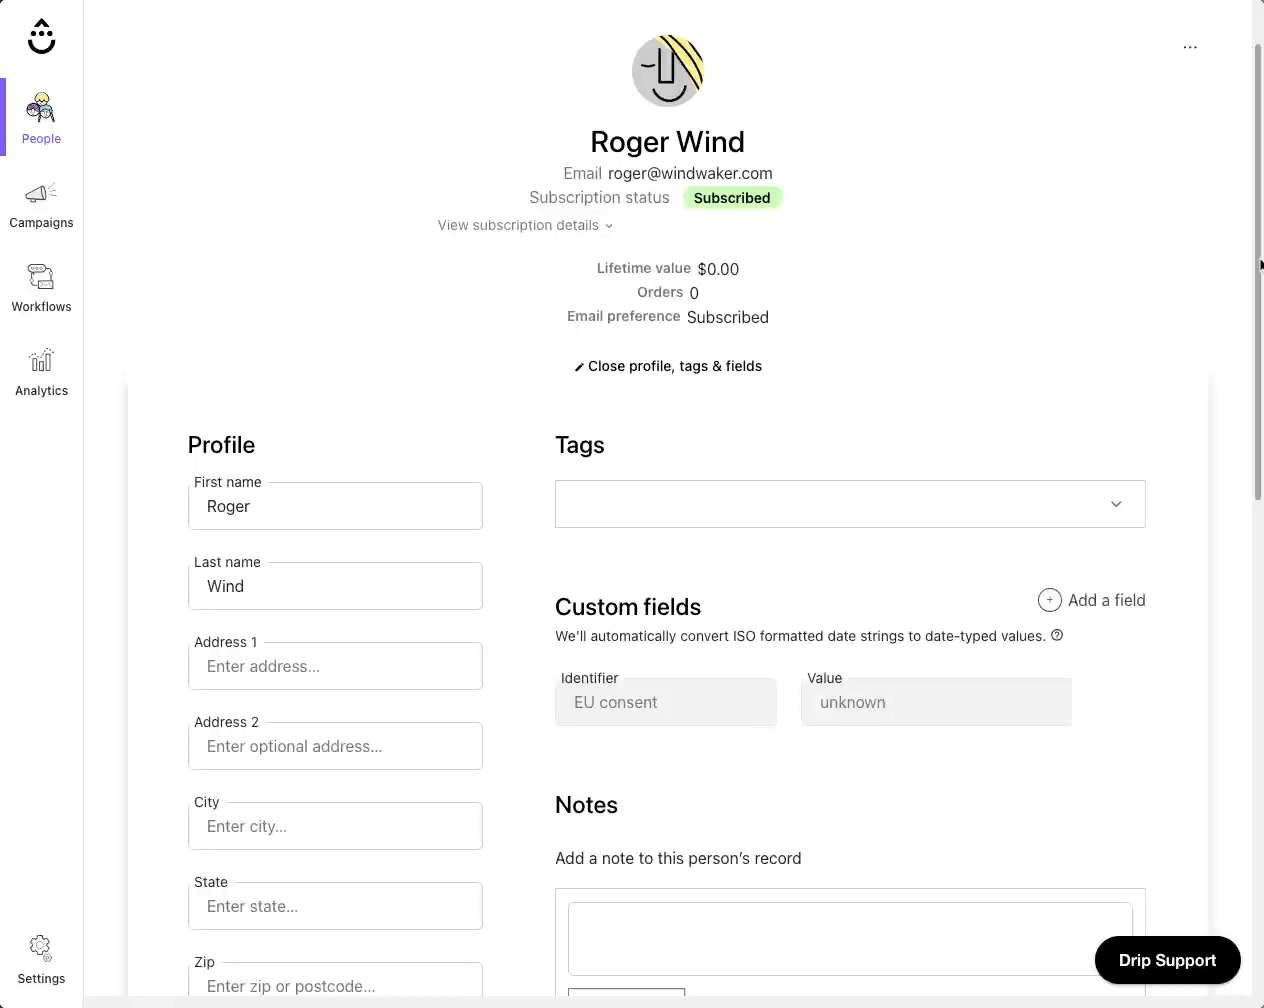
Drip profiles are equipped to store detailed subscriber data from custom fields and tags to behaviors and workflows. This helps you target your email content to people’s interests—and the more accurate that data is, the more relevant your emails will be.
GC Drip connects Gravity Forms to Drip, a combo that lets you not only add but also update all details in people’s profiles directly through powerful forms. Whether it’s a purchase follow-up form, contract renewal, or a feedback form, you can instantly move people throughout their subscriber lifecycle — adding them to workflows, updating tags, and personalizing emails without lifting your wand. 🪄
Let’s see how it works!
This article requires the Gravity Connect Drip plugin.
Buy Gravity Connect to get this plus other premium Gravity Forms plugins!
Step 1 — Install and Activate GC Drip
GC Drip is available through Gravity Connect. You can easily install and activate it through Spellbook.
Step 2 — Create a GC Drip Feed
After connecting your Drip account to Gravity Forms, head to the form you want to use. In the Settings menu, click on Drip to get to the GC Drip Feeds screen. From there, click on Add.
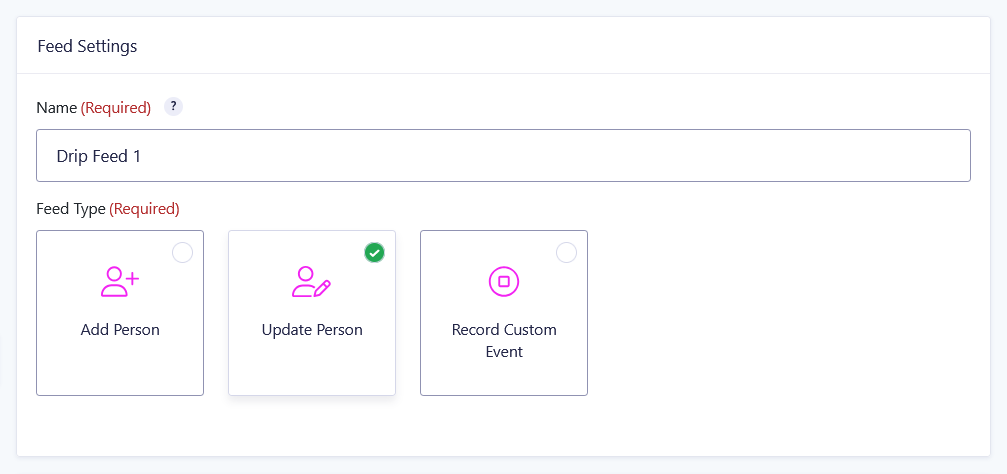
Step 3 — Set Up GC Drip Feed
Name your feed and select the “Update Person” Action.
Head down to the Action Settings and map the following fields:
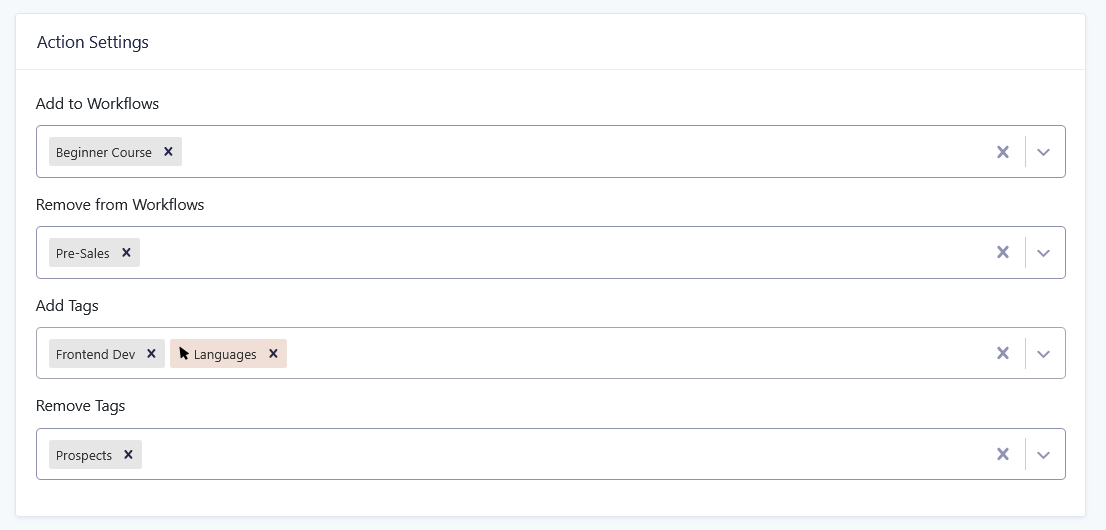
There are two ways you can manage Drip workflows from Gravity Forms using GC Drip.
Add to Workflows: Choose which Drip workflow(s) to add the person to.
Remove from Workflows: Choose which workflow(s) to remove the person from.
Add Tags: Select from your Drip tags or any form field which tags to add to the person. You can create new tags on the fly too.
Remove Tags: Select from your Drip tags or any form field which tags to remove from the person.
Drip workflows are automated sequences that guide people through a journey you specify—send specific email, apply certain tags, and possibly branch groups based on behavior. Tags, on the other hand, are labels that help you categorize people into bigger groups (e.g. lead, haircare-customer, event-attendee) for segmentation, workflow triggering, and audience filtering. Together, they power personalized automation in Drip.
Going to Personal Details, you can map and update all of the following fields. Email is the only required field since it’s used to identify the person:

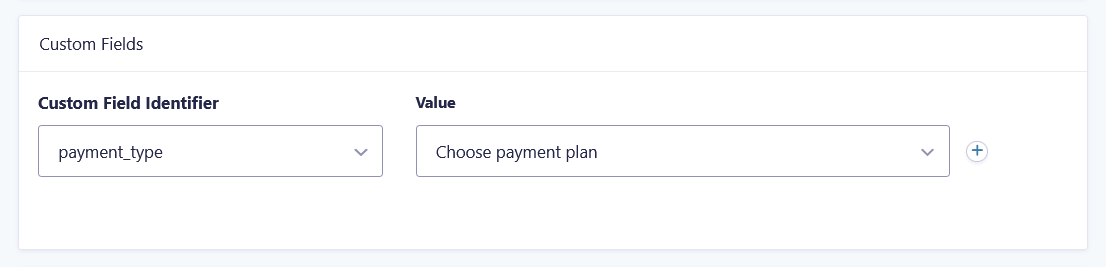
Right below, in the Custom Fields section, you can map form fields, entry properties, or custom values to add or update specific details to the new person. You can select from existing identifiers or create new ones.
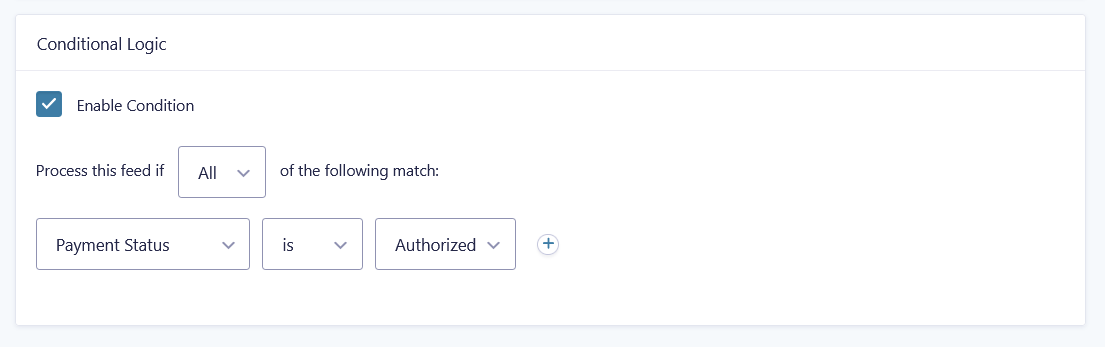
Lastly, you can use conditional logic to trigger feeds based on user behavior and other dependencies.
Say a lead signs up through a newsletter form—just name and email. Later, they fill out a service inquiry form where they choose their business type and budget. If they select “Agency” and a budget over $5,000, conditional logic routes the submission through a special feed that tags them as a high_value_lead and updates custom fields like business_type and budget_range.
Step 4 — Test Connection
Once your feed is saved and ready to go, run a test entry to confirm everything is set up correctly.
You’re all set!
The next step in your automation workflow is to record Gravity Forms custom events in Drip. It’s easy-peasy lemon-squeazy! 🍋
If you have any questions about this connection, let us know in the comments!
PS—Here’s a tip for keeping your lists clean: validate emails in real-time with GP Email Validator. 🤫