How to Send Gravity Forms Event Registrations to Google Calendar and Google Sheets
Running event registrations through Gravity Forms? Here’s how to send each submission to Google — as a Calendar event, a Sheets row for your records, or both.
- How Gravity Connect Sends Data to Google Calendar and Sheets
- What You’ll Build
- What You’ll Need
- Set Up the Google Calendar and Sheets Feeds
- Taking It Further
Gravity Forms makes it easy to collect the details you need for an event registration — who’s coming, when it’s happening, and whatever else your event calls for. Once you have that data, there’s a lot you can do with it. So I got curious and looked through the Gravity Forms community forum to see what users are typically trying to do.
A common approach I found: sending registration data to Google Calendar to create an event, and to Google Sheets to log those details. And most users were reaching for Zapier to do this! So I’d like to share a much easier way — using Gravity Connect to handle both without leaving Gravity Forms.
This guide uses two Gravity Connect Connections: GC Google Calendar and GC Google Sheets.
How Gravity Connect Sends Data to Google Calendar and Sheets
Gravity Connect uses feeds to send your form data to Google Calendar and Sheets directly from Gravity Forms. You set one up for each Connection, configure it once in your form settings, and every submission gets sent to one, the other, or both.
This setup uses two Connections:
- Gravity Connect Google Calendar creates a Google Calendar event from each submission using the event details collected in your form, like the event name, date, time, and attendee email.
- Gravity Connect Google Sheets adds the registration data to your spreadsheet as a new row, including registrant details and any other fields you want to track.
What You’ll Build
By the end of this guide, each form submission will:
- Create a Google Calendar event using details from the submission
- Add the registration data as a new row in Google Sheets
- Keep Calendar events and Sheets rows synced when entries change
What You’ll Need
- Gravity Forms (any license)
- Gravity Connect (installed via Spellbook)
- Gravity Connect Google Calendar (aka GC Google Calendar)
- Gravity Connect Google Sheets (aka GC Google Sheets)
- To install, open Spellbook › navigate to Connect › activate both.
- A Google account
- A Gravity Form with fields for registration and event details
Note: This setup uses two Connections, so check if your Gravity Connect license covers both before getting started.
Set Up the Google Calendar and Sheets Feeds
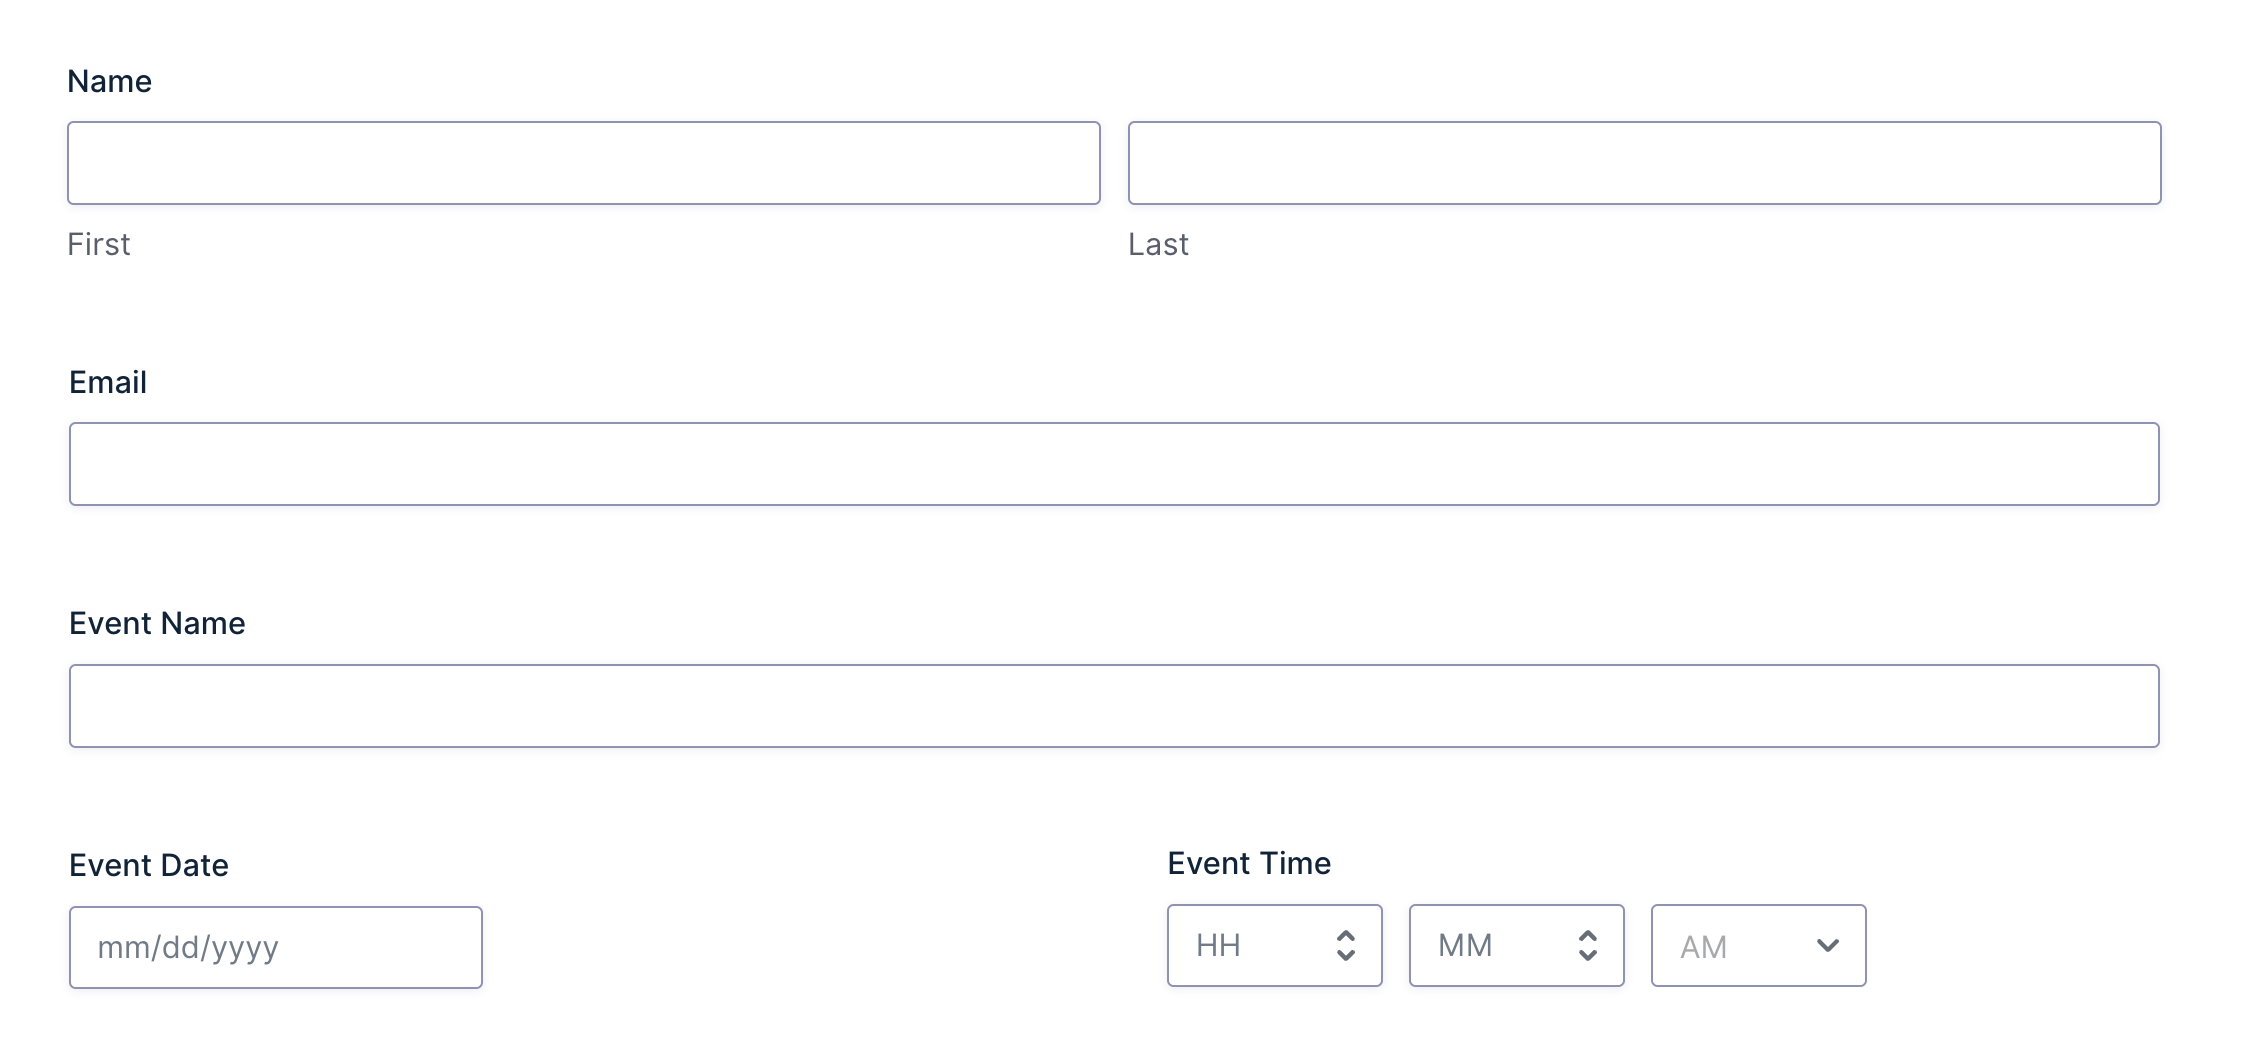
1 — Build Your Event Registration Form
At minimum, you’ll want to include fields for name, email, event name, event date, and event time.
You can also include fields for things like session choice, ticket type, or dietary needs — anything beyond the basics that your event workflow calls for.
2 — Set Up the Google Calendar Feed
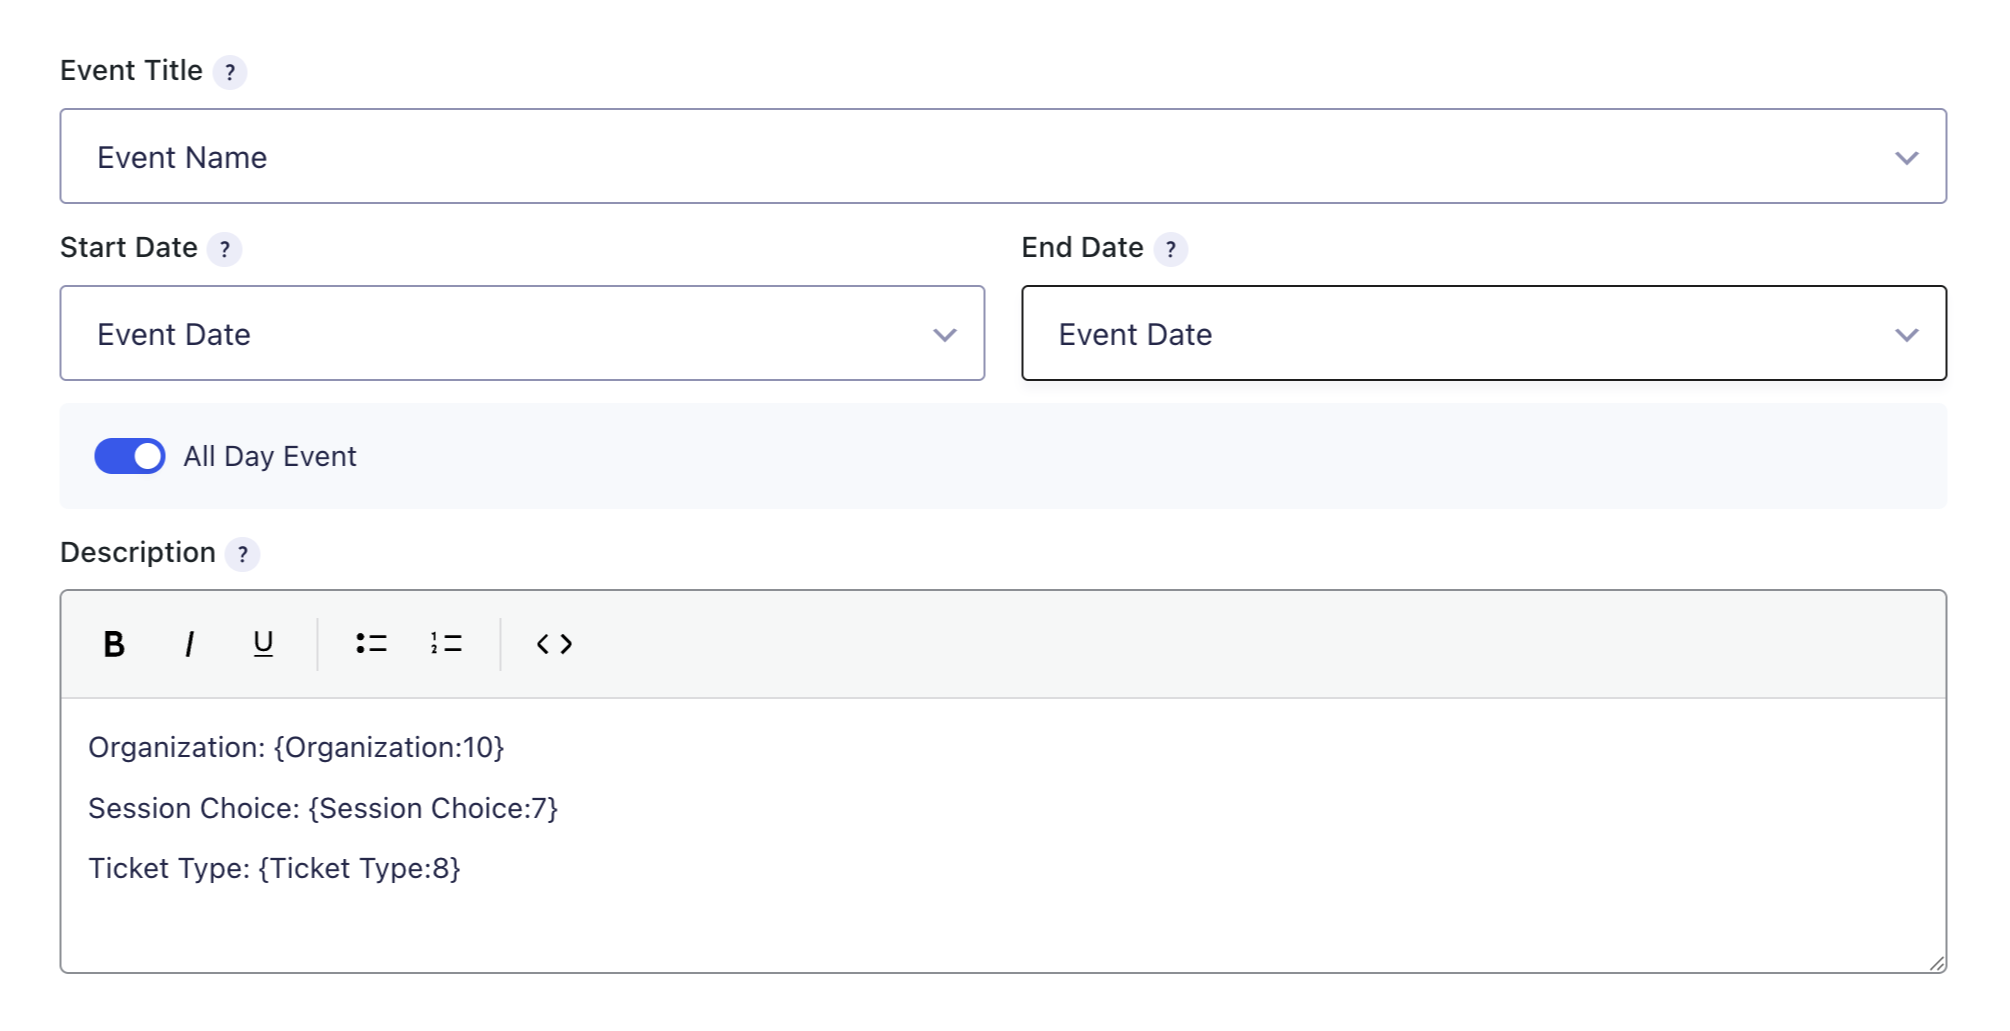
In your form settings, navigate to Google Calendar and click Add New to create a GC Google Calendar feed.
From there, authorize your Google account, choose a calendar, and map your form fields to the event details: title, date, time, description, and attendees.
- If you want registrants to receive a calendar invite, map the registrant Email field as an attendee.
- To keep Calendar events synced when entries change, enable Update & Delete Events.
For a full calendar setup walkthrough, check out our guide on connecting Gravity Forms to Google Calendar.
Pro Tip
Running an online session? Select Google Meet under Conferencing to generate a meeting link for each calendar event.
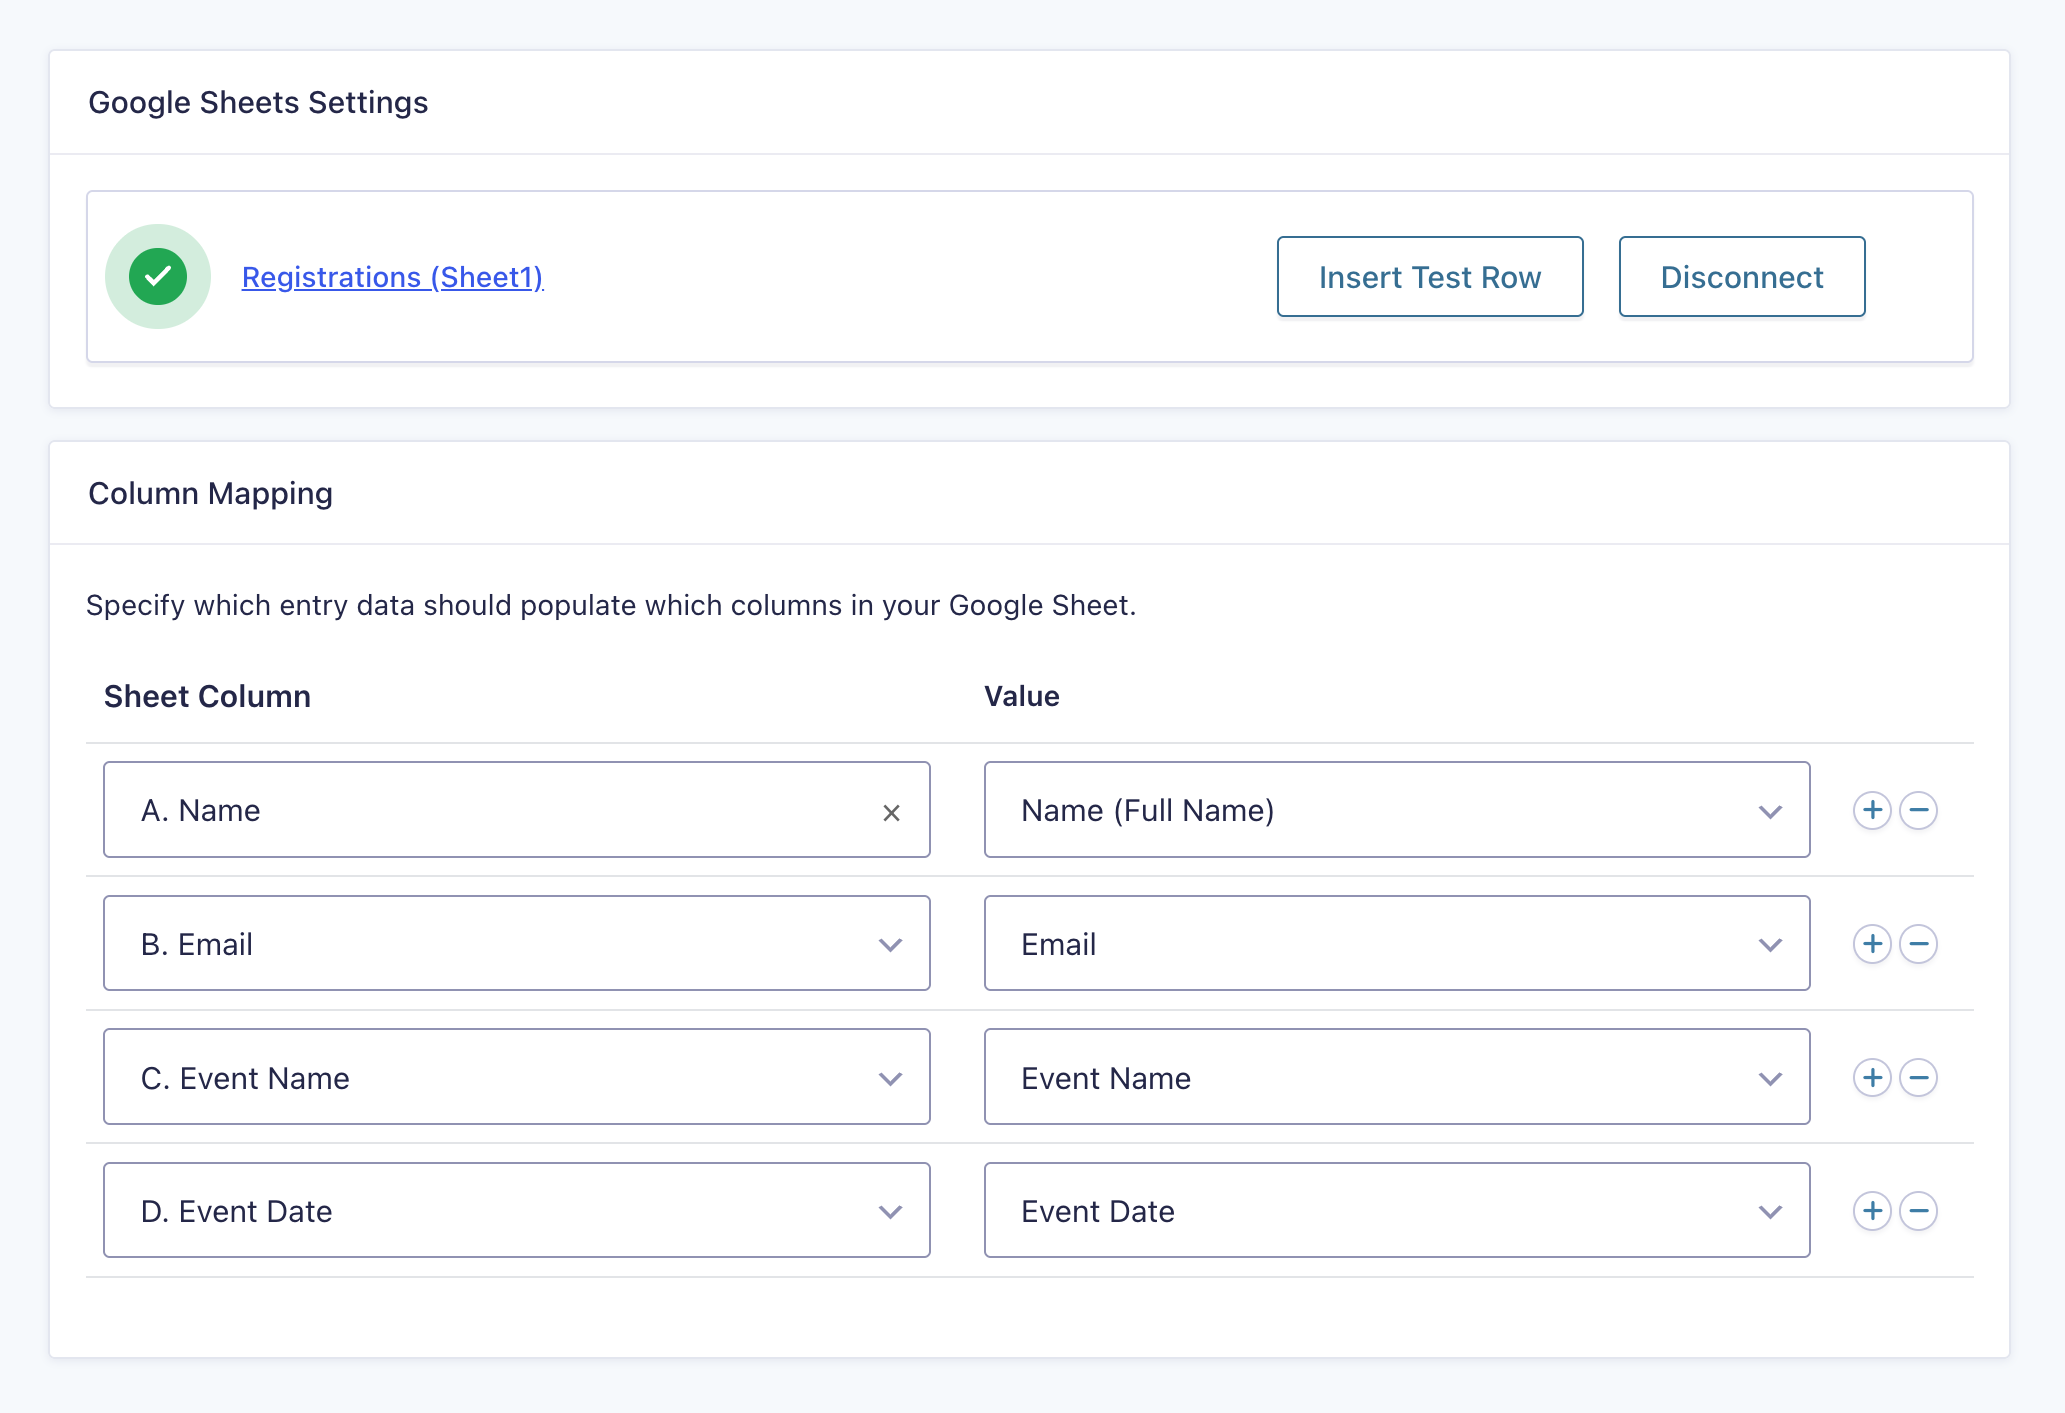
3 — Set Up the Google Sheets Feed
Back in your form settings, navigate to Google Sheets and click Add New to create a GC Google Sheets feed. Choose a spreadsheet, then map your form fields to the matching columns.
To keep your spreadsheet synced when entries change, enable Update & Delete Rows.
For a full Sheets setup walkthrough, check out the GC Google Sheets documentation.
4 — Test the Setup
Submit a test entry, then check both destinations. You should see:
- A new event in Google Calendar
- A new row in Google Sheets
- The mapped form details showing up in the right places
Edit or trash the test entry in Gravity Forms to confirm both Connections sync correctly.
Heads Up
Make sure Update & Delete is enabled in both feeds, not just one. It’s easy to set it in the Calendar feed and forget to do the same in Sheets, or vice versa. 😉
Key Takeaways
- Gravity Forms collects event registration details. Gravity Connect sends them to Google Calendar and Google Sheets.
- GC Google Calendar creates a calendar event from each submission.
- GC Google Sheets logs each submission as a new row in your spreadsheet.
- Both can be configured on the same form and run independently, so you can use one or both depending on your workflow.
- Both run under a single Gravity Connect license, as long as your plan covers at least two Connections.
Taking It Further
A few things worth exploring once you have both Connections running.
- Want to send event reminders? Add in GP Notification Scheduler so you can send reminder emails to registrants before or after the event date.
- Want Sheets to send data back to your form? Pair GC Google Sheets with GP Populate Anything so your form can populate choices or values from spreadsheet data.
- Need availability-based booking? Pair GC Google Calendar with GP Bookings for availability blocking, scheduling rules, or appointment-style bookings.