How to Make a Gravity Forms Progress Bar
Learn how to create a Gravity Forms progress bar in WordPress the easy way using Gravity Perks.

Creating a multi-step form in WordPress is a great way to enhance the form-filling experience for users. It’s a user-friendly format that makes forms with lots of information far less daunting. Additionally, it’s perfect for splitting up forms into easy-to-understand sections and preventing users from filling in one section of a form if they haven’t filled in a previous bit first.
To create a good multi-stage form, it’s important that you focus on helping the user visualize multi-page navigation. The Gravity Forms plugin provides two types of progress indicators, a progress bar and labeled steps, to help the user understand where they are in the process. Gravity Forms also includes ‘Next’ and ‘Previous’ buttons for progression through the form.
These are great tools for simpler multi-page forms; however, for longer forms, navigating with only Next and Previous buttons can be quite a chore. If the user wants to go back to a field several pages ago, they have to click and wait for the form to reload for each page. A better visual aid can help them navigate anywhere on the form quickly and easily. This is possible to implement with GF Multi-Page Navigation.
In this tutorial, we’ll show you how to make a Gravity Forms progress bar to create more visual forms in WordPress.
How to Make a Gravity Forms Progress Bar
Using the GF Multi-Page Navigation perk, you can create a Gravity Forms progress bar in a few simple steps on your WordPress website.
Gravity Forms Multi-Page Navigation is the easiest way to create multi-page forms with a progress bar.
Here’s what you need to do:
Step #1: Setting Up Multi-Page Navigation
Navigate to Forms > Add New from the WordPress admin panel to create a new form using the Gravity Forms plugin. Add the form fields you’d like to the form editor making sure you have at least two pages.
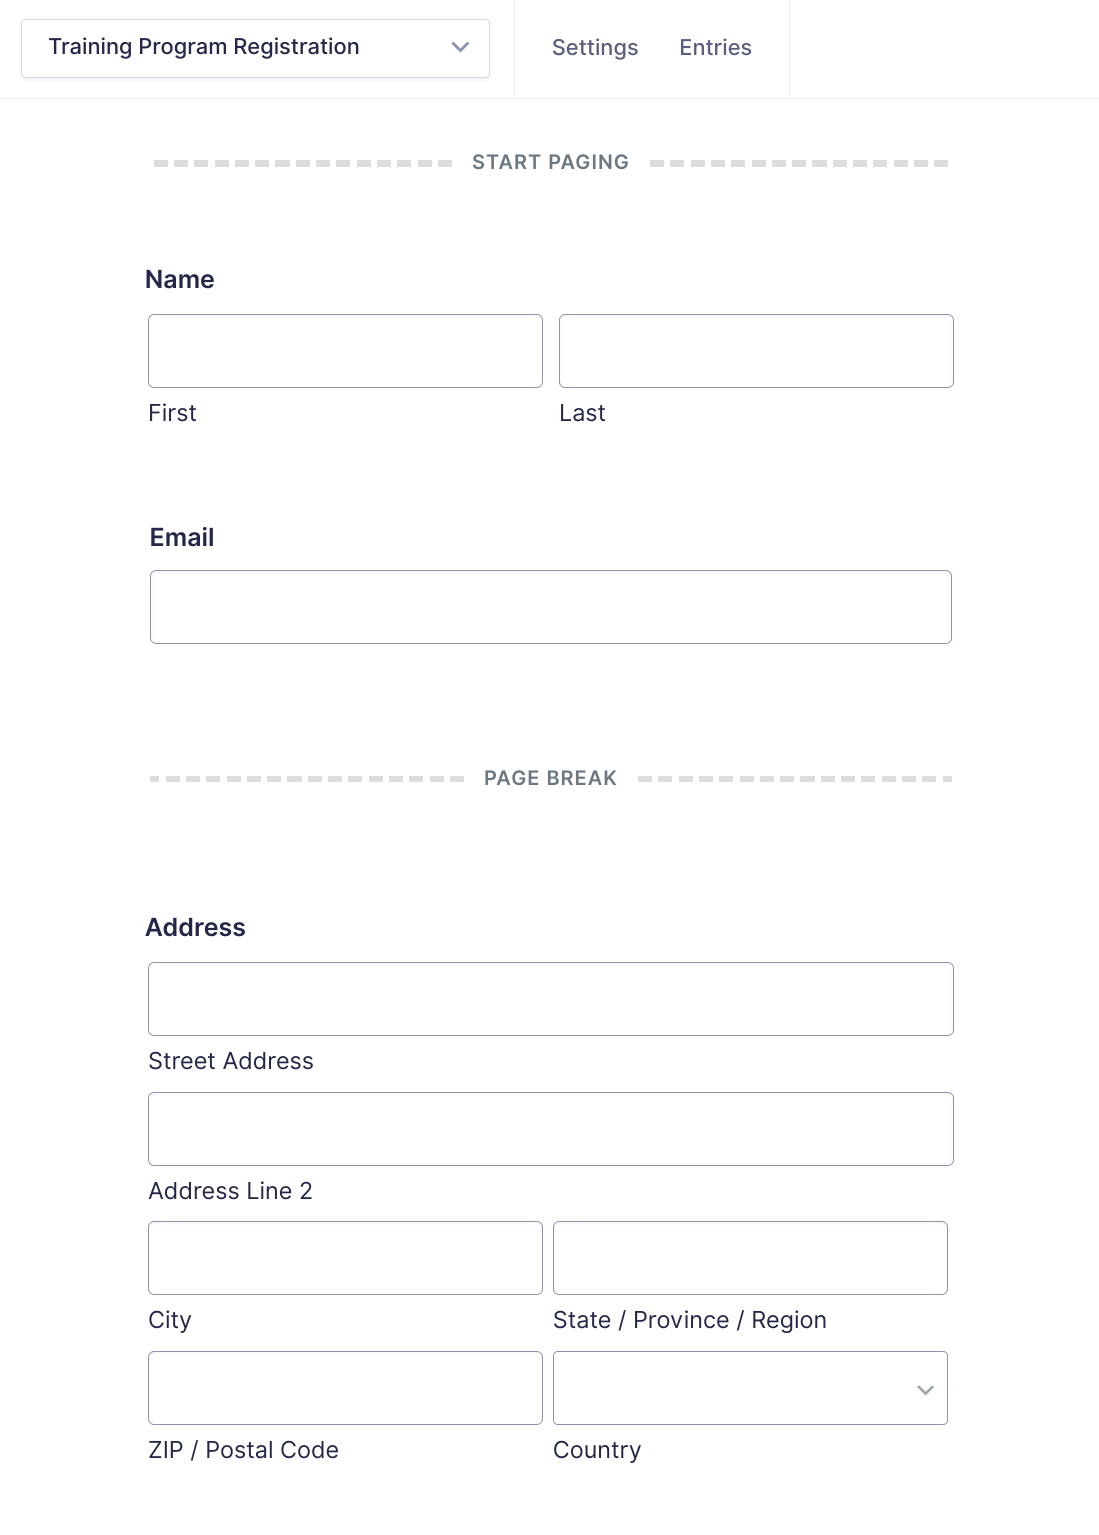
The Page form field lets you add page breaks to your form. You’ll find it under Standard Fields in the Gravity Forms form editor. All you have to do is drag and drop them into place to create separate pages. Once that’s done, select the Start Paging field on the first page (i.e. at the top of the form) and check the Enable Page Navigation checkbox.
Step #2: Changing the Navigation Types
GF Multi-Page Navigation lets you specify which pages on your form can be navigated to and when. You can configure this setting using the Activation Type option.
The available options include:
#1: The user can navigate to any form page they have completed.
Once the user fills out a page of the form, they can navigate directly to that page from any other page on the form. This is particularly useful for longer forms that have a linear progression.
#2: The user can navigate to any form page from the start.
When the user starts filling out the form, they can navigate to any page in the form from the get-go. This is useful for when you want to set up a mult-page form but don’t necessarily need the user to fill out the form pages in a specific order. One of the key benefits of this navigation type is that users can save their progress in the form and pick up later.
#3: The user can navigate to any form page after reaching the last page.
This navigation type means that the user can navigate to any page on the form once they’ve reached the last page. It’s perfect for when you want to keep the user focused on advancing through the form while still giving them the option to go back and make any necessary edits later on.
Step #3: Styling the Form
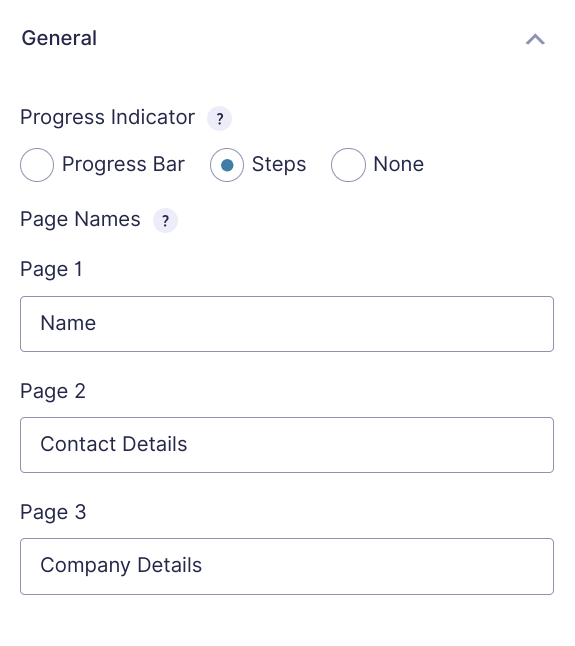
There are plenty of ways to style your multi-page form using the Gravity Forms WordPress plugin with GF Multi-Page Navigation. For example, you can click on the Start Paging field on the first page and set the Progress Indicator to Steps using the radio buttons.
If it’s set to Progress Bar, you will need to create custom page links.
Gravity Forms also lets you select which progress bar style you’d like to use in your forms. The default options include blue, gray, green, orange, and red. In addition to this, a custom option is also available which lets you choose your own text and background color.
Users will need to fill out the first page of the form to start progress bar. You can also choose to display the completed progress bar on confirmation and set the Completion Text.
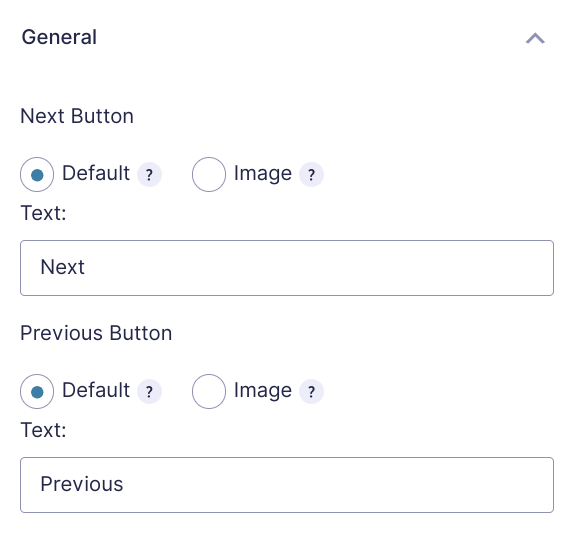
Finally, the Gravity Forms lets you set the text for the Previous and Next buttons in your form. To do this, simply click on the Page Breaks you’ve added to your form and set the text for the Next Button and Previous Button options. Optionally, you can choose to use a custom image instead of displaying text and enable conditional logic.
And, if you’re a developer, you can add custom CSS to your multi-page forms. For more information on how to use CSS styling to customize your forms, see the documentation for code snippets.
Bonus: Visual, Animated Form Progression
Improve conversions on your multi-page forms with the help of fluid transitions between form pages and through automatic page progression.
Gravity Forms Page Transitions animates the form’s progress bar (i.e. the progress indicator) as the user moves through the form. It also brings your form to life with smooth, buttery transitions between form pages.
GP Page Transitions’ Soft Validation feature ensures that any required form fields are filled out before the user can transition to the next page or stage in the form — enabling you to automatically advance users to the next page after the last field on the current page is completed.
Your forms will feel better, convert better, and delight your users.
Check out a demo and download the perk: Gravity Forms Page Transitions.
Conclusion
Using GF Multi-Page Navigation, you can add a Gravity Forms progress bar to your forms in a few simple steps. The perk lets you customize the look and feel of the progress bar and choose from different navigation types.
To take things to the next level, you can pair it up with the GF Page Transitions perk to create visually-appealing animated transitions between form pages and enhance your form’s functionality through Soft Validation.
Gravity Forms Page Transitions brings your forms to life with animated transitions between form pages and automatic page progression.
Ready to add a progress bar to your Gravity Forms forms? Get GF Multi-Page Navigation and GF Page Transitions today!


Hi, is there a way to link the progress bar with each form submitted? For example, new logged in users who have applied to our program must upload and submit 4 documents. I need a progress bar to show that Item 1 has been uploaded (25% done), etc.
When all 4 uploads are complete, it will be sent to another partner to verify the documents.
How do I set this up?
Hi Samantha,
Sorry, but we do not have a solution to link the progress bar to the file upload fields. The progress bar is linked to the number of pages on the form, so a possible workaround will be to add a file upload field on each page on the form and set the field to be required. So, the user will only be able to navigate away from a page if they have uploaded an image to the field.
Best,