How to Collect Signatures with Gravity Forms [Complete Guide]
Discover how to navigate the world of collecting online signatures and integrate signatures into your Gravity Forms with our complete guide.
- How do you collect signatures with Gravity Forms?
- Level-up your signature-capture functionality with Gravity Forms
A few words that come to mind when thinking of Gravity Forms may be power, versatility, robustness, flexibility. But what about… e-signatures?
Maybe not. But picture this: easy signature collection for legal or business reasons, reduced paperwork, uber-satisfied customers, saved time, and it all taking place in Gravity Forms.
If that sounds like something you need, let’s dive into signature-collection with Gravity Forms. We’ll begin by exploring the built-in functionality for signature capture in the Gravity Forms plugin – the Gravity Forms Signature Add-On. Later on, we’ll explore some other WordPress plugin solutions that will have your signature collection process reaching new heights of efficiency.
Let’s kick things off with the Gravity Forms Signature Add-On.
How do you collect signatures with Gravity Forms?
The Gravity Forms Signature Add-On enables you to effortlessly capture signatures from your end-users right on your WordPress website. This add-on integrates directly with your existing forms, providing a signature field so users can sign documents using a mouse, touch pads, or even a touchscreen device.
Here’s a simple step-by-step guide on how to implement the Gravity Forms Signature Add-on:
- Install and activate the add-on: You first need to install the Signature add-on; for this you’ll need a Gravity Forms Elite License. Navigate to the Plugins tab on your WordPress backend and locate the Gravity Forms digital signature plugin. Click Install, and once the installation is complete, click Activate.

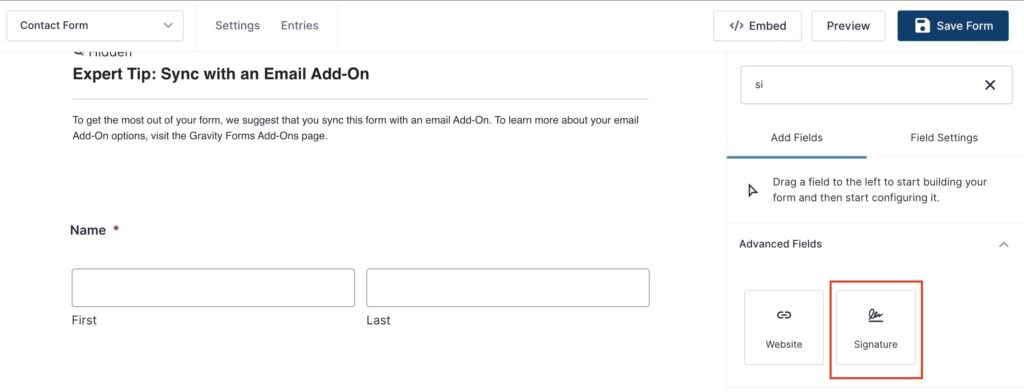
- Add a Signature field to your form: Go to the WordPress form where you want to add the Signature field. In the form editor, click Add Field, then select Advanced Fields. From the list that pops up, choose Signature. For instance, here we have used a contact form.
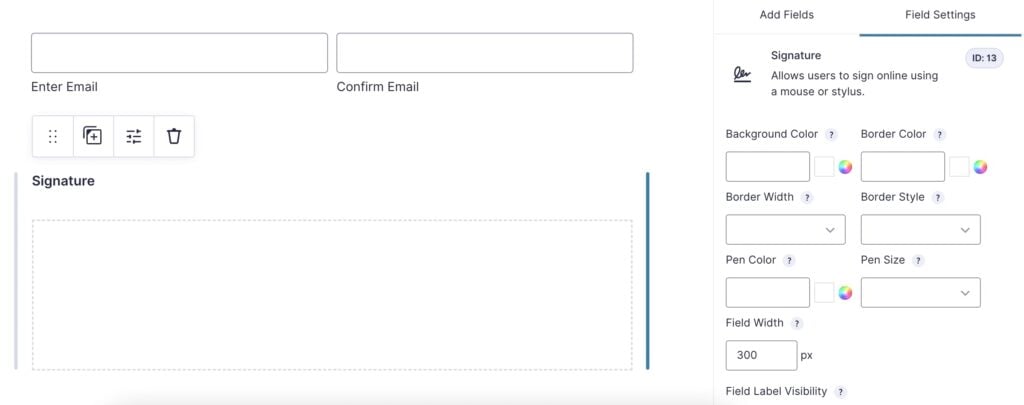
- Customize the signature field: The Signature field has a variety of options for customization. You can add a custom label, adjust its size, and make it a required field if necessary.
- Save and publish your form: After making the desired adjustments, save your form and publish it on your website.
Following these steps, you can integrate digital signature collection into your Gravity Forms’ form submission workflow in a matter of minutes, streamlining the process of obtaining digital signatures for various purposes.
Take your Gravity Forms signature collection to the next level
While the Gravity Forms Signature Add-On is an excellent starting point, you can further enhance its capabilities with the help of supplementary plugins. For instance, you could create legally binding documents and streamline the signing process, or ensure that signature form entries are compliant with relevant regulations.
Let’s look at how this can be done.
Create legally binding documents with the Legal Signing plugin
Signatures gathered with the Gravity Forms Signature Add-On can be legally binding, but this requires the user to have a solid understanding of what constitutes a legally binding signature and configure their signing documents accordingly.
To simplify this process and ensure that every signature is legally binding without any extra work or know-how from the user, you can use a dedicated plugin like Legal Signing from CosmicGiant.
This certified Gravity Forms add-on enables you to easily create and sign legally binding contracts with full ESIGN and UETA compliance.
Some of the main features of Legal Signing include:
- Legally binding signatures: Add legally binding signatures to your forms using the built-in Legal Signature field or the Gravity Forms Signature Add-On. When the contract is finalized, Legal Signing automatically generates a certificate proving that it was created by the Legal Signing API.
- Full audit trail: Keep a comprehensive audit trail of the contract signing process, including details on when specific signers were sent a notification, viewed, and signed your forms. This audit trail ensures transparency and compliance with legal requirements.
- Map form fields to signatories: Ensure that you always get the right signatures and data in the right places by mapping form fields to specific signatories. This feature streamlines the signing process and guarantees that your contracts are accurate and complete.
- Submission timeline: Create a submission timeline to ensure that your contracts are delivered on time. This feature helps you track the progress of each contract and stay on top of deadlines.
Add form users’ names to the signature field with Gravity Forms Populate Anything
To create a more professional, personalized experience for your signature capture form, consider adding the user’s name to your signature fields.
Gravity Forms Populate Anything enables you to dynamically pull data from elsewhere in your forms using live merge tags. This functionality allows you to create more personalized forms by dynamically populating your field labels with values that your users have entered earlier in the form.
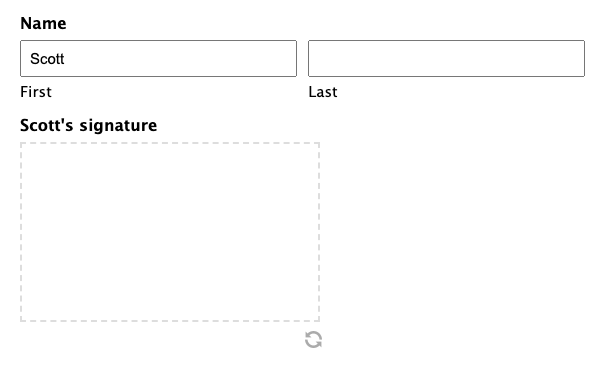
By combining GP Populate Anything’s live merge tags and fallback features with our free solution to append and prepend values to your merge tags, you can add text to your form labels only when a merge tag is able to draw data from the linked field, and otherwise display a fallback value.
Let’s walk through an example to understand this better.
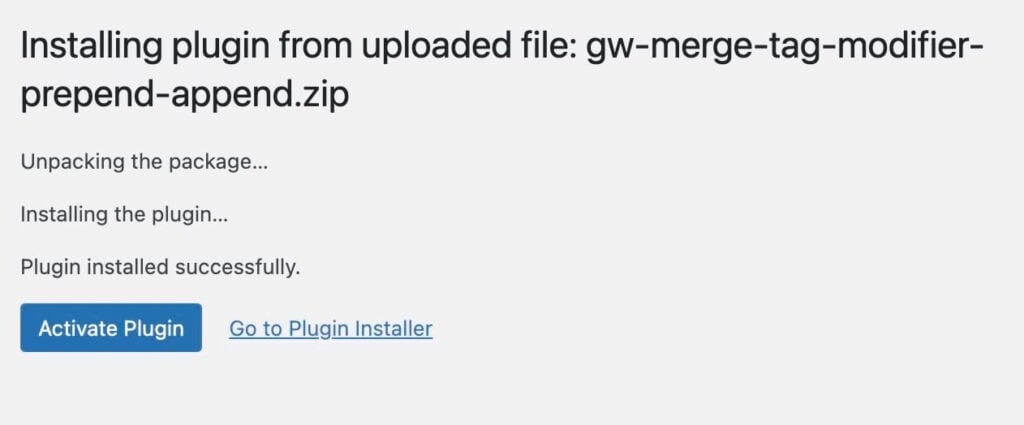
- Install the free plugin: First, install and activate the plugin on your WordPress site.
- Create a form with user input: Create a Gravity Forms form that includes fields for the user’s name and a signature field. For example, you might have a First Name and a Last Name field, followed by the signature field.
- Configure GP Populate Anything: In the signature field settings, use GP Populate Anything’s live merge tags to pull data from the First Name and Last Name fields. For example, you might use the following live merge tag for the signature field label: {Name (First):2.3}
- Use the free plugin to append and prepend values: With the free Gravity Perk, you can now append or prepend values to the merge tag. For example, you might use the following syntax in the signature field label: {Name (First):2.3:prepend[Please sign here, ]}
- Set a fallback value: If the merge tag cannot draw data from the linked field, you can use conditional logic to set a fallback value using the Fallback parameter in GP Populate Anything. For example, you might use the following syntax: {Name (First):2.3:prepend[Please sign here, ]:fallback[Signature]}.
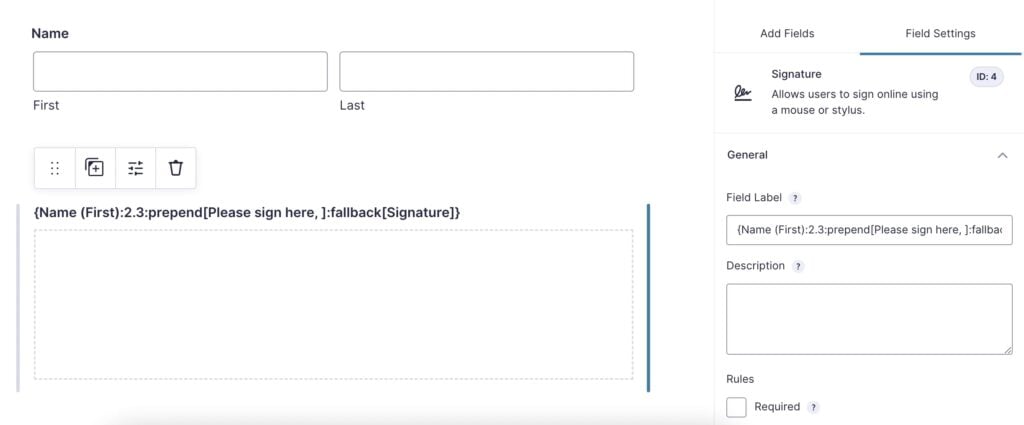
Using append/prepend tags can be a great way to make the form more engaging and effective and enhance the user experience.
Level-up your signature-capture functionality with Gravity Forms
Ready to catapult your signature collection process into the digital age? Start by harnessing the power of the Gravity Forms Signature Add-On.
But why stop there? Turn your forms from great to stellar by integrating robust plugins like Legal Signing and GP Populate Anything, taking user experiences to a new level.
And if you need more, here’s the real game-changer: the full suite of Gravity Perks.
Want an idea of what to do with Gravity Perks?
How about gating content behind those signatures, like documents, digital downloads, and more?
At the end of the day, it’s about more than just capturing signatures. It’s about transforming every element of your forms, from design to functionality, making them as dynamic and versatile as your business demands.
Explore the Gravity Perks universe today and take your business a quantum leap forward into the digital age!

