How to Crop Images with Gravity Forms
Add cropping capability to Gravity Forms File Upload fields.
This article requires the GP File Upload Pro perk.
Buy Gravity Perks to get this perk plus 48 other premium Gravity Forms plugins!
One thing I’ve taken for granted with modern web applications is the file upload workflow. Most web apps support drag-and-drop uploads and in-app cropping. Changing your profile picture in social media applications is effortless and feature full. I have become accustomed to expect this behavior everywhere.
Unfortunately, outside of the web app bubble, most online forms have rudimentary file upload fields. Only after I have added a file do I typically notice there isn’t a cropping option. I then have to open my file in an image editor and make a special version just for uploading to the form. This interrupts my workflow as a user and causes unneeded frustration.
To solve this problem, we created Gravity Forms File Upload Pro. It supercharges the Gravity Forms File Upload field by adding features like drag-and-drop, cropping, sorting, and more. Today, I’m going to talk about how to use to crop photos or AI-generated images in your Gravity Forms, giving your users the experience they’ve come to expect from the modern web.
Getting Started
In this tutorial, we’re going to show how to add the cropping capability to the built-in Gravity Forms File Upload field. Once you have GF File Upload Pro installed, follow the steps below to build the form.
Steps
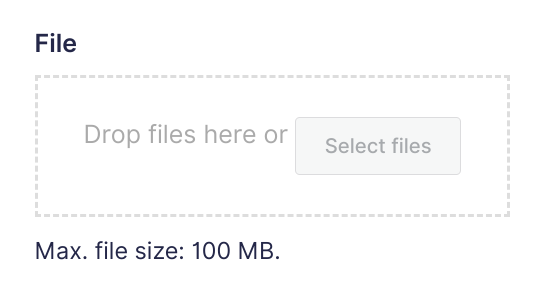
Step 1 – Add a File Upload Field
If your form doesn’t already contain a File Upload field, add one now. Set any parameters or limitations that you normally would to the field. For example, set the maximum number of files, file size, and whether or not you want the field to accept multiple files.
Step 2 – Enable File Upload Pro
Navigate to the Perks tab and check Enable File Upload Pro and Enable Cropping. Optionally enable Require Crop. Don’t be intimidated by the multitude of cropping options. We have a comprehensive breakdown in File Upload Pro’s documentation.
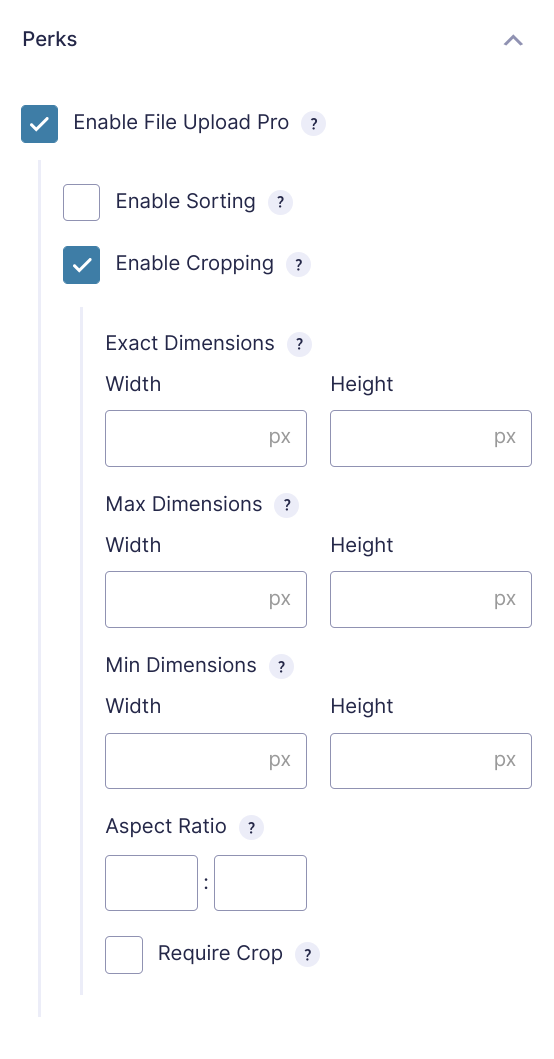
Step 3 – Configure Your Cropping Options
I need images that are a specific size.
Use the Exact Dimensions setting to enforce exact images sizes from uploaded images. This is good for featured images, banners, ads, profile pictures, print work, and anywhere else that the image must have an exact height and width.
If your image must fit into a specific aspect ratio, but the actual dimensions aren’t important, use the Aspect Ratio setting. This will limit the crop to the specified ratio without adjusting the number of pixels.
When cropping dimensions or aspect ratio are enforced, File Upload Pro will automatically crop the image. The user must re-crop the image to change the automated crop. This can lead to questionable results. To prevent this, enable the Require Crop setting to require the user to crop their images before the image is uploaded.
File Upload Pro works beautifully with Fillable PDFs. Get the PDF’s image slot size and then use those dimensions (or aspect ratio) to configure your File Upload Pro settings.
I need to prevent uploaded images from being too large.
Most users don’t realize how big the images they’re uploading are. Mobile phones take huge images these days. Those images will sits on your server, taking up valuable space. When those images are then displayed on your site, it can cause slow load times, especially for users that are viewing the page with slow internet connections.
Use Maximum Dimensions to automatically scale the image down. The user can optionally crop the image for more control.
I need to prevent images from being too small.
When images are too small for the intended purpose, there isn’t much you can do to change it. Scaling the image up gives you a grainy and undesirable result. Better to have the user upload a fitting image at the start.
Use Minimum Dimensions to enforce a minimum image size. If they upload an image that is too small, File Upload Pro will notify them that a larger dimension is required.
That’s It
With cropping enabled on the field, File Upload Pro will handle the rest. Give your form a spin and enjoy the cropping magic. Once an image is added to the field, click the image to load the cropper. If Require Crop is enabled, the cropper will automatically load once the image is finished uploading.
Taking It Further
File Upload Pro supports cropping stencils and it comes pre-packaged with a “circle” stencil. To learn more about how it works and how to activate it, check out our documentation.