How To Evenly Distribute Leads to a Sales Team with Gravity Forms
Automate your lead distribution process in just a few minutes.
When working with a team, it’s important to make sure everyone is getting their share of the leads (or doing their share of the work). This tutorial will show you how to automatically distribute leads generated from a Gravity Form. Let’s get started!
Getting Started
This tutorial requires the Gravity Forms Round Robin snippet. Once you have it inserted into your theme’s functions.php file, follow the steps below.
Steps
Step 1 – Add a Drop Down Field
Start by adding a Drop Down field to your form. The options input into this field are what the snippet will cycle through, so we’re going to insert the email addresses for our sales team.
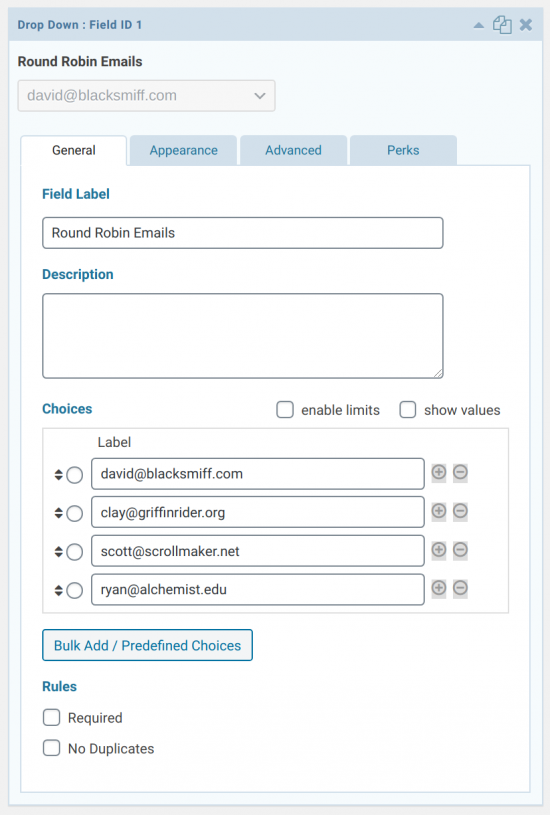
This field will be hidden by default, and the submitted value of this field will always be overridden by the snippet.
This field serves two purposes. First, it will identify to which salesperson the lead was assigned. Second, it will be used below to send a notification to the assigned salesperson so they can get to work on the new lead.
Send More Leads to a Specific Emails
Many email services support special characters as aliases for emails. Using aliases, you can add the same address to the Drop Down to send more leads to some addresses instead of others. Here’s a short list of common email providers and their support for email aliases:
- Gmail supports using
+and.in email addresses to create aliases. For example, all of these addresses will be delivered toscott@gmail.com:scott@gmail.comscott.a@gmail.comscott+b@gmail.com
- Yahoo supports only using a dot in addresses like this:
scott.a@yahoo.com - Outlook supports only using a plus in addresses like this:
scott+b@outlook.com
You can use GF Populate Anything to automatically populate their emails into the Drop Down. Here’s how.
Step 2 – Configure Snippet
Update the form_id and field_id in the snippet to match your Form ID and the Field ID for your Drop Down from above.
new GW_Round_Robin( array(
'form_id' => 123,
'field_id' => 4,
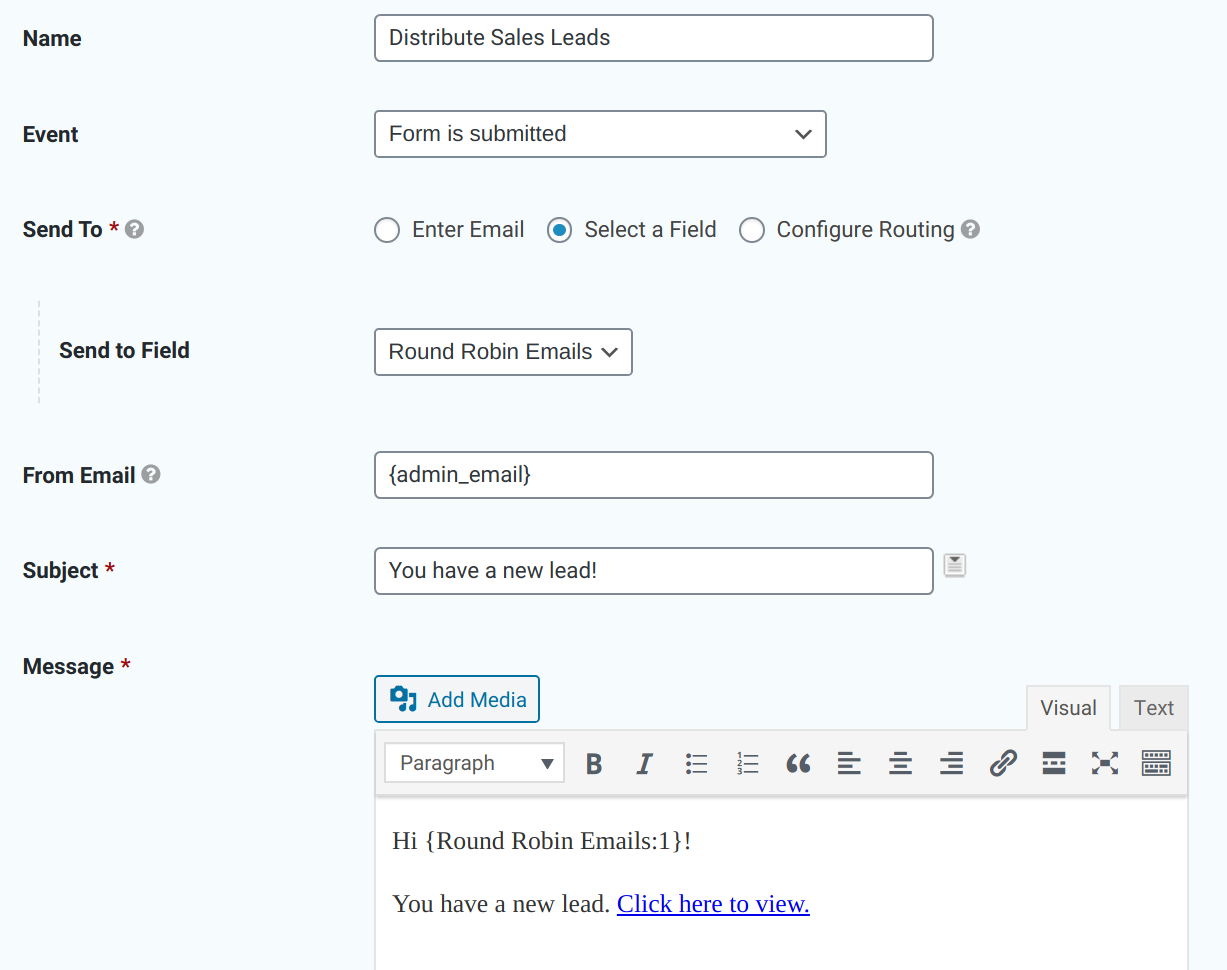
) );Step 3 – Configure Notifications
Next, create a notification, set the Send To setting to “Select a Field”, and choose your Drop Down field.
That’s all there is for setup. When the first entry is submitted to the form, the Round Robin snippet will send the lead to the first name in the list, in our case to david@blacksmiff.com. The next entry will be sent to clay@griffinrider.org, and so on. Once the end of the list is reached, it will start over with David and continue cycling.
Dynamically Populate Your Recipients
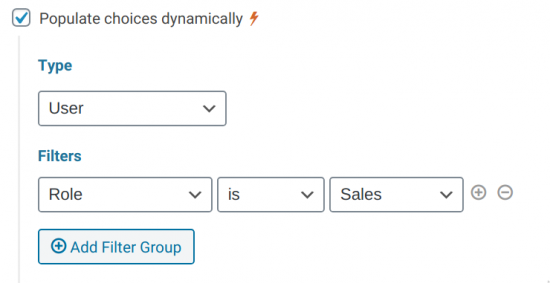
With GF Populate Anything, you can automatically populate the email addresses.
Check the Populate choices dynamically checkbox and set the Type to “User”. If your sales people have a particular role, filter by role.
Want an easy way to manage custom roles? Check out User Role Editor from MemberPress.
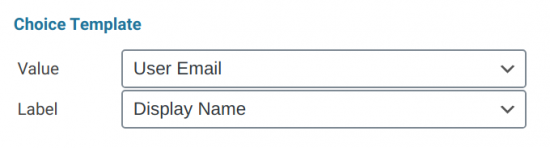
Set the Value for the Choice Template to “User Email”.
Any sales person with the Role of Sales will automatically be added to the list. The beauty of this approach is that as your team changes over time, Populate Anything will automatically update the list without any user intervention.


Is there a way to cc another user on all leads distributed so I can track who got what lead when?
Hello Mark, Will this be the same person each time? If so, you can use the gform_notification_enable_cc hook found here.
Yes, it would be the same person every time. Thank you so much Ryan for the helpful post and for answering my question!!
Hey Mark, Super happy to hear this resolved your issue. We hope you have a wonderful day.