How to Record Drip Custom Events in Gravity Forms
Record custom events in Drip directly from Gravity Forms and magically expand your email marketing automations.

- Step 1 — Install and Activate GC Drip
- Step 2 — Create a GC Drip Feed
- Step 3 — Set Up GC Drip Feed
- Step 4 — Test Connection
- Step 5 – Make Magic Happen with Drip
Abracadabra: get laser-targeted segments, dynamic workflows, and relevant insight on customer behavior by recording Drip custom events from Gravity Forms automatically. That’s GC Drip, our brave connection bridging Gravity Forms to Drip, allowing you to add people, update them, and record detailed custom events when anything (yes, anything) happens in one of your forms.
For example, focus on action-oriented events like Downloaded a resource and Purchased mystery pack, or go super granular and record if certain fields were filled out, like Entered credit card information. If you’re feeling saucy, record multiple events at once and take the email marketing automation possibilities to the stratosphere. 🚀
Let’s get into more details while setting it up, shall we?
This article requires the Gravity Connect Drip plugin.
Buy Gravity Connect to get this plus other premium Gravity Forms plugins!
Step 1 — Install and Activate GC Drip
GC Drip is available through Gravity Connect.
- Easily install and activate it via Spellbook
- Then, connect your Drip account to Gravity Forms
Step 2 — Create a GC Drip Feed
Head over to the form you want to record custom events from. In the Settings menu, click on Drip to get to the GC Drip Feeds screen. From there, click on Add.
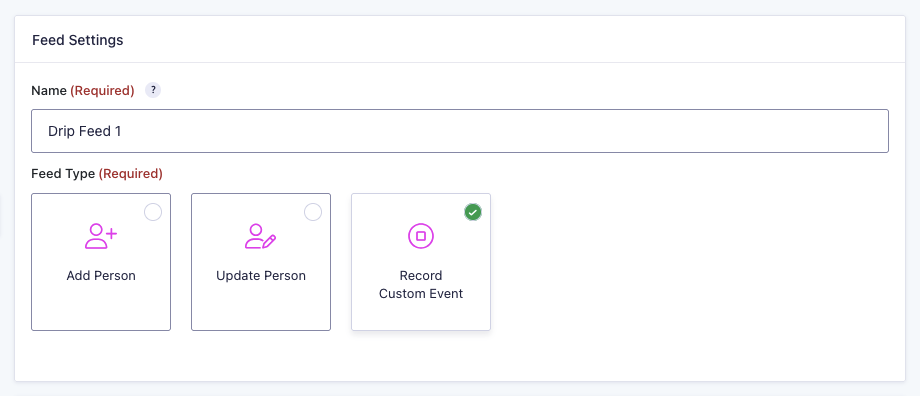
Step 3 — Set Up GC Drip Feed
In the Feed Settings, name your feed and select the “Record Custom Event” feed type.
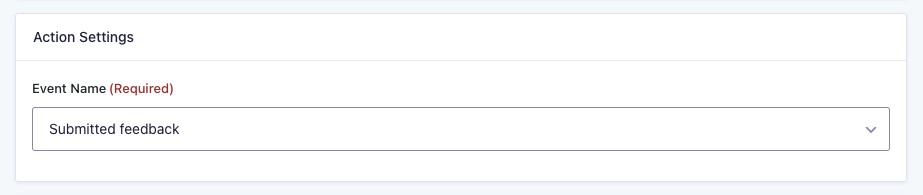
Next, under Action Settings, choose a pre-existing Event Name from Drip or add a new one.
Right below, map the Email Field to a Gravity Forms Email field. This email identifies the person the custom event will be recorded for.
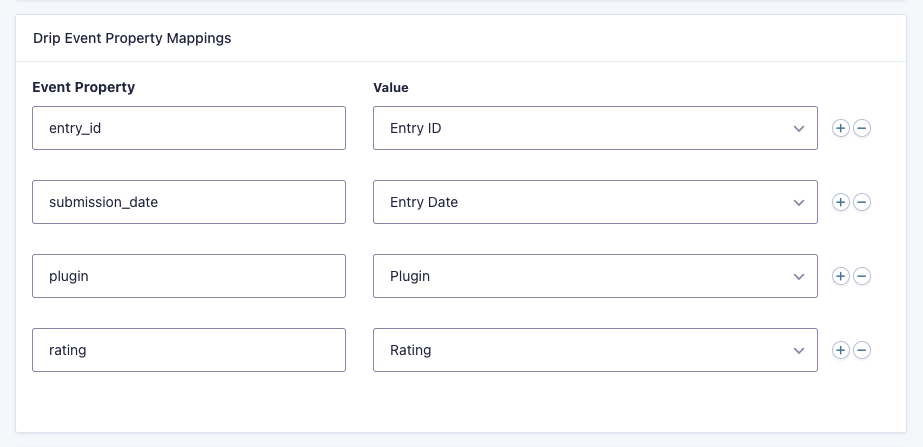
Then, use the Drip Event Property Mappings to add event properties to the custom event. You can map form fields, entry properties, or custom values to them.
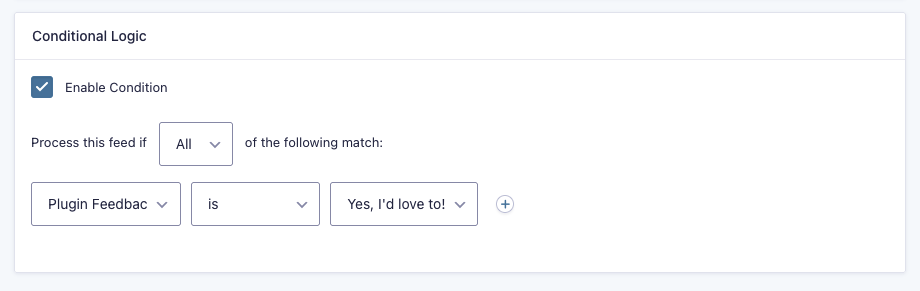
Lastly, you can set up multiple feeds and use conditional logic to trigger specific ones based on customer behavior. For instance, this Record Custom Event feed is part of a support feedback form where customers can choose to give additional plugin feedback, so I only want this specific feed to run if the customer chose to provide that kind of feedback.
Step 4 — Test Connection
Once your feed is saved and ready to go, run a test entry to confirm everything is set up correctly.
Step 5 – Make Magic Happen with Drip
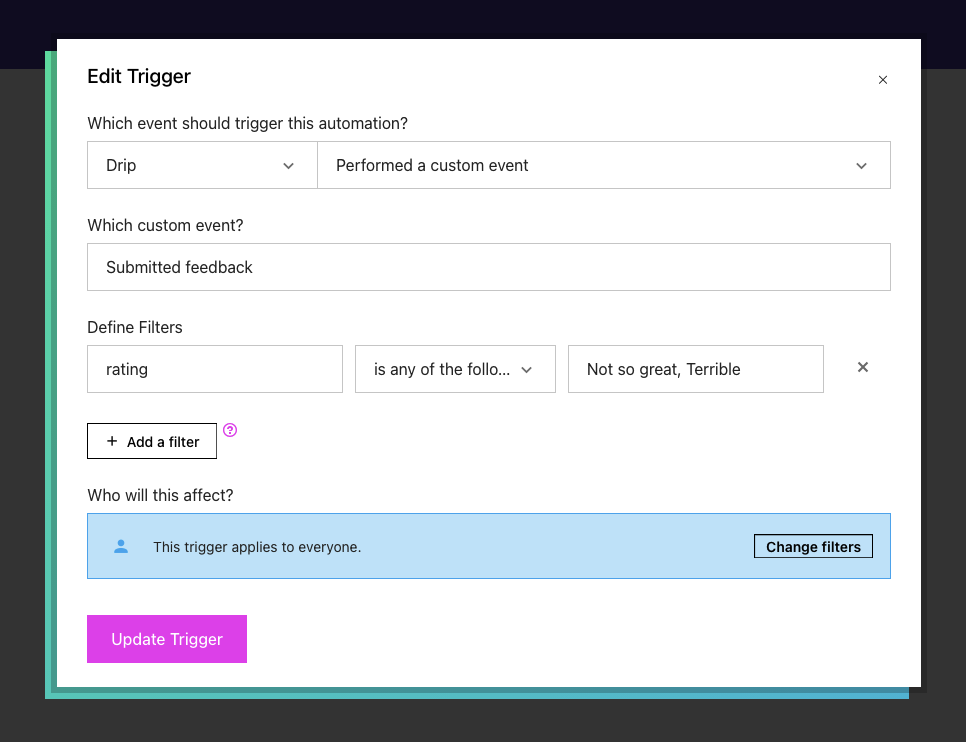
Once that juicy entry info hits Drip, you can trigger hyper-targeted actions using filters.
For instance, I’ve recorded the additional plugin feedback from my support form in an event property to use it as a filter for an outreach campaign. If a customer rated a plugin as Not so great or Terrible, it triggers a workflow step that reaches out to learn more about low plugin ratings—a smooth, personalized way to follow up thoughtfully.
That’s all, folks! If you have any questions, drop them in the comments down below. 💦