How to Send Gravity Forms Data to Airtable
Gazing into the crystal ball… I see you effortlessly sending Gravity Forms data to Airtable. 🔮

- Step 1 – Install and Activate GC Airtable
- Step 2 – Create GC Airtable Feed
- Step 3 – Set Up GC Airtable Feed
- Step 4 – Test Connection
- Step 5 – Make Magic Happen with Airtable
Yes, it’s true: the Airtable Connection doesn’t just send entries from Gravity Forms to Airtable—it teleports 🌀📡 them straight into your Airtable base, ready to be sorted, filtered, and put to work.
Airtable, if you’re not familiar with it, is like a spreadsheet with superpowers. It organizes data with the ease of a table and the flexibility of a database. Analyze survey results, separate high-value leads from ordinary inquiries, manage event registrations, or even visualize your data with Airtable’s visual interfaces.
In this guide, I’ll show you how to set up this magical link using a volunteer application form for a local pet shelter. Let’s go! 🐾🔮
This article requires the Gravity Connect Airtable plugin.
Buy Gravity Connect to get this plus other premium Gravity Forms plugins!
Step 1 – Install and Activate GC Airtable
GC Airtable is available through Gravity Connect and is easily installed via Spellbook.
This tutorial assumes you have an Airtable table and a form set up. If you don’t, here are resources to get you started:
– How to create a base in Airtable.
– How to build a form with Gravity Forms.
Step 2 – Create GC Airtable Feed
Navigate to the form you wish to connect to Airtable. Under Settings, click on Airtable—this will take you to GC Airtable’s Feeds. Click on Add.
Step 3 – Set Up GC Airtable Feed
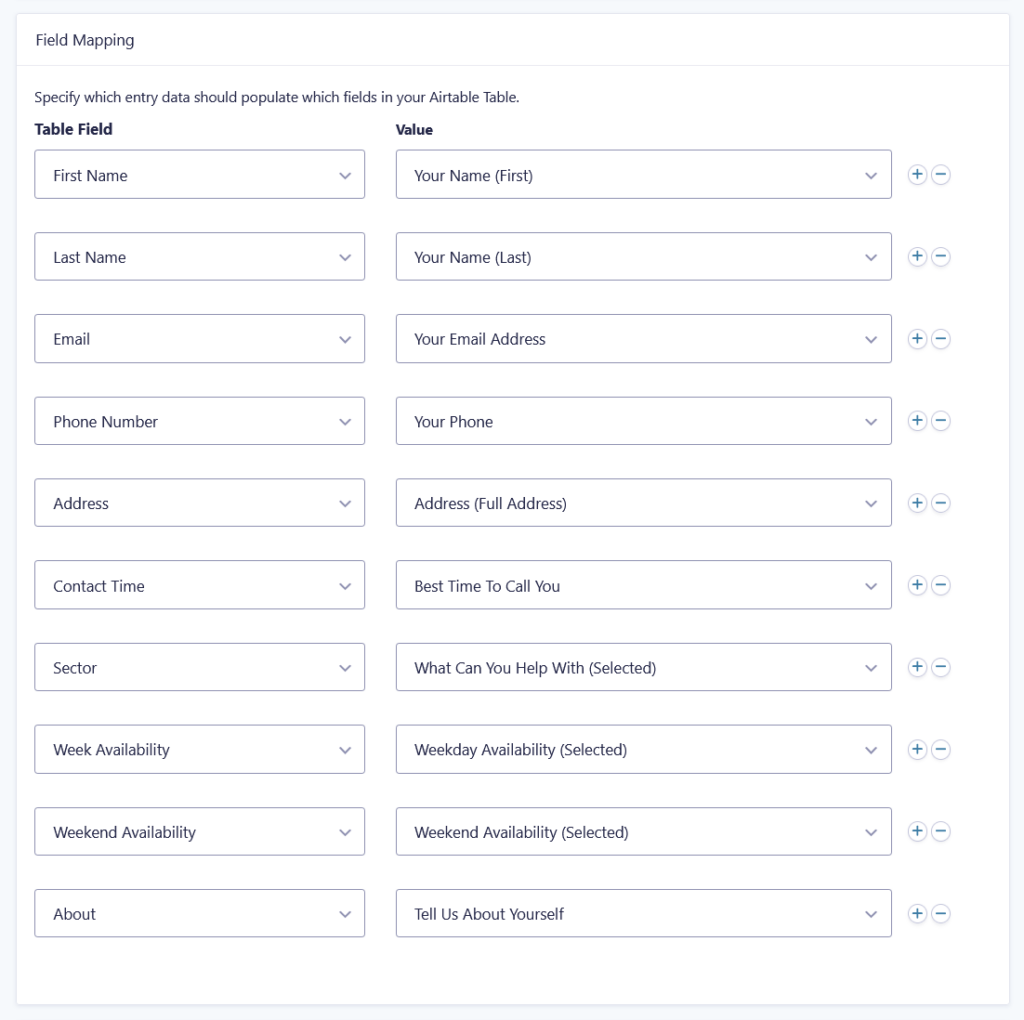
Authorize your Airtable account and select a table. Then, map each form field to its corresponding Airtable field.

Check out the full list of available field combinations in GC Airtable’s documentation.
Optionally, you can enable Update & Delete Records. When this setting is active, any edits to the original entry automatically update the corresponding record, and deleting the entry removes its associated record. You can change this setting at any time. 😉
You can also create unlimited feeds and apply conditional logic to run them only when specific conditions are met. For example, my pet shelter operates in multiple cities, so I separate my volunteer tables by city. As a result, I have three feeds, each configured with its own conditional logic rule that looks like this:

Step 4 – Test Connection
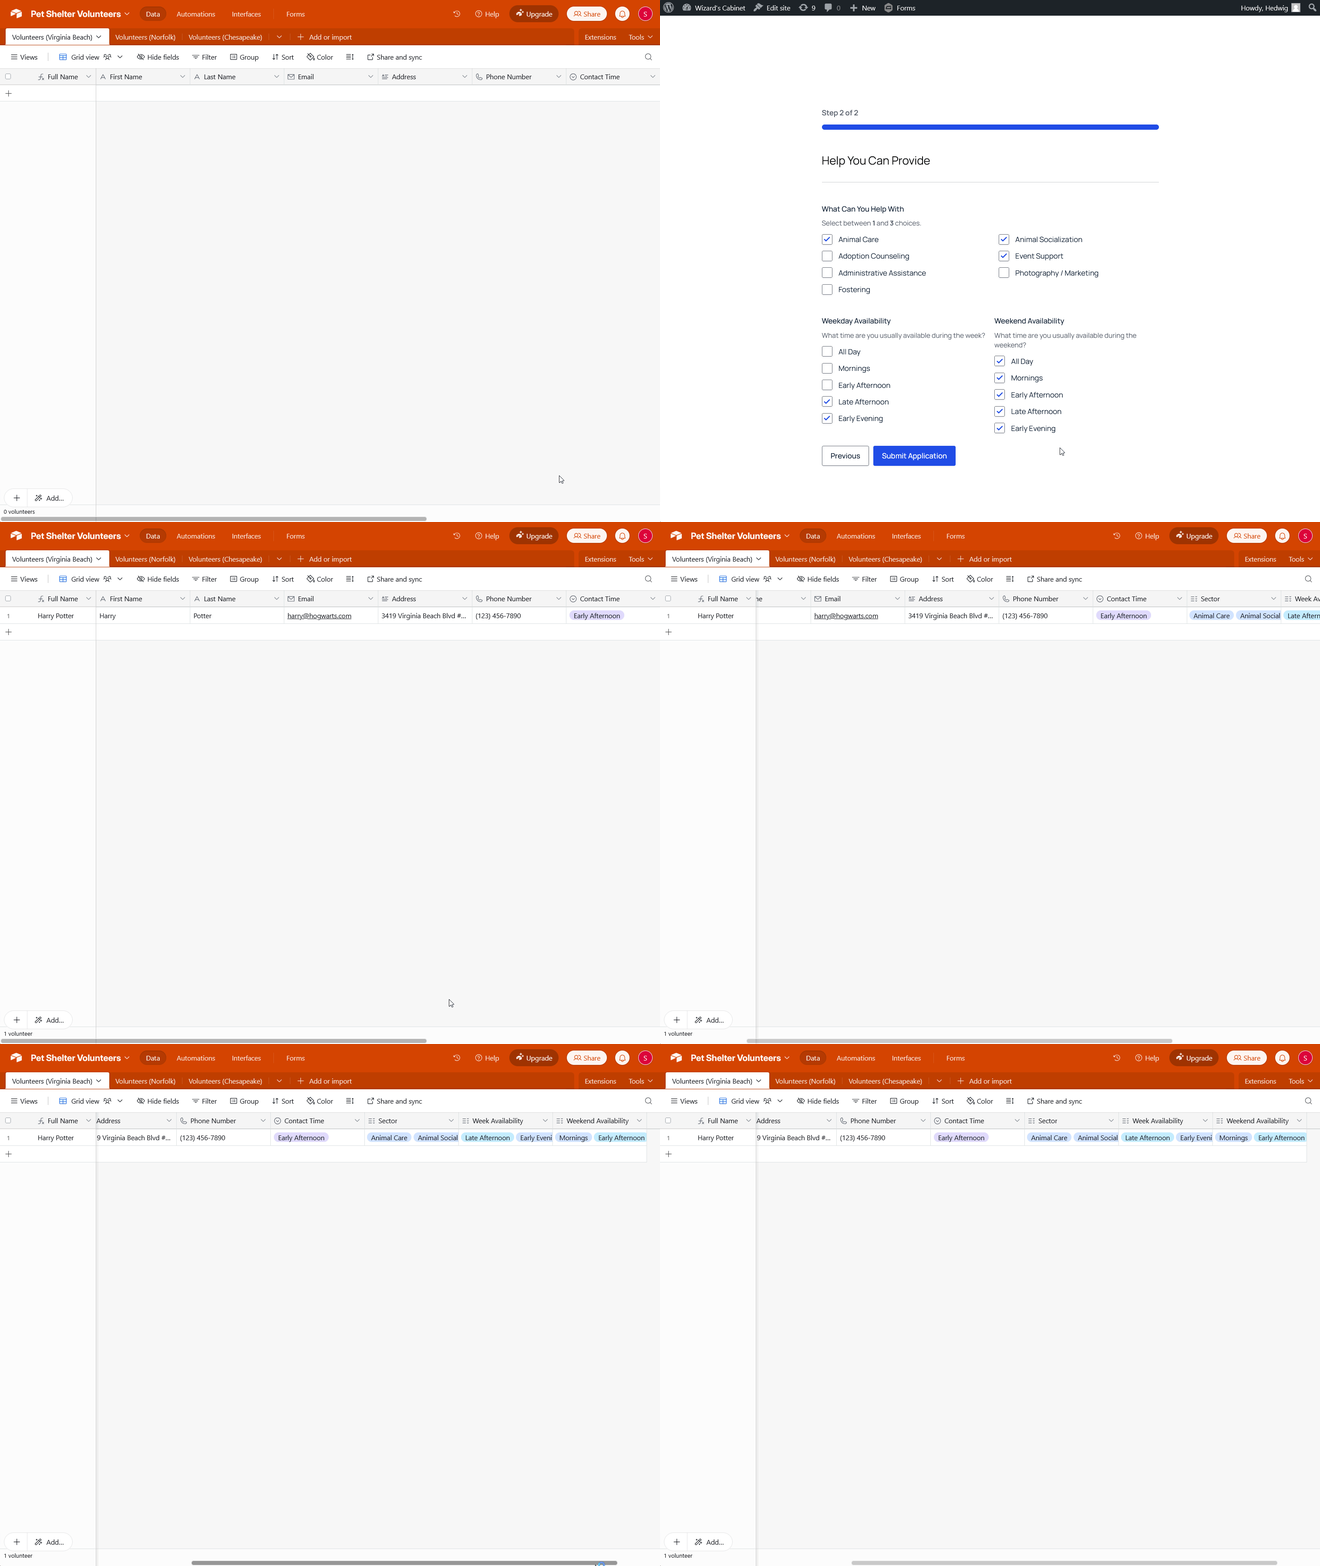
After the feed finishes saving, use the handy “Insert Test Record” button to test that the feed is working.
Pro-tip: I usually like to make a dummy entry as well to visualize my mappings. 👀

Step 5 – Make Magic Happen with Airtable
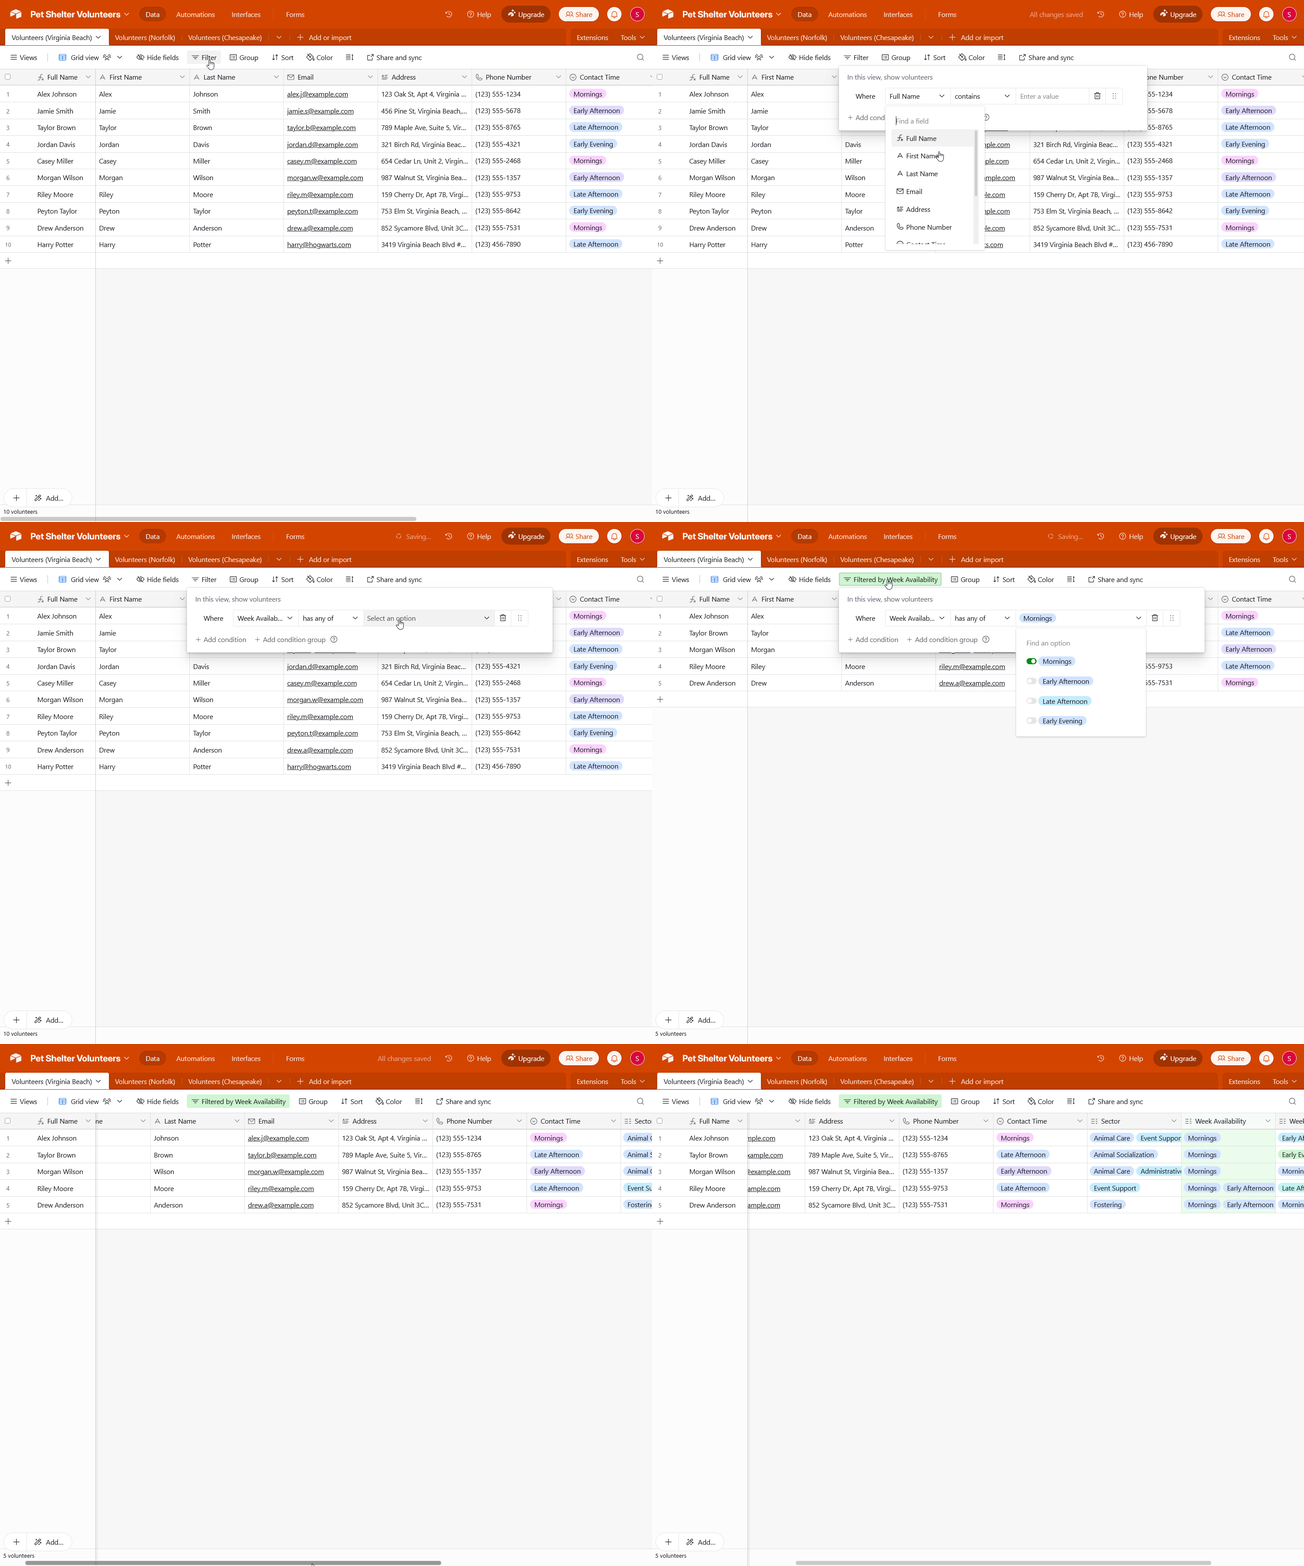
Now that you have this data on Airtable, you can use all sorts of tricks. I, for one, want to know which volunteers are available in the mornings.

What are the projects you are going to use this Connection for? Let us know in the comments!


