How to Create Conditional Choices with Gravity Forms
Learn how to use WordPress and Gravity Forms Populate Anything to create conditional choice fields that automatically change based on user input.
Why Create Conditional Choices?
Have you ever wanted to automatically change the available choices in a choice-based field (think Checkboxes, Radio Buttons, Drop Down) based on user input?
The logic behind conditional choices might be something like:
If the value of Field A is “Value B” then show (or hide) Choice C in Field D.
A more specific example:
If the Type of Pet field is not “Dog” then “Chew Bone” should not be available in the Pet Accessories field.
Or how about this:
If the Meal Type field is “Lunch” then only show choices that are available for lunch in our Meals field.
This is actually possible in Gravity Forms out of the box but it’ll make your forms a little clunky. How do you do it? You create a copy of your choice-based field for each variation of choices and then use conditional logic to show/hide the appropriate field based on the user’s selections.
This solution works just fine when there are only one or two variations, but anything more than that and your form becomes unwieldy and difficult to maintain.
Is there a more elegant way to solve this problem? Why yes, yes there is. Allow me to introduce you to Populate Anything. It’s the easiest way to populate anything into Gravity Forms.
This article requires the GP Populate Anything perk.
Buy Gravity Perks to get this perk plus 49 other premium Gravity Forms plugins!
Getting Started
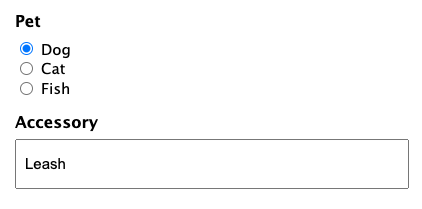
We’re going to build a form where users can select what kind of pet they have. Depending on which pet type they choose, a Radio Button field is going to display possible accessories for them to purchase.
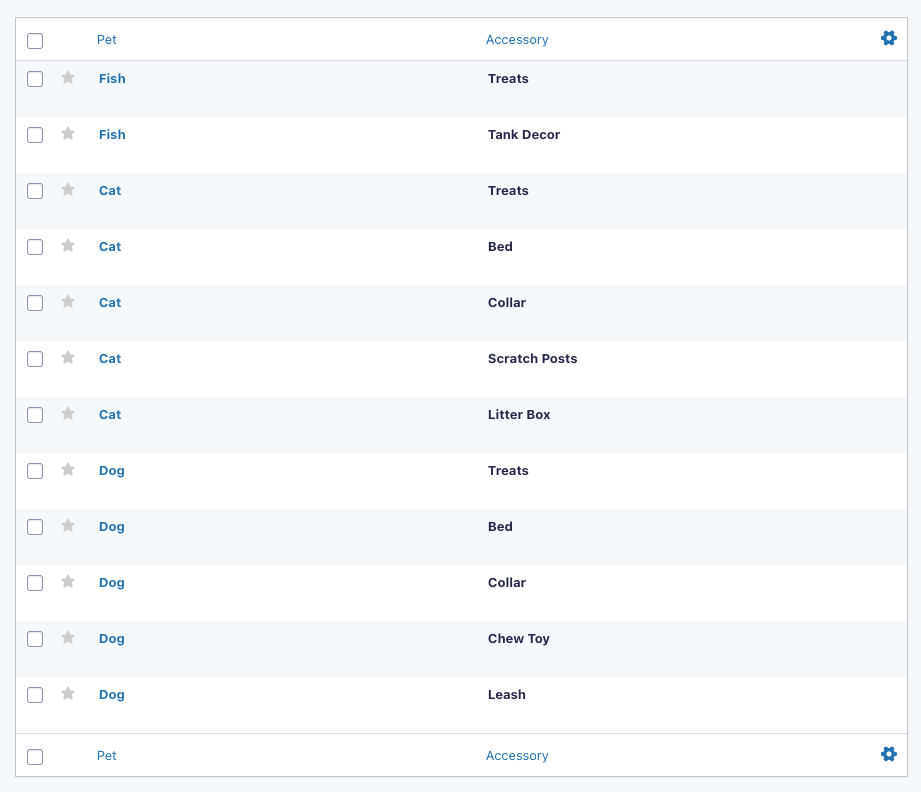
Before building that user-facing form, we first need to create a mapping form. This form is used to map out the different pet accessories and which pet they belong to.
Once we have entries for all of our pet accessory combinations, we will build the user-facing form using Populate Anything. Let’s get started.
Steps
Step 1 – Create a Mapping Form
We are going to make a form to store our source items and conditional values. Then, we will map those values to a Radio Button field in our user-facing form. Note this technique will work with any choice-based field (e.g. Drop Down, Radio Button, Checkbox, Multi-select).
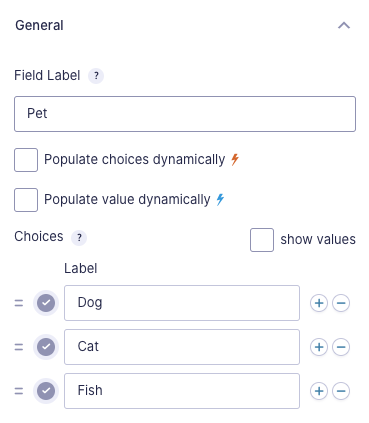
Start by adding a Radio Button field to the mapping form and set the choices to the different Pet types.
Then, add a Text field. In this field, we will we will input each of our pet accessories.
Step 2 – Submit Form Entries
With the fields added to your mapping form, submit entries for every pet/accessory combination.
Once all entries are submitted, we’ll build the user-facing form.
Step 3 – Create a User-facing Form
With all of the different pet accessories mapped to their appropriate pets, it’s time to build the form our users will see. This form contains two sets of Radio Button fields. The first is identical to the Radio Button field in our mapping form.
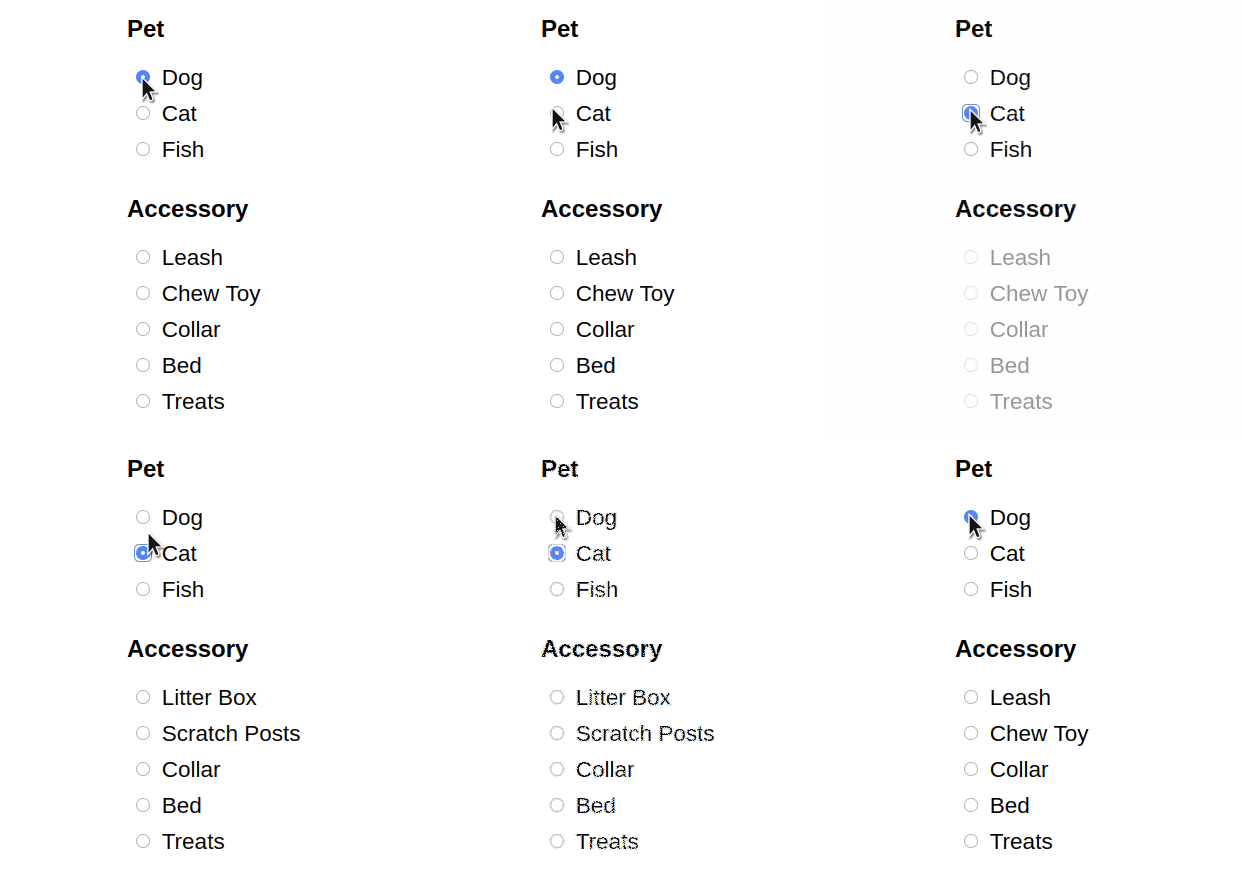
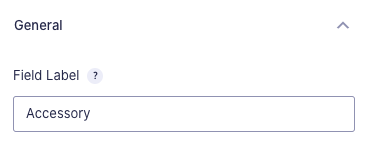
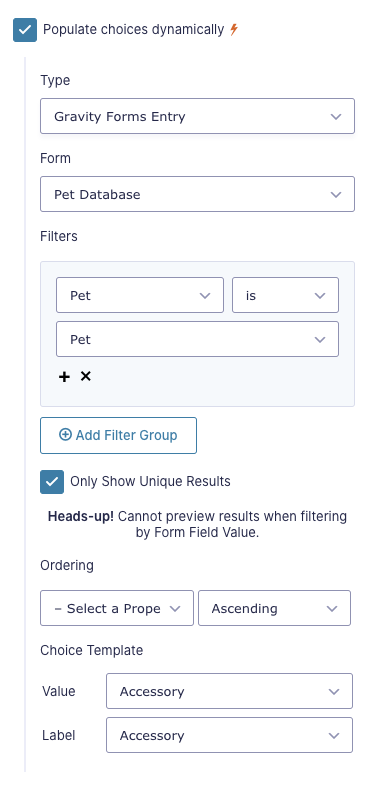
In the second Radio Button field, we’re going to use Populate Anything to populate all of the available pet accessories and filter those populated values by the selection made in the Radio Button from above.
With the filter in place, the form will automatically switch the available accessories based on the selected pet.
Taking It Further
Advanced Conditional Choices
Do you need conditional choices with multiple variables? Check out our Create Smart Forms and Advanced Conditional Choices with Gravity Forms article which demonstrates how you can filter choices by multiple user specified values (e.g. meal type and party size).
Check or Select Choices Conditionally
You can take it a step further and let the form automatically make selections in the choice-based field. Check out How to Check Checkboxes (and Other Choice-based Fields) Conditionally for a tutorial on setting that up.
Use Gravity Forms as a Database
If you’re looking for other ways to use Gravity Forms as a simple database, check out Using Gravity Forms as a Simple Database.





Are there any plans to further this kind of functionality with API requests instead of DB / entry requests only?
Hi Cameron,
No immediate plans, but we’re definitely open to suggestions and feature requests. Let us know what type of APIs you’re looking to integrate with, and we’ll pass it along to our product manager.
Hey guys, so either I’m dense or this doesn’t work. Here’s how I set up my Mapping Form:
https://paste.pics/HUQPH https://paste.pics/HUQPN
Here are my entries:
https://paste.pics/HUQPR
Here’s my front-end form:
https://paste.pics/HUQQ0 https://paste.pics/HUQQ9 https://paste.pics/HUQQD https://paste.pics/HUQQL
And here are the options I get on the front-end:
https://paste.pics/HUQQX
You can see this at the bottom of this page:
https://www.sn-translations.de/willkommen/
What am I doing wrong? (I have a hunch it might be something with the filter).
Hi Matt,
Thanks for the screenshots. It seems Populate Anything is not active for the dropdown. If you have an active Gravity Perks license, please send us a support request and we will try to help.
Best,
Is it possible to use populate anything in a similar way essentially as an attribute filter for WooCommerce products. I’m not too worried about pricing or creating orders I’d just like a few drop downs to filter down a large product range to a more manageable selection.
Its a bit like the book listing you have as a demo on the Populate anything perk page but I’m looking to do it from products rather than posts. Been trying but can’t seem to get it right.
Thanks
Hi Tim,
We’ll need more information on your setup to assist you with a solution. So I have sent you a message via email requesting this additional information.
Best,
Is it possible to Limit how many time they can choose these checkboxes? Our idea that we have a form in order to sign up for a course. I that form there is a field where they can choose (with checkboxes) the date and location for the particular course, but we need to limit that each date and time only can be chosen for 10 patrician. We bought the Limit perk but I did not figure out hot to set that.
Thank you in advance.
Hi Daniel,
I would suggest using GP Inventory for this. It integrates with Populate Anything. You would populate the Choice and Value, but not the Inventory Limit. For that, you can just type in
10.Is there a way to add conditional logic to choices? For example, I have a nested form in my form that acts as an agreement that they have an option to sign then or later. I have a radio choice that says “Agreement signed?” and yes or no choices. Is there a way if that the user completes the agreement it will mark it yes and if not no?
Hi Parker,
It’s possible using this tutorial to create conditional choices, however, to determine if what you’re asking about is possible or not, we’ll have to take a closer look at your setup. If you have an active Gravity Perks license you can get in touch with us via our support form.
Best
Can this be done using DROP DOWN fields instead of RADIO buttons?
Woody House
Hi Woody,
Absolutely. This will work with any choice-based field, such as Drop Down, Radio Buttons, Checkbox, and Multi-select.
I can easily get the fields to populate choices from my database, but when I submit the form with the newly populated choices, only the first line of choices displays/prints on the confirmation or notification pages. Is there a fix for this? I need to display the results of the choices selected on the form in both confirmation and notification.
Hi Lori,
Thanks for writing in.
I’m not tracking the question properly, but it is probably related to Populate Anything only showing the first result.
If you have an active Gravity Perks License, you can get in touch with us via our support form with your account email address and we’ll be happy to dig into this further.
Best,