Create Smart Forms and Advanced Conditional Choices with Gravity Forms
Learn how to create smart forms that dynamically update available fields based on user input.
This article requires the GP Populate Anything perk.
Buy Gravity Perks to get this perk plus 48 other premium Gravity Forms plugins!
Why Create Smart Forms in WordPress?
Have you ever wanted to create smart forms that automatically change the available choices in a choice-based field (think Checkboxes, Radio Buttons, Drop Down) based on user input?
Say you run a catering company and you want to adjust the available menu items based on two criteria: if the event is a lunch or dinner, and if the number of guests is above a certain threshold.
In this tutorial, we’ll walk you through how to use Gravity Forms (and related perks) to create choice-based fields that will conditionally adjust available options depending on selections made in other fields.
Getting Started with Gravity Forms Conditional Choices
Before building our user-facing form, we first need to create a mapping form. This form is used to map out all the different configurations for our menu items. This form will act as a data entry point for each menu item, creating a simple database.
Once we have entries for all of our menu item combinations, we will build the user-facing form using Populate Anything. Let’s get started.
Steps
Step 1 – Create a Mapping Form
We are going to make a form to store our source items and conditional values. Then, we will map those values to a Checkbox field in our user-facing smart form. Note this technique will work with any choice-based field (e.g. Drop Down, Radio Button, Checkbox, Multi-select).
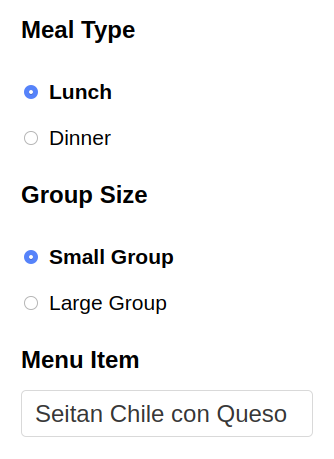
For this tutorial, we’ll be building a form for a catering company. When the user indicates the type of event and the number of guests, a Checkbox field will populate with the menu item options.
A Mapping form is created in Gravity Forms to connect values from one form to another. These can be used to automatically populate fields on a destination form with dynamic values pulled from a source form.
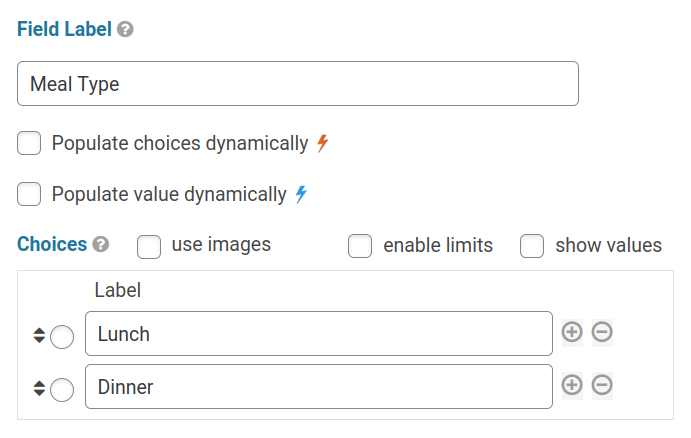
Start by adding a Radio Button field to your mapping form and set the choices for that field. Our choices are Lunch or Dinner.
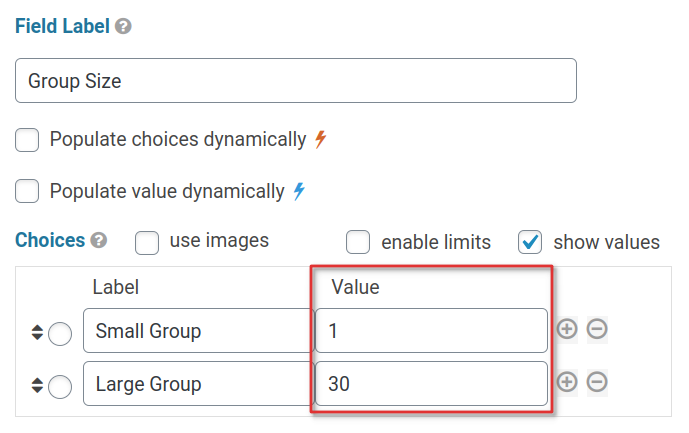
Then, add a second Radio Button field to the mapping form. This field will be used to indicate if the menu item is exclusive to large parties. The threshold we’re using is 30 guests, so we manually set the values for each Radio Button choice accordingly.
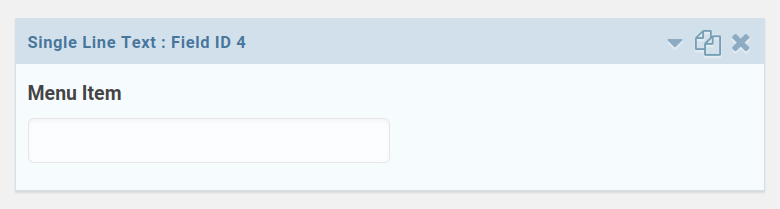
Lastly, add a Text field to the mapping form. In this field, we will input our menu items.
Step 2 – Submit Form Entries
With the three fields in place, submit form entries for the different menus.
Depending on the number of configurations, this might require many submissions. For example, my catering menu has 4 levels: Lunch, Lunch Large Group, Dinner, Dinner Large Group. The Lunch menu—for less than 30 guests—has 3 items:
- Seitan Chile con Queso
- Lasagna Cruda
- Cremini Ravioli
The Lunch Large Group menu—for parties larger than 30—has 5 items, the 3 included in the normal Lunch menu and 2 extra items.
- Seitan Chile con Queso
- Lasagna Cruda
- Cremini Ravioli
- Smoked Portobello Steak
- Brussels Ramen
In order to create the Lunch Large Group menu, I have to submit entries that contain all of the Lunch items and two additional entries for the new items.
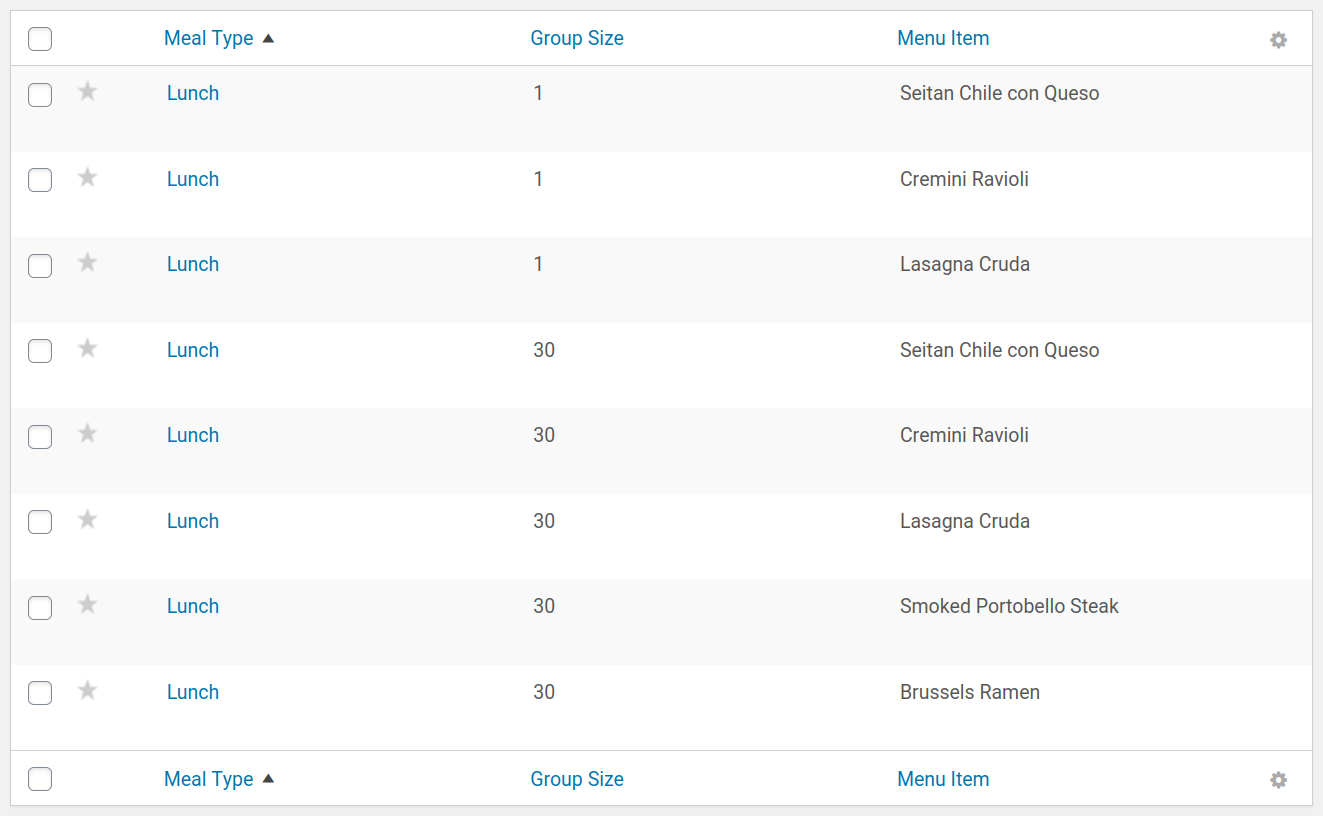
This same pattern continues for the Dinner and Dinner Large Group menus because I want to include the lunch items in the dinner menus. Once I have all of the entries submitted, I can build the user-facing form.
Step 3 – Create the User-facing Form
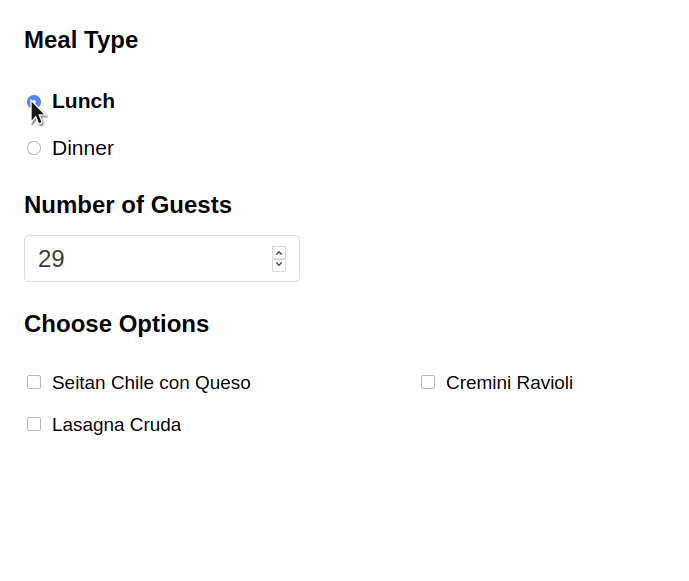
The form our users will see is similar to the mapping form, with some key differences. It contains three fields: a Radio Button, Number, and Checkbox field.
Add the first Radio Button field to your form and set the choices to Lunch and Dinner. This is identical to the field in our mapping form.
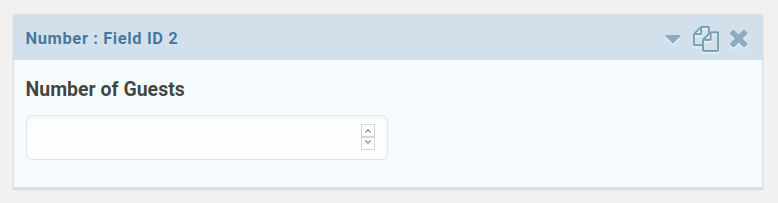
Next, add the Number field and title it “Number of Guests”. In this field, the user will input the exact number of guests for their party.
Then, add the Checkbox to the form. In this field, we will use Populate Anything to populate the menu items from our previously submitted entries and filter on the Meal Type and Number of Guests.
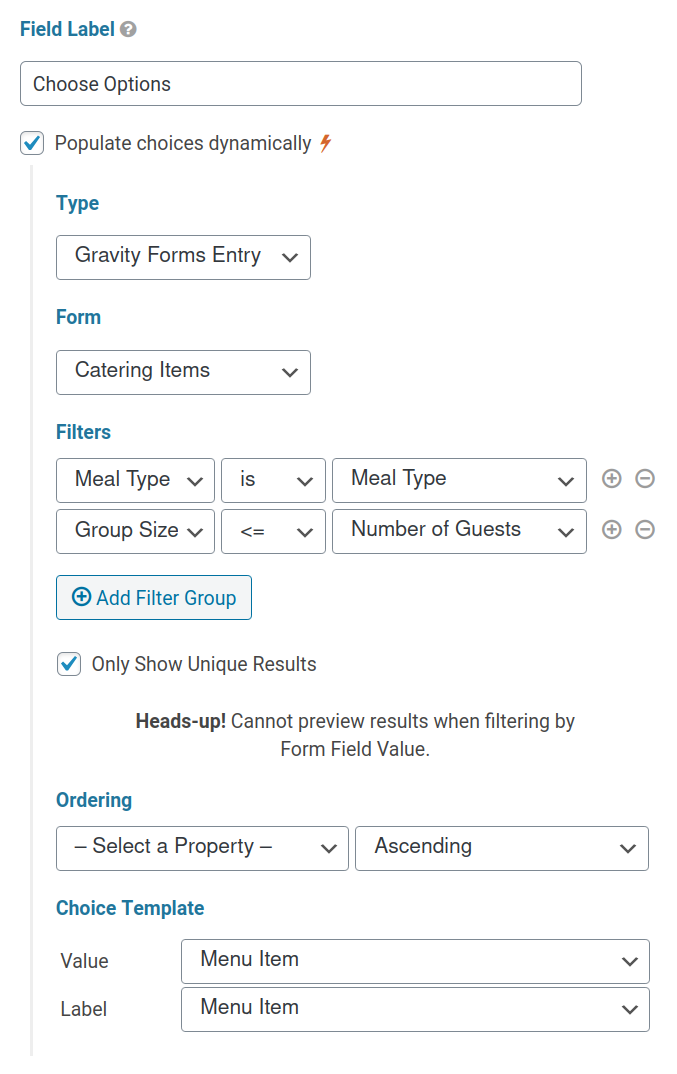
With the field mapped, the form will automatically adjust the available options based on the selected meal type and number of guests.
Taking It Further
Building complex interactive forms is easy with Populate Anything. You can take it a step further and let the form automatically make selections in the choice-based field. Learn more on How to Check Checkboxes (and Other Choice-based Fields) Conditionally for a tutorial on setting that up.
If you’re looking for other ways to use Gravity Forms as a simple database, check out Using Gravity Forms as a Simple Database.


This is exactly what I needed!!!! Gravity Wiz is AWESOME!!!
Thank you so much!
Hi Robert,
Fantastic. Glad to hear this article helped!