Gravity Forms in Elementor: A Complete Guide
Learn how to install and use Gravity Forms and Elementor together to create custom forms and embed them into your site.

- What is Elementor?
- How to Create a Basic Contact Form With Gravity Forms
- How to Display Gravity Forms Using Elementor (3 Methods)
- Transform How You Display Elementor Forms
Creating a visually stunning website in WordPress that engages and converts users is more important than ever.
To achieve this, many website owners look to integrate two WordPress plugins:
- Elementor, a powerful drag-and-drop page builder used on over 8.5 million websites, which helps create beautiful, responsive designs, and
- Gravity Forms, a popular form-building solution, active on over 1 million sites, which lets you create all types of powerful and customizable forms.
Integrating these two popular plugins can be a bit tricky. Elementor does not natively support the display and customization of forms created using Gravity Forms.
Fortunately, there are several ways to easily add forms created using Gravity Forms to your WordPress website using Elementor.
In this article, we’ll show you three different solutions, each with their own benefits and drawbacks, so you can choose the best method for your particular needs.
After that, we’ll also introduce you to some powerful options for taking your form functionality to the next level — which can help you create advanced, customized Gravity Forms powered workflows.
So, let’s dive in and explore how to add Gravity Forms to Elementor!
What is Elementor?
For those already acquainted with WordPress, Elementor is likely a familiar name. It is one of the most popular visual page builder plugins available for WordPress, and its intuitive drag-and-drop interface has helped make it a favorite among web designers and developers.

Here are some of the key features that make Elementor stand out:
- Drag-and-drop interface: Elementor allows you to easily design web pages by dragging and dropping widgets onto your page. You can customize your page layout, add images, videos, buttons, and more in a few clicks.
- No coding required: You don’t need to have any coding experience to use the Elementor page builder. With its intuitive interface, you can create sophisticated and visually attractive web pages easily.
- Centralized design dashboard: Elementor provides a centralized design dashboard that makes it easy to navigate and access all of the tools you need for designing your website.
- Extendible widget library: Elementor has an extensive widget library that enables you to add all kinds of elements to your WordPress site, including custom post types, WooCommerce products, and more.
With these powerful features, Elementor makes it easy to create beautiful and professional-looking web pages without the need for coding or technical expertise.
While it’s an excellent page builder, we’ve noted that it doesn’t have built-in functionality to add Gravity Forms directly. Before we discuss the three easy methods for displaying Gravity Forms using Elementor, let’s quickly go over how to set up your first form with Gravity Forms.
How to Create a Basic Contact Form With Gravity Forms
To embed your forms using Elementor, you’ll first need to create one. In this section, we’ll walk you through the steps to create a basic contact form using Gravity Forms.
If you’re already familiar with creating forms in Gravity Forms, you can skip ahead to the next section.
- From your WordPress dashboard, go to ‘Forms’ > ‘New Form’.
- Give your form a name in the ‘Form Title’ field. For example, ‘Contact Form’.
- Use the Gravity Forms drag-and-drop editor to add your required form fields. For a basic contact form, you’ll likely want to include fields for the user’s name, email address, and message.
- To add a new field, click on the ‘Advanced Fields’ or ‘Standard Fields’ tabs on the right-hand side of the editor, then drag and drop the field you want to add onto your form.
- To customize each field, click on the field and adjust its settings in the ‘Field Options’ panel on the left-hand side of the editor.
- Once you’ve added all the fields you need, click ‘Update’ to save your form.
Here’s a short video of the process for reference.
That’s it! You’ve now created a basic contact form with Gravity Forms. You can preview your form by clicking on the ‘Preview’ button at the top of the editor. Once you’re happy with your form, you’re ready to embed it on your website using one of the three methods we’ll cover in the next section.
How to Display Gravity Forms Using Elementor (3 Methods)
Now that you know how to create a basic contact form with Gravity Forms, let’s dive into the three methods to display your form on your WordPress website using Elementor and Elementor addons.
We’ll cover the most straightforward and commonly used methods for embedding your Gravity Forms, including:
- Using a shortcode,
- Using the Gravity Forms widget, and
- Using a third-party widget
Each method has its own benefits, so we’ll go through step-by-step instructions for each one to help you choose the best option for your needs.
Let’s begin!
Method 1: Embedding a Gravity Form Using a Shortcode
Using a shortcode to embed a Gravity Form into your website is one of the fastest ways to use the plugin with Elementor. It requires no third-party installation or complicated steps, making it a great option for those who want to add a form to their site without too much fuss.
Shortcodes also have a range of additional functionality above and beyond simple form display, so they’re one of the most versatile options when it comes to embedding your Gravity Forms.
Here’s how to add a Gravity Form to your website using Elementor’s shortcode widget:
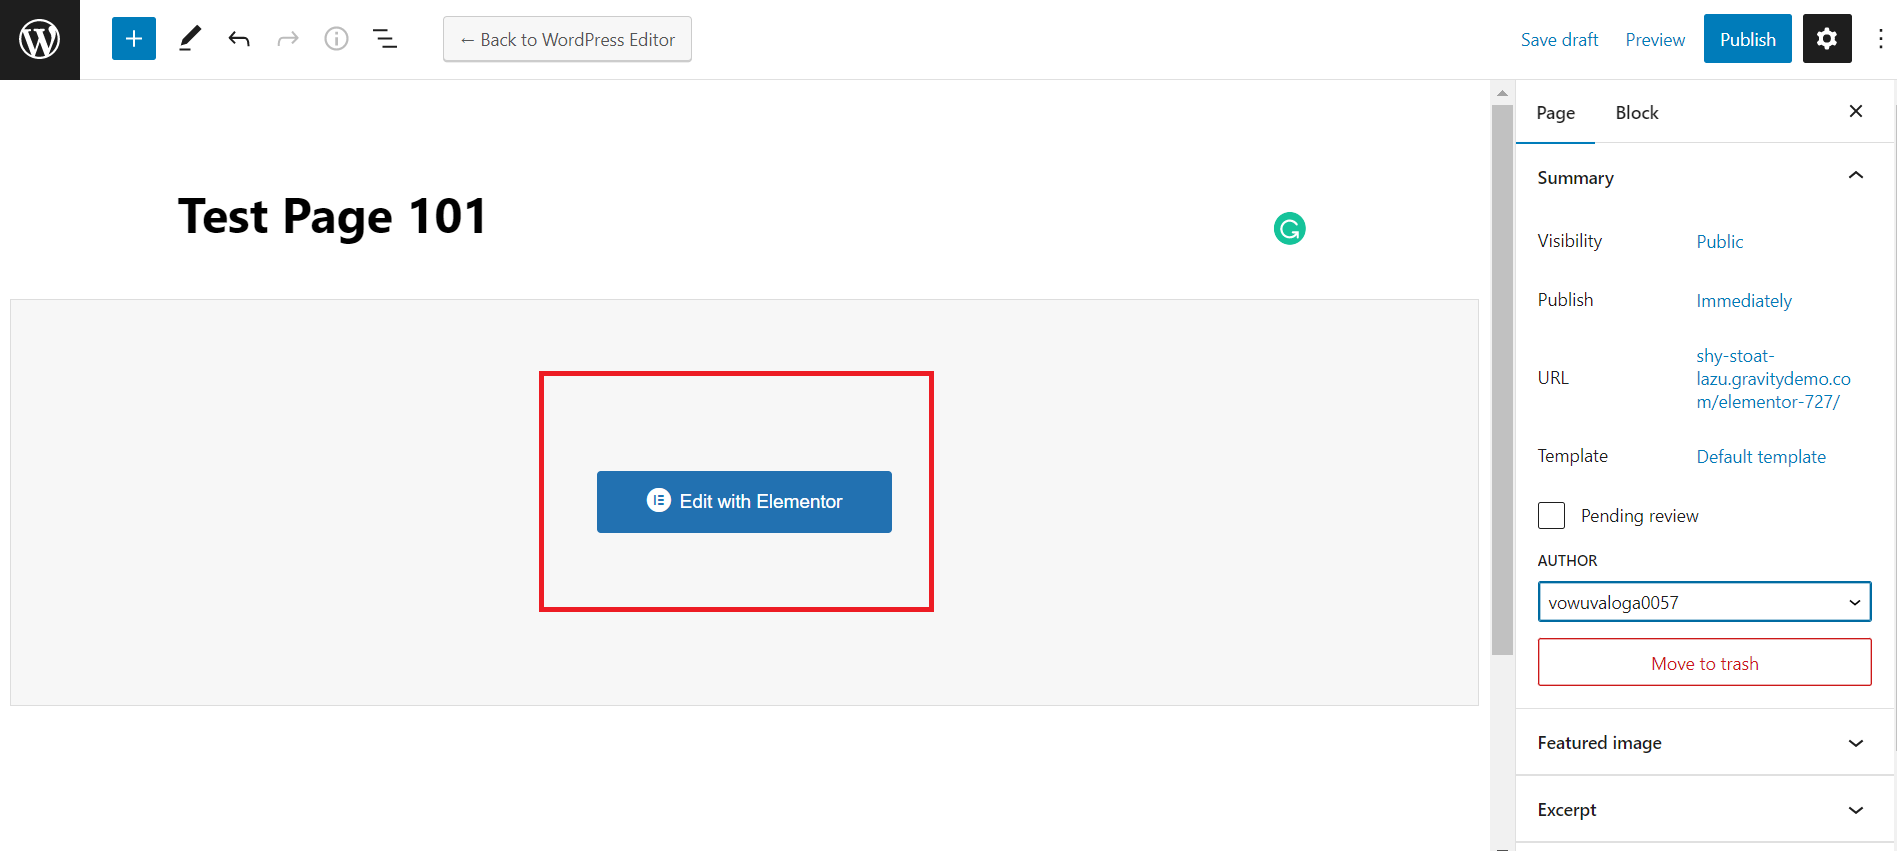
- Navigate to the page you want to edit and click ‘Edit with Elementor’.
- Under the ‘Elements’ tab, search for ‘Shortcode’ and drag and drop the Shortcode widget onto your page.
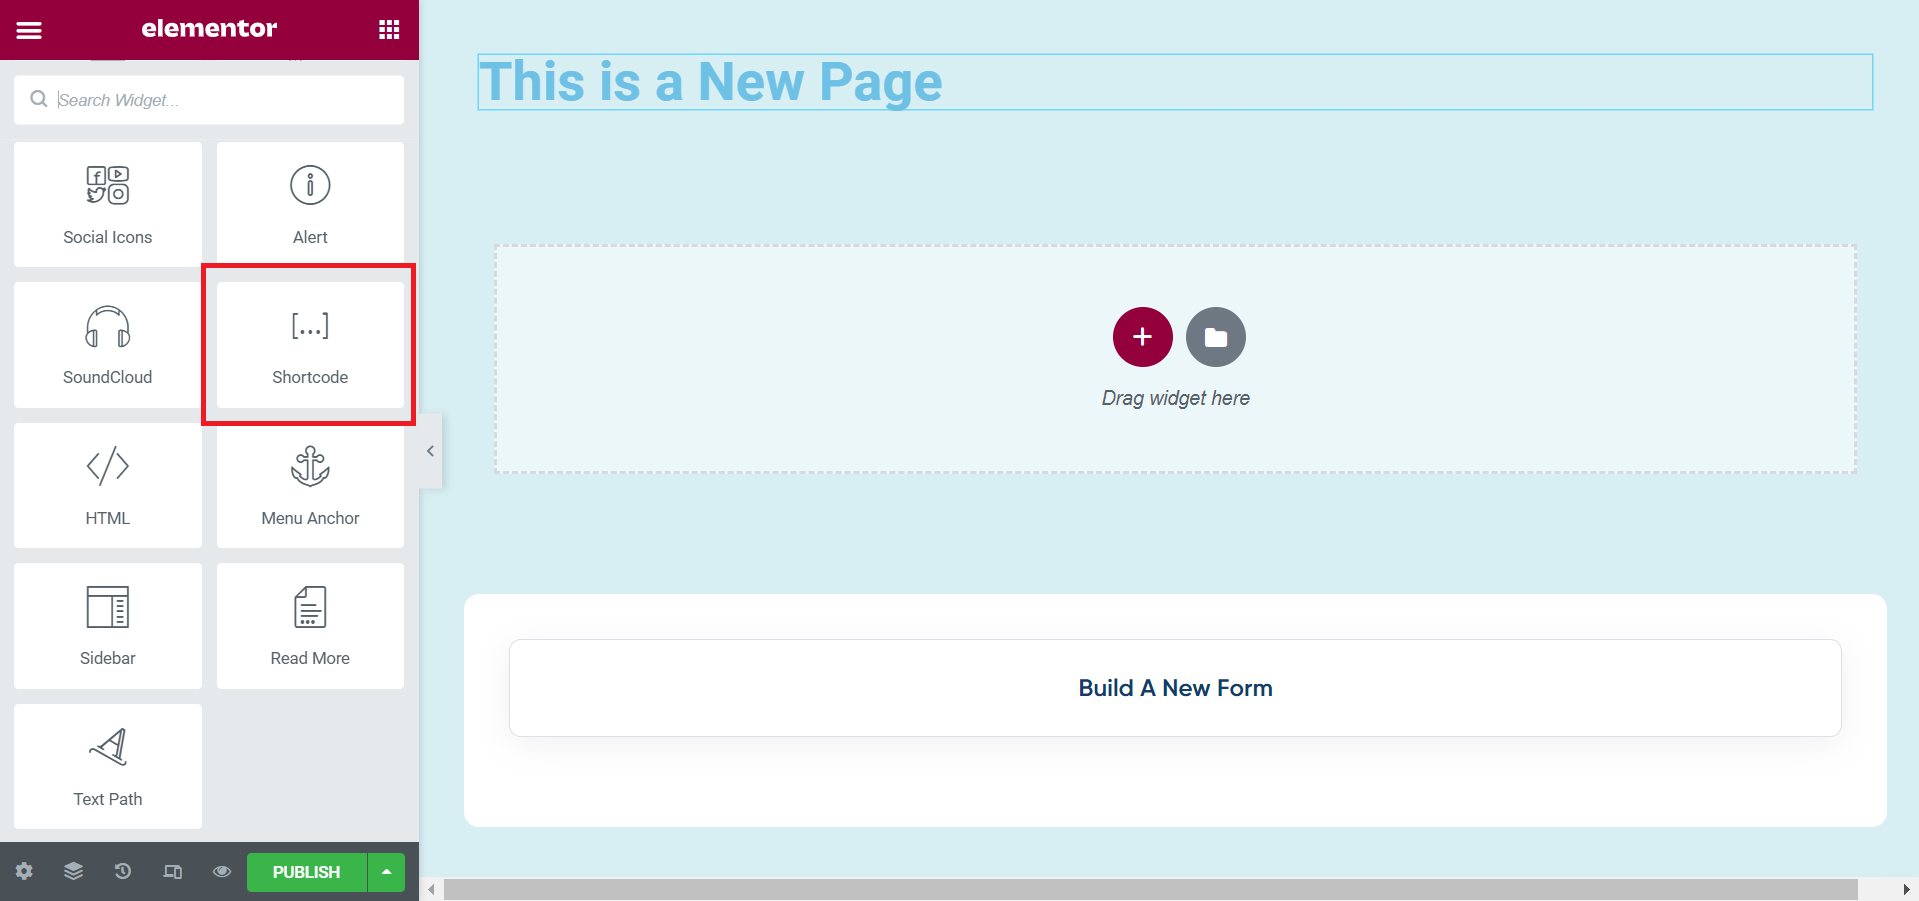
- Add the shortcode for the form you want to use to the widget. The shortcode should be in the format:
[gravityform id="form id" title="true/false" description="true/false" ajax="true/false"]

- Note that “Form ID” should be replaced by the ID of the form you want to embed. To find this, from your WordPress dashboard, navigate to ‘Forms’ – you’ll see each form’s ID in the right-hand column.
- Choose either “true” or “false” for ‘title’, ‘description’, and ‘ajax’ to determine whether or not to display the form title or description and whether or not to use AJAX when submitting the form.
- For example, if you wanted to add a form with the ID ‘25’, you wanted to include the title and description, and you wanted to use AJAX when submitting the form, your shortcode would look like this:
[gravityform id="25" title="true" description="true" ajax="true"] - Once you’ve pasted in your shortcode, a preview of your form should load in the visual editor.
Note that you won’t have access to any styling options by default when using this method. If you want to add your form using a shortcode and want to customize your form outside of Gravity Forms’ default styles, any custom styling will need to be done using CSS code.
Using shortcodes is a great way to quickly add a Gravity Form to your website without the need for any complicated third-party integrations. While this method doesn’t provide extensive customization options, it’s a great starting point for those looking to embed their first form with Gravity Forms and Elementor.
Method 2: Using the Forms Widget
Widgets are the basic building blocks for your webpage. They are used to add all sorts of functionalities to a page, from writing text to adding images, forms, testimonials, carousels, FAQs, and other dynamic data.
Using the WordPress ‘Form’ widget along with the Elementor ‘Sidebar’ widget to embed a Gravity Form takes a few extra steps, but it offers a way to display an interactive form while keeping your WordPress installation lean and simple since no other shortcodes are required.
Before you begin, make sure you have installed Gravity Forms on your site and an Elementor Pro subscription, as the form widget is part of the Pro features.
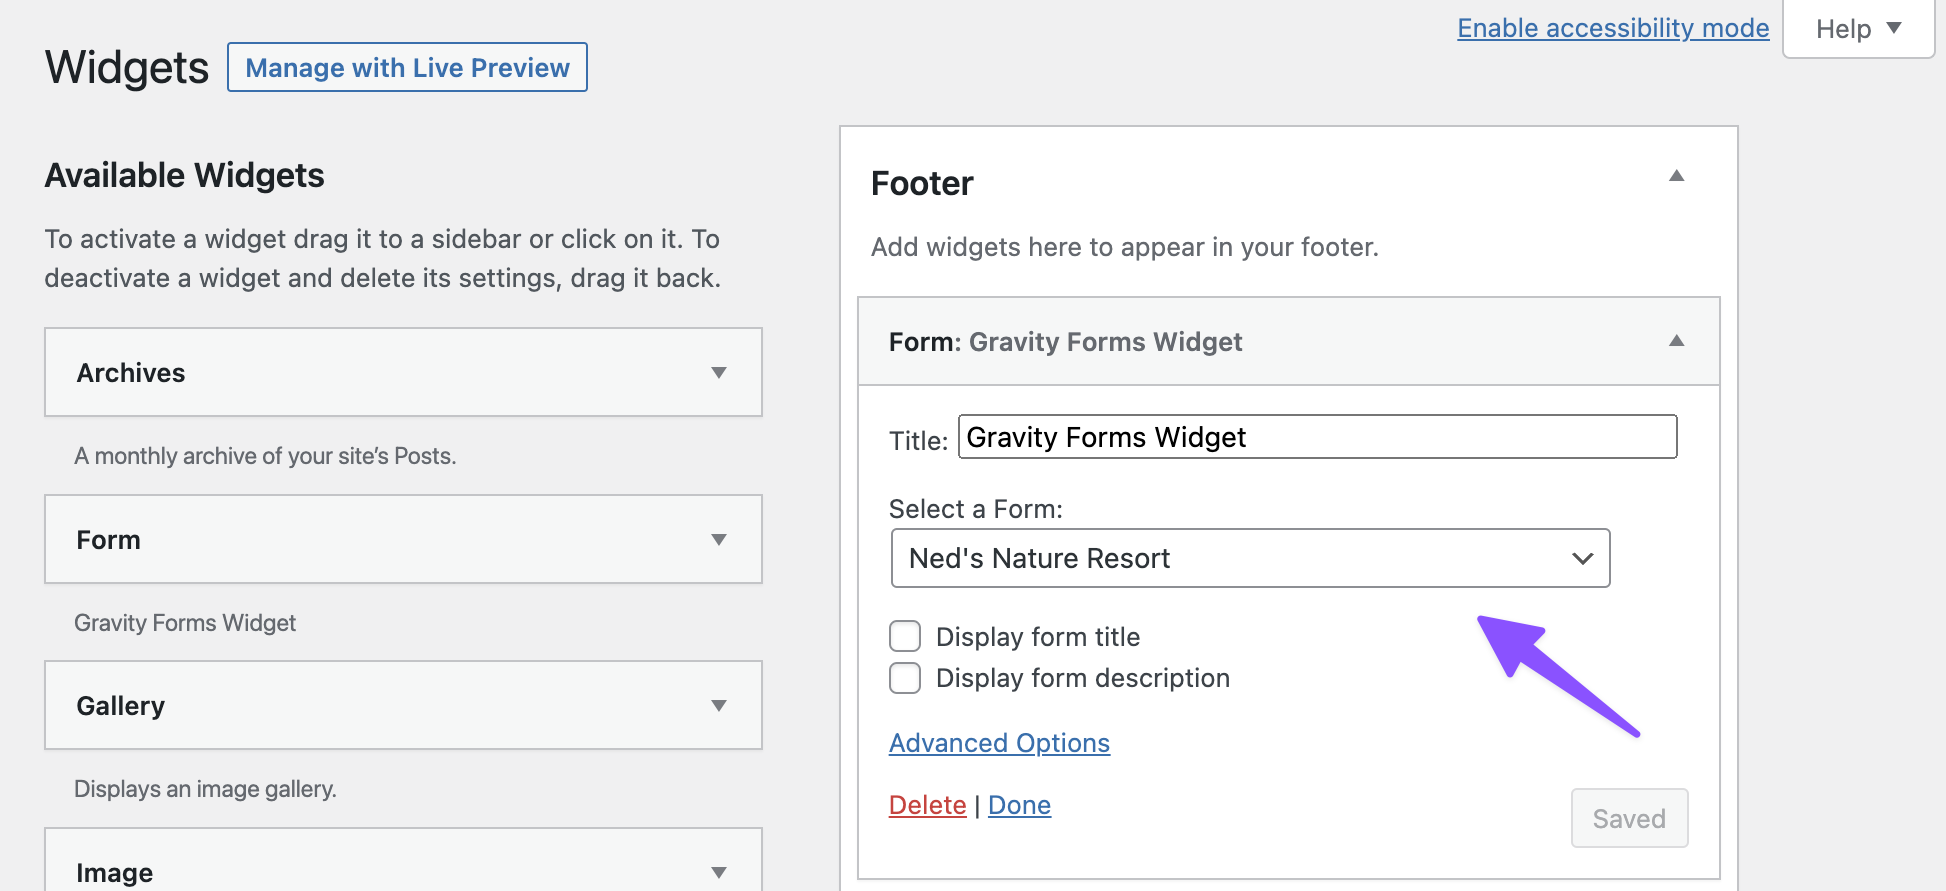
- First, navigate to Appearance › Widgets from the WordPress Dashboard.
- Under ‘Available Widgets’, look for the ‘Form’ widget and drag it to any widget area. This example uses the Footer area.
- Give your widget a title and select which Gravity Form you’d like to use. Save.
- Next, navigate to the page you want to add the form to and click ‘Edit with Elementor’.
- Under the ‘Elements’ tab, search for ‘Sidebar’, then drag and drop the ‘Sidebar’ widget where you want it on the page. You can choose from different pre-designed form layouts and templates, or create your own design by selecting the ‘blank’ layout.
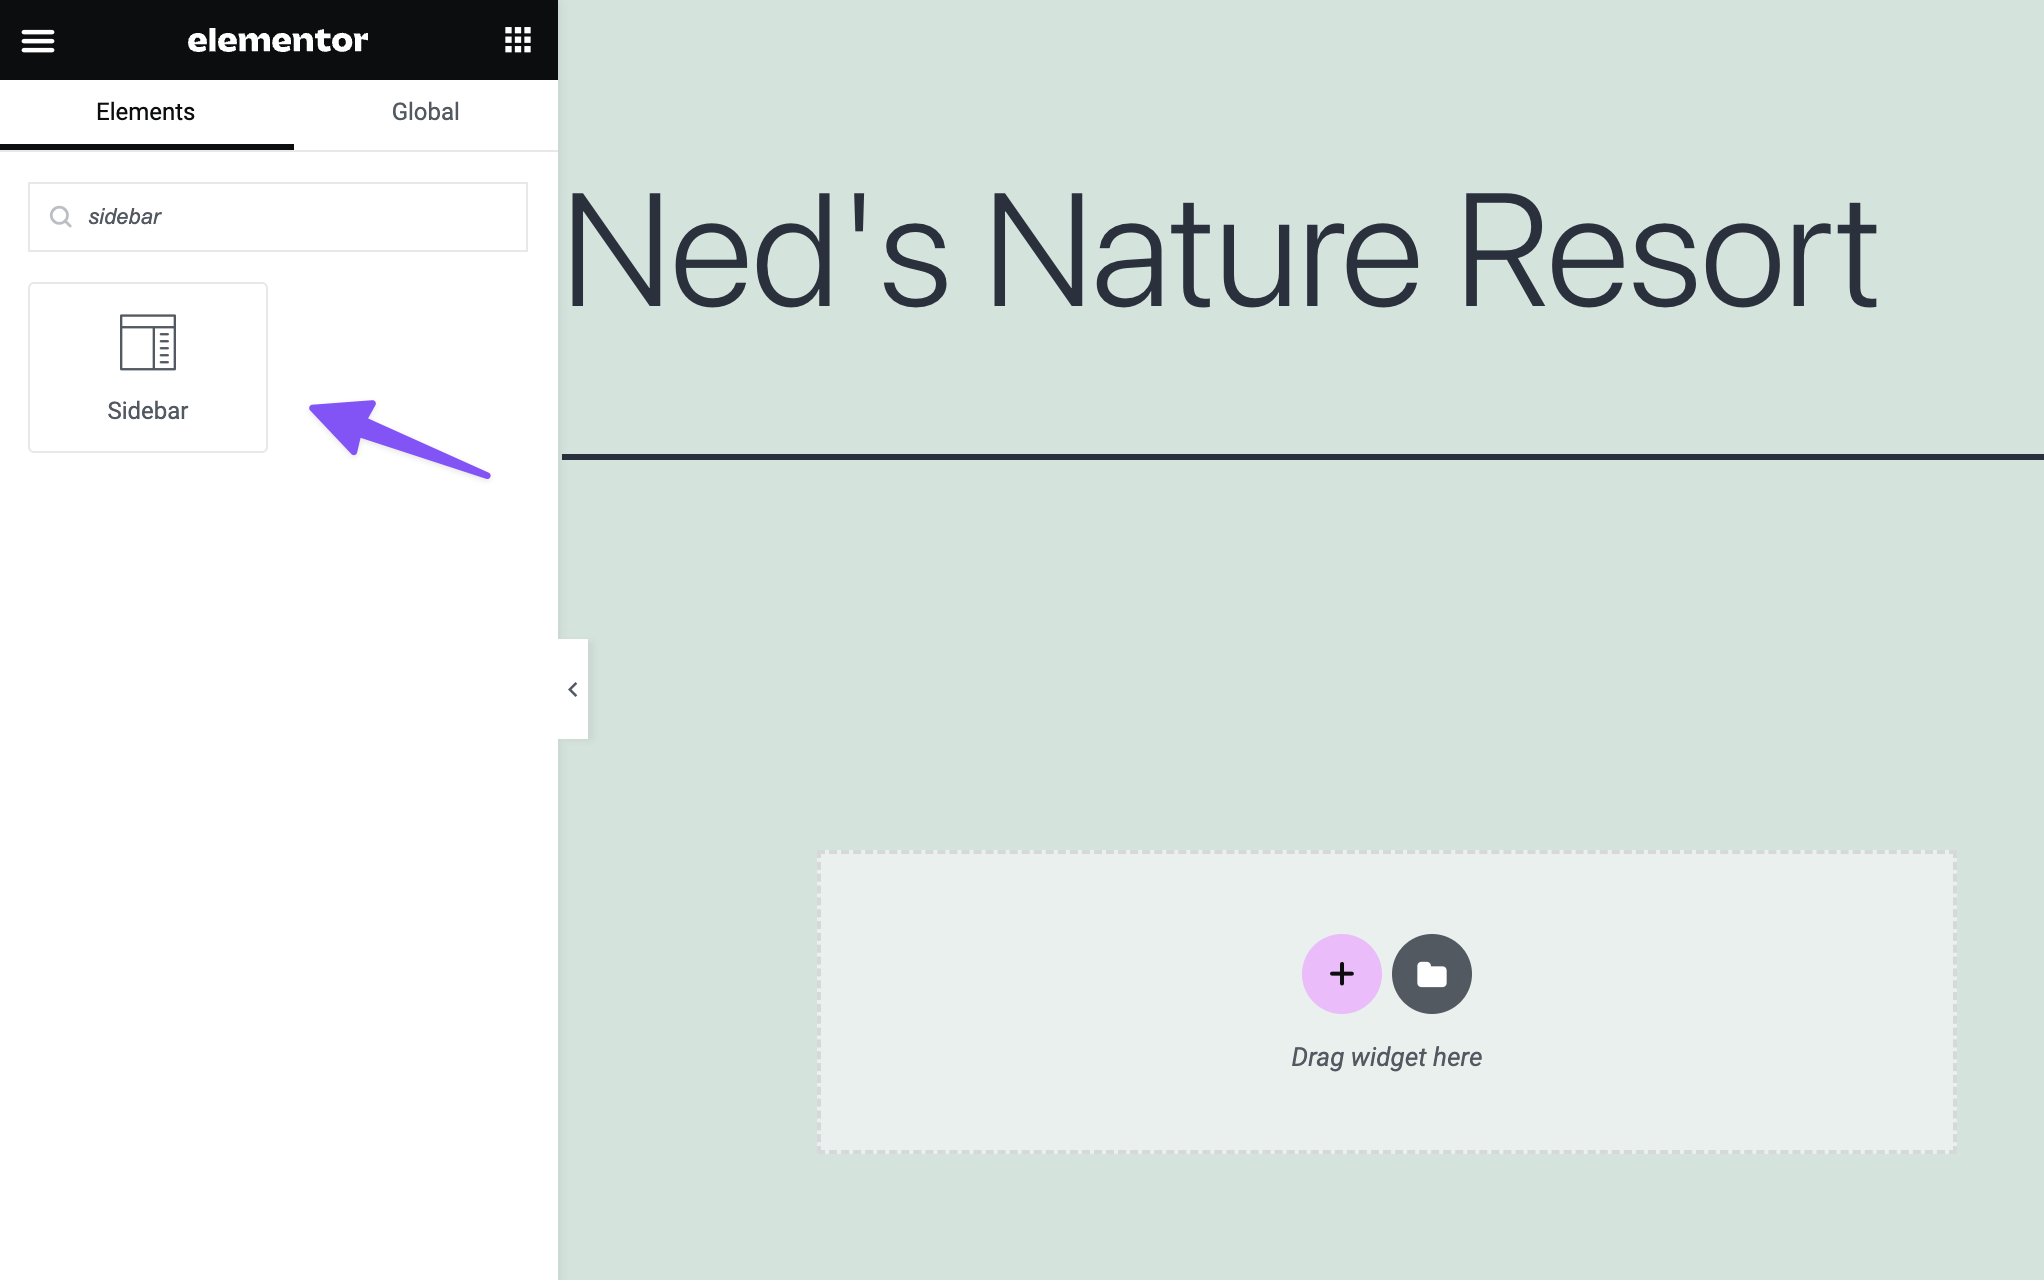
- In the ‘Sidebar’ widget settings, select the sidebar that you’d like to use. This should be the widget area where you added your form in the step above.
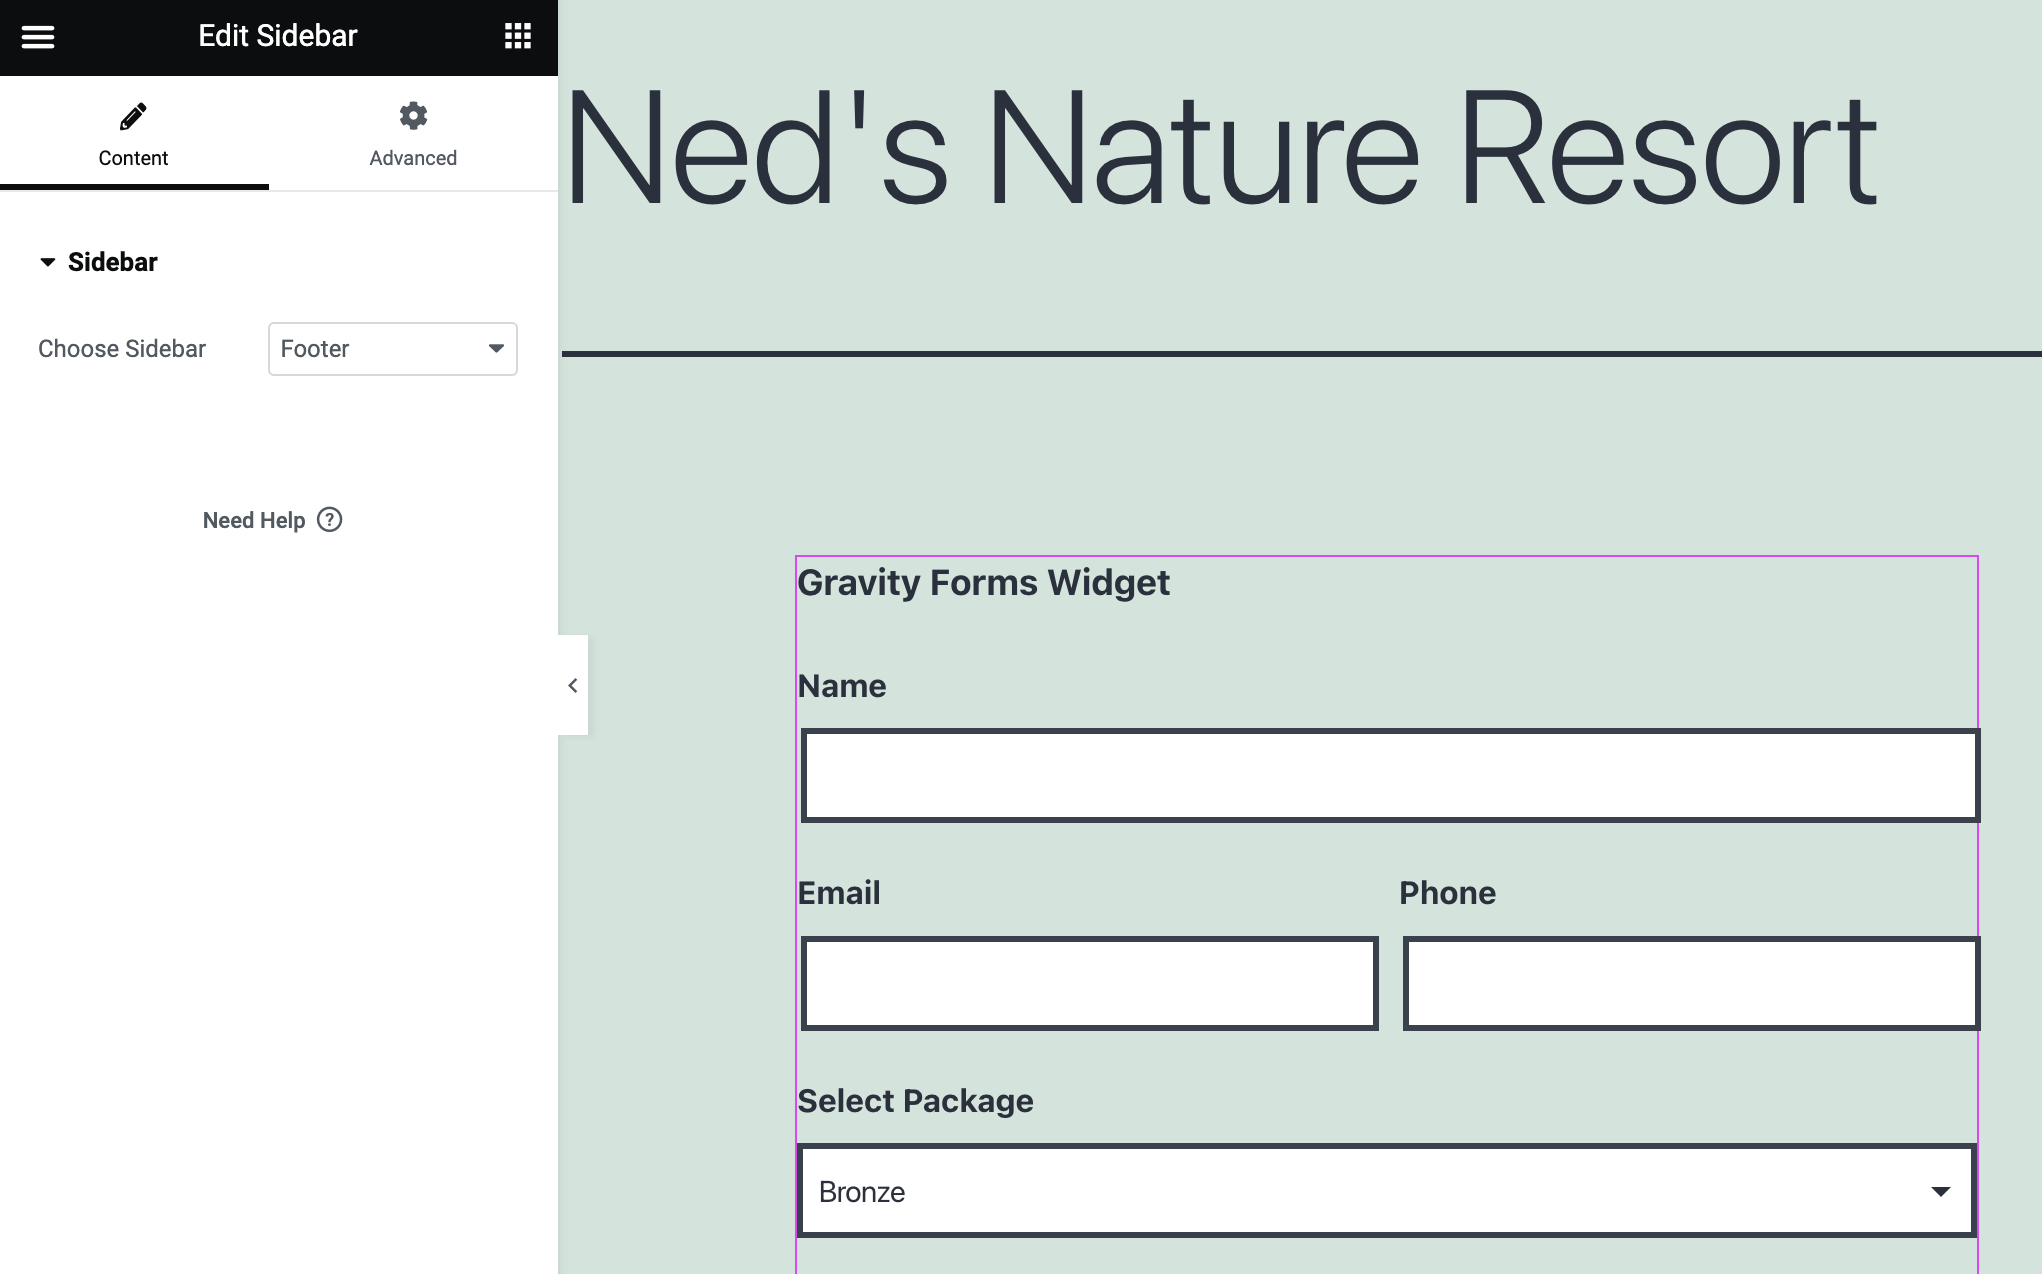
Overall, using the Form widget in the Elementor editor is a simple and straightforward way to add a form to your website. It’s ideal if you want to quickly add a form to your page without having to worry about custom shortcode or other complications.
Method 3: Using a Third-Party Widget
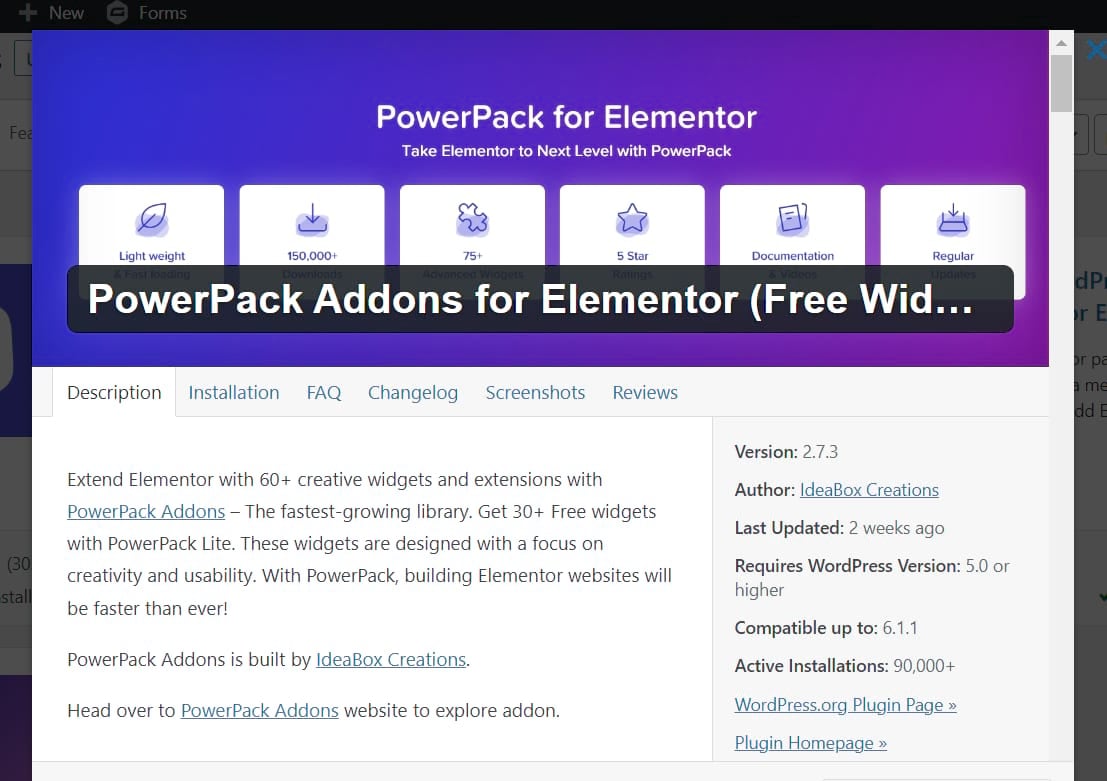
The third method for embedding a Gravity Form in Elementor is to use a third-party widget. In this case, we’ll be using the PowerPack Addons for Elementor plugin.
While this method is the most complicated of the three, it offers the advantage of allowing you to style your forms once they have been embedded.
Here’s how to embed a Gravity Form in Elementor using a third-party widget:
- Download and install the free PowerPack Addons for Elementor plugin. This plugin extends Elementor with an additional 70+ widgets, including a dedicated Gravity Forms widget.
- Navigate to the page you want to add the form to and click ‘Edit with Elementor’.
- Under the ‘Elements’ tab of the visual page builder, search for ‘Gravity Forms’.
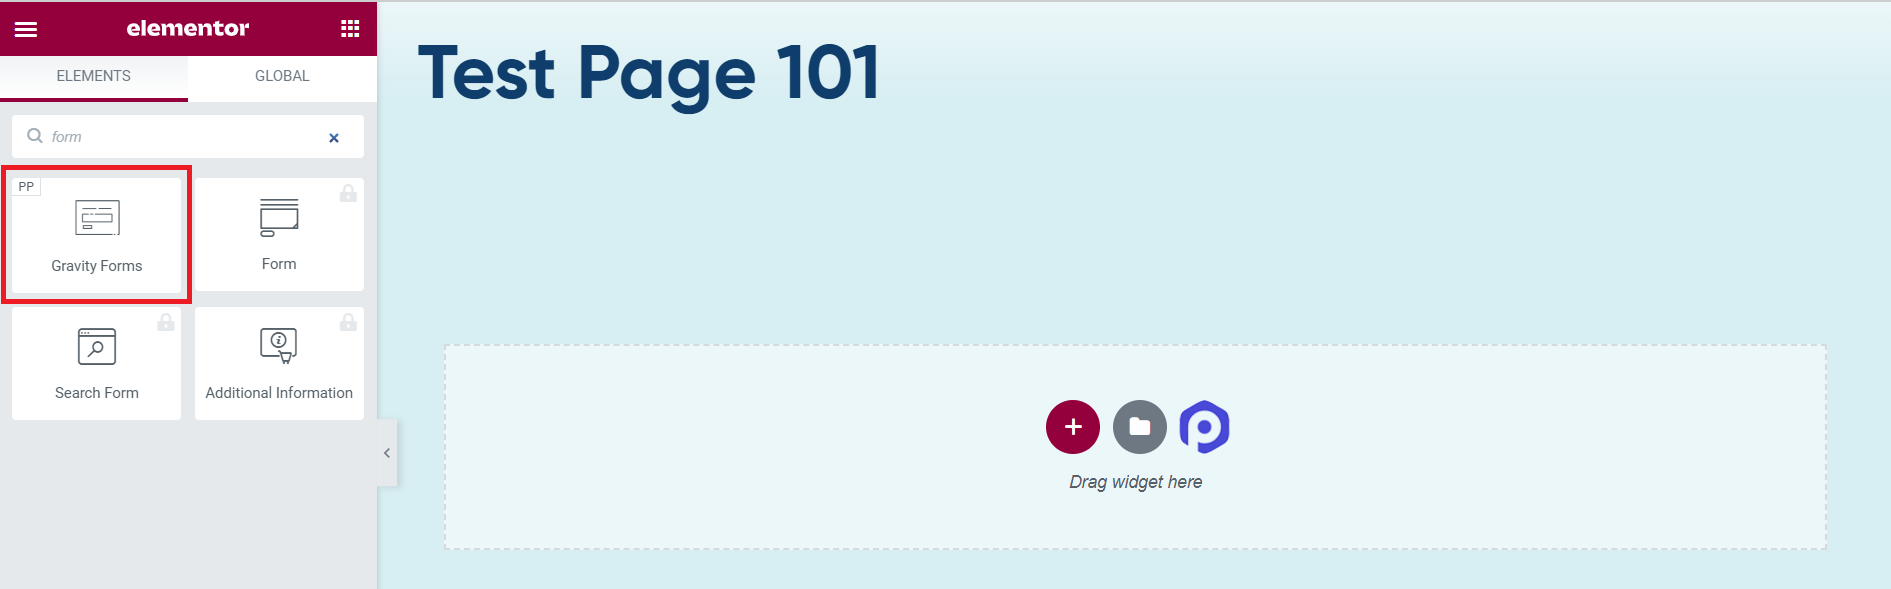
- Drag and drop the Gravity Forms plugin widget wherever you would like on your page. There will be a dropdown menu, from which you can choose your form. Once this has been selected, a preview of your form will appear inside the page editor.
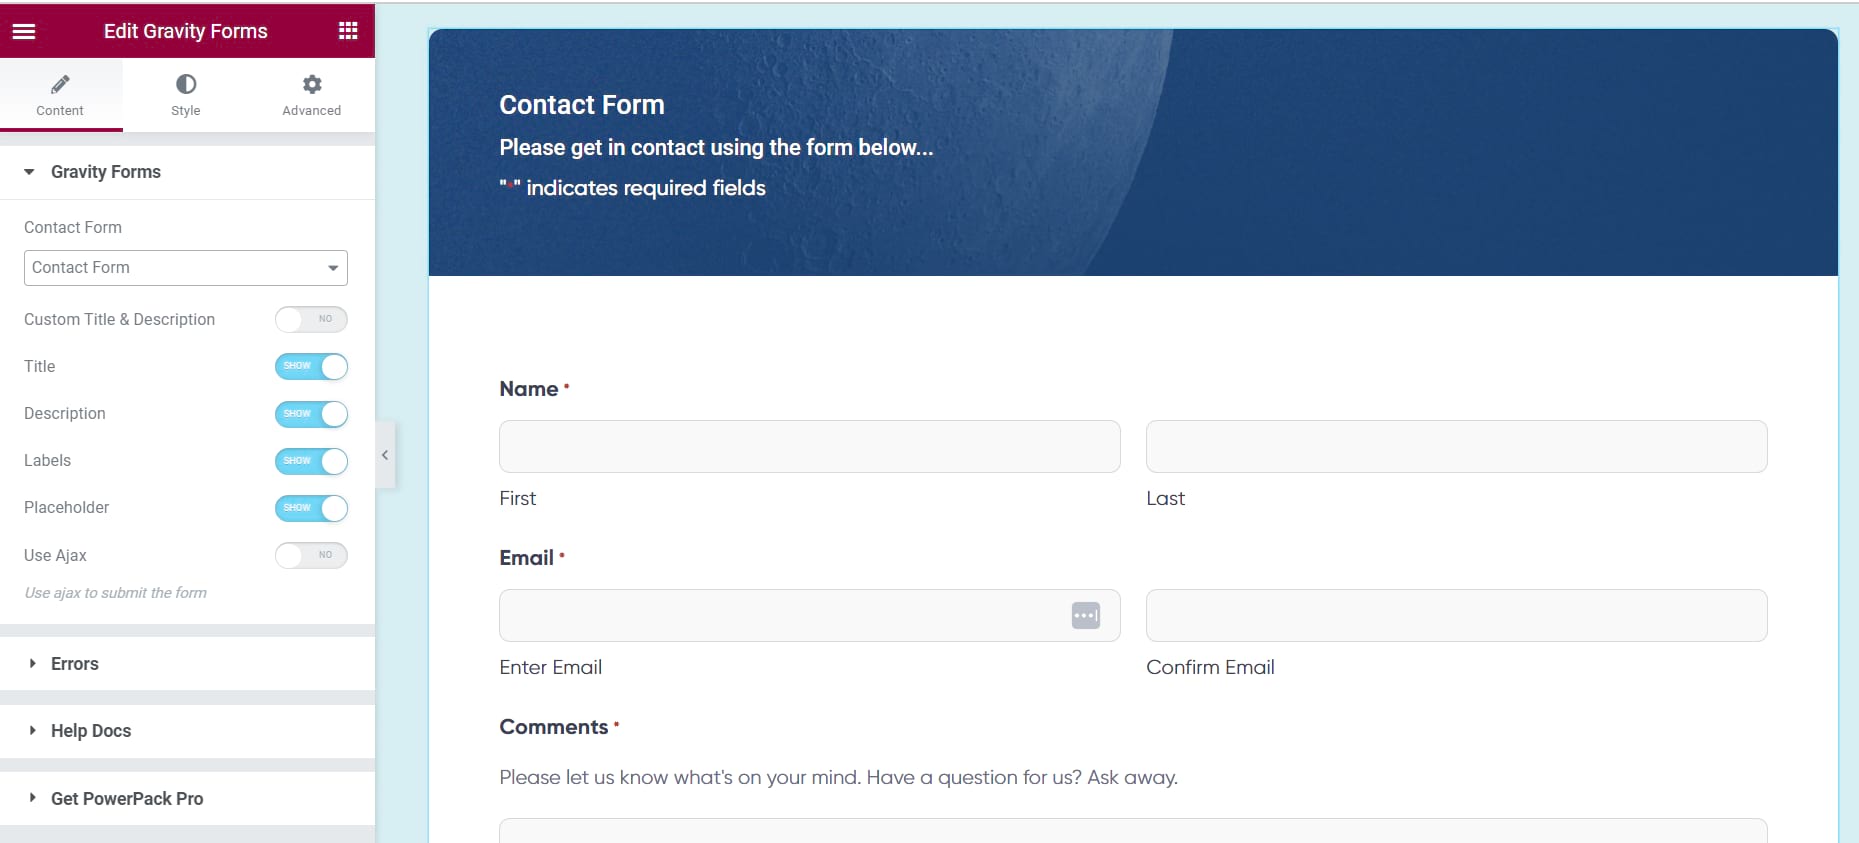
- Customize your form using the additional options in the widget menu, including:
- Choose whether to display the form title and description.
- Use AJAX when submitting the form to prevent annoying page reloads.
- Style your form from the Style tab in the widget menu. This enables you to style various elements of your form, including typography and color, form labels, form field display (e.g. size and appearance of input boxes and submit buttons), and form notifications
- Once you are happy with the appearance of your form, hit ‘Publish’.
Another option for a third-party widget is the Essential Addons for Elementor plugin. This plugin also offers a dedicated Gravity Forms widget that works in much the same way as the one provided by PowerPack Addons.
With this method, you have greater control over the styling of your forms and can fully customize them to fit your website’s overall design.
Transform How You Display Elementor Forms
Gravity Forms is undoubtedly one of the most robust form builder plugins available for WordPress websites, and its integration with Elementor makes it even more powerful. By adding Gravity Forms to Elementor, you can create stunning, bespoke forms that complement your site’s design and branding.
Having said that, although Gravity Forms is an excellent solution for creating forms for your WordPress site, there is a lot more you can do to extend its functionality and get the most out of your forms using certified add-ons (ahem, like, for example, Gravity Perks!)


Why dont you guys build an elementor GF module?
Hi Shae,
It looks like an interesting project. I’ll forward this to our Product manager as a new perk idea.
Best,
Please please, I hope this happens!
Hey Anna,
Glad to hear this still has some interest!
It’s been a couple of years, so I’ll go ahead and bump this over to our Product Manager again.
Method 2 isn’t accurate. The Form Widget is Elementor Form only, not Gravity. Please check!
Hi Pagna,
Thanks for pointing this out. We updated the article with more accurate instructions for adding Gravity Forms to your page using Elementor.