How to Connect Gravity Forms to Pipedrive with GC API Alchemist
Send Gravity Forms submissions directly to Pipedrive and automatically create contacts, deals, and organizations.
- What GC API Alchemist Does for Pipedrive
- What You’ll Need
- 1 — Get Your Pipedrive API Token
- 2 — Create Your API Connection
- 3 — Set Up Your Feed
- 4 — Map Your Form Fields
- 5 — Test the Connection
- More Ways to Use GC API Alchemist with Pipedrive
- Alchemy Complete!
Getting Gravity Forms data into Pipedrive typically involves manual entry, CSV exports, or a third-party automation platform. GC API Alchemist connects the two directly—it lets Gravity Forms talk to any web service with an API, including Pipedrive, and gives you features that go beyond just pushing data.
What GC API Alchemist Does for Pipedrive
GC API Alchemist connects your forms directly to Pipedrive’s API and lets you build workflows that automatically create contacts, organizations, and deals.
To demonstrate exactly how this works, we’ll build a simple lead form that creates a new contact in Pipedrive the moment someone hits submit.
What You’ll Need
- A lead form: Build your own or grab this ready-made form (right-click and save).
- GC API Alchemist: lets Gravity Forms push and pull data from any API-supported platform.
- To install, open your Spellbook › click Connect › install and activate GC API Alchemist.
- A Pipedrive account where your new contact will live.
- Pipedrive API token — Your authentication key.
1 — Get Your Pipedrive API Token
First, you’ll need the key that unlocks Pipedrive’s door. This token is how Pipedrive knows it’s really you sending data.
Here’s how:
- Log in to Pipedrive.
- Click your profile icon (top right) › Personal Preferences.
- Select the API tab and copy your API Token.
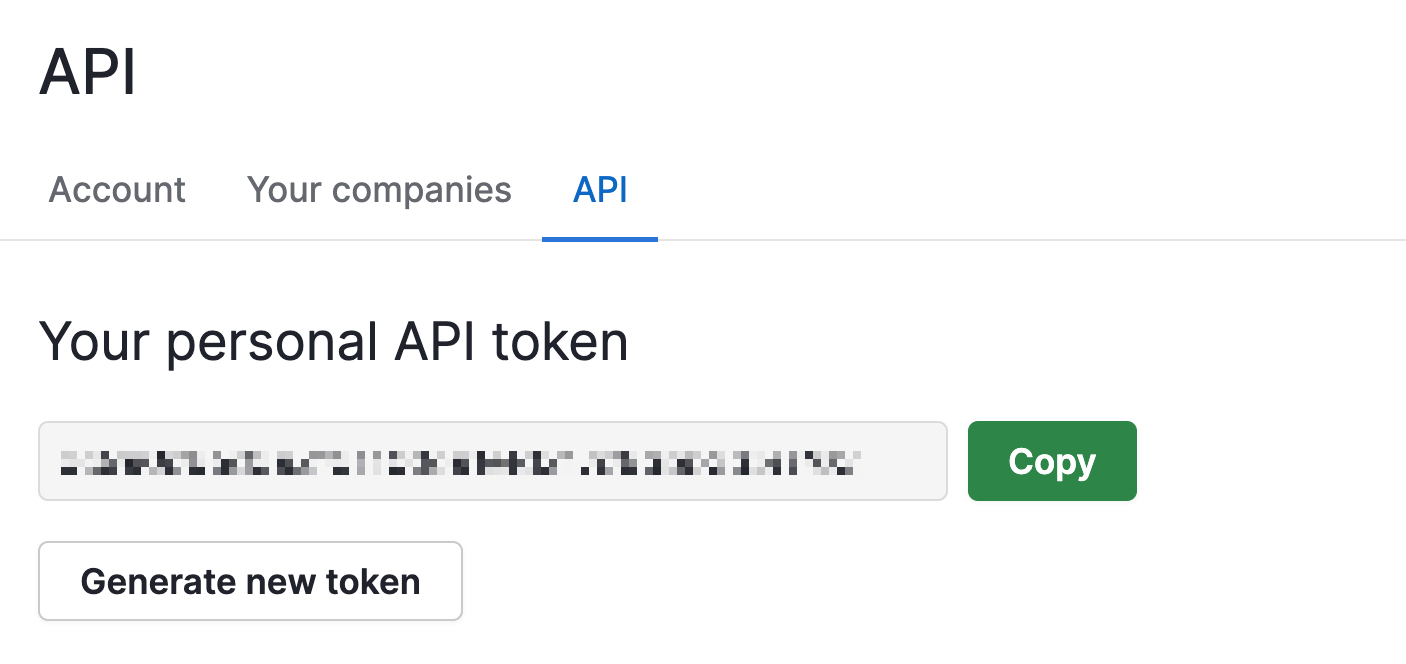
Keep this handy—you’ll need it in the next step.
2 — Create Your API Connection
Now we’re building the bridge. This API Connection is your reusable profile that tells WordPress where Pipedrive lives on the web. Set it up once, use it across every form that needs to talk to Pipedrive.
Here’s how:
- Go to Forms › API Connections › Add New API Connection.
- Name it Pipedrive.
- Set Base URL to
https://api.pipedrive.com/v1. - Set Authentication to None.
- Click Update.

3 — Set Up Your Feed
A feed is what communicates to send a submitted form entry straight to Pipedrive.
Let’s set it up:
- Go to your form’s Settings › API Alchemist.
- Click Add New.
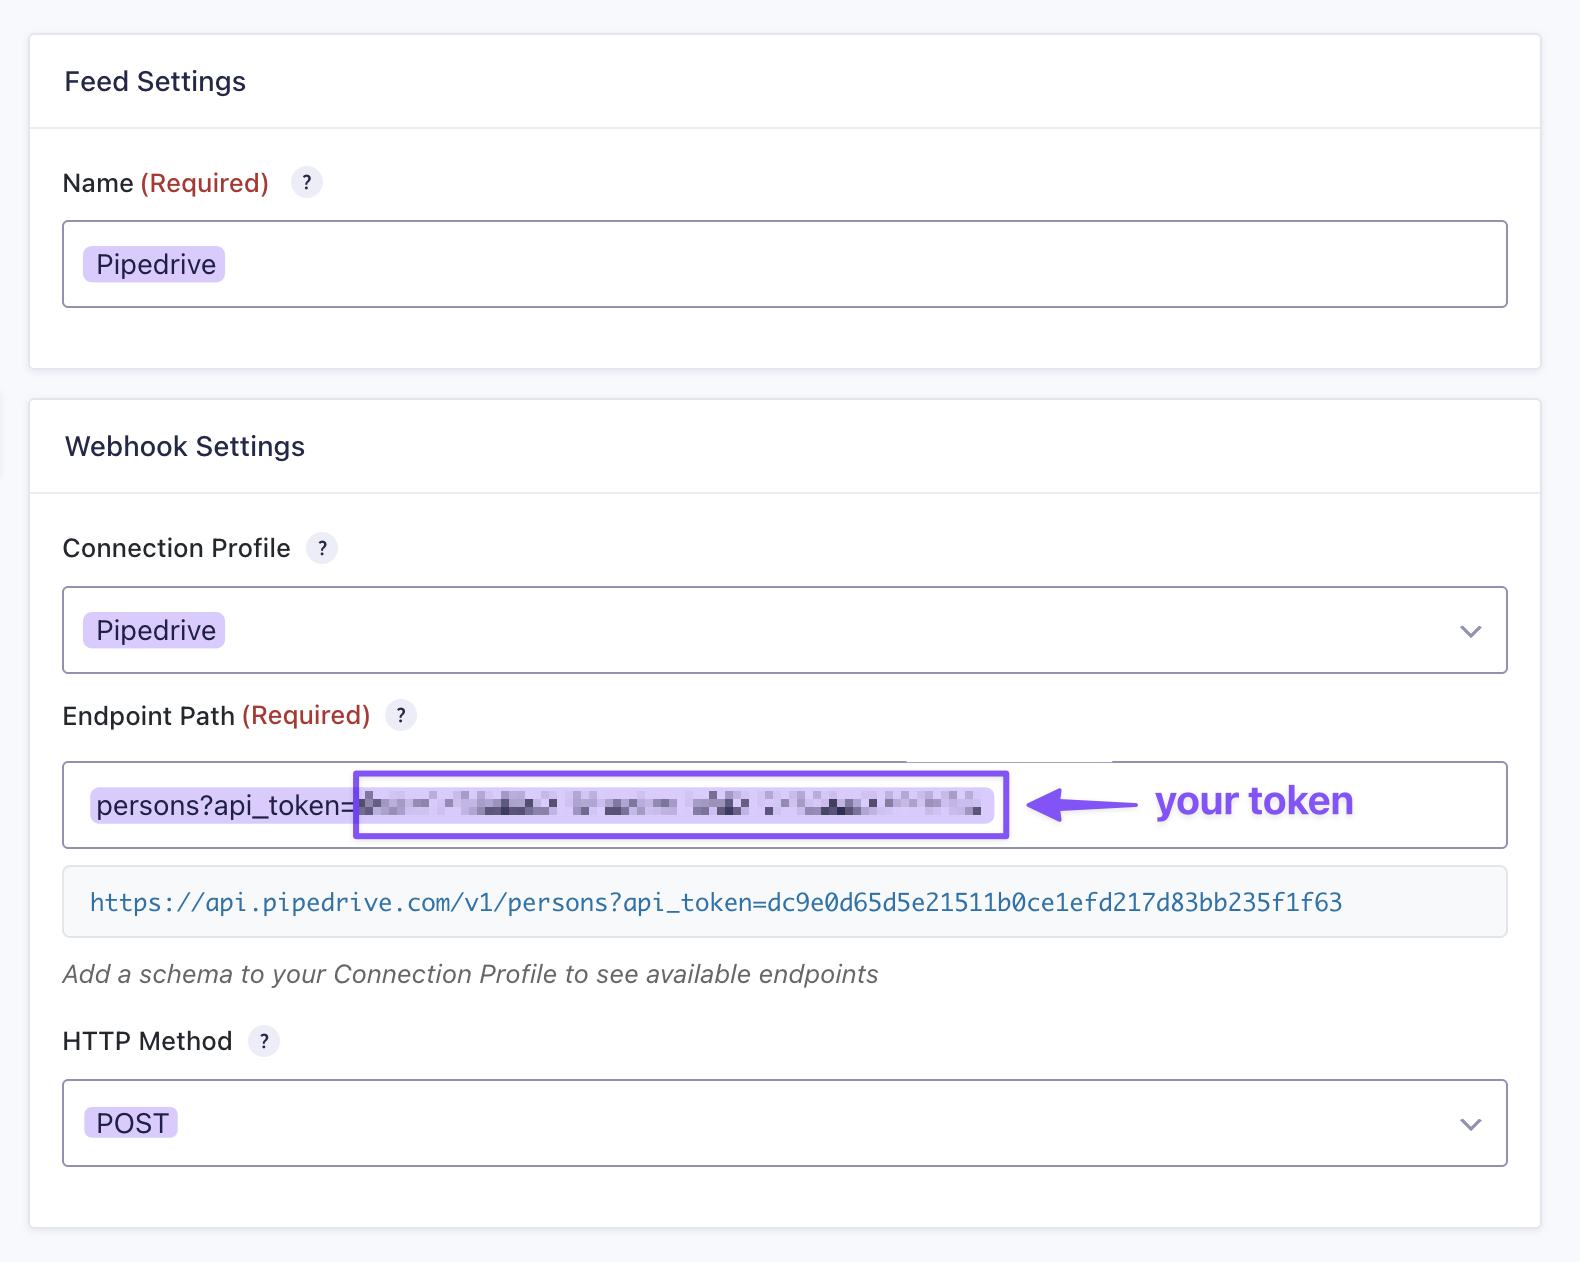
- Name your feed (like Pipedrive Lead).
- Connection Profile: Select Pipedrive.
- Endpoint Path:
/persons?api_token=YOUR_API_TOKEN(paste your actual token). - HTTP Method: POST.
4 — Map Your Form Fields
Mapping fields is like connecting the dots.
Your form collects “Name” and “Email”—but Pipedrive needs to know exactly which field goes where in its database.
Map them correctly, and every contact appears in Pipedrive with all the right details in all the right places.
Here’s how:
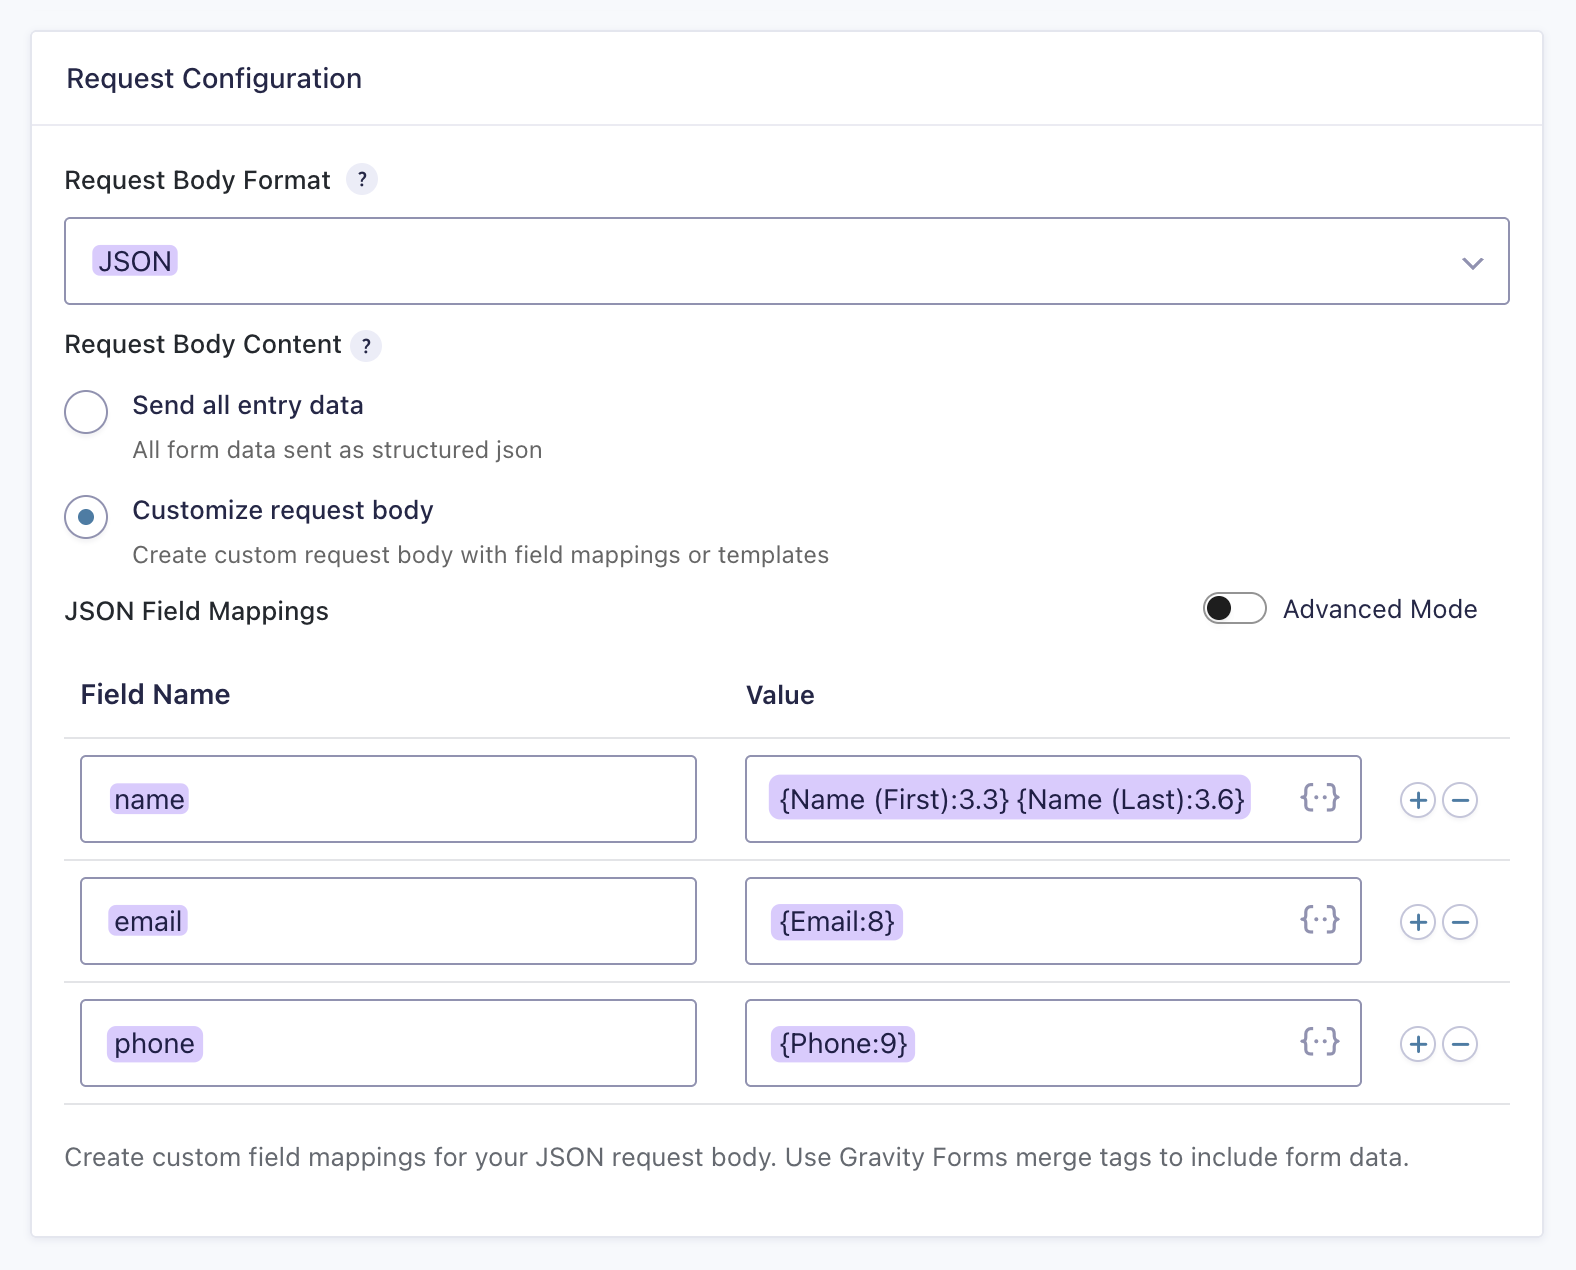
- Scroll to Request Configuration.
- Set Request Body Format to JSON.
- Select Customize request body.
- Under JSON Field Mappings, add these exact keys:
name={Name (First)} {Name (Last)}email={Email}phone={Phone}
- Click Save Settings.
5 — Test the Connection
Submit a real entry. Watch it appear in Pipedrive instantly.
More Ways to Use GC API Alchemist with Pipedrive
Connecting your form to Pipedrive is just the beginning. Here’s what else you can build:
- Create organizations separately: Point your endpoint to
/organizationsand map your company field toname. - Build pipeline entries: Switch the endpoint to
/dealsand create full pipeline entries with deal value, stage, and owner. - Stack multiple feeds: Create a Person, capture their ID, then instantly create a Deal linked to that exact contact—all from one form submission.
- Auto-populate forms: Pull existing Pipedrive data into your forms so returning visitors never fill out the same fields twice.
- Send to multiple destinations: Fire to Pipedrive, Slack, and Google Sheets simultaneously from the same submission.
Alchemy Complete!
Got a specific API integration or workflow you want to see? Drop a comment below with your ideas—we might just conjure it up in our next tutorial! 😉