How to Set Up Address Autocomplete in Gravity Forms
With GP Address Autocomplete, just type a few letters, select a suggestion, and addresses fill in automatically.
- The Big Picture
- Step 1: Set Up a Google Cloud Platform Project
- Step 2: Enable the Two APIs
- Step 3: Generate the API Key
- Step 4: Add the API Key to Gravity Forms
- Step 5: Enable Autocomplete on Address Fields
- You’re All Set!
Typing out a full address isn’t exactly fun, and on mobile? It kinda feels like a thumb workout. All that extra tapping and typing gives people just enough time to wonder if they really need to finish this form right now.
GP Address Autocomplete solves all this by connecting Address fields to Google’s giant address book. As soon as you start typing, location suggestions pop up, and the whole address fills in with a single click. Best of all? You only need to set it up once.
This article requires the Gravity Forms Address Autocomplete perk.
Buy Gravity Perks to get this perk plus 48 other premium Gravity Forms plugins!
The Big Picture
Address Autocomplete works its magic by connecting Gravity Forms to two of Google’s services: the Google Places API and the Maps JavaScript API. All you need? A single key to connect to both services.
Here’s the plan:
- Let Google know you’d like to connect with their services.
- Grab your key and secure it so only your site can use it.
- Plug the key into Gravity Forms.
Step 1: Set Up a Google Cloud Platform Project
Before we dive in, what’s Google Cloud Platform? Think of it as Google’s hub of online services (maps, storage, and more) that you can use on your website. To use these services, you’ll need a “project.”
But what’s a “project”?
Think of it as a folder where Google stores the services you’re using. We’ll set one up right now.
Important
When setting up billing, Google will ask for a credit card, but don’t worry! They give you $200 free monthly credits which covers about 10,000 address lookups. That’s plenty enough for most sites! And if you ever need more, you can always upgrade.
Create a Project
- Head to Google Cloud Platform Console.
- Click the project dropdown in the top right (it might say “Select a project”).
- Click New Project.
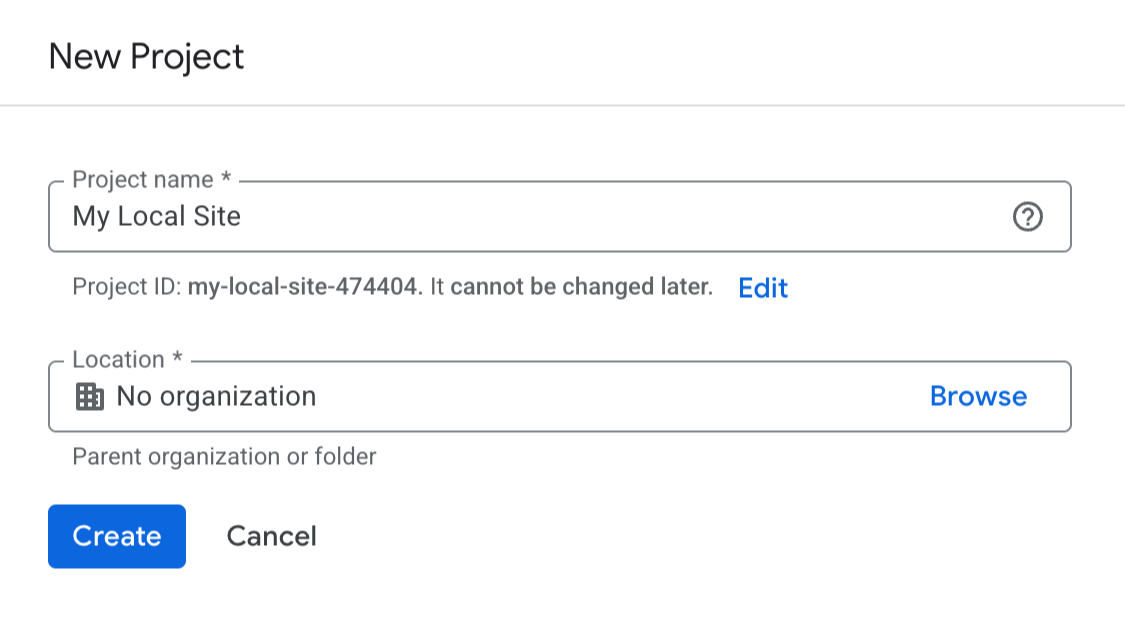
Give your project a clear name like your site’s name. Next, we’ll add in the Google Places and Maps JavaScript APIs.
Step 2: Enable the Two APIs
Quick explainer: API (Application Programming Interface) is like a messenger that lets two applications talk to each other. In this case, it’s how Gravity Forms asks Google for address suggestions. If you want to learn more, we’ve got a great guide that explains API in detail.
Let’s enable the two APIs you need:
1 – Places API
This is what knows “all the addresses in the world” and serves up suggestions.
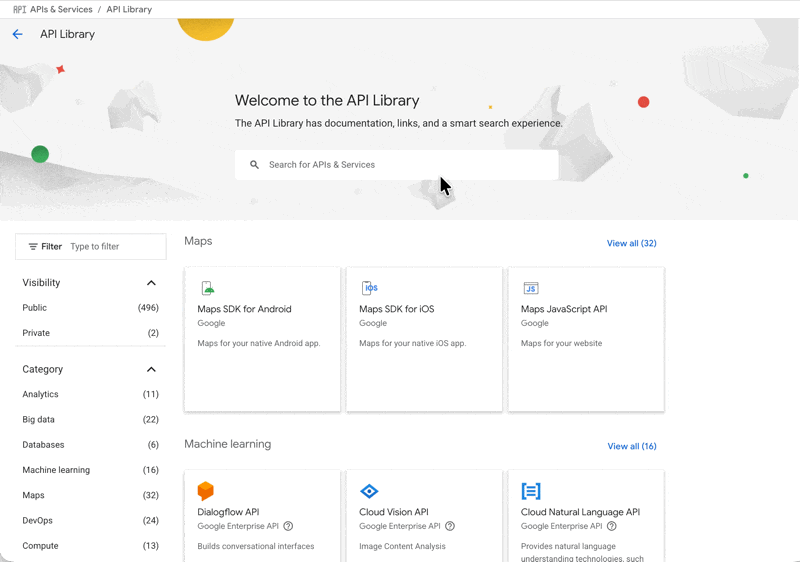
- Click the menu icon (☰) in the top left, then select APIs & Services › Library.
- Search for “Places API.”
- Click and Enable.
Important
Make sure you’re enabling Places API, not Places API (New). GP Address Autocomplete doesn’t support the new version just yet! We’ll update this article as soon as it’s ready.
2 – Maps JavaScript API
This one powers the autocomplete feature.
- Still in the API Library,
- Search for “Maps JavaScript API.”
- Click and Enable.
Now Google knows you want to use these APIs.
Step 3: Generate the API Key
What’s an API Key? Think of it as a message that tells Google “Yes, this site is allowed to use your APIs.”
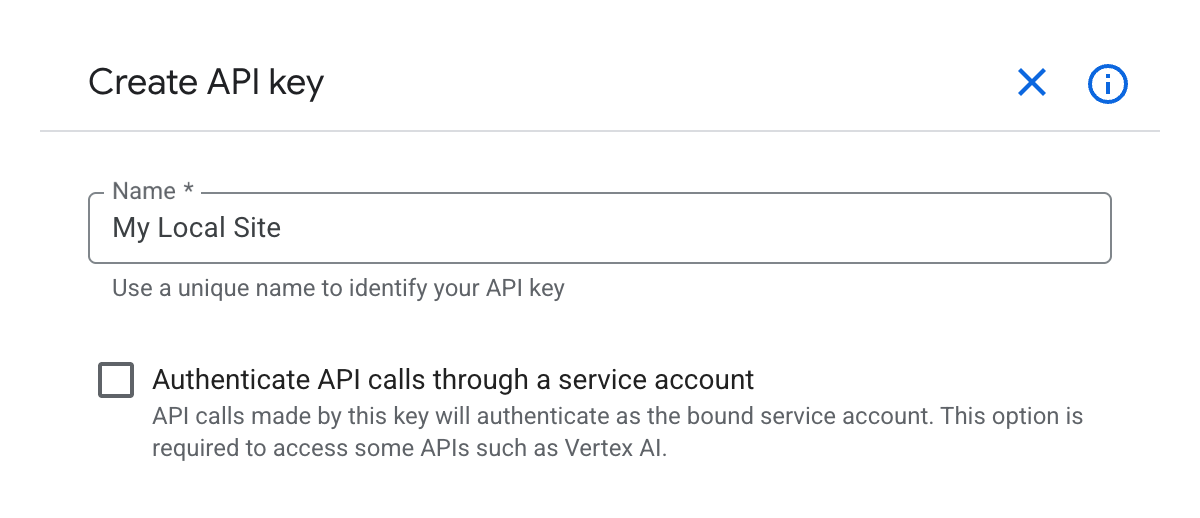
Let’s Create the Key 🔑
- Click the menu icon (☰) in the top left, then select APIs & Services › Credentials.
- Click the + Create Credentials button.
- Select the API key from the dropdown.
- Give it a clear name like
My Local Site.
Don’t close this window yet. We’ll need to keep this key safe so only your website can use it.
Keep the Key Safe 🔐
- Under Application restrictions, select Websites.
- Click Add and enter your domain (if you have a staging or local site, you can add those too).
- Under API restrictions, select Restrict key.
- From the dropdown, select only: Places API and Maps JavaScript API.
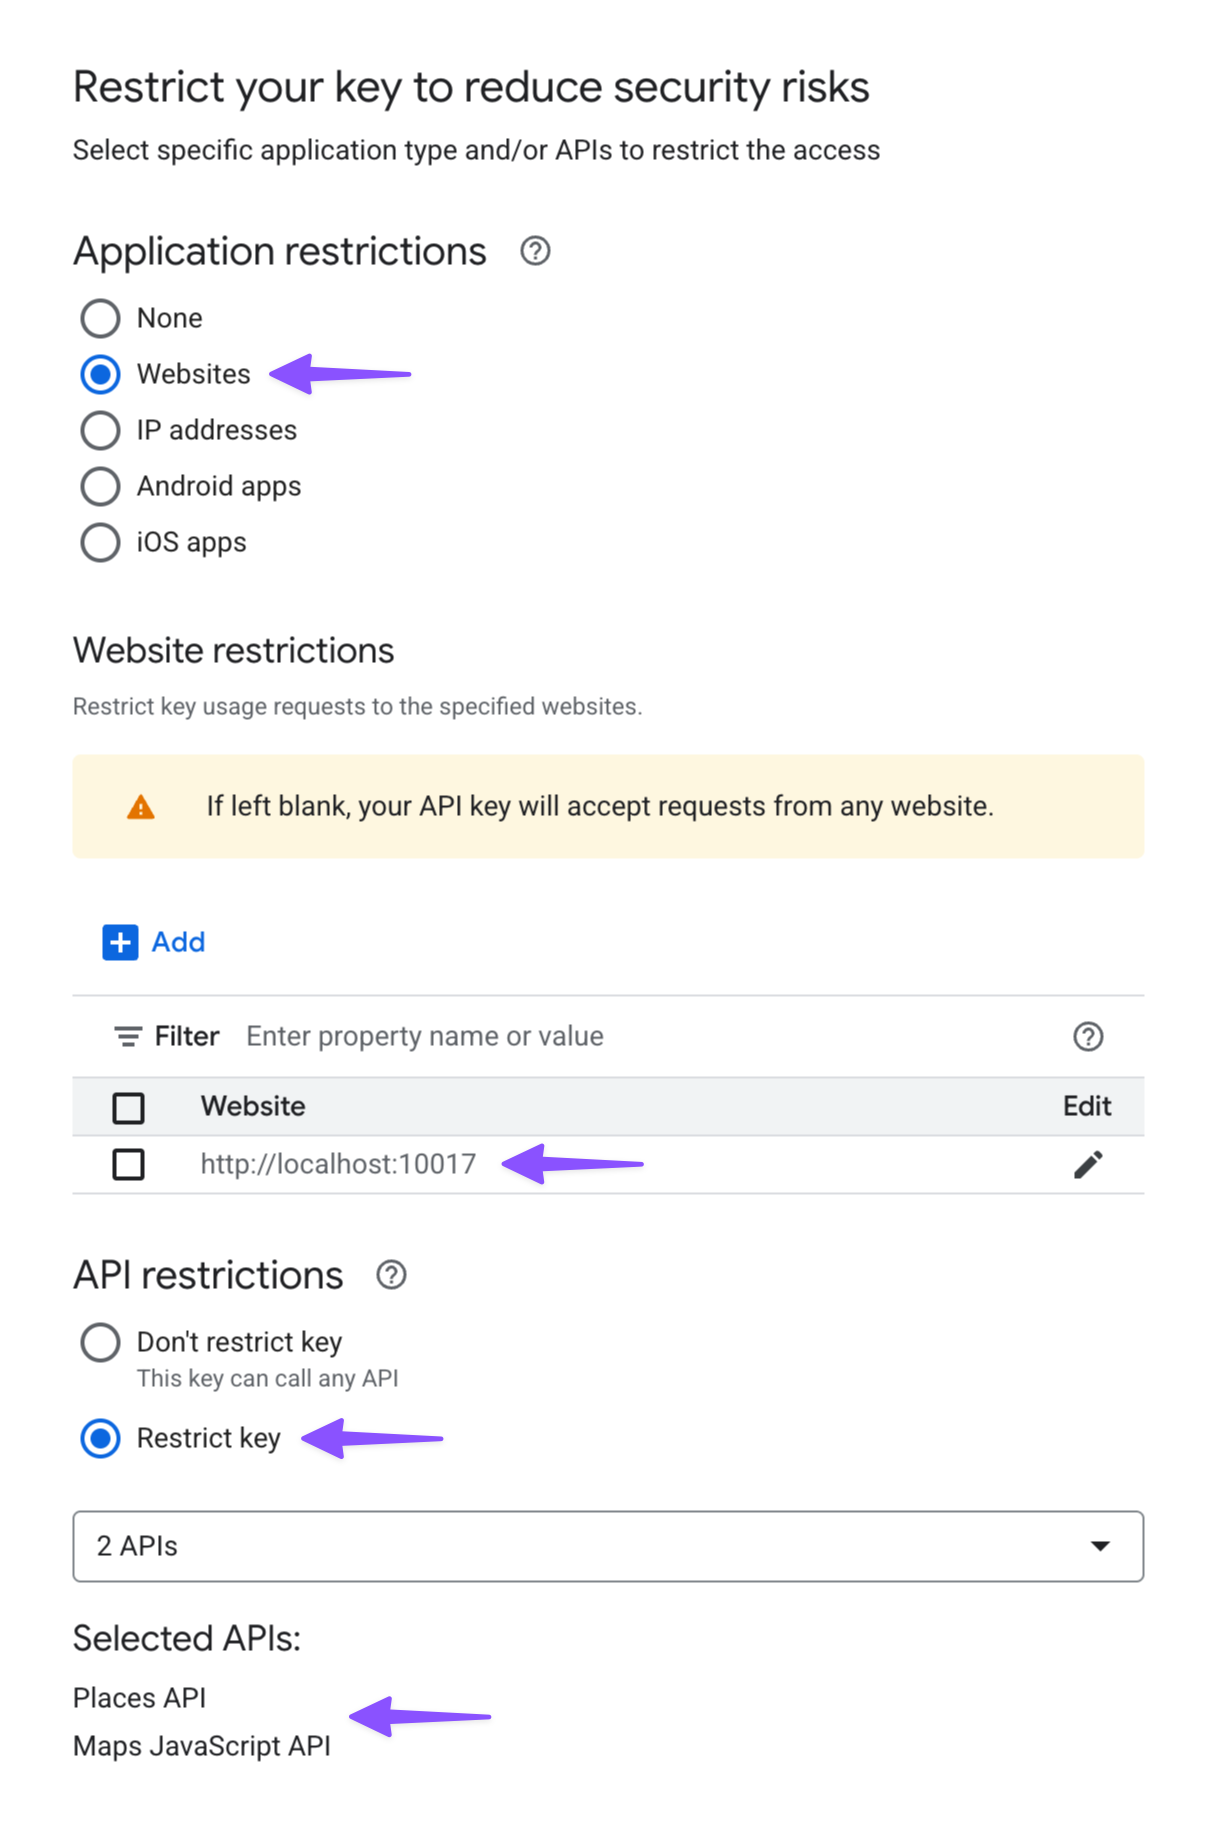
Why does this matter? This restriction protects you. If someone finds your API key, they can only use it for address lookups and nothing else. It’s like having a token that works in one game machine, not the whole arcade. 😉
Obtain the Key
When you’re done configuring everything, click Save.
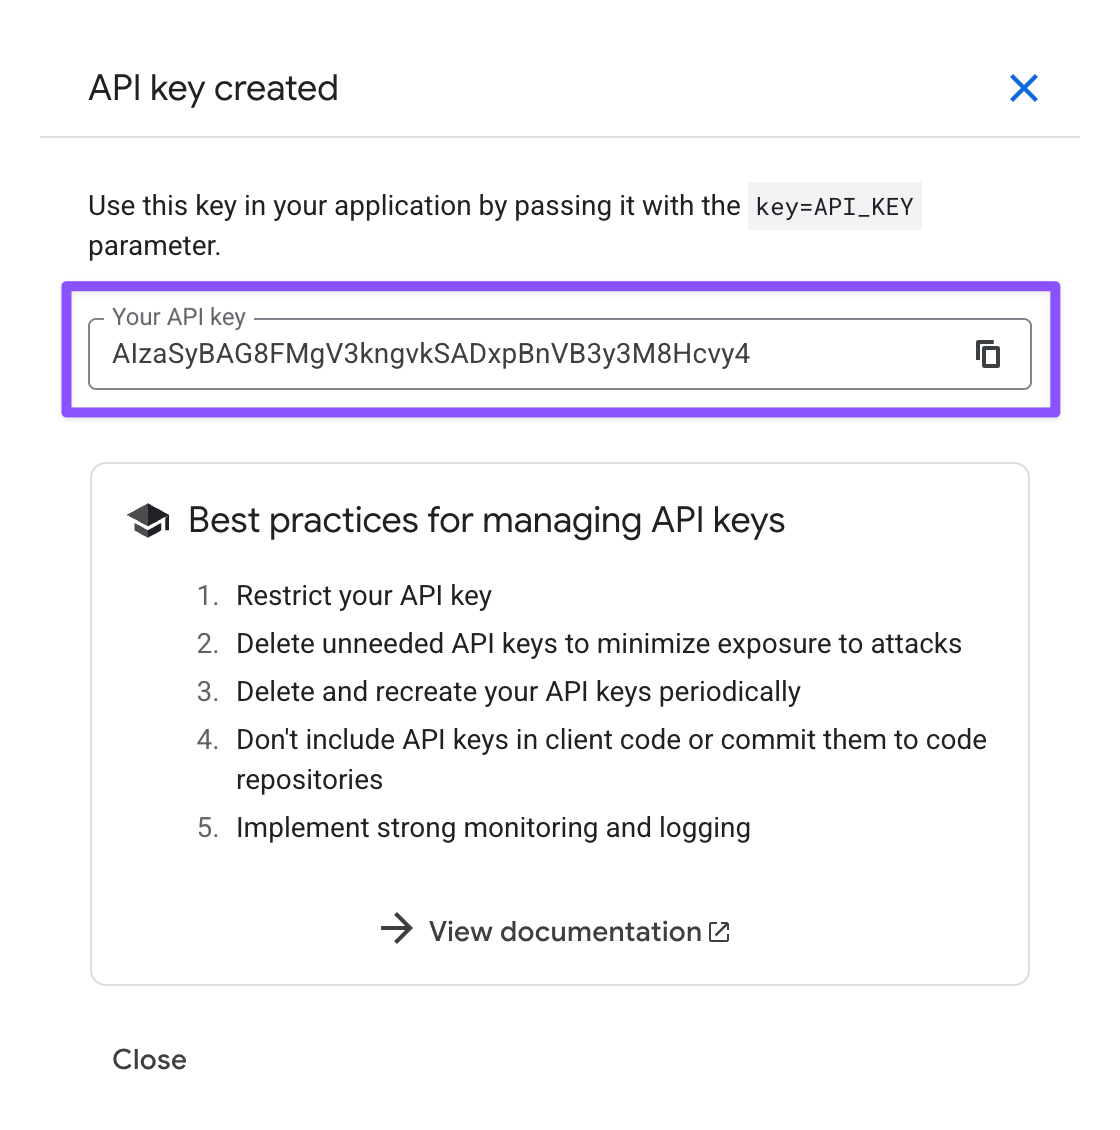
See the long string of random characters? That’s the API key. Copy it to somewhere safe (like a password manager).
Step 4: Add the API Key to Gravity Forms
Let’s bring it all home. Let’s use the API key to connect our Google APIs to Gravity Forms.
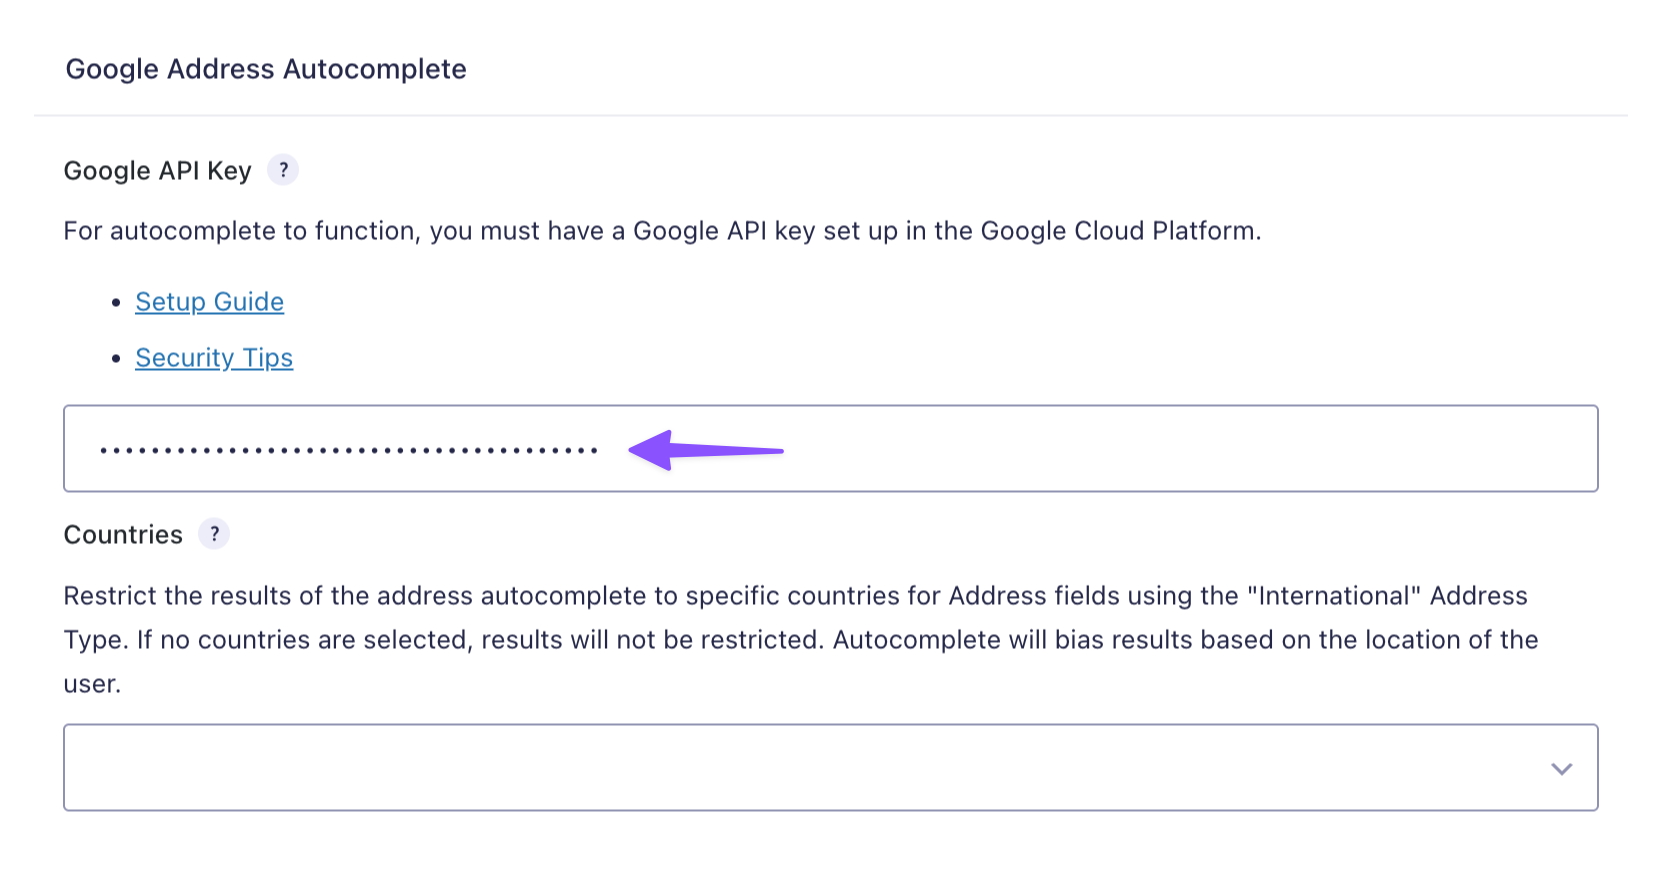
- In your WordPress dashboard, go to Forms › Settings › Autocomplete.
- Paste the API key into the Google API Key field.
- Hit Save Settings.
Tip
If you only want address suggestions from specific countries, use the Countries dropdown to select up to 5 countries. Leave it blank for worldwide results.
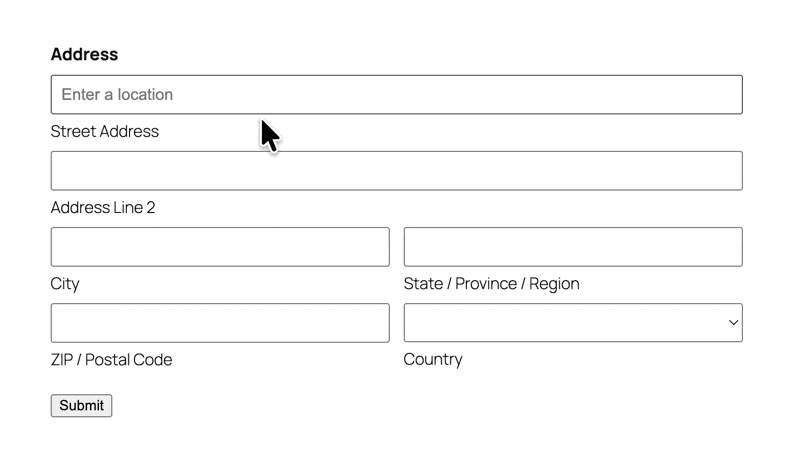
Step 5: Enable Autocomplete on Address Fields
Time to enchant those Address fields:
- Open your Spellbook and activate GP Address Autocomplete.
- Go to your form.
- Add an Address field (or edit an existing one).
- Open the field settings and navigate to the Perks tab.
- Check Enable Google Address Autocomplete.
That’s it! Start typing and watch suggestions appear instantly. 🪄
You can even take this further by adding an interactive map that automatically pins the autocompleted address as soon as someone fills it in.
Important
When someone uses Address Autocomplete on your form, whatever they type gets sent to Google to fetch those address suggestions. Since data is being shared with Google, they ask that you link to their Terms of Service and Privacy Policy somewhere on your site. It’s a simple step to stay compliant!
You’re All Set!
No more friction, no more abandoned forms. Everybody wins. 🏆