How to Map Addresses to Custom Fields in Gravity Forms
Capture geographic data from addresses in form submissions and use it to build directories, listings, and location-based features.

Collecting addresses on a form is easy. But using them for location-based features, like helping people find nearby events? That’s where it gets tricky. Plain text addresses require more work for that kind of magic. You’ll want data your site can calculate with, like map coordinates.
Luckily, GP Address Autocomplete does more than just speed up typing. It also captures those map coordinates behind the scenes. With it, you can finally pin your events on a map and start building all kinds of other location-based features for your site.📍
This article requires the Gravity Forms Address Autocomplete perk.
Buy Gravity Perks to get this perk plus 48 other premium Gravity Forms plugins!
What is Address Meta?
When a user starts typing in an Address field, Address Autocomplete shows a dropdown of suggestions. Once they select a location, it doesn’t just fill in the address, it also grabs the map coordinates. This data is what we call “Address Meta.”
Where Can I Find The Address Meta?
First up: Make sure Address Autocomplete is enabled. If you’re just getting started, we have a quick setup guide to help you out. Swing back when you’re all set.
Address meta is automatically stored in each entry. Here’s where to find it:
Entry List Page
Address meta can be displayed as columns right in your entry list. We’ve got a guide on displaying entry meta in columns. Don’t worry if the guide says “Phone Meta”—the steps work exactly the same.
Merge Tags
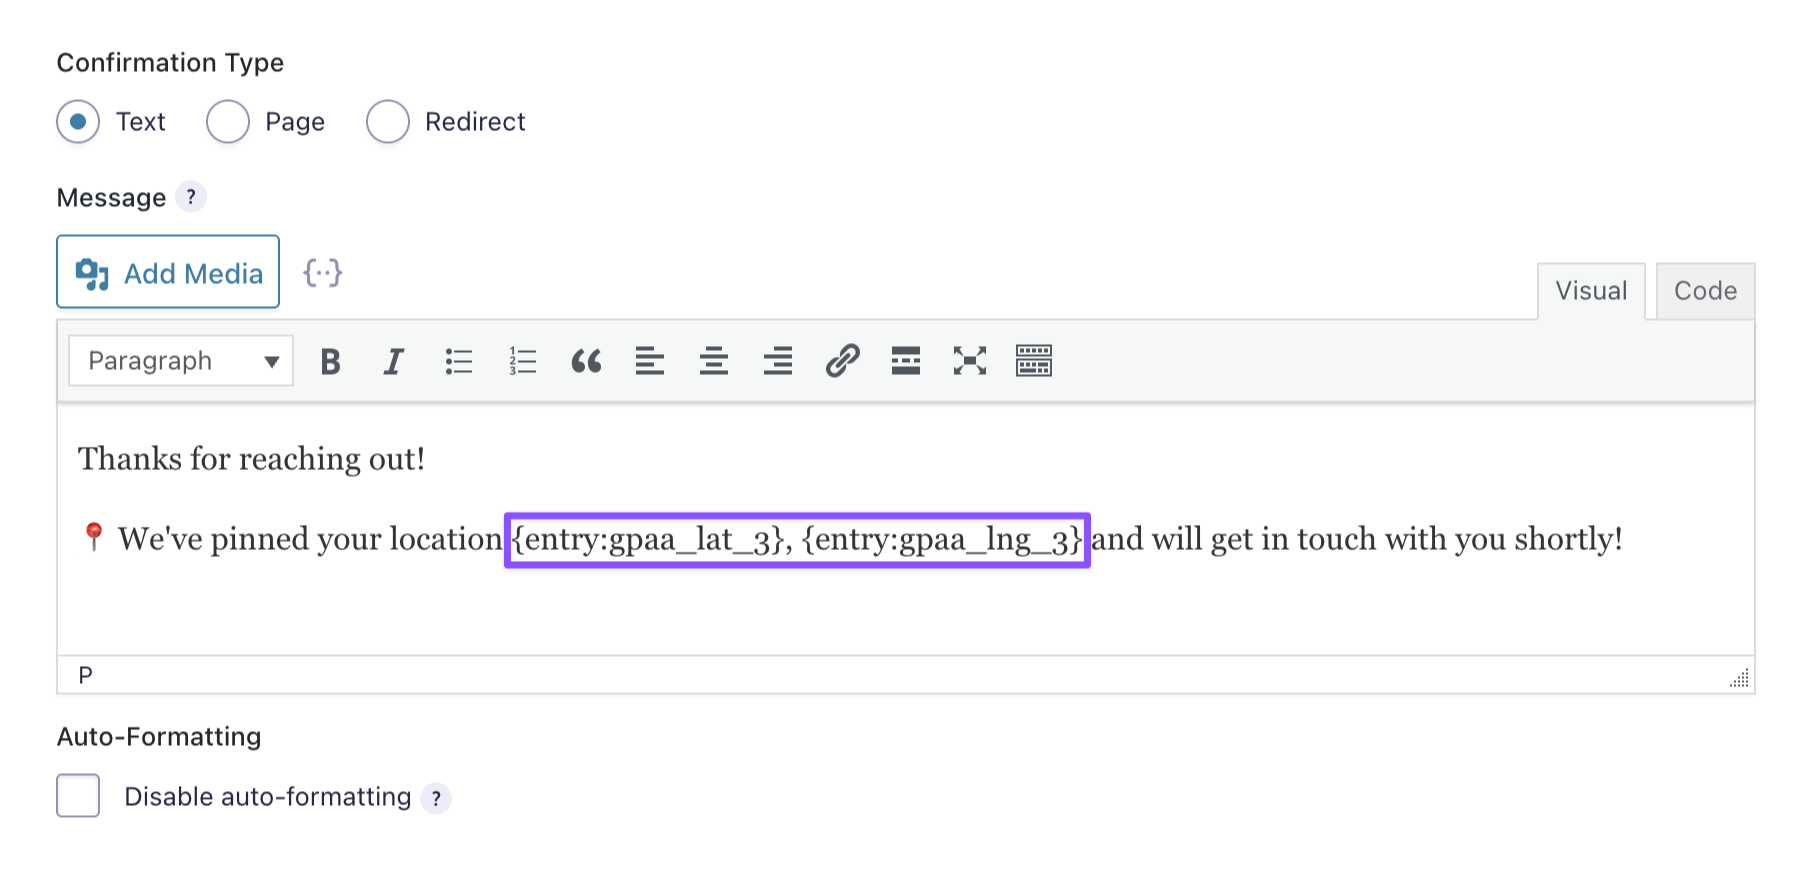
Address meta works anywhere merge tags are supported, like Confirmations, Notifications, or for mapping to custom fields.
For address meta that aren’t map coordinates (like Street, City, etc.), you’ll find them right in the Insert Merge Tag {··} drop down in your Confirmations or Notifications editor.
For map coordinates, follow this formula:
- Latitude:
{entry:gpaa_lat_FIELDID} - Longitude:
{entry:gpaa_lng_FIELDID}
Replace the FIELDID with your Address field’s ID. For example, if your Address field is 3, you’d use entry:gpaa_lat_3.
Mapping Address Meta to Custom Fields
Address meta can be used by other plugins, like maps and search filters, to power all sorts of location features on your site. But for them to find the address meta easily, you’ll need to map it to a post’s custom field.
Wait, what are “custom fields?” Think of them as little storage boxes attached to your posts and pages—like labeled drawers where plugins can grab the exact data they need.
To make this work, add Post Fields (Title and Body) to your form so new posts get created every time someone hits submit. Then, add in a Post Custom Field to map your address meta—which captures data standard Post Fields don’t cover.
Here’s how to set it up:
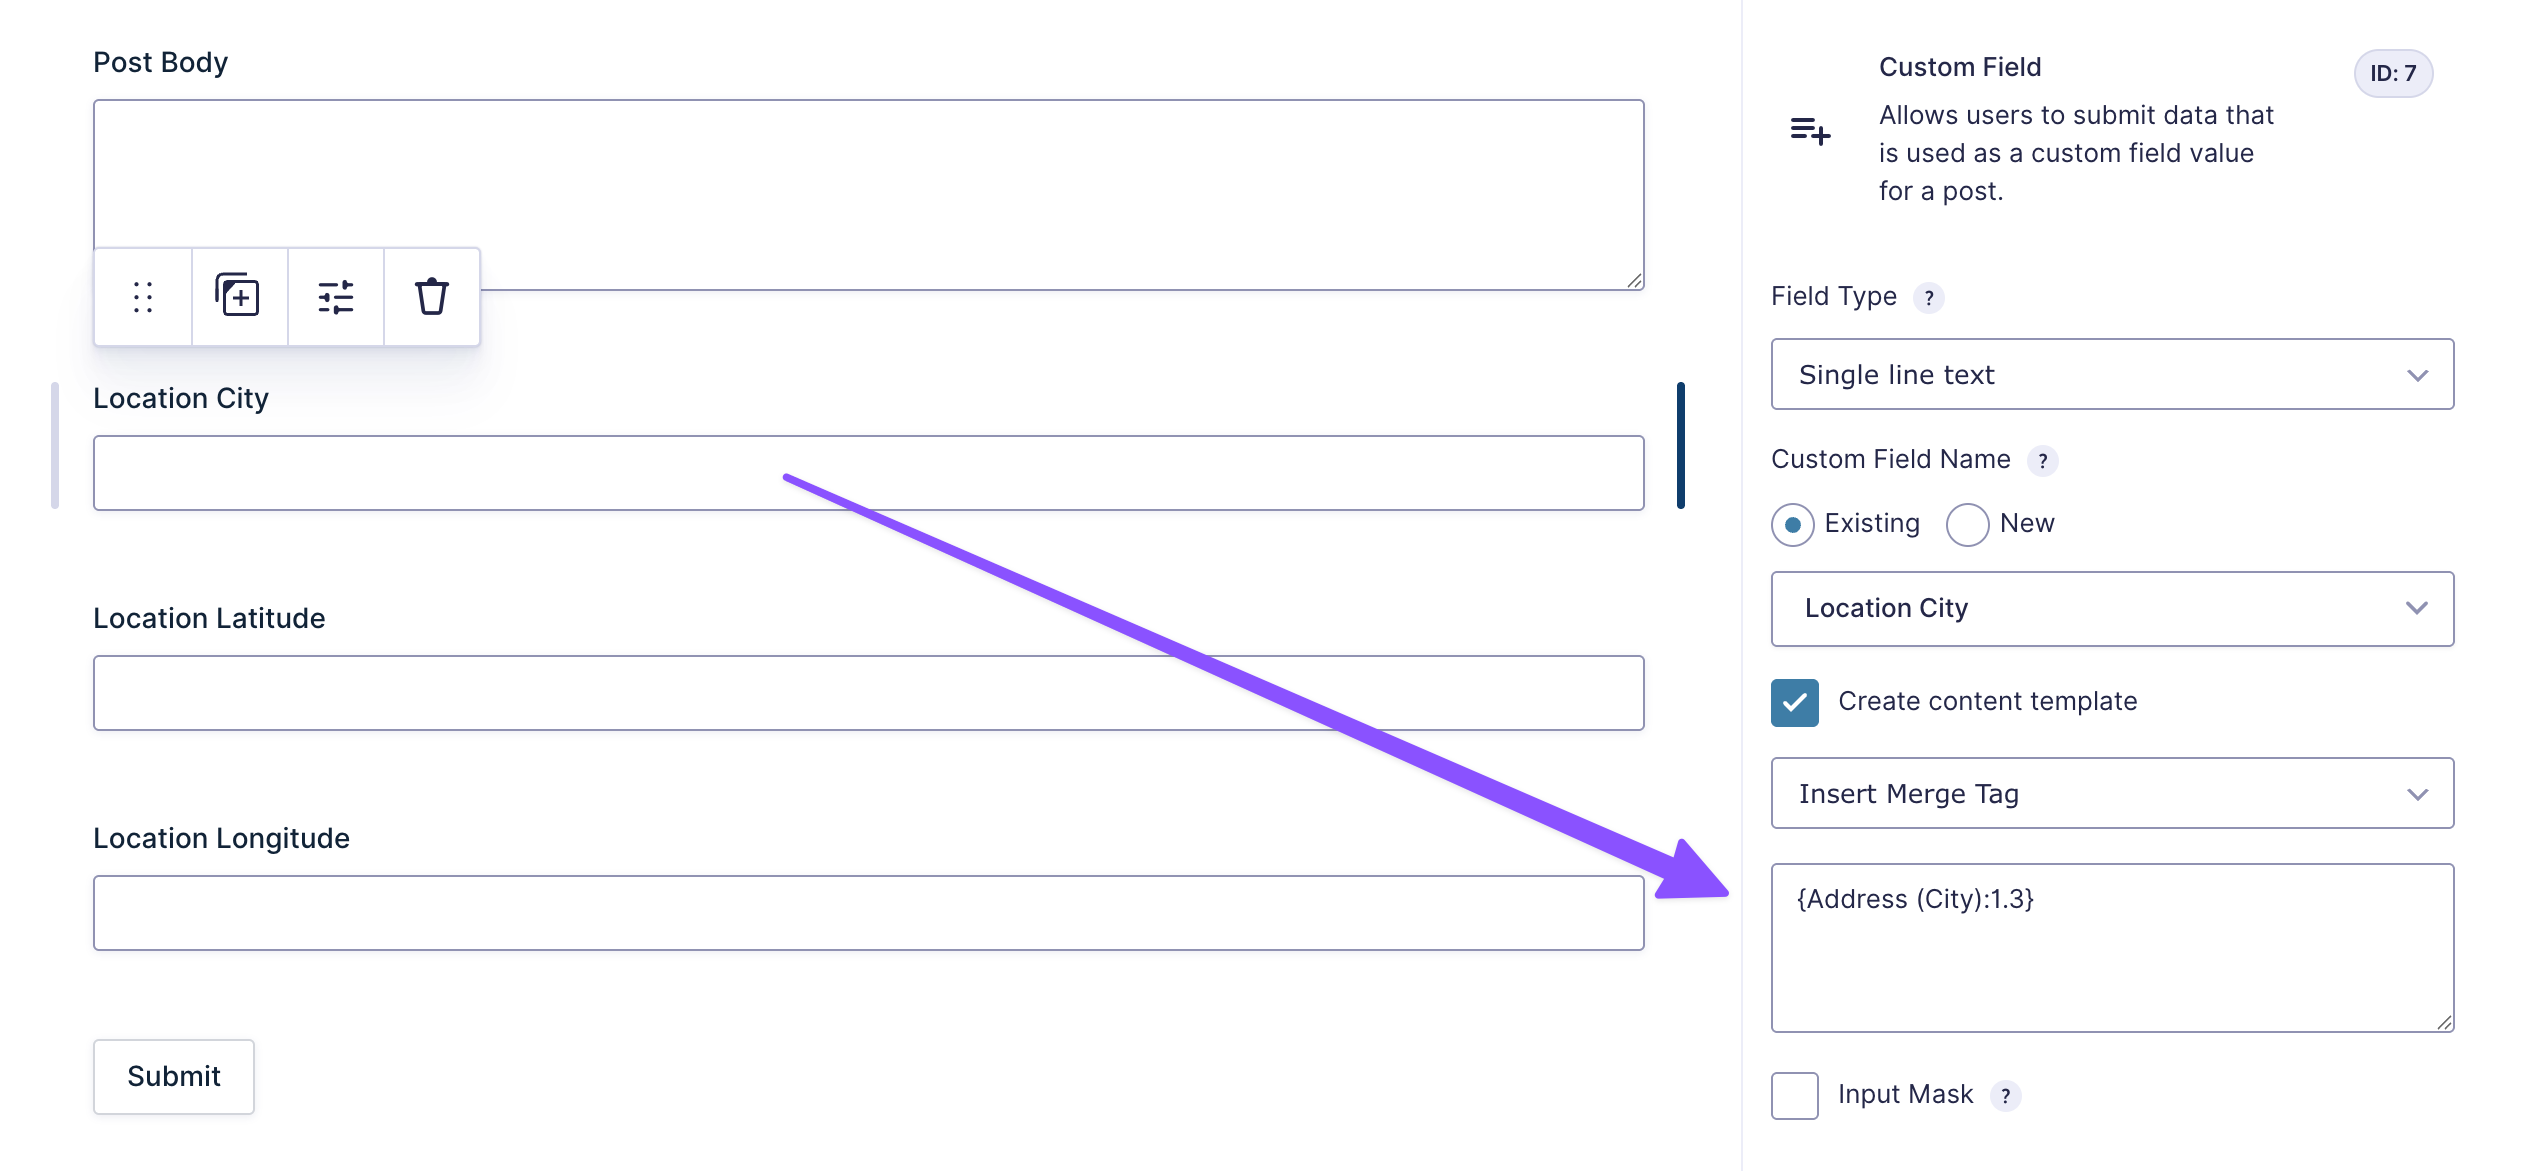
- In your form, add the required Post Fields: Post Title and Post Body.
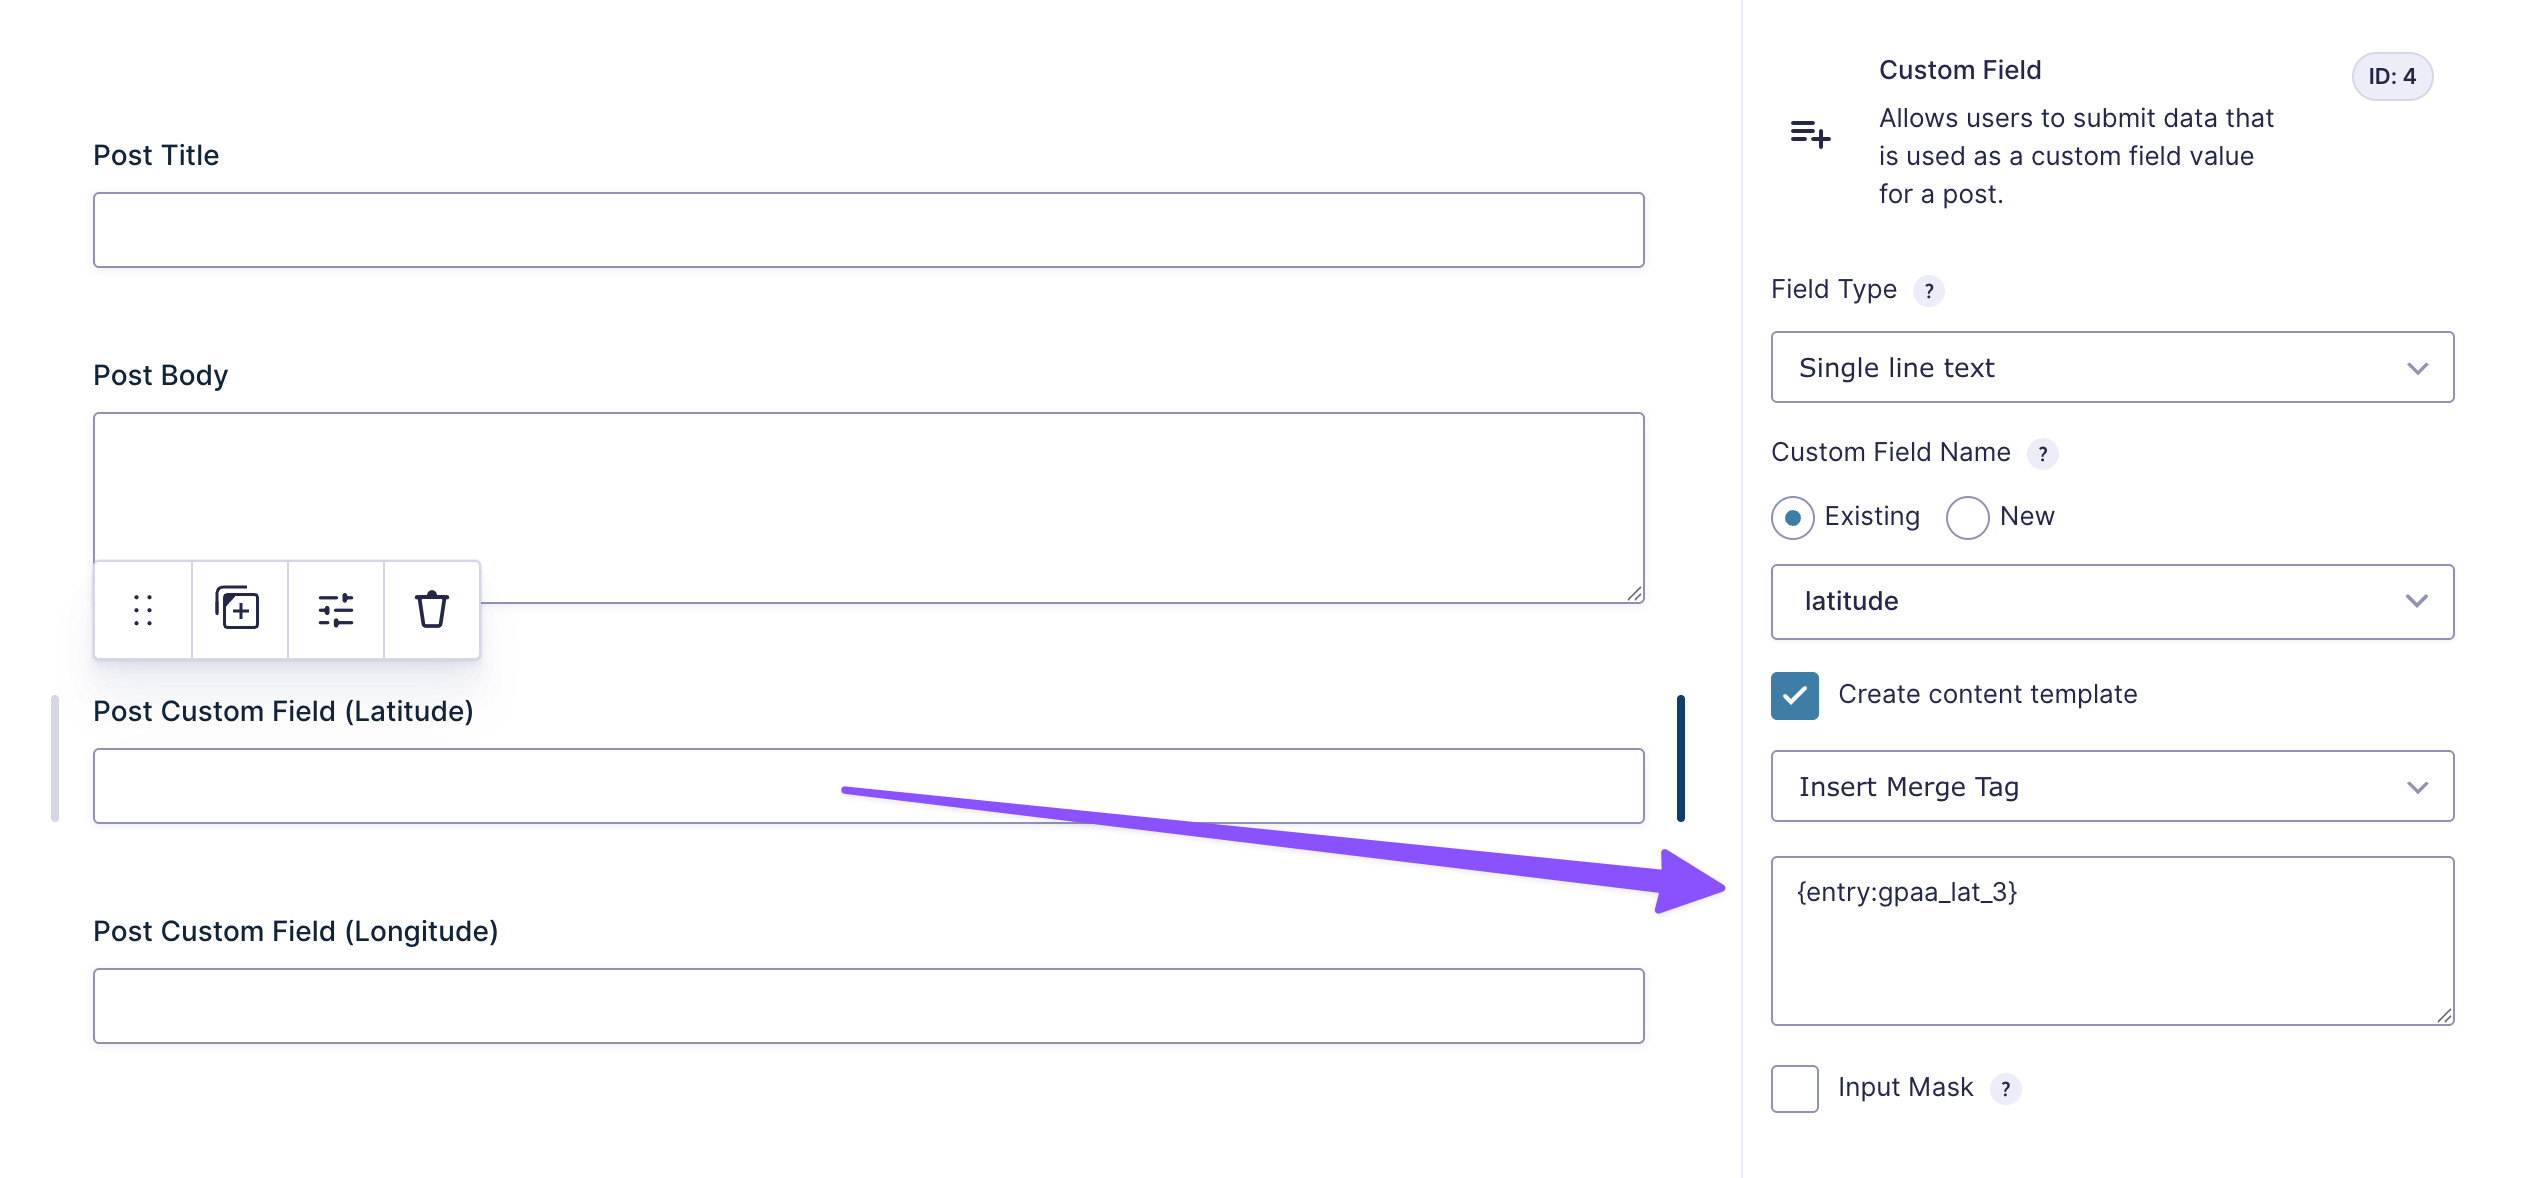
- Add a Post Custom Field (one for each address meta).
- Set the Custom Field Name to New and give it a name like
Location CityorLocation Latitude. - Enable Create content template.
- Add the merge tag using the drop down (for coordinates, use the formula above).
- Save your form.
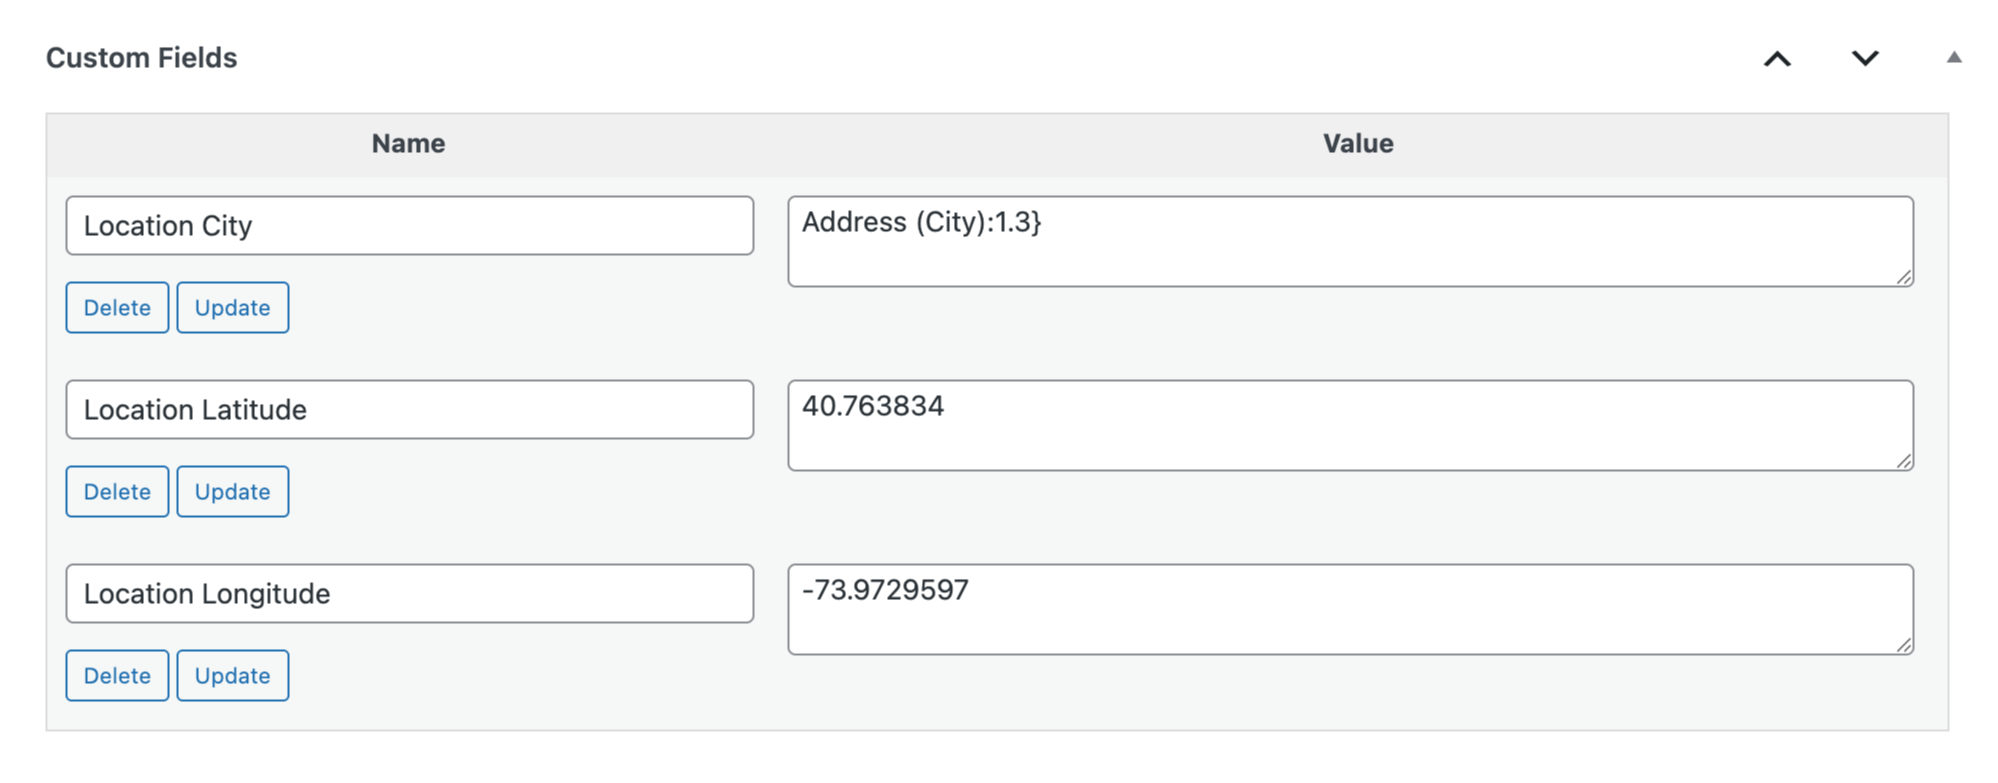
To view your mapped data, head over to the newly created post and edit it. Custom fields are hidden by default, but you can display them real quick:
- Click the three-dot menu (⋮) in the top-right corner.
- Click Preferences › General › and toggle on Custom fields.
- Click Show & Reload Page.
And there it is! At the bottom, you’ll now see a panel with the address meta all tucked in and ready to use.
Taking It Further
The Post Custom Field method works great for getting started. But if you’re diving into something more advanced—like building a directory with custom post types or managing listings—you’ve got two solid options to take things up a notch.
Advanced Post Creation Add-On (APC)
This official Gravity Forms add-on lets you map custom fields to any custom post types, not just the standard posts and pages.
APC uses “feeds” in your form settings, giving you a more organized way to map data to custom fields. You can use this to map address meta into multiple custom fields without cluttering your form with a bunch of Post Custom Fields!
Here’s how:
- Go to the Gravity Forms Add-Ons library, install and activate Advanced Post Creation Add-On.
- Go to your form’s settings and click Post Creation.
- Add a new feed and fill out the required fields.
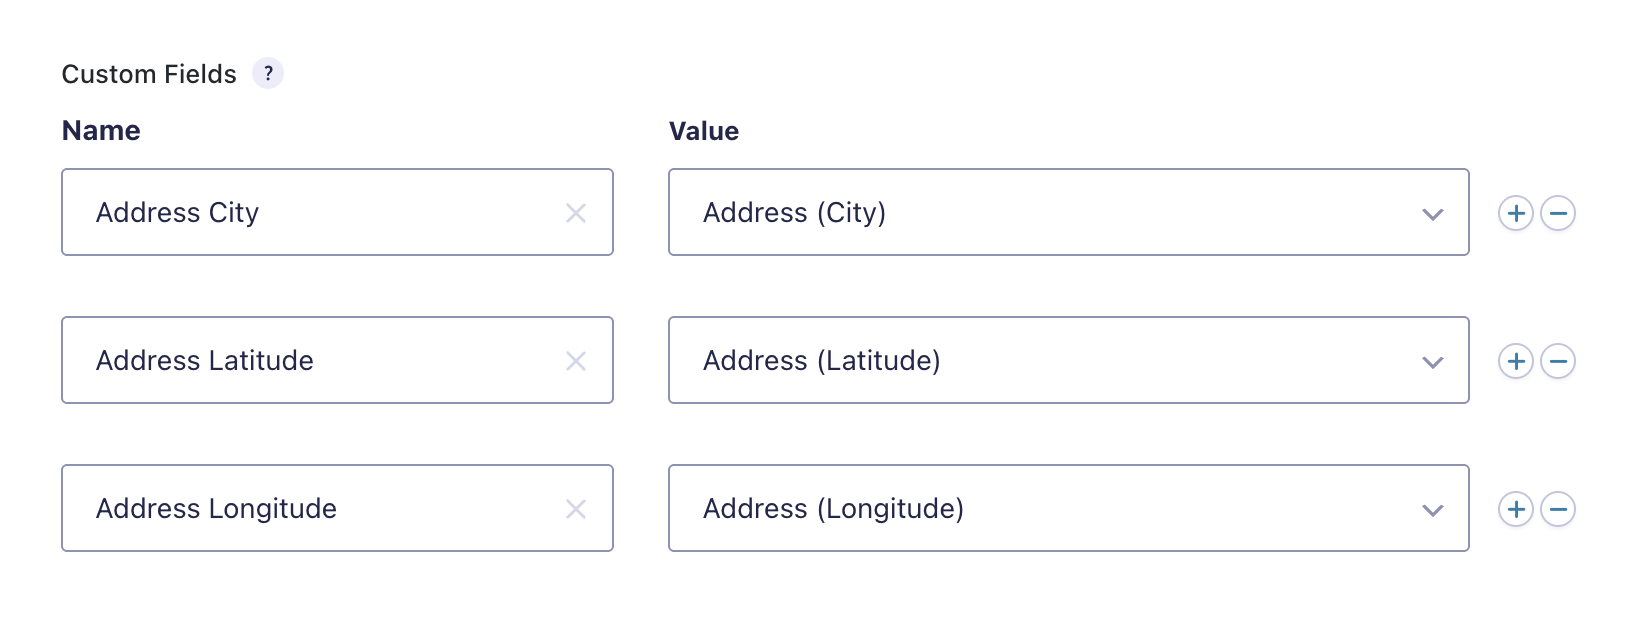
- Scroll down to the Custom Fields section and click Add Custom Field.
- Enter a custom field name.
- In the Value dropdown, select the address meta value you need: city, country, latitude, etc.
- Save your feed.
Advanced Custom Fields (ACF)
ACF is a free WordPress plugin that creates and manages custom fields for any post type. It’s also a great way to keep your address meta organized and flexible!
Imagine building a directory where each listing needs an address, phone number, and email. With the Post Custom Field method, you’d be juggling quite a few individual fields. ACF lets you bundle everything together into one tidy field group.
Here’s how:
- Download and install Advanced Custom Fields.
- In ACF, create a field group and add your custom field/s.
- In your form, add a Post Custom Field.
- In the field’s settings, match the exact ACF custom field name in the Custom Field Name setting.
- Enable Create Content Template.
- In the Content Template setting, enter the address meta merge tag.
- Save your form.
Pro-tip
Pair Address Autocomplete with GP Copy Cat to automatically copy addresses from one field to another.
Map magic done! What cool features are you building with those address meta? 🗺️