How to Connect Gravity Forms to Google Calendar
Turn Gravity Forms submissions into Google Calendar events, complete with attendees, event details, and optional Google Meet links.
- How do you connect Gravity Forms to Google Calendar?
- What You’ll Build
- What You’ll Need
- Create Your First Google Calendar Event from Gravity Forms
- Edge Cases & Limitations
- Example Use Cases
- Frequently Asked Questions
Gravity Forms can collect the details you need for a Google Calendar event: who it’s for, when it happens, where it takes place, and anything else you want on the calendar.
But turning those details into an actual Google Calendar event? Gravity Connect Google Calendar handles that — connect your form to a calendar, map your fields, and create events on submission.
This article requires the Gravity Connect Google Calendar plugin.
Buy Gravity Connect to get this plus other premium Gravity Forms plugins!
How do you connect Gravity Forms to Google Calendar?
Use Gravity Connect Google Calendar (GC Google Calendar for short), part of Gravity Connect — our suite of direct Gravity Forms integrations.
It connects through Google OAuth, which means you sign in with Google and approve calendar access. Once connected, your WordPress site talks directly to Google to create calendar events. Your credentials and calendar data never touch Gravity Wiz servers.
You can also create multiple feeds for one form, each pointing to a different calendar or running only under specific conditions.
What You’ll Build
By the end of this guide, you’ll be able to:
- Connect a Gravity Form directly to Google Calendar
- Map form fields to Google Calendar event properties
- Automatically invite attendees via Google Calendar
- Auto-generate a Google Meet link on each submission
- Keep Google Calendar events updated when Gravity Forms entries are edited or trashed
What You’ll Need
- Gravity Forms (any license)
- GC Google Calendar installed via Spellbook — Gravity Wiz’s free plugin manager
- A Google account with access to Google Calendar
- A Gravity Form with fields for event details, such as title, date, time, location, and attendee email.
Want a head start? Download this ready-made form export (right-click and save) and import it into Gravity Forms.
Create Your First Google Calendar Event from Gravity Forms
1 — Install and Activate GC Google Calendar
- Install GC Google Calendar from Spellbook.
- Activate the plugin.
2 — Connect Your Google Account
- Go to your form › Settings › Google Calendar.
- Click Add New to create a new feed.
- In the Google Account dropdown › select Authorize New Account.
- Complete the Google sign-in and permissions prompt. Select the connected account from the dropdown..
- In the Google Calendar dropdown, select where events should be created.
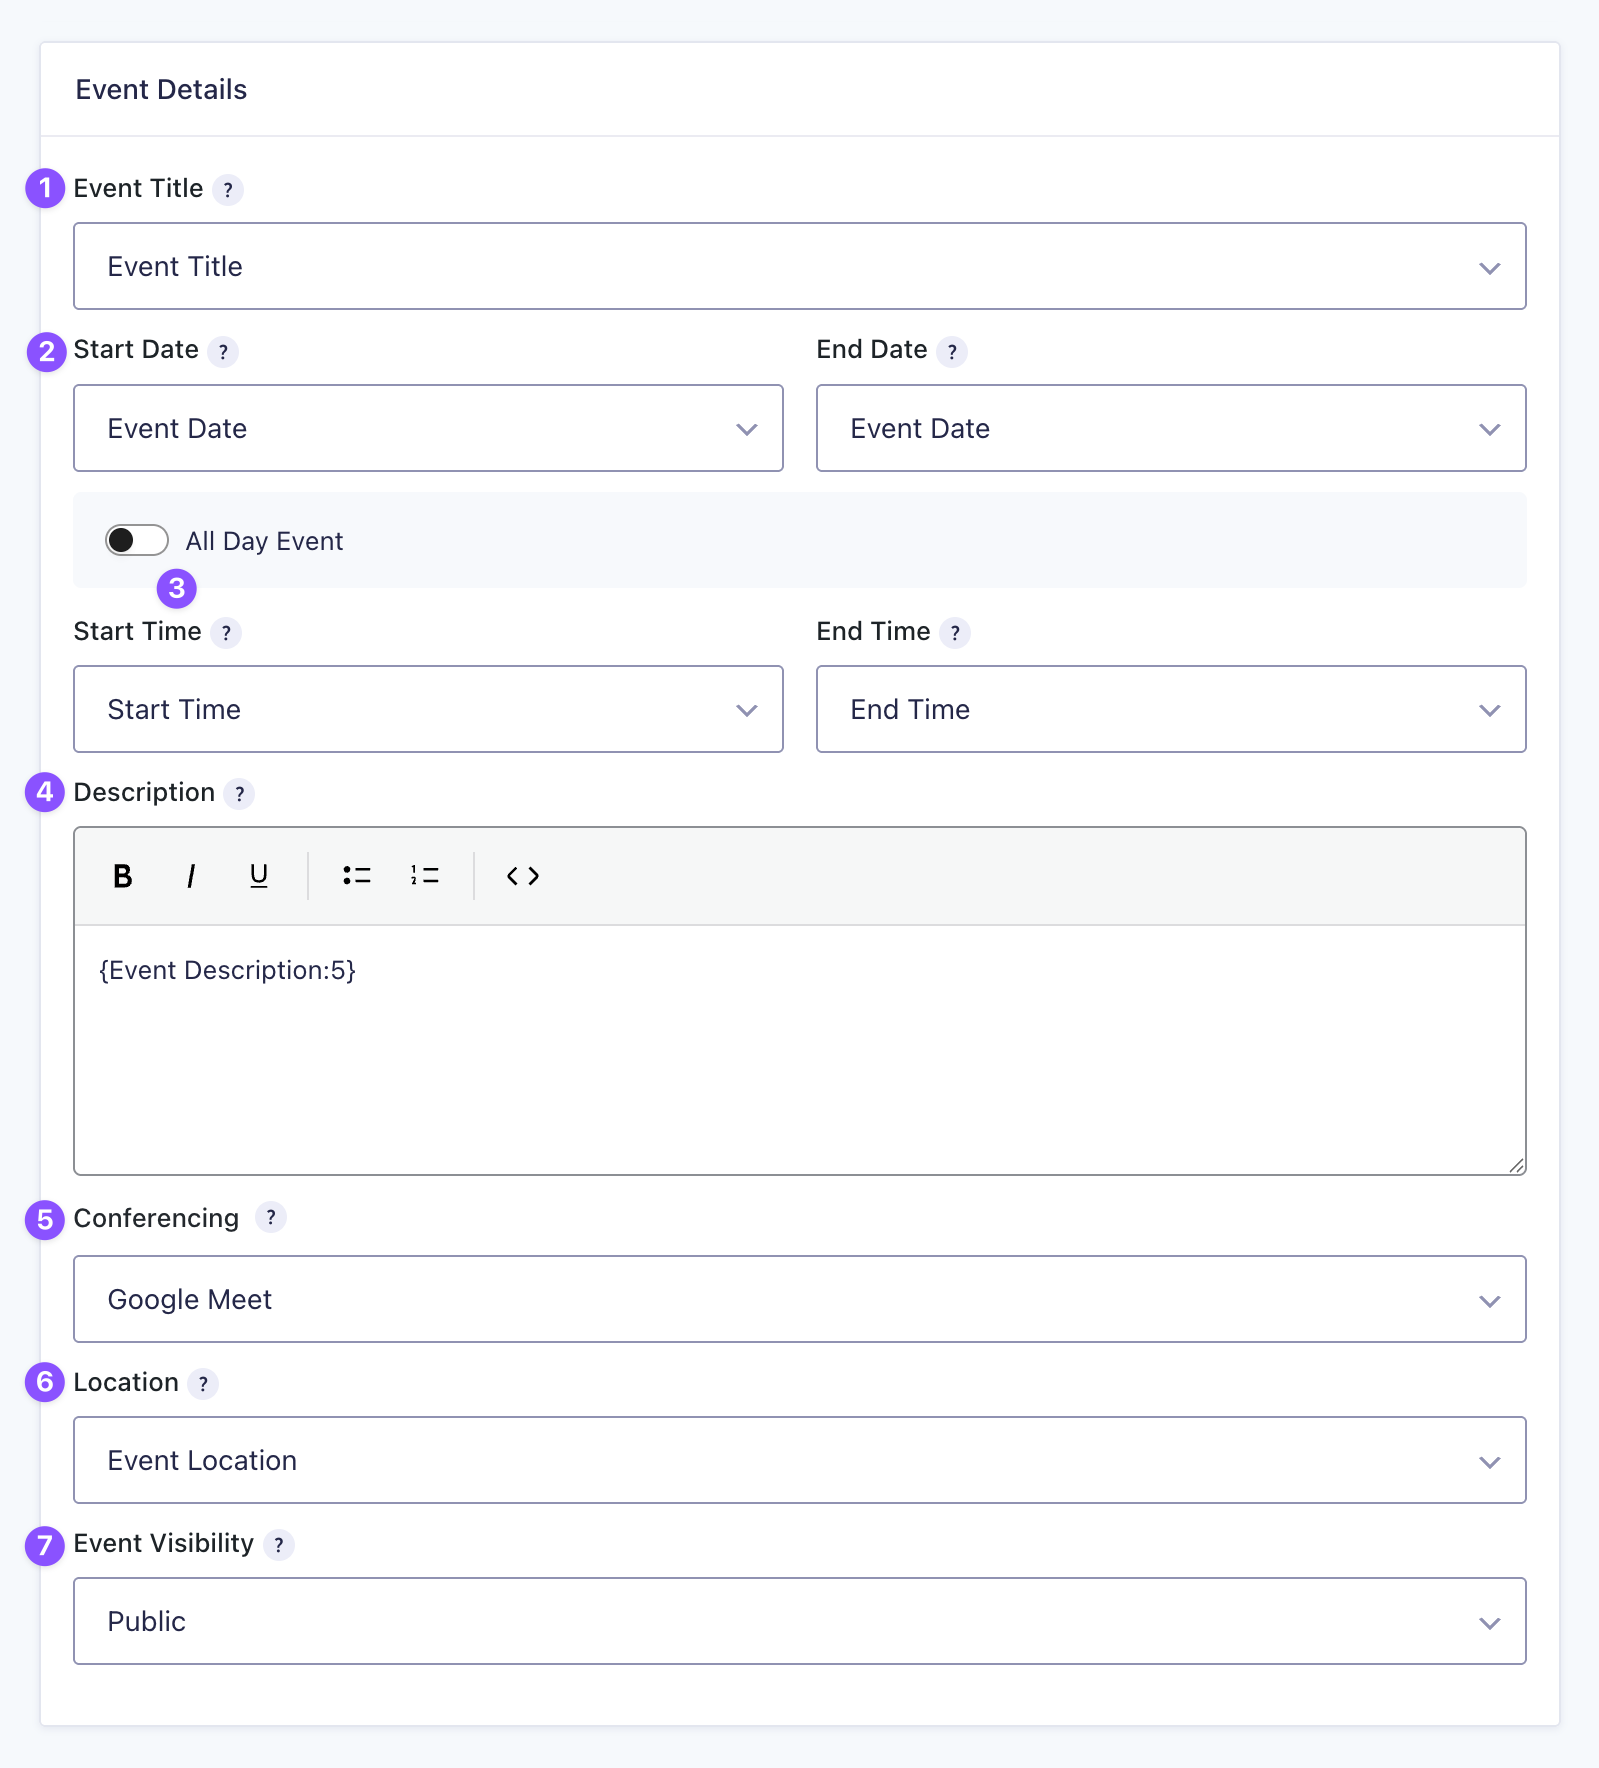
3 — Configure Event Details
- Event Title — select the field that holds the event name.
- Start Date / End Date — select the form date fields to use.
You can also use relative date values like +1 hour or next Monday to calculate event times automatically. In the Start Date or End Date dropdown, select Custom Value and type the relative value directly.
- All Day Event — enabled by default. Disable it to map Start Time and End Time fields.
- Description — enter fixed text or use merge tags, like
{Name:1}, to pull in details from your form. - Conferencing — select Google Meet to add a meeting link to the event.
- Location — select a form field to populate the event’s location.
- Event Visibility — choose Calendar Default (inherits the calendar’s settings), Public, or Private.
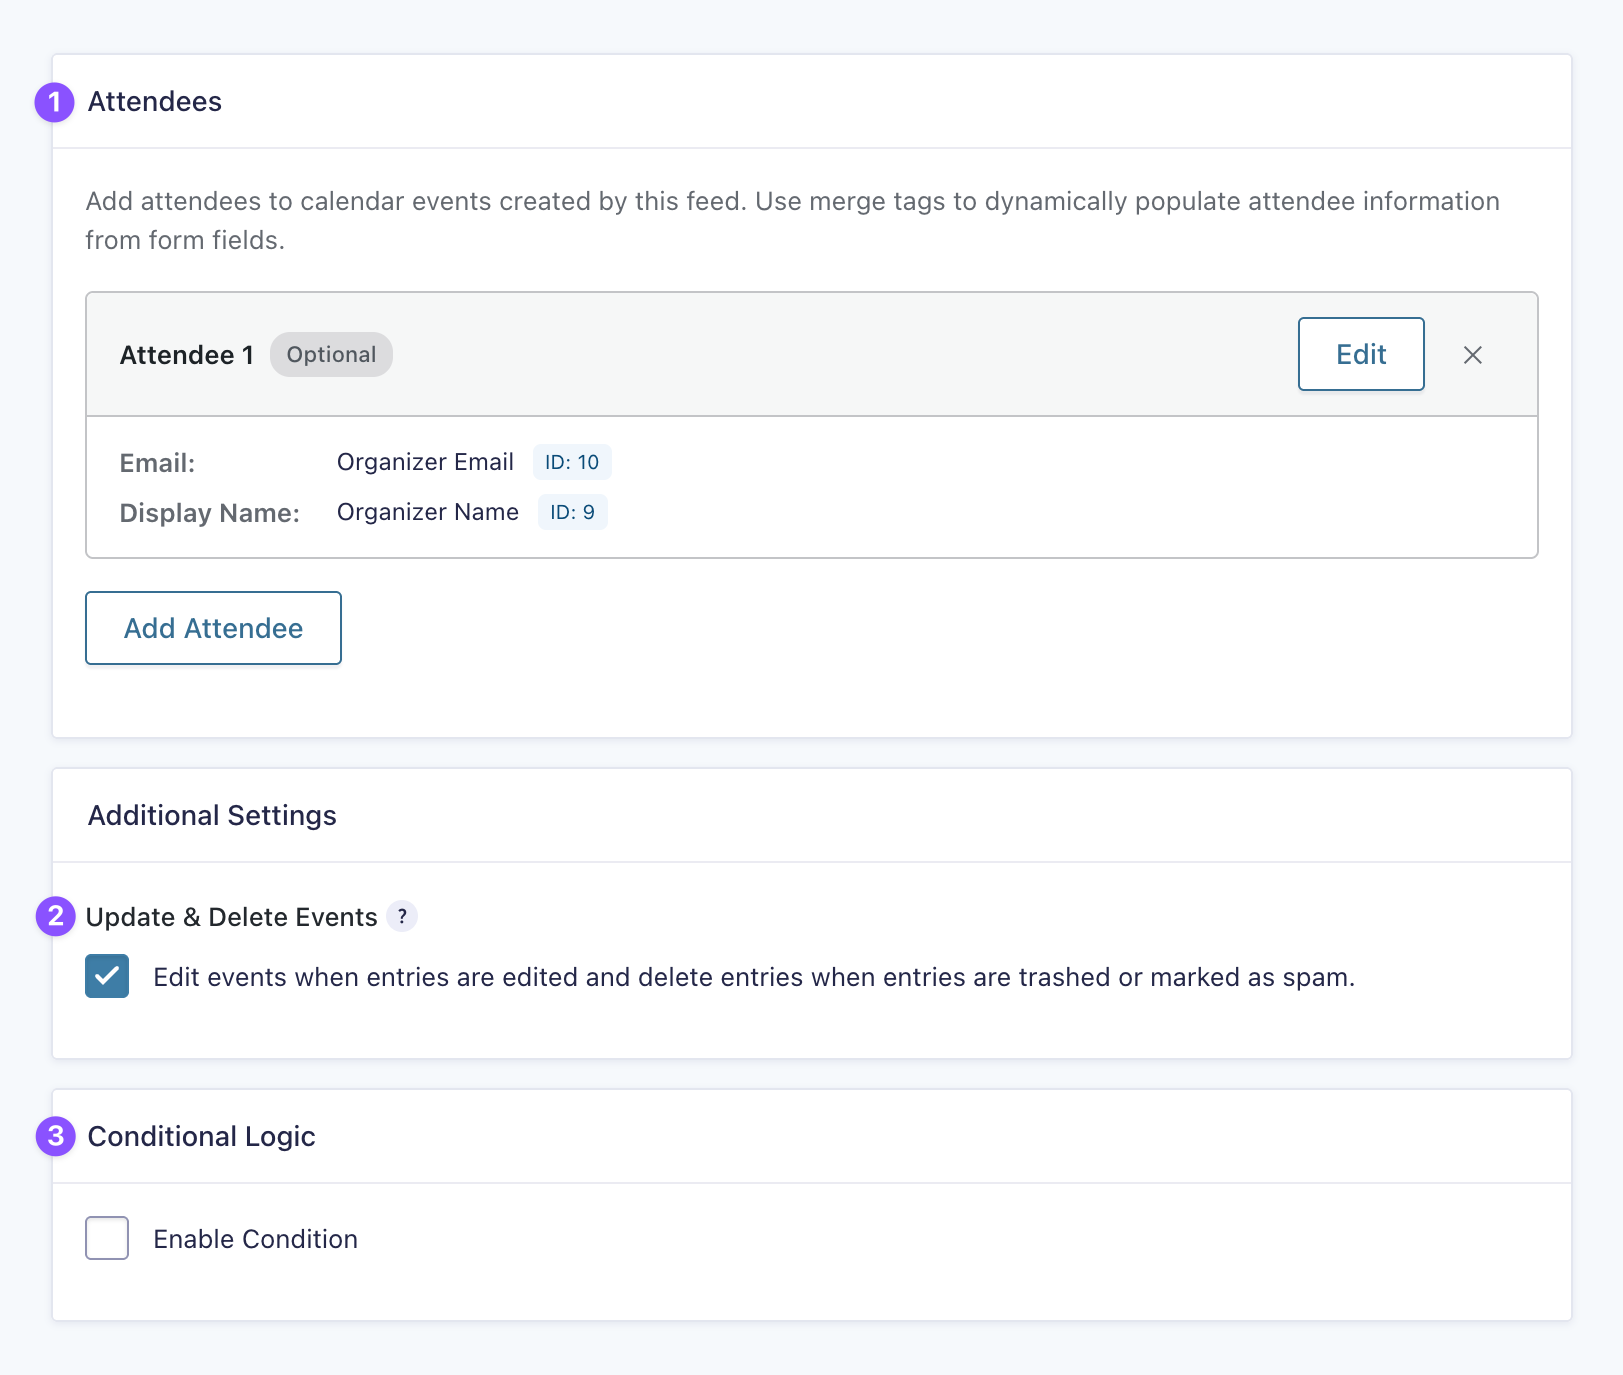
4 — Configure Attendees and Event Sync
- Attendees — click Add Attendee and map each attendee’s email, display name, and optional comment from your form fields.
- Update & Delete Events — update Google Calendar events when entries are edited, and remove them when entries are trashed or marked as spam.
Leave this unchecked if you don’t want later entry changes to affect the calendar event. For example, your team might edit entries for internal notes after an event is already confirmed.
- Conditional Logic — control when the calendar event gets created. For example, only create an event when a Confirmed checkbox is checked, or when payment is confirmed.
5 — Save the Feed and Test
- Click Save Feed.
- Open your form on the front end and submit a test entry.
- Open Google Calendar and check that everything landed where it should.
Edge Cases & Limitations
- If the connected account’s authorization expires or gets revoked, the feed may stop creating events until the account is reconnected — via Google Accounts in the plugin settings.
- If you manually rerun the Google Calendar feed from an entry’s detail page, conditional logic is ignored.
- Conferencing is currently limited to Google Meet.
- Changes made directly in Google Calendar don’t sync back to Gravity Forms.
Example Use Cases
- Appointment booking — Send booking requests or confirmed bookings to Google Calendar. For more advanced scheduling, pair this with GP Bookings to manage booking availability and confirmations.
- Event registration — Create calendar events for webinars, workshops, or internal sessions, with an optional Google Meet link included.
- Conditional event creation — Create events only after payment, approval, or another condition is met.
Key Takeaways
- Gravity Forms doesn’t natively create Google Calendar events from form submissions.
- Gravity Connect Google Calendar handles this automatically by creating events in Google Calendar when a form is submitted.
- Setup is done through a Google Calendar feed, where you choose a calendar and map your form fields to event details like title, date, time, description, location, and attendees.
- Enable Update & Delete Events if you want Google Calendar events to update when Gravity Forms entries are edited, trashed, or marked as spam.
Frequently Asked Questions
Why isn’t my event appearing in Google Calendar after submission?
First, confirm the feed is enabled. If it is, open the entry in Gravity Forms and check the entry notes for any Google Calendar-related error messages. Also confirm the connected Google account has write access to the calendar selected in your feed.
Why is my event showing the wrong date or time?
This is usually a mapping issue. Check that your Date and Time fields are correctly mapped in the Google Calendar feed. If it’s a timed event, make sure All Day Event is disabled so the time fields appear.
Why aren’t attendee invitations sending?
Check that the Email field is mapped in the Attendees setting and that the submitted email address is valid. A typo in the email is often the culprit.