How to Set a Featured Image and Add to ACF Gallery From The Same Field
Simplify your forms by using a single Multi-file Upload field to set the featured image and populate a gallery for a generated post.
This article requires the GP Media Library perk.
Buy Gravity Perks to get this perk plus 48 other premium Gravity Forms plugins!
Map Multiple Images During Post Creation with The Advanced Custom Fields Gallery
If you’re a regular reader of our blog, then you know that we love the Advanced Post Creation Gravity Forms add-on. It offers a combination of flexibility and ease-of-use that makes it dead simple to create posts and map meta fields. When combined with Advanced Custom Fields, you can create posts for any situation.
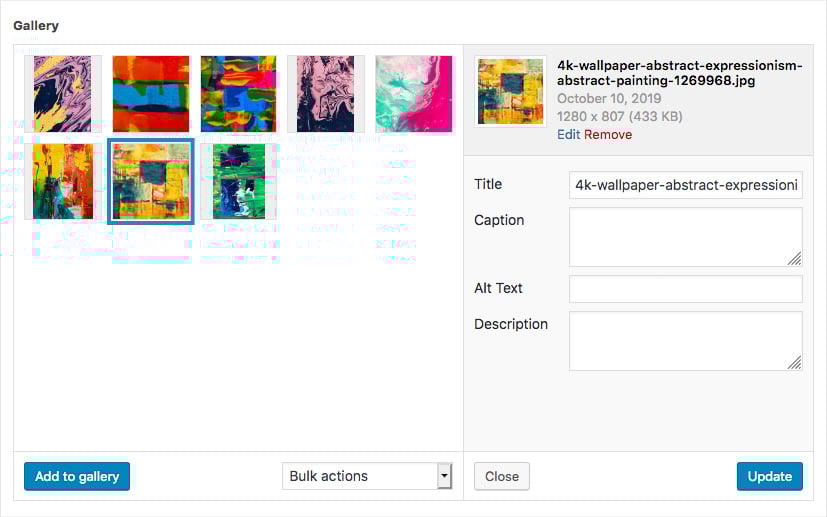
One of the most powerful features of ACF Pro is the Advanced Custom Fields Gallery field. It provides an interactive interface for managing a collection of attachments. Those attachments can then be easily displayed in your post by adding some code to your theme.
Combine this functionality with the Advanced Post Creation add-on and you can map a multi-file upload field to an ACF Gallery to easily attach images to the gallery when creating a post.
But what if you also need to select a featured image?
Typically, you’d have to create a separate File Upload field to handle that, bringing additional complexity in your form and an extra burden on your users.
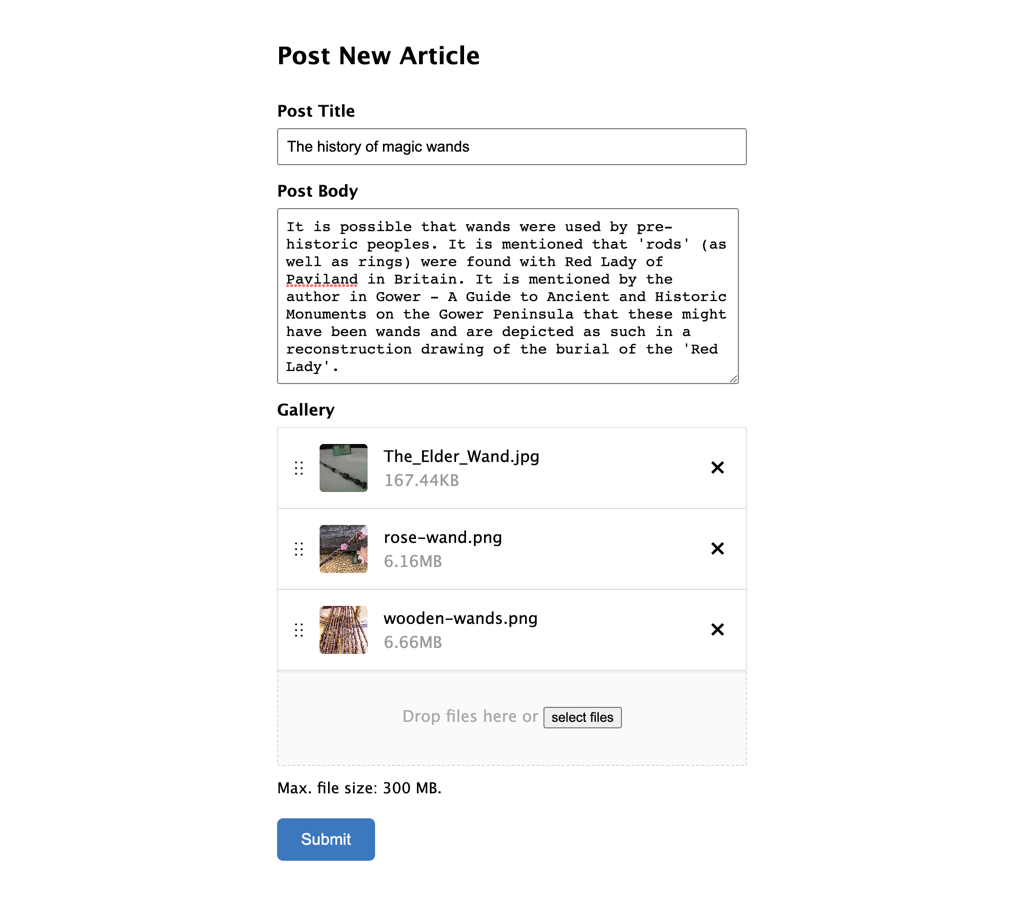
In this tutorial, we’ll show you to use a single Multi-file Upload field to add a Featured Image to your post and map the rest of the images to an ACF Gallery.
Getting Started
Before getting started with your form, make sure to create a Gallery using Advanced Custom Fields Pro. Make sure to note the Field Name for that field in the ACF field settings. For our tutorial, we have given it the name gallery.

Steps
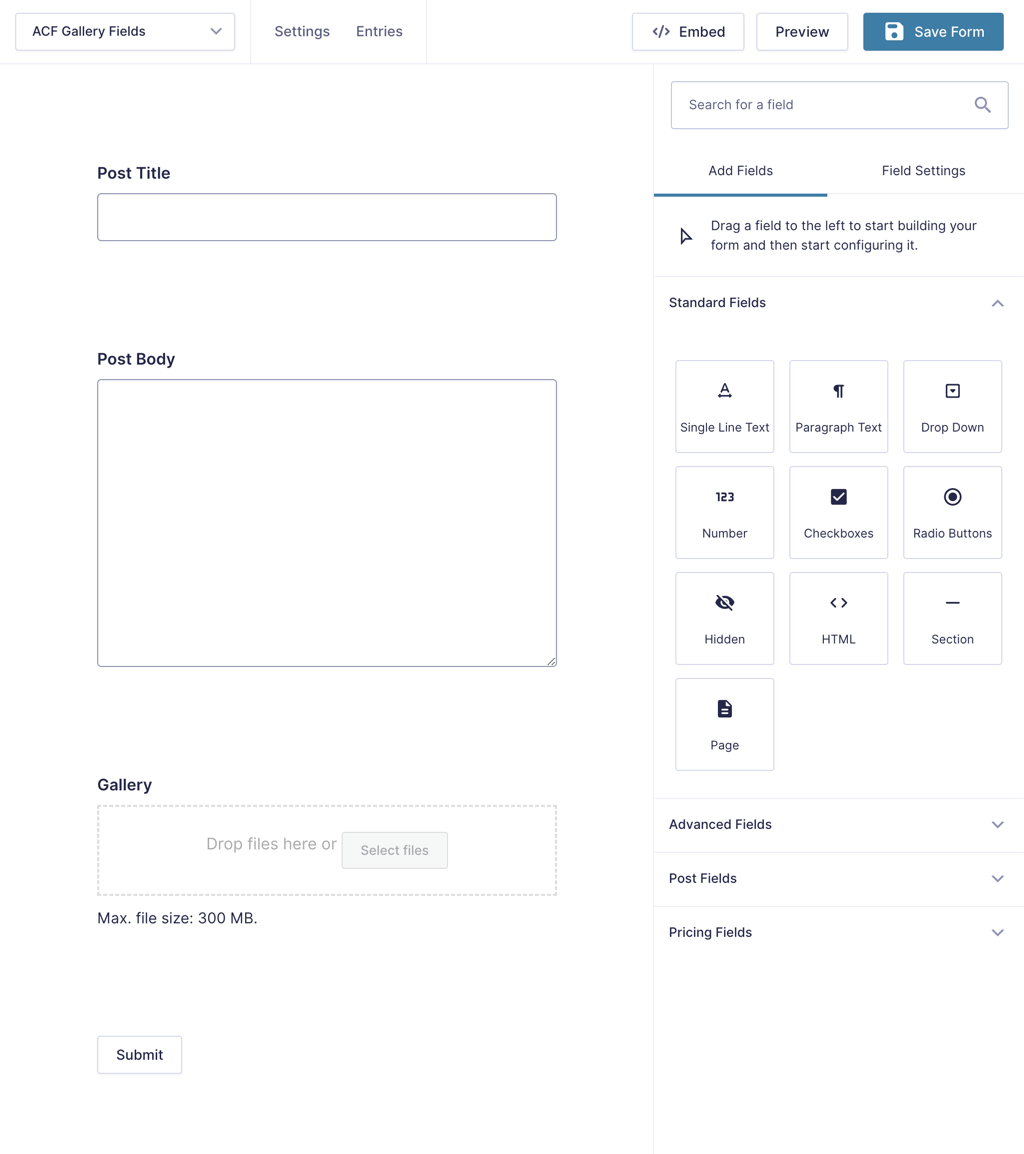
Step 1 – Add Fields to Your Form
You will need a minimum of three fields to create a post and upload images to the gallery: Single Line Text, Paragraph, and File Upload. Add each of these fields to your form, and give them appropriate names.
Step 2 – Activate Media Library
In the File Upload field’s settings, navigate to the Perks tab and check Upload to Media Library. This will upload the files to the media library, and when coupled with the APC settings in the next step, makes sure they’re properly mapped to the ACF Gallery field.

Step 3 – Create APC Feed and Map Fields
With the form set up, the next step is to create your Advanced Post Creation Feed and map the fields. Insert the merge tags for the Post Title and Post Body fields into the Title and Content fields respectively.
Ignore the Media Gallery setting. GF Media Library is handling uploading the images to the media gallery, and if you map the field here it will prevent the Perk from being able to work its magic.
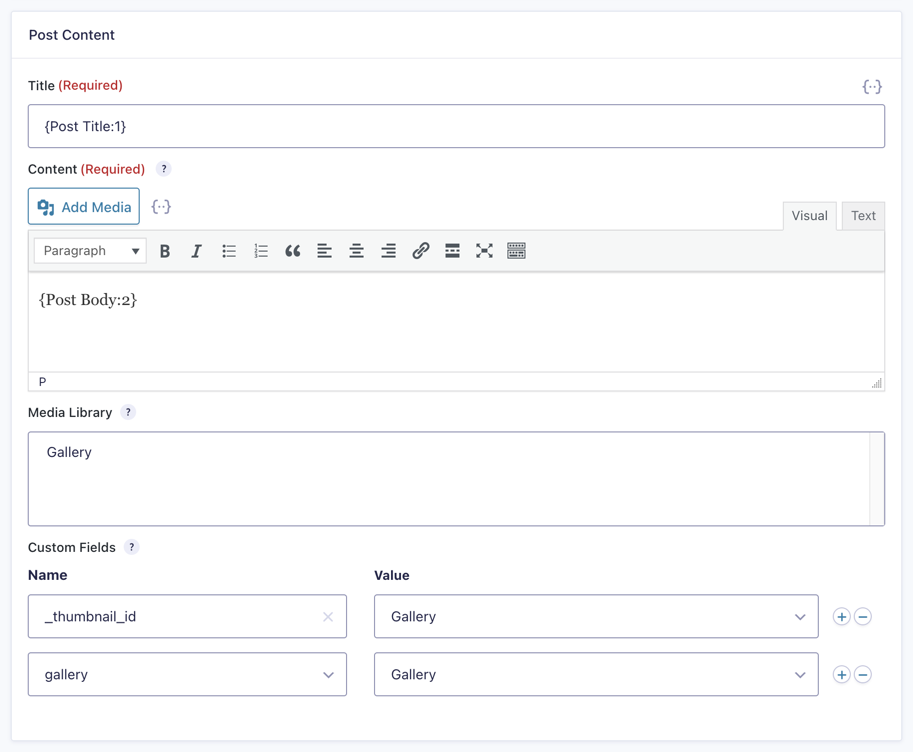
Under Custom Fields, you will map the Gallery field to two different custom fields:
-
_thumbnail_idand gallery(or whatever you named your ACF Gallery field).
You can select gallery from the list, but _thumbnail_id will need to be typed in after selecting Add New Custom Field Name from the drop down.
That’s It
That’s all there is to it. Once the fields are mapped, any new submission will automatically create a new post. The first image in the File Upload field will be set as the post’s Featured Image and the subsequent images will be placed in the ACF Gallery field.
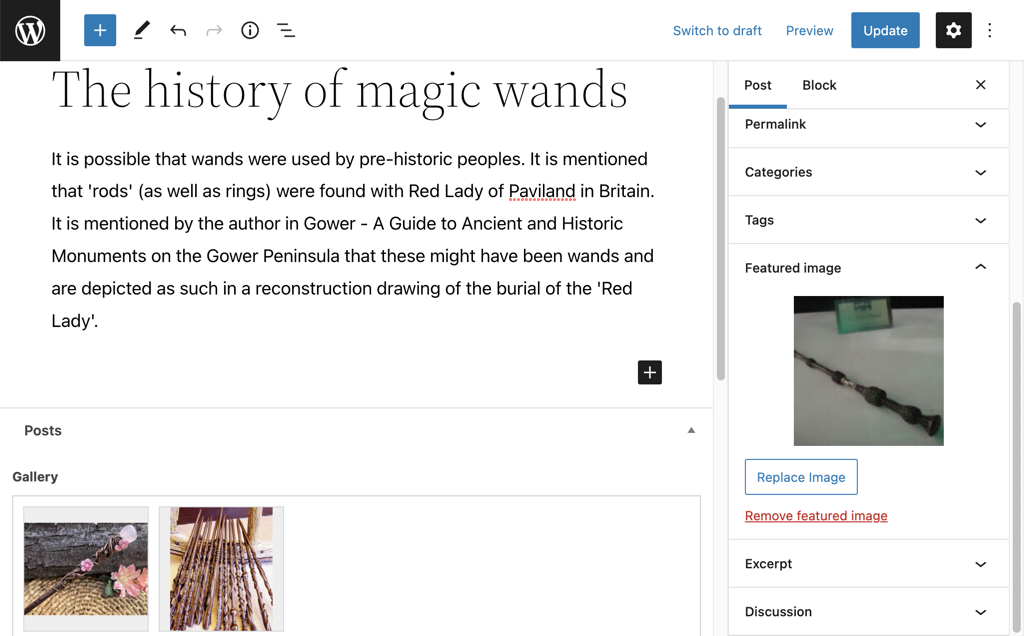
Here you can see the post from the above submission as it appears in the Block Editor with the featured image and the gallery populated.
Taking It Further
Sorting Upload Files
The first image in the File Upload field is mapped to the Featured Image, which makes this a perfect fit for File Upload Pro’s sorting. With sorting enabled, users can rearrange uploaded files to make sure the correct image is used as the feature image for the post.
Using AI Images
Looking for specific images for your gallery? You can fill it with tailor-made visuals by using GC OpenAI to leverage Gravity Forms for AI image generation.


Hi, Instead of ACF, I use Meta Box to create my custom field “gallery”. Only the thumbnail ends up on the post. The gallery does not in the custom field gallery.
Note that the images do show up in the media library however (twice).
I’m using the classic editor.
Can you help me please ?
Thx ! Oliver
Hi Phillippe, we’ve already followed up via email. Metabox doesn’t seem to be supported yet using this tutorial.
I don’t see the “perks” ab when adding the multiple file upload field.
Do you have a screenshot of where that is on the form edit screen?
Hi Kyle,
The Perks tab is under the Field Setting section on the left side of the form edit screen. It should be available when you activate the GP Media Libray Perk. If it’s still not showing for you, I suggest you run a Theme/Plugin conflict test to check if another plugin is causing this. You can also get in touch with us via our support form if you have an active Gravity Perks license so we can look into this further.
Best,
Best,
Tried this and only the thumbnail ends up on the post. The gallery does not. The images do show up in the media library however (twice) and as expected instead of Gutenberg the post is using the classic editor even though I don’t use the classic editor on this website.
Hi Frank,
I’m going to reach out to you directly to see if we can get your form sorted out, but I did want to comment on the classic editor for others to see.
The APC add-on inserts body content into classic blocks in the WP block editor. They can still be drag-and-dropped, but their behavior will be similar to the classic editor.
If you have the Classic Editor plugin installed, the post will use the Classic Editor instead of the Block Editor.