Guide: Populating Gravity Forms Dropdowns with ACF’s Relationship Field
Everything you need to know about dynamically populating Gravity Forms dropdowns using ACF’s Relationship field and creating chained selects.
Does this situation sound familiar? Your users are filling out a form, and they have to pick an option from a drop down list. Based on what they pick from the first drop down list, you’d like to display a second list with additional options. These additional options all depend on what the user selected in the first dropdown.
Maybe you’re running a resort and only want to show certain activities based on which package your guests have selected. Maybe you run a tutoring business and only offer extra study sessions if your clients purchase your premium service. Or, maybe you run an event catering business and only offer certain food selections based on the user’s dietary preferences.
What’s common in all the above scenarios? There are two selection fields, and there is a relationship between these two fields. When something gets selected in the first field, the system somehow needs to know which options to display in the second field. The items in the second list are conditional on what was selected in the first field.
Let’s take a deep dive into how we can create and manage dynamic conditional lists using a powerful combination of Gravity Forms Populate Anything and Advanced Custom Fields.
This article requires the GP Populate Anything perk.
Buy Gravity Perks to get this perk plus 48 other premium Gravity Forms plugins!
Getting Started
In order to get started, we’ll need a few things first:
For this tutorial, we’ll use the example of choosing activities at a resort. We’ll create a list of activity packages, a separate list of individual activities, and create a relationship between these fields so that the activity list changes based on the package that’s selected.
What is Advanced Custom Fields?
Advanced Custom Fields (ACF) is a free WordPress plugin that adds some powerful advanced features to the default WordPress environment.
We’ll be taking advantage of ACF’s ability to create custom post types and custom fields as a way to organize our data in a practical way. With ACF, we’ll create a post type for our Packages and another for our Activities. Then, using the magic of the ACF Relationship field, we can “connect” each activity to its corresponding package.
Create the ACF Post Types
With ACF installed and activated, open your WordPress Dashboard and navigate to: ACF › Post Types. Click on Add New towards the top of the page. We’re going to create a new Post Type for Packages and Activities.
On the “Add New Post Type” page, we’ll fill the fields as follows:
- Plural Label: “Packages”
- Singular Label: “Package”
- Post Type Key: this should be filled out automatically (“package”)
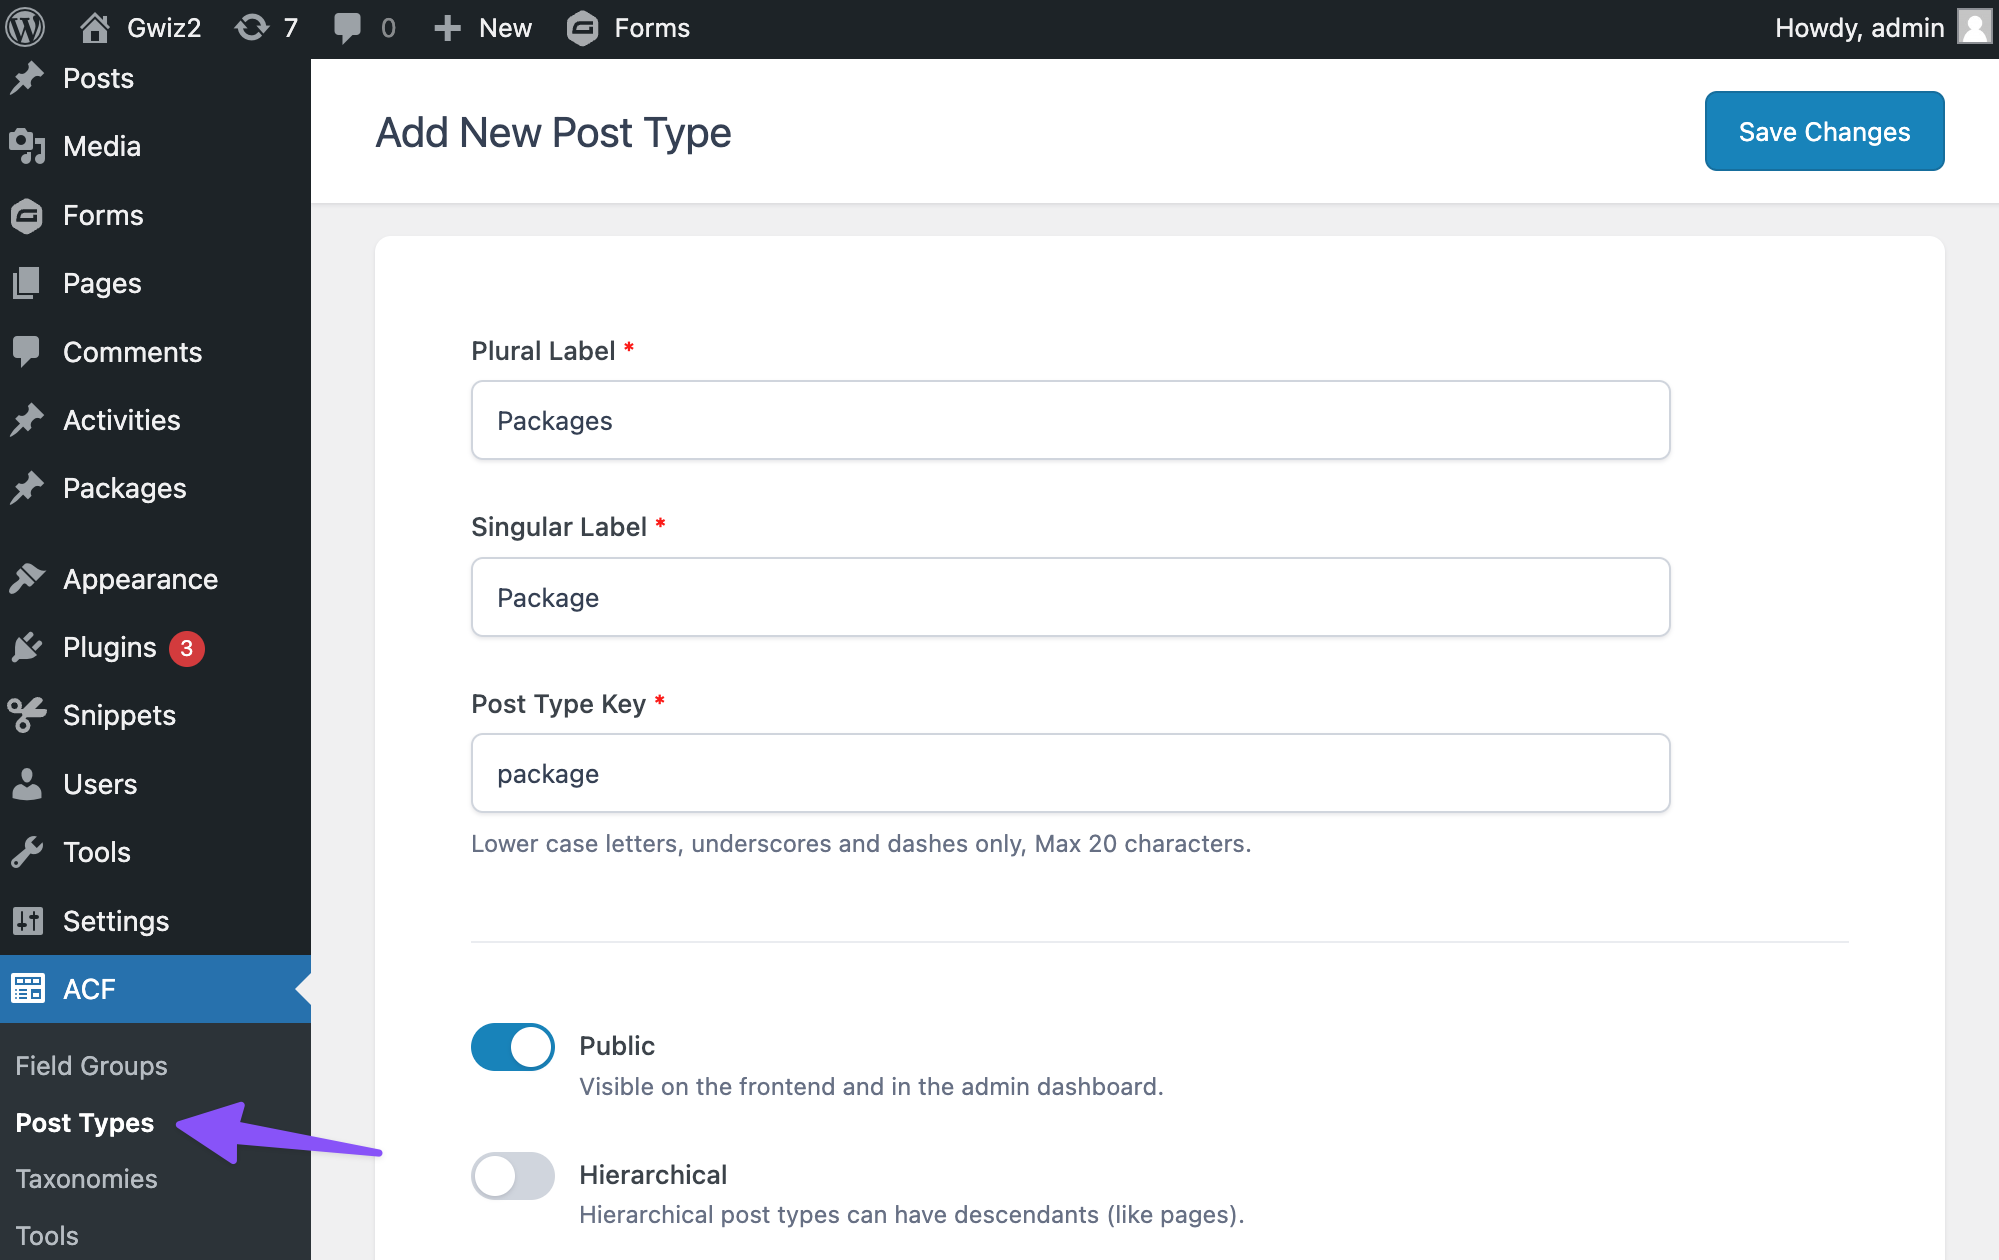
Make sure the Public option is enabled, and click Save Changes in the top right corner to save the Post Type.
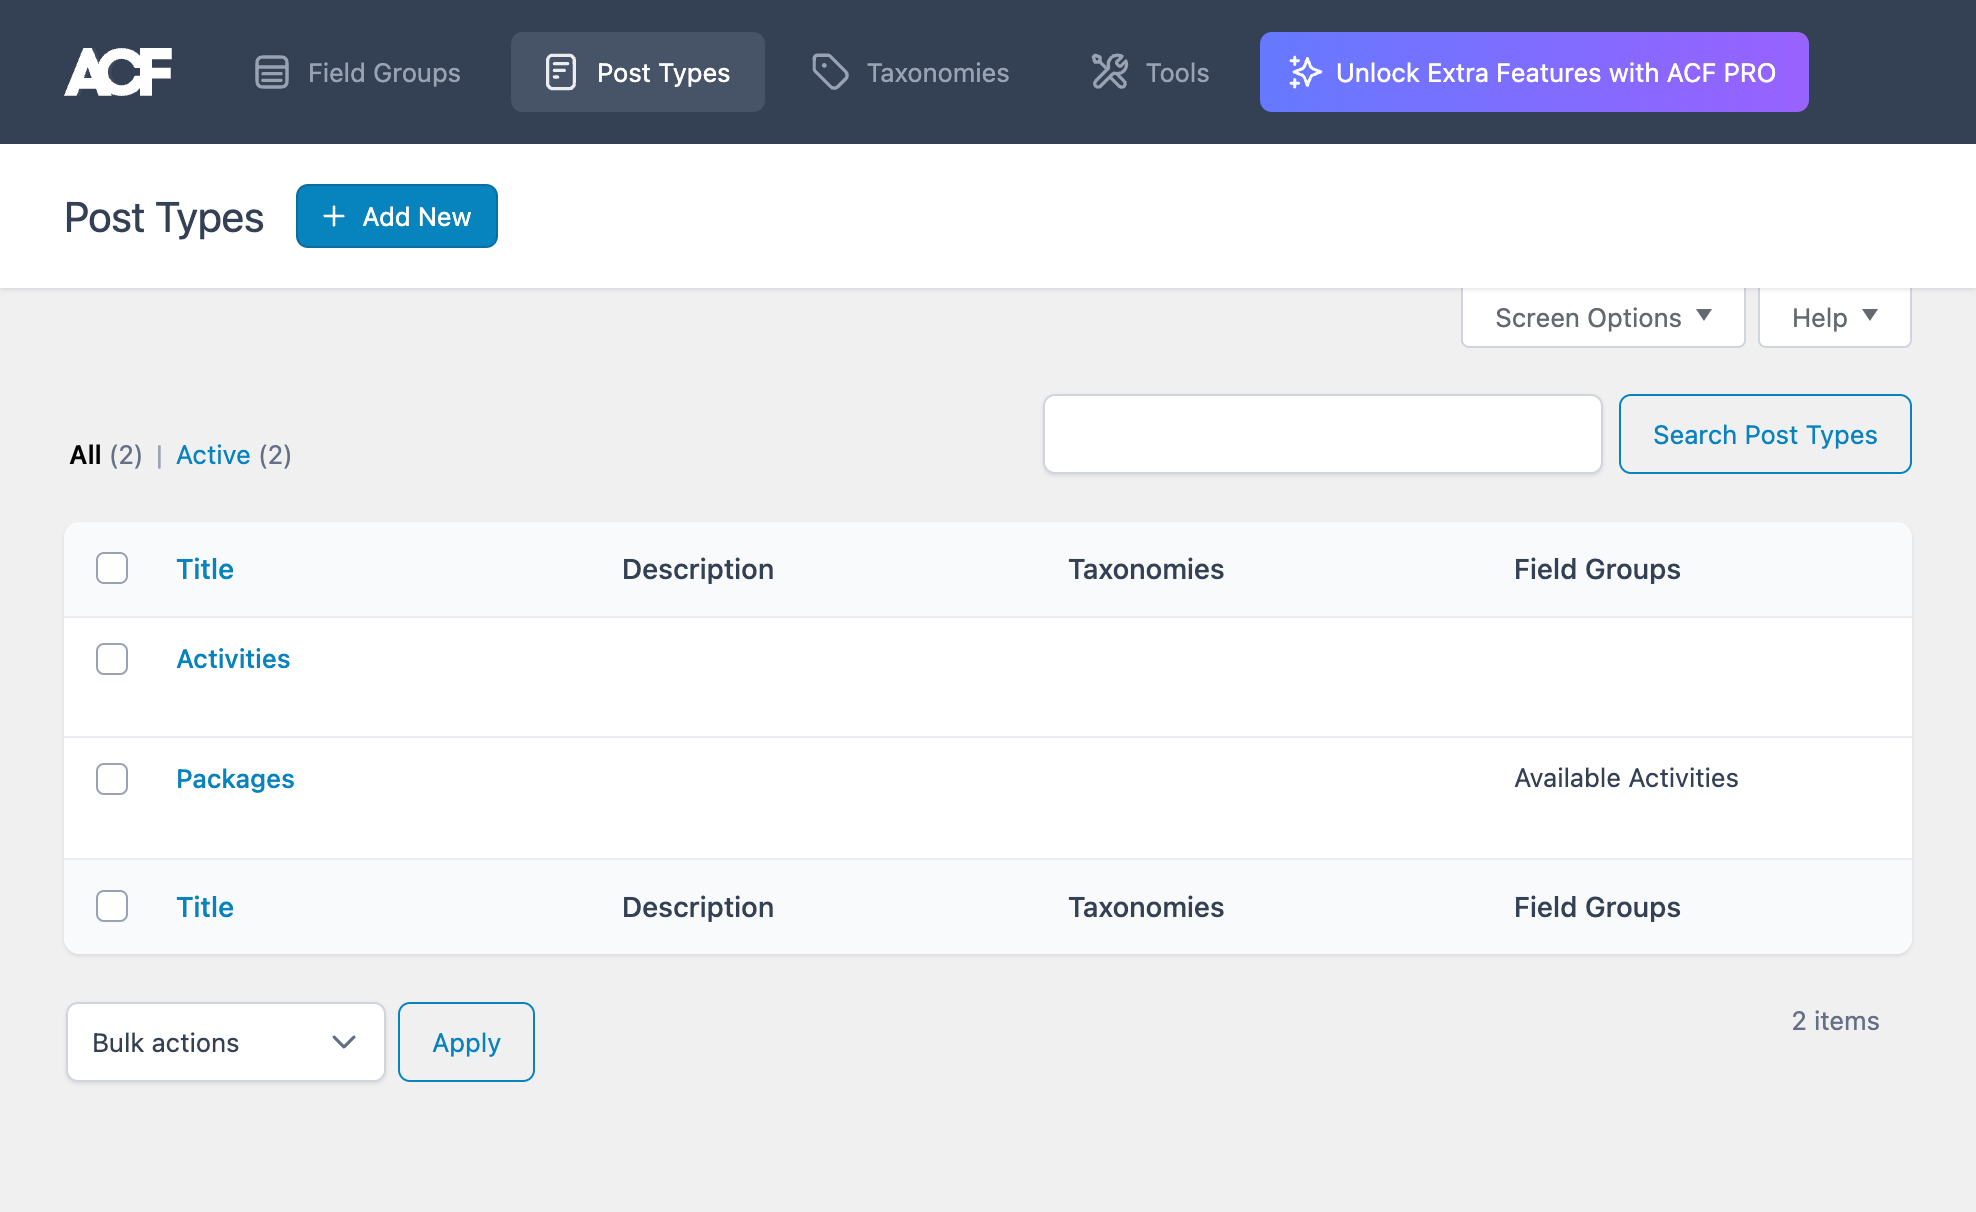
Repeat the same steps above to create the Activities Post Type. On the “Add New Post Type” page, we’ll fill the fields as follows:
- Plural Label: “Activities”
- Singular Label: “Activity”
- Post Type Key: this should be filled out automatically (“activity”)
Once both Post Types are added, your Post Types page should look like this:
Add the Packages and Activities
Do you notice anything different in the WordPress Sidebar? Under Comments, you should see two new links – one for Activities, and one for Packages. We’ll use these links to add our lists of Packages and Activities.
Let’s start by adding the Packages we want users to be select from. For this tutorial, we’ll have three options to pick from: Bronze, Silver, and Gold.
From the WordPress Sidebar, click on Packages › Add New. Enter “Bronze” as the title, and click Publish. Repeat for the Silver and Gold packages. When you’re finished, your Packages page should look like this:

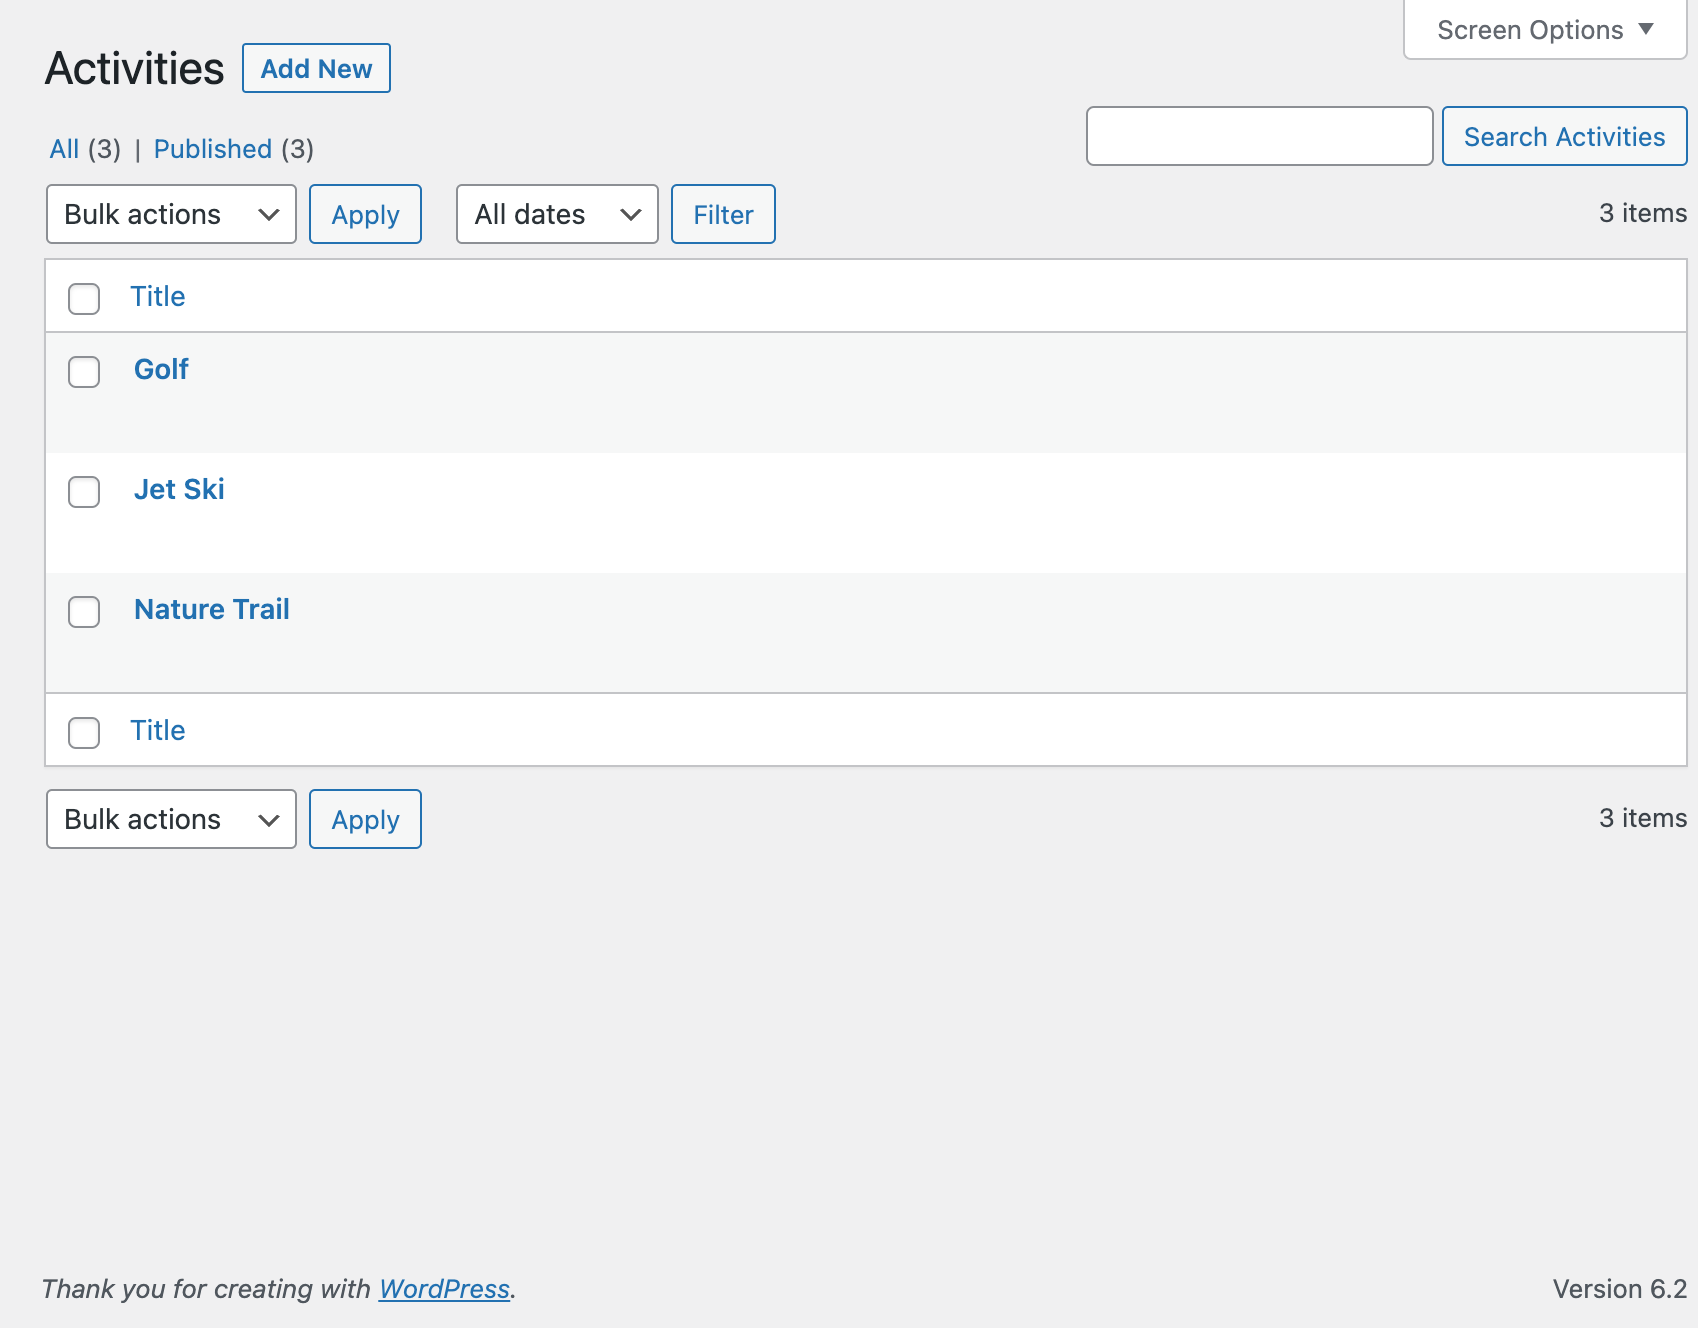
Next, we’ll add the Activities we want to offer to users. We’ll offer a selection of Golf, Nature Trails, and Jet Skiing.
From the WordPress Sidebar, click on Activities › Add New. Enter “Golf” as the title, and click Publish. Repeat for the Nature Trail and Jet Ski activities. When you’re finished, your Activities page should look like this:
Create a Relationship Field
We now have the package and activity lists created for our users – we’re off to a great start! However, there’s an important piece of the puzzle that’s still missing. How does WordPress know which activities belong to each package?
ACF can help us here too. The Relationship field allows you to specify a relationship between posts which lets us link our Activities to Packages. Let’s say we want the following rules to be applied:
- When the Bronze package is selected, users can only choose the Nature Trail activity.
- When the Silver package is selected, users can choose the Nature Trail and Golf activities.
- When the Gold package is selected, users can choose all the Nature Trail, Gold, and Jet Ski activities.
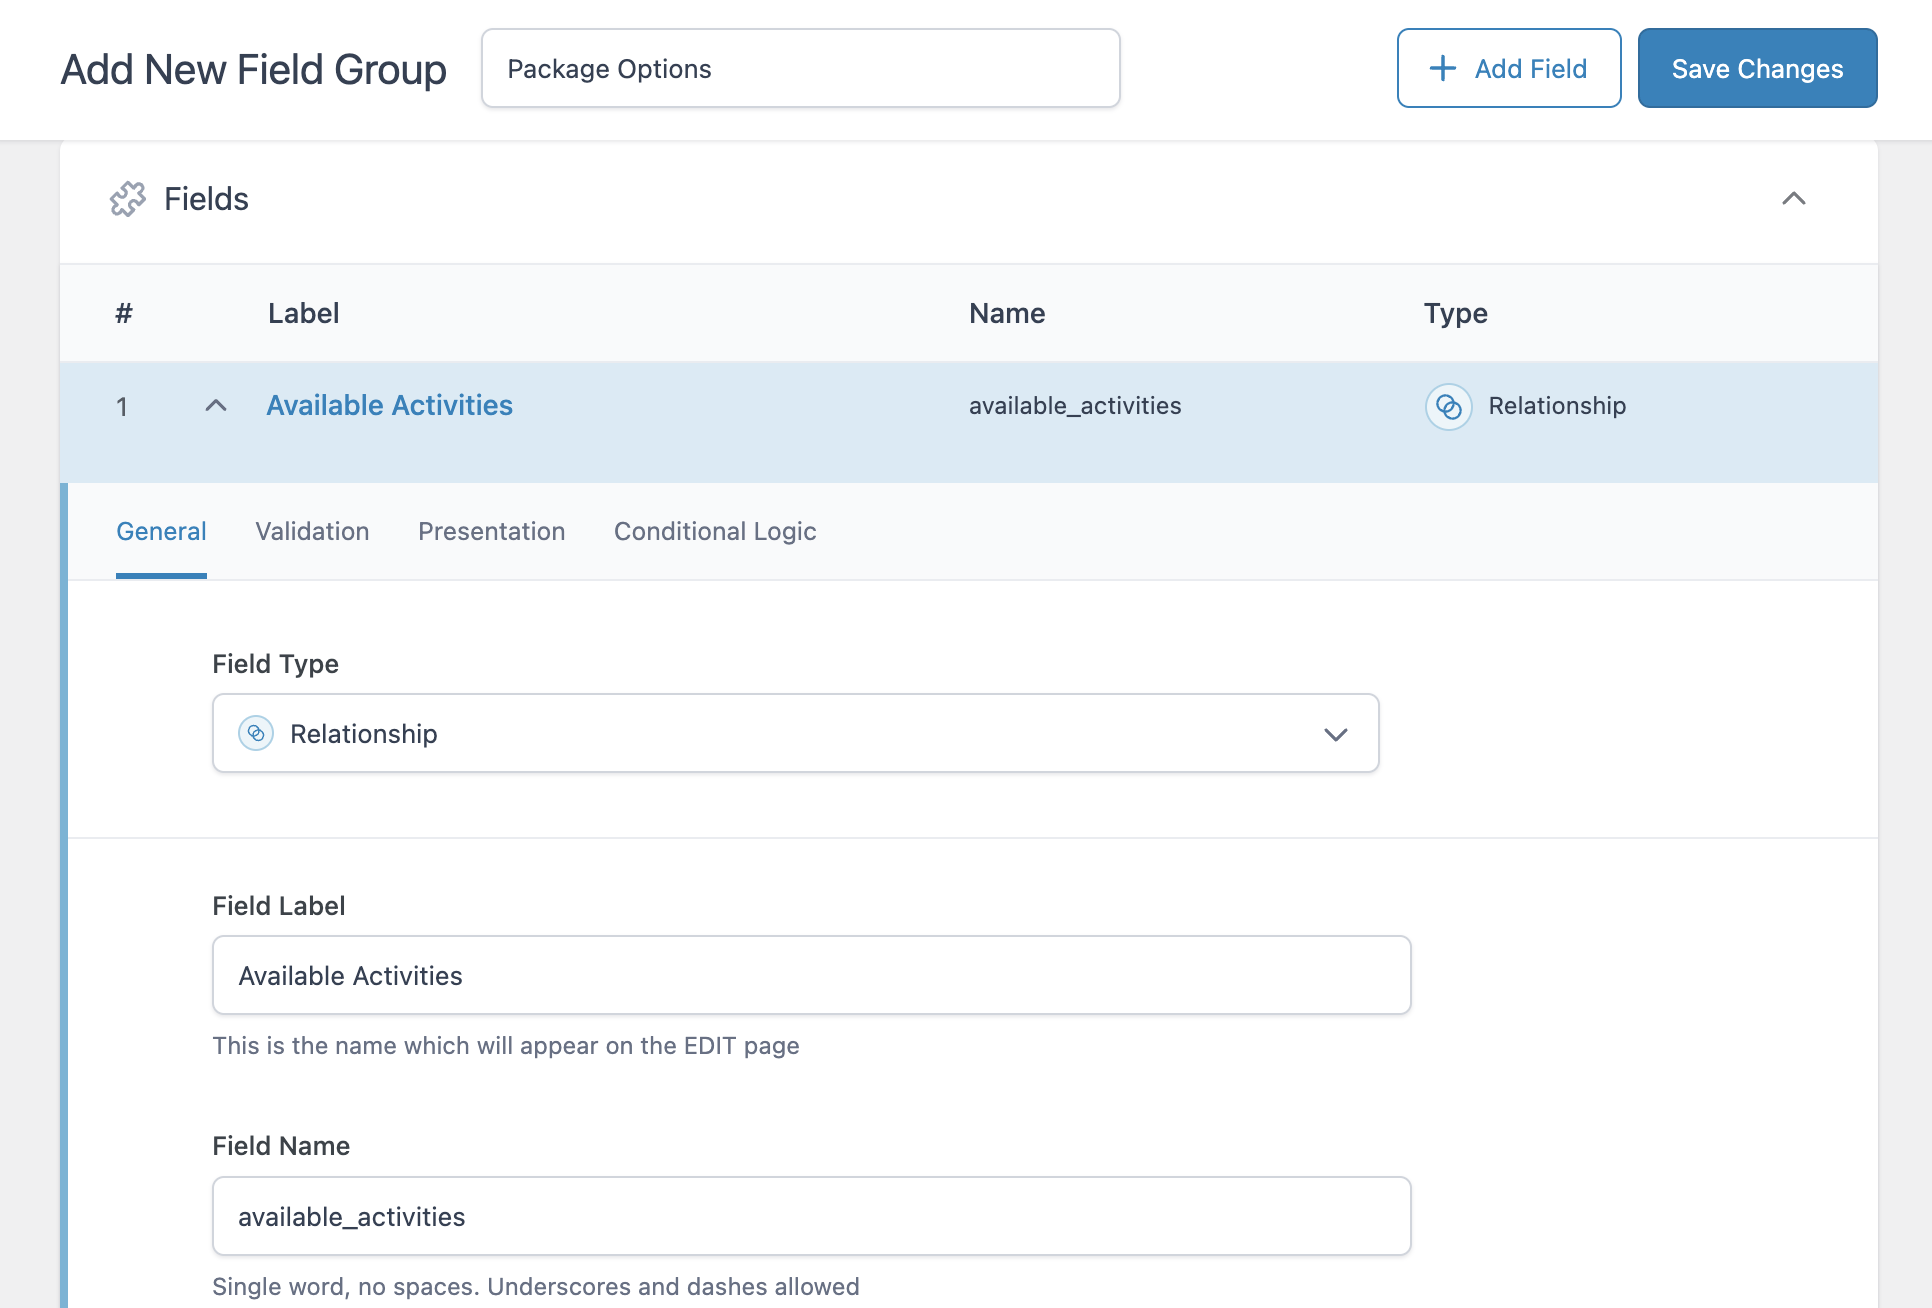
From the WordPress Dashboard, navigate to ACF › Field Groups › Add New. We’ll fill the fields on the “Add New Field Group” page as follows:
- Field Group Title: “Package Options”
- Field Type: Relationship
- Field Label: “Available Activities”
- Field Name: this should be filled out automatically (“available_activities”)
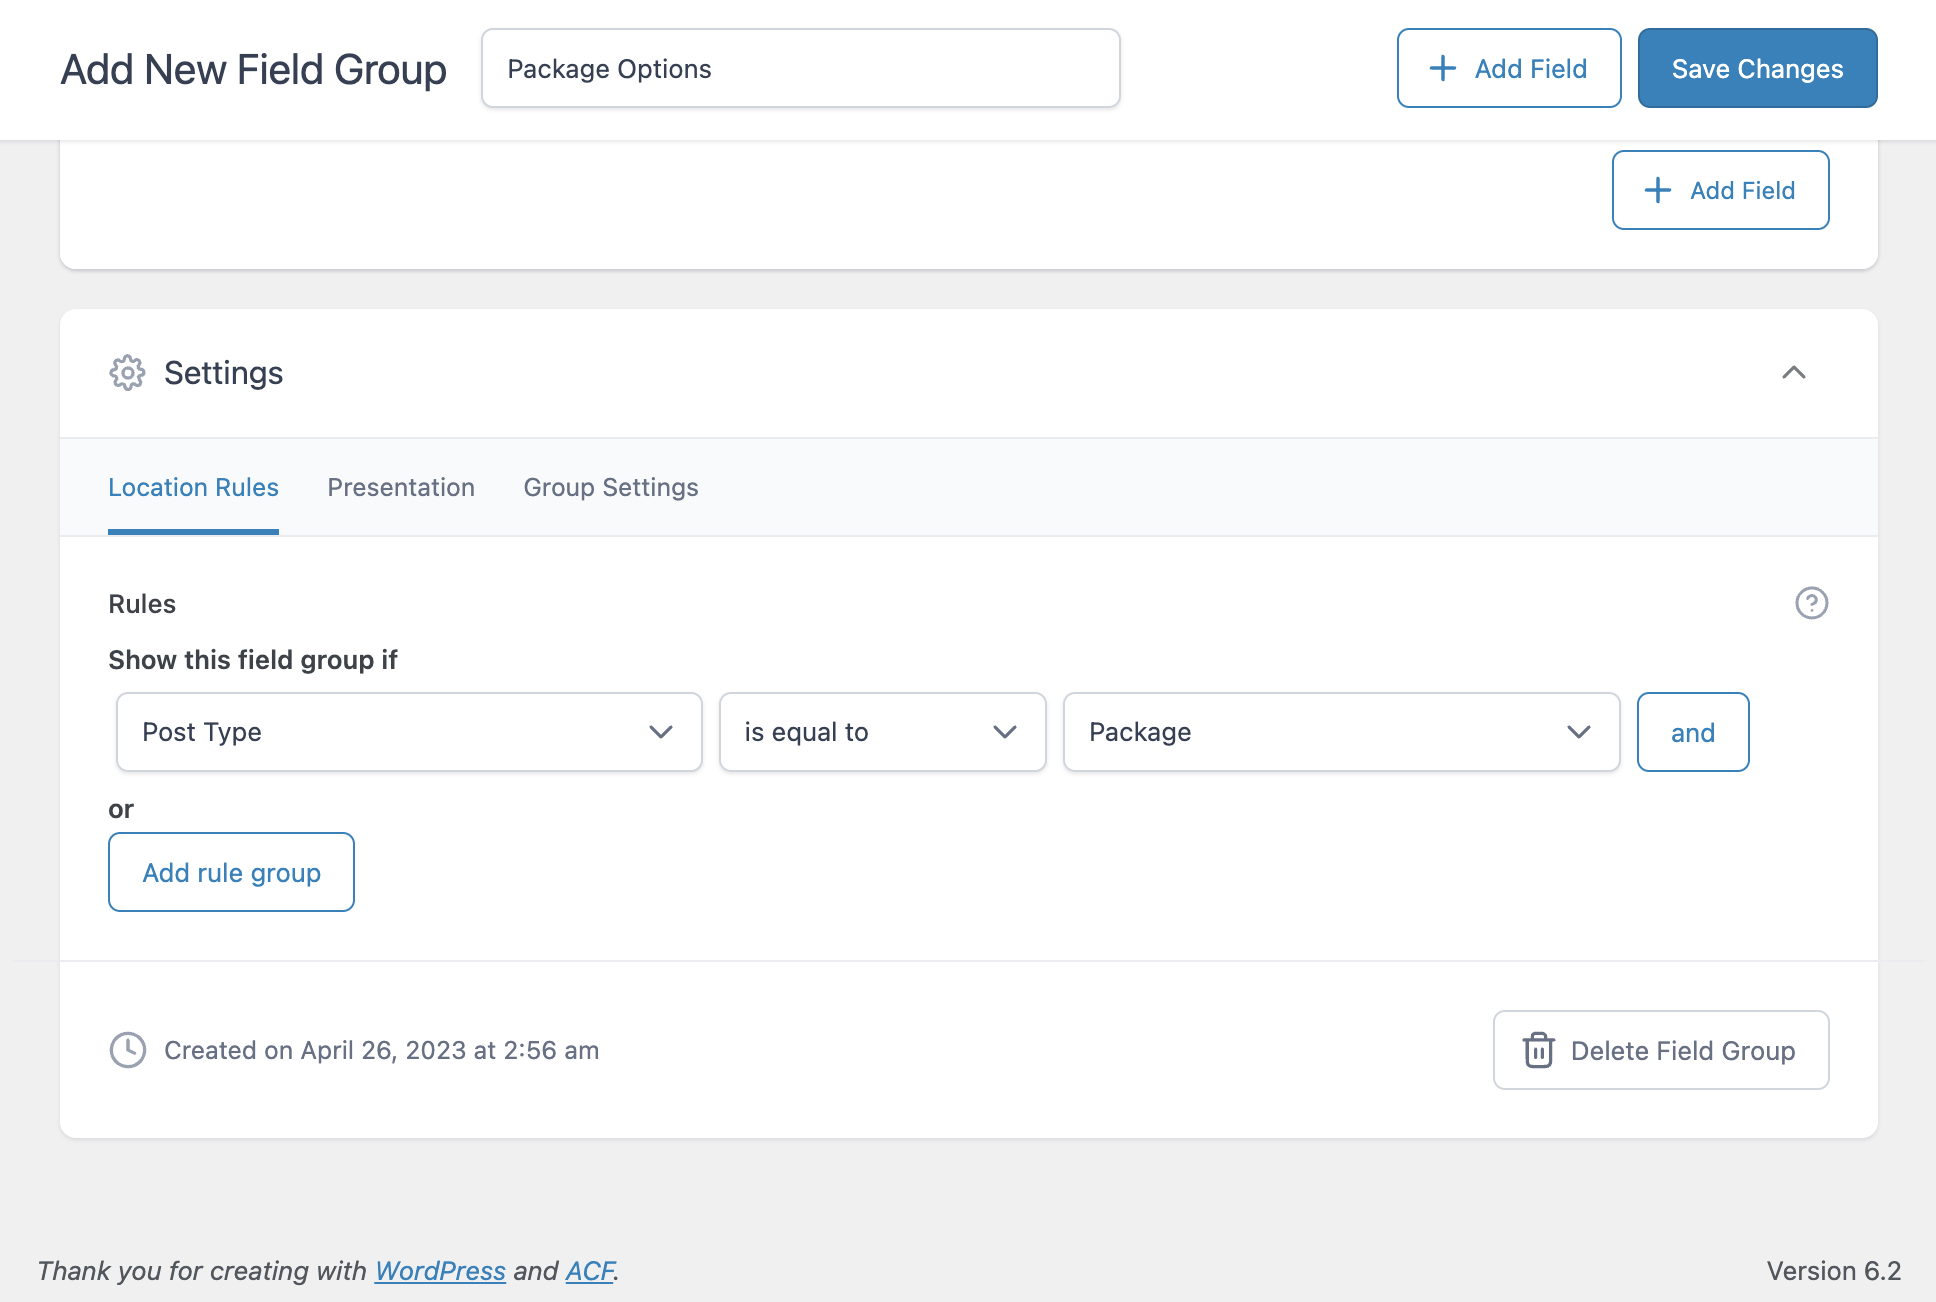
We’ll only want to show this field group if a Package is selected. To make sure of this, scroll down to the Settings section. Under Location Rules, we’ll add the following:
- Show this field group if Post Type is equal to Package
Assign Activities to Packages
Now comes the fun part! With our handy Relationship field created, we can now assign each activity to the package(s) they belong to.
From the WordPress Dashboard, navigate to Packages › Bronze › Edit. Towards the bottom of the editor, you should see a new section called Available Activities. This is the field group we created.
In the Available Activities section, click on Select post type and choose Activity. You should see the three activities we created appear on the left hand side. Click on Nature Trail to add this activity to the Bronze package. Since we only want the Nature Trail for Bronze, we’re all set here.
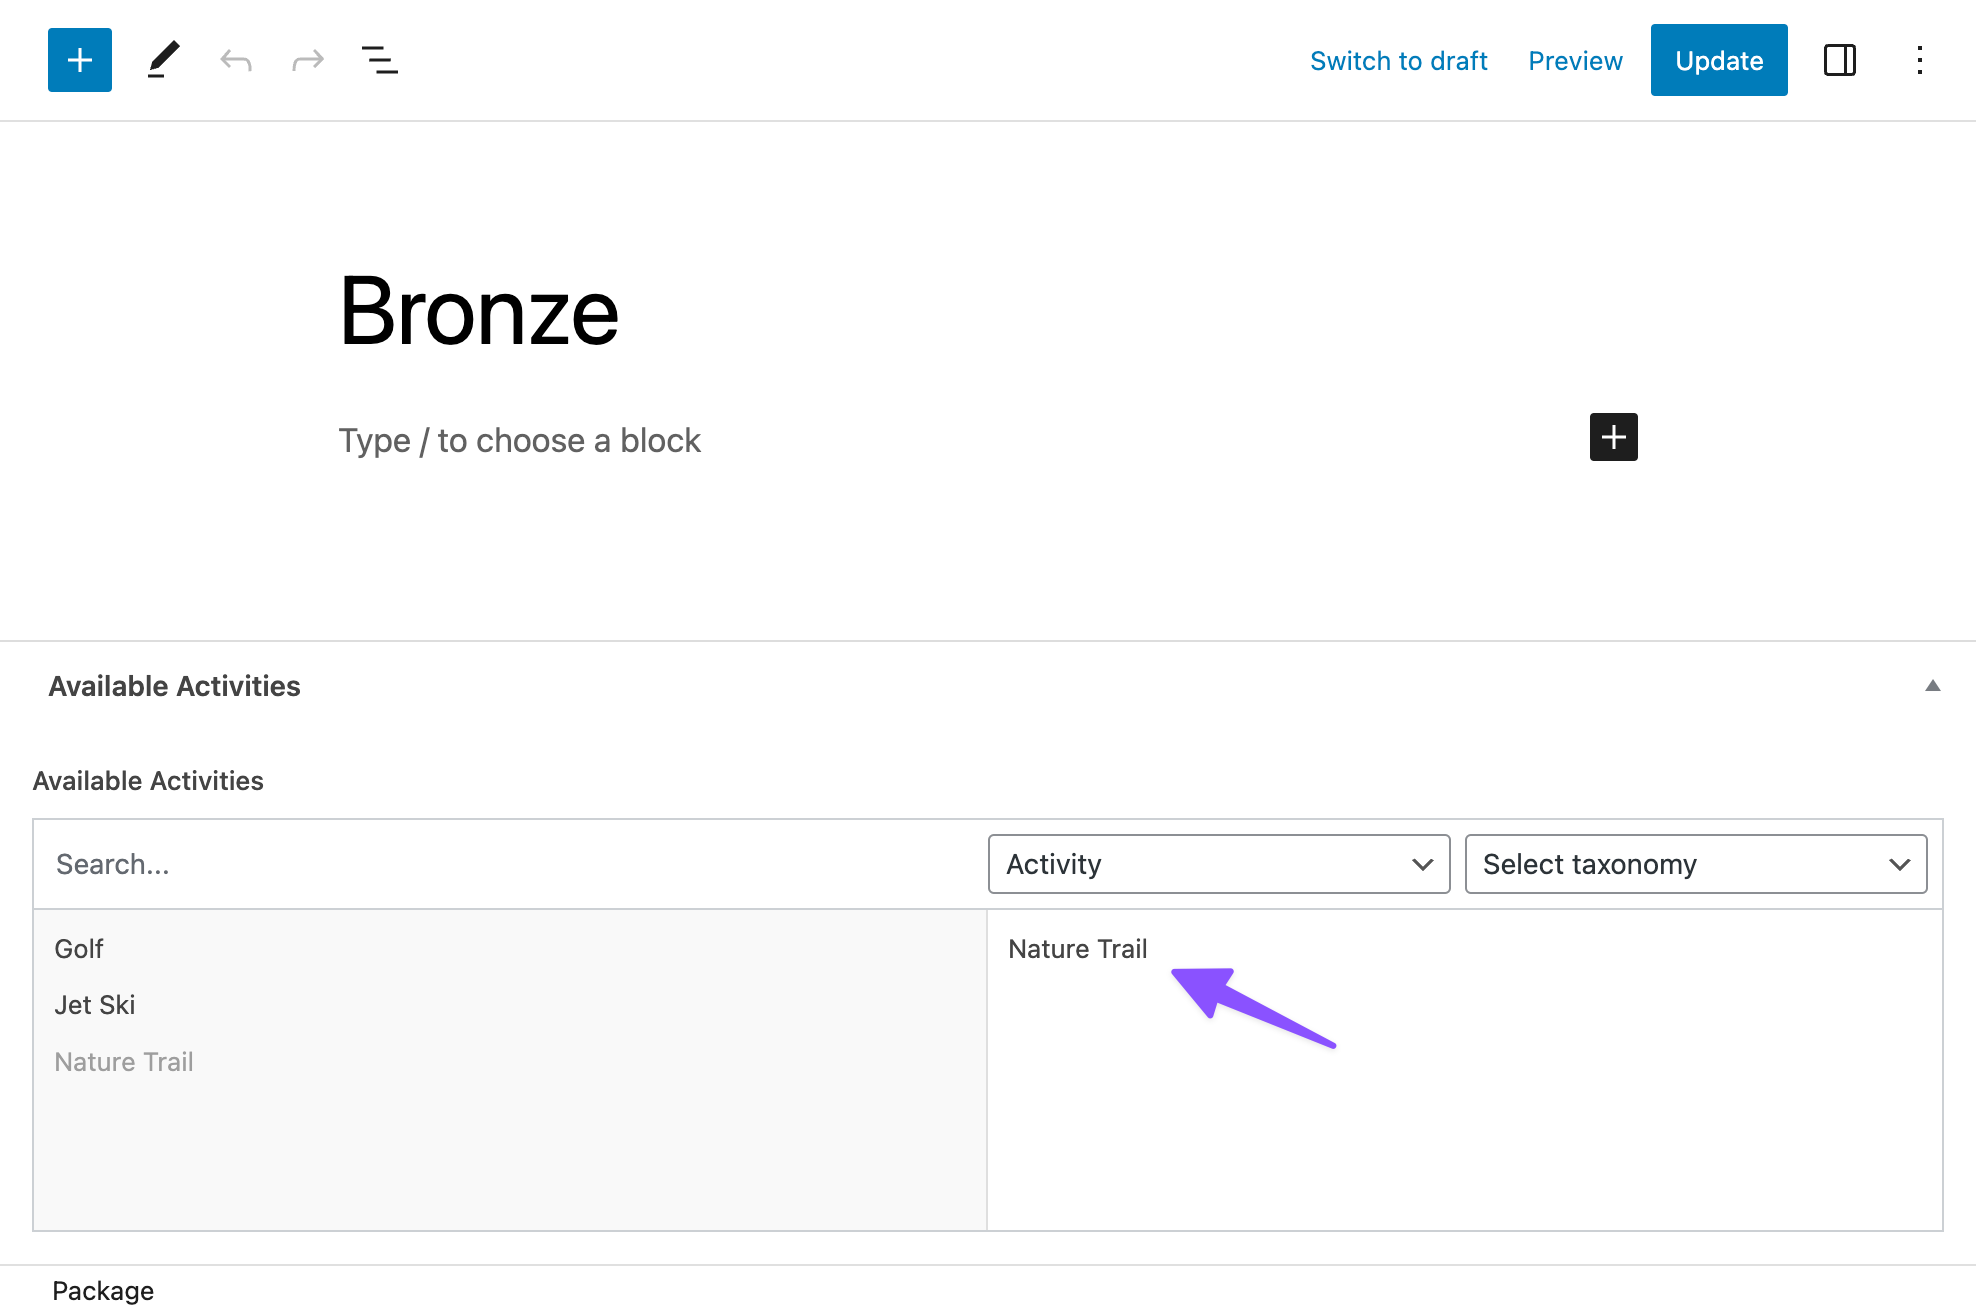
Don’t forget to click Update to save your changes.
We’ll want to repeat the steps above for the Silver and Gold packages. We’ll add Nature Trail and Golf to the Silver package, and all three activities to the Gold package.
Build the Form
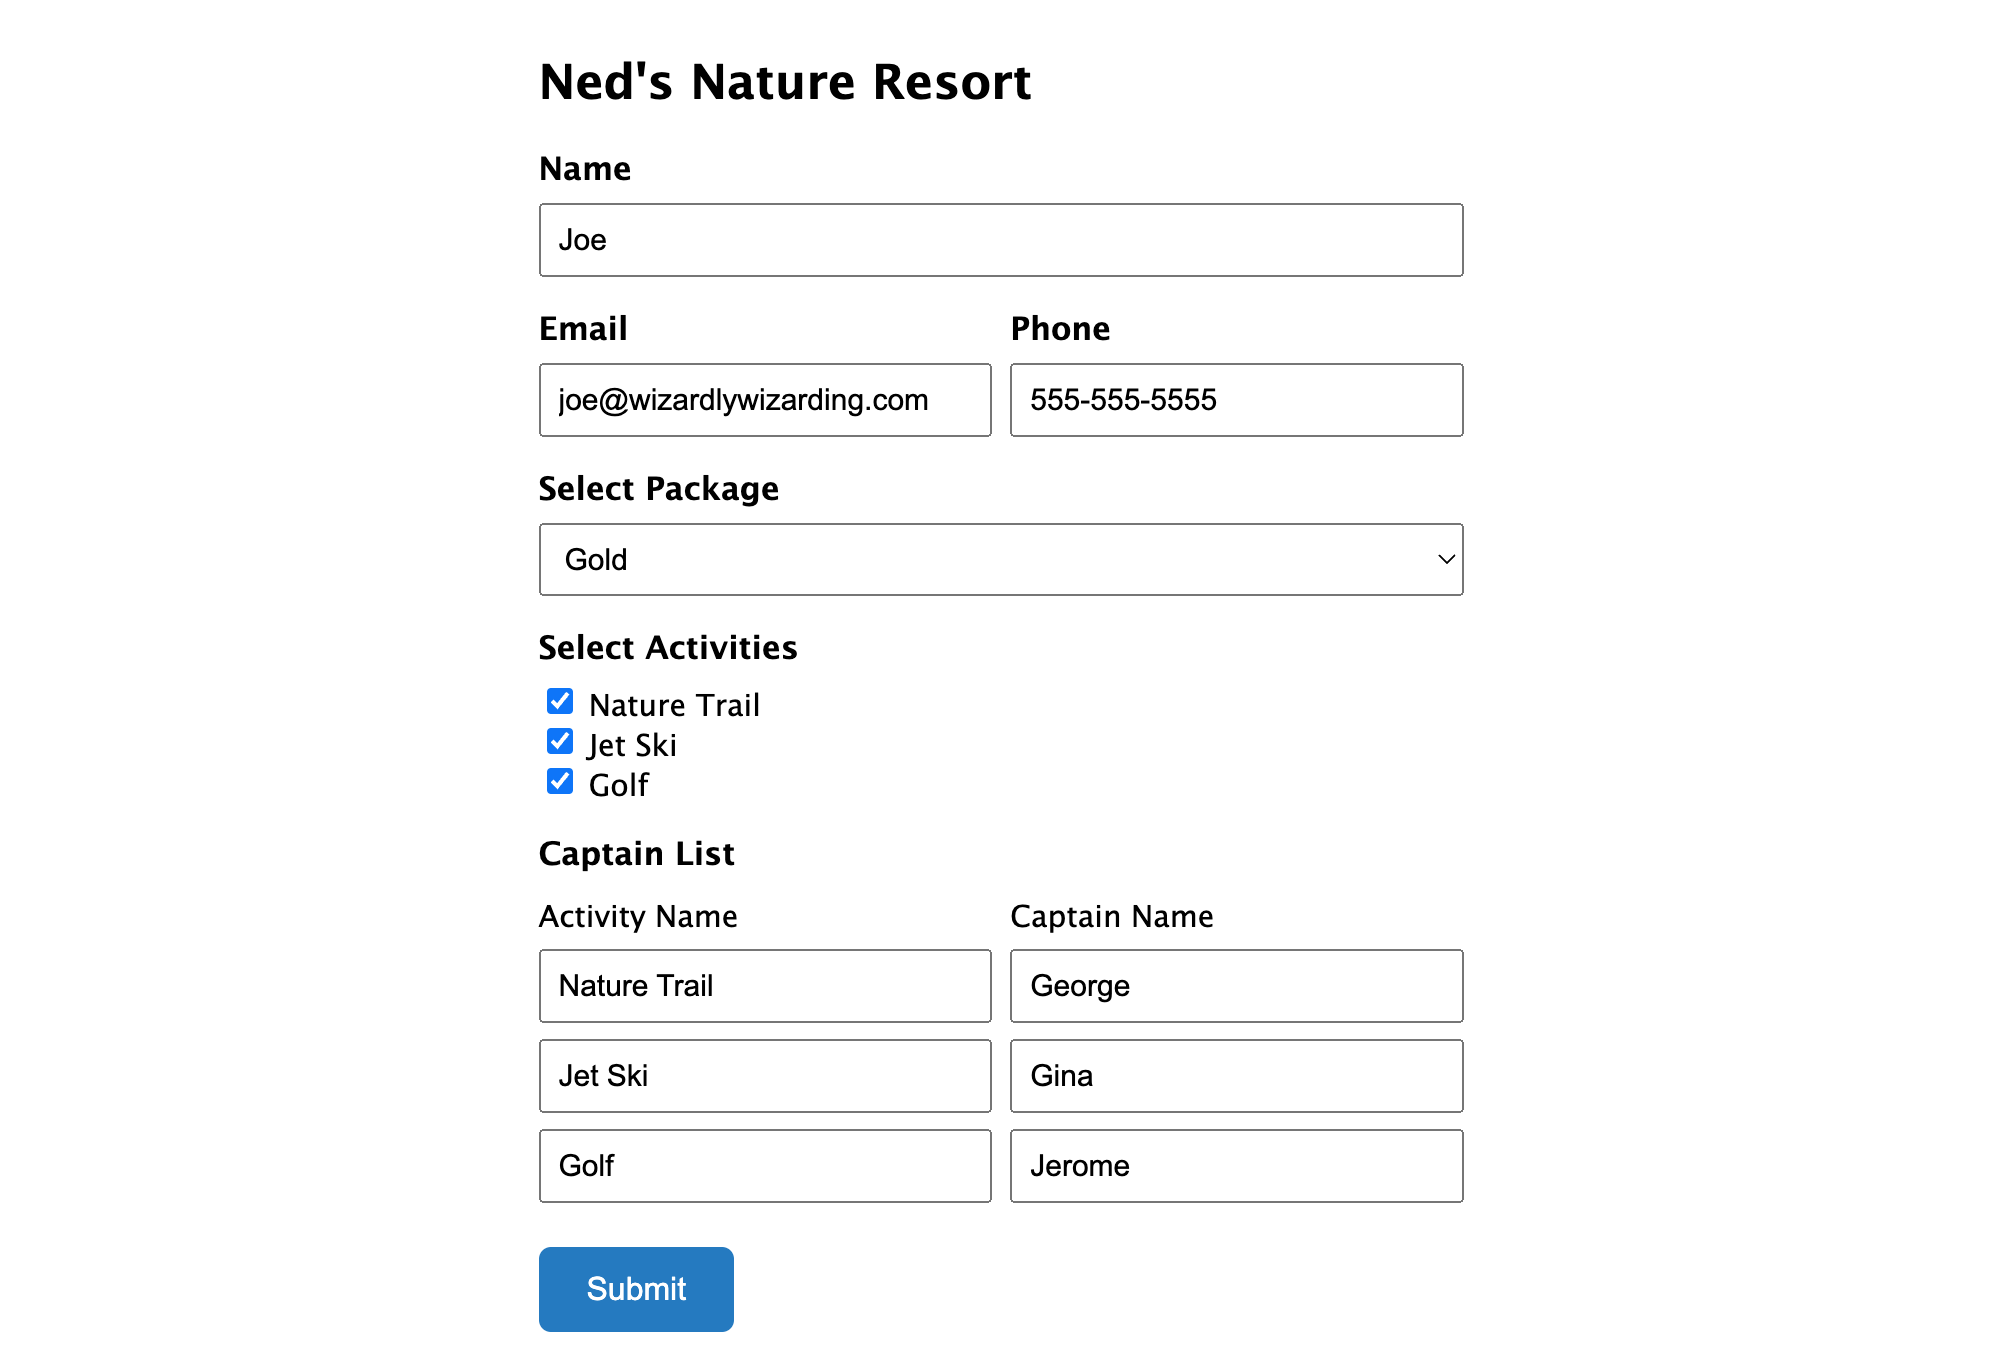
Now that we have our custom fields set up, it’s time to build your form. Create your form in Gravity Forms as normal. We’ll add fields for the user’s Name, Email, and Phone number.
We’ll also add a new Drop Down field called “Select Package”, and we’ll use Populate Anything to populate a list of the packages we created. What’s even better is that this list is dynamic – if you ever add or delete a package in the future, the list will automatically update in your form. Pretty neat!
Configure the “Select Package” field
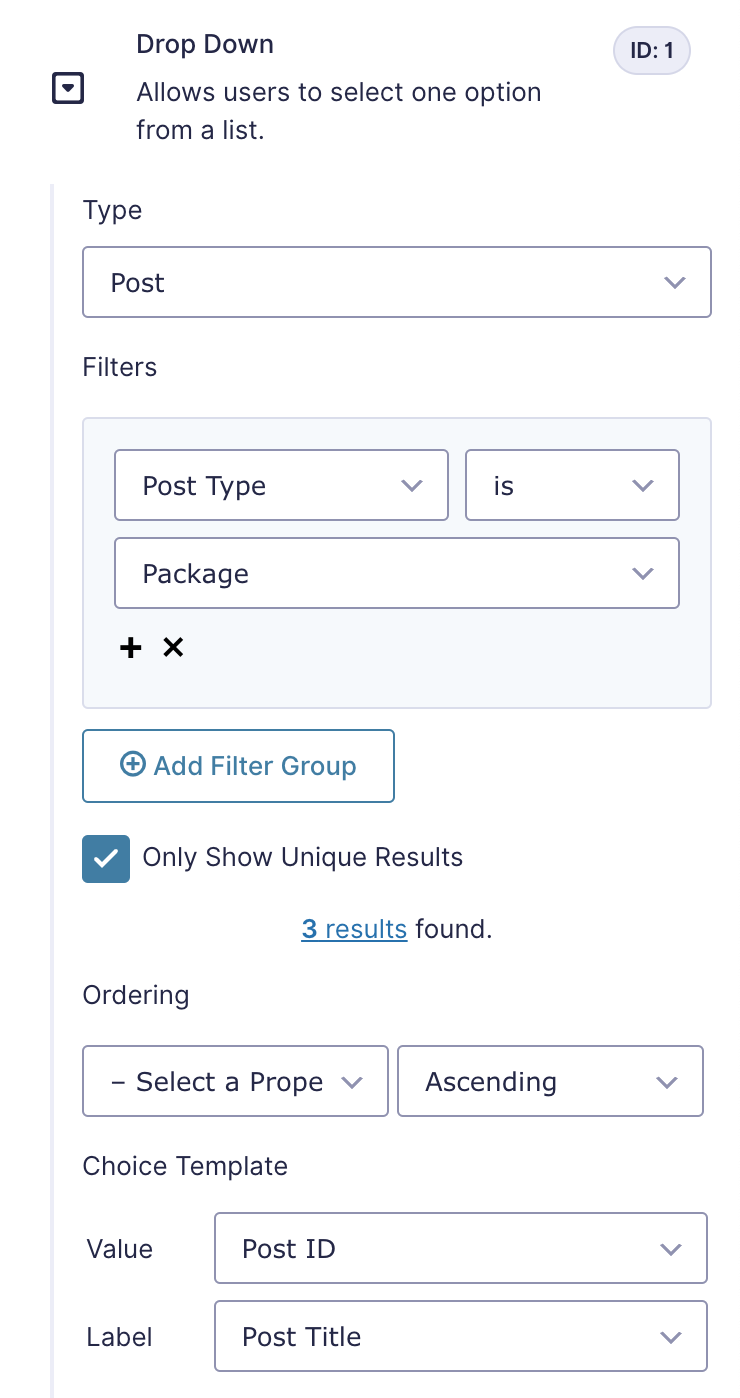
Click on the “Select Package” field and make sure Populate choices dynamically is checked. We’ll set the Type to be Post.
Next, we’ll add a filter so that we only show the posts from the Package type, and not other posts in the system.
Under Filters, click Add Filter Group, and set the filter to: Post Type is Package.
Under Choice Template, set the Value to Post ID, and the Label to Post Title
Configure Activity IDs
Once the user selects their package, we’ll want to show only the activities we want to be available for that package. To achieve this, we’ll use a hidden field to help store the activity IDs.
Add a new Checkbox field to your form called “Selected Package Activity IDs”. Make sure Populate choices dynamically is checked and set the Type to Post.
Similar to the step above, we’ll also add a Filter Group set to: Post ID is Select Package.
Under Choice Template, set the Value and the Label to available_activities.
We’ll also want to check Populate value dynamically to make sure we can get the available activity ID values. Use the exact same Type, Filters, and Value Templates section as above:
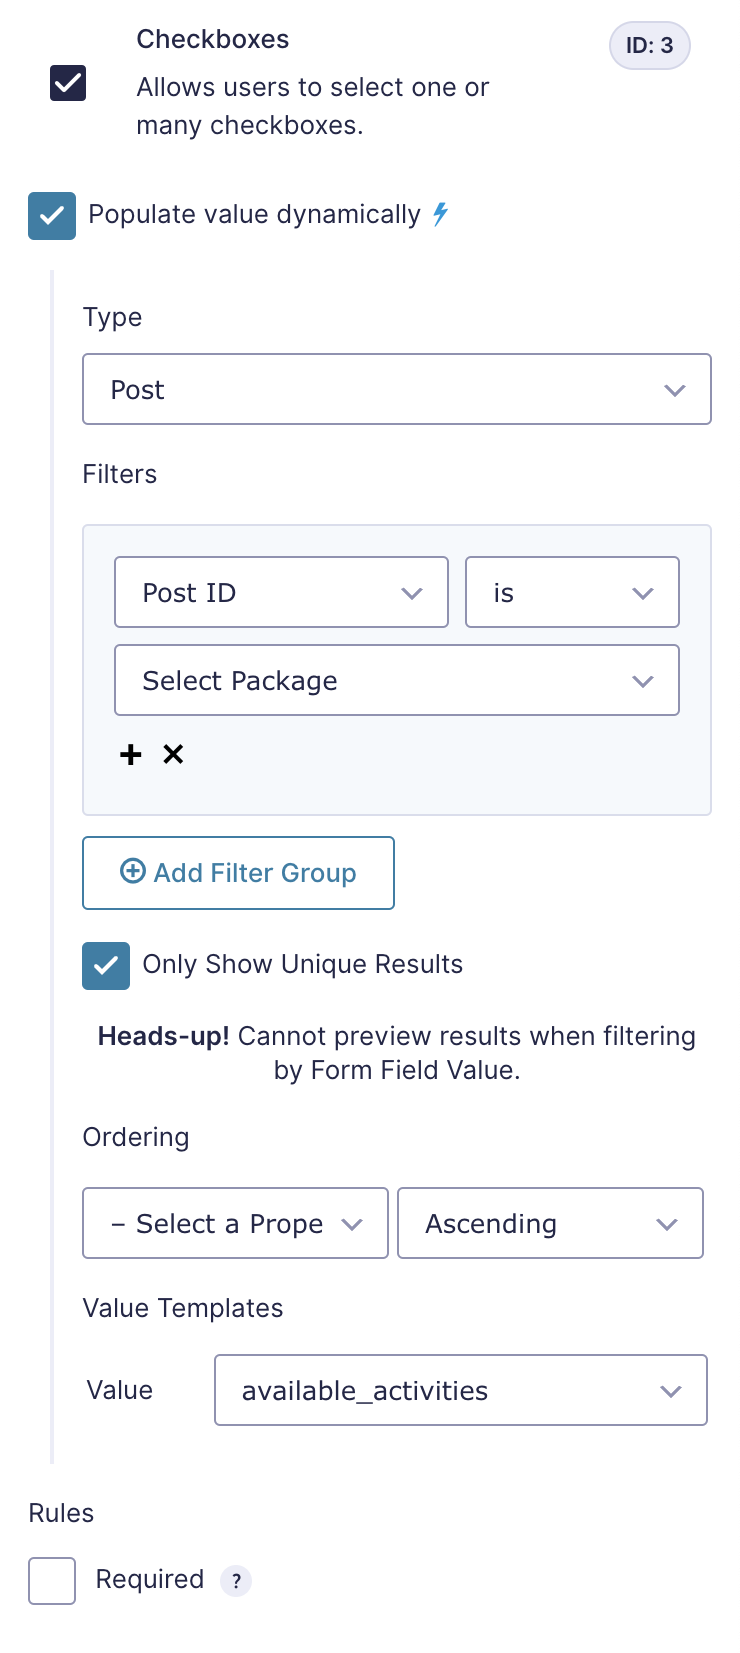
Finally, we’ll make sure this field is hidden by ensuring Hidden is selected under Advanced › Visibility.
Install “Explode Commas as Choices” Snippet
In the background, we’ve configured the activity IDs to populate when the correct package is selected. However, by default, Populate Anything will add each ID together into one selection in a comma-separated list.
We want to separate each activity ID as its own checkbox. Thankfully, there’s a snippet that can help us with that.
Download and install the “Explode Commas into Choices” snippet. Once the snippet is installed, we’ll want to add this custom CSS to “Selected Package Activity IDs” in the Custom CSS Class field under the Appearance header:
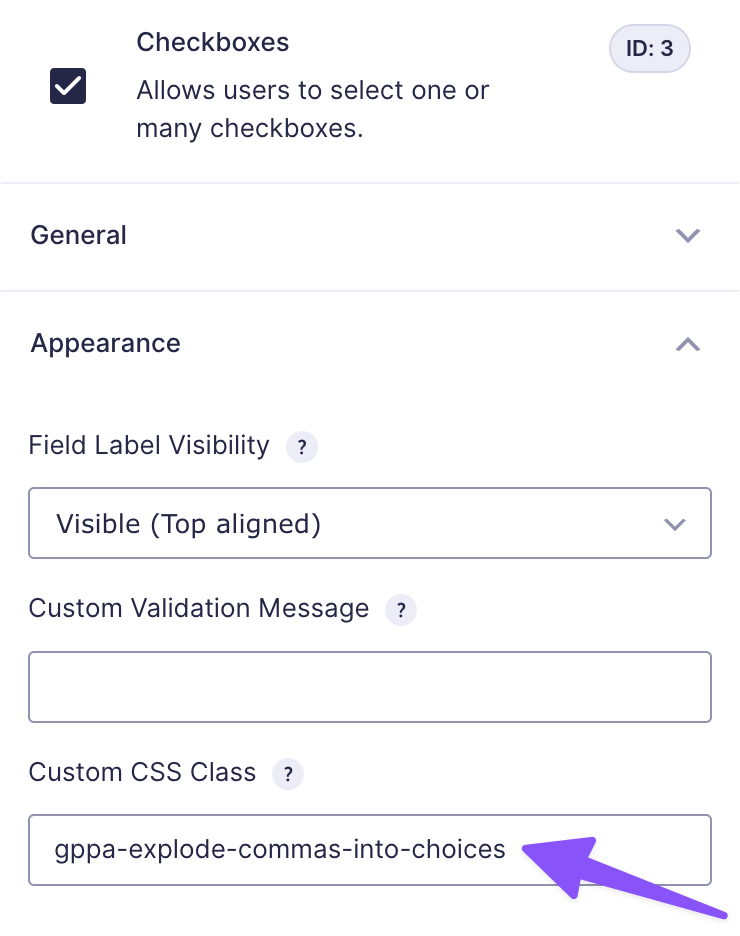
Not sure how to install a snippet? Check out our step-by-step article that explains how to do it!
Configure the “Select Activities” field
Up until this point, we’ve done a lot of work behind-the-scenes to get the activities mapped to each package. Now, we’ll create the user-facing part of the form where they’ll be able to select the activities. This field will show a dropdown list of activities based on which IDs are in our hidden “Select Package Activity IDs” field.
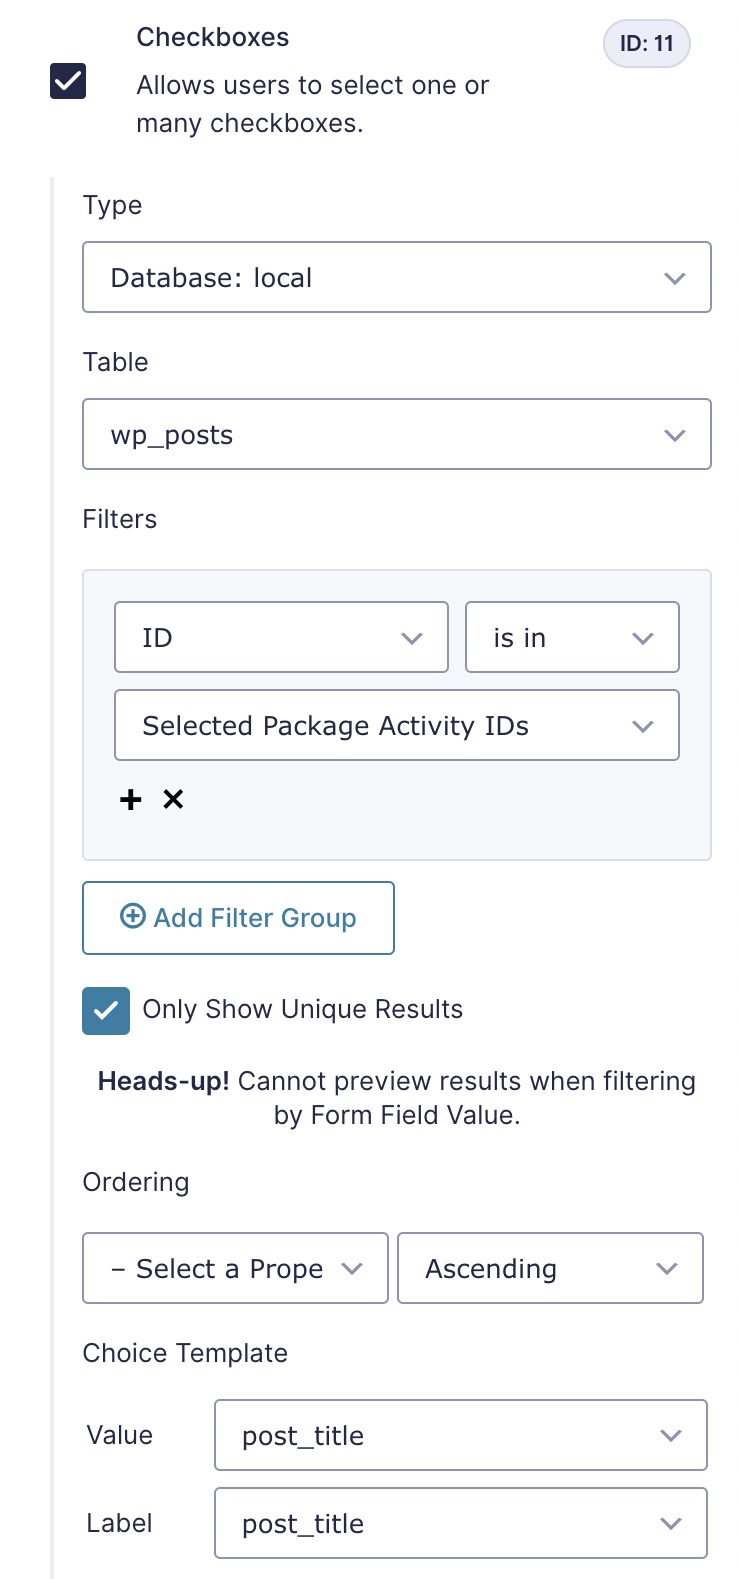
Create a new Checkbox field called “Select Activities”. Make sure Populate choices dynamically is checked. We’ll set the rest of the fields as follows:
- Type: Database:[your-database-name-will-appear-here]
- Table: wp_posts
- Filter: ID is in Selected Package Activity IDs
- Value & Label: post_title
And that’s it! Now, depending on which package the user selects, the list of available activities will change accordingly.
Want to dynamically populate thousands of choices into Drop Down or Multi Select fields without sacrificing performance? Gravity Forms Advanced Select makes it easy to work with massive datasets.
Taking it Further
Generate a Preferred time field for each selected activity
Let’s say that after the user selects their activities, we need the user’s group to nominate a Captain for each activity. We could add a standard text field to do this, but how do we know if the user selects just one activity, or all three? Behind the scenes, we can use this handy snippet to count the number of checkboxes, and we’ll save that count to a hidden number field. Then, we’ll use Gravity Forms Auto List Field to automatically create the correct number of rows.
To start, add a new Number field to your form called “Activity Count” and set its visibility to be hidden. Take note of the field ID in the top right corner – we’ll need this soon.
Next, install this snippet and make sure your configuration at the bottom looks like this:
new GW_Choice_Count( array(
	'form_id'          => 123,           // The ID of your form.
	'count_field_id'   => 4,             // Any Number field on your form in which the number of checked checkboxes should be dynamically populated; you can configure conditional logic based on the value of this field.
	'choice_field_ids' => array( 5 ), // Any array of Checkbox or Multi-select field IDs which should be counted.
	'values'           => false,         // Specify an array of values that should be counted. Values not in this list will not be counted. Defaults to `false` which will count all values.
) );- Replace
123with your form’s ID - Replace
4with your “Activity Count” field ID - Replace
5with your “Select Activities” field ID
Save. Now, your Number field will update behind-the-scenes to show how many activities were selected.
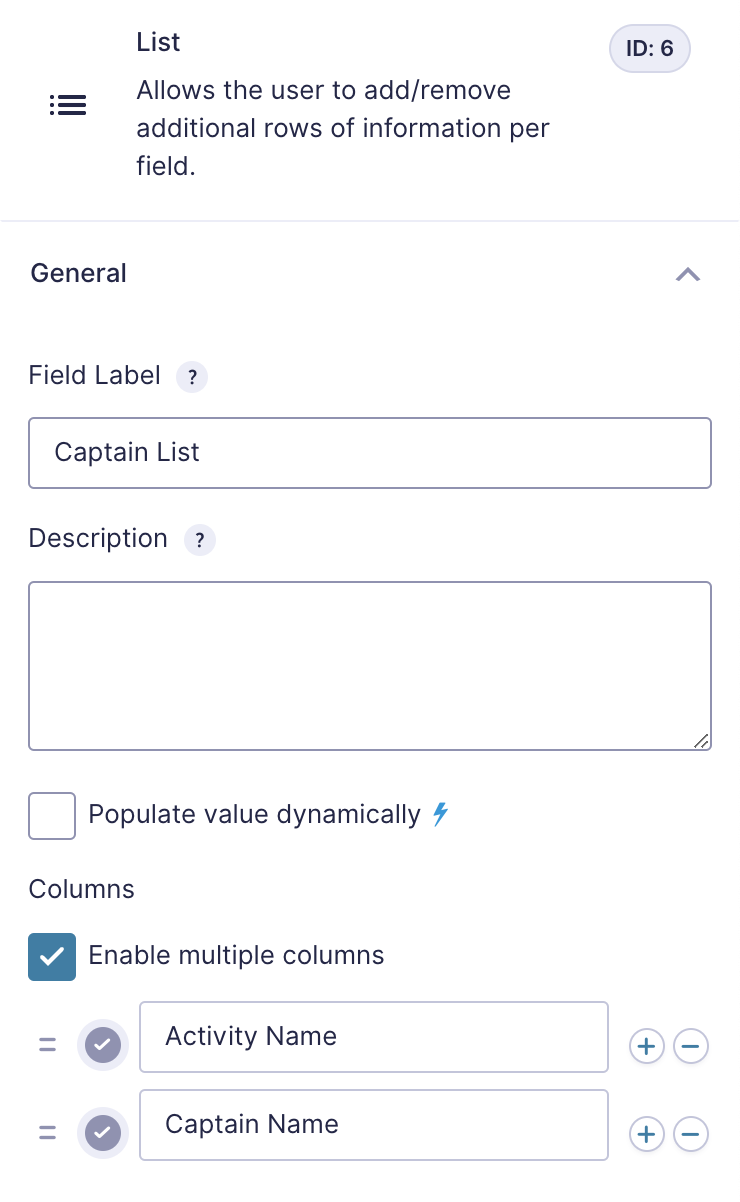
Next, we’ll create a new List field called “Captain List”. We’ll fill the fields as follows:
- Field Label: “Captain List”
- Under Columns, make sure Enable multiple columns is checked
- Add two columns:
- Activity Name
- Captain Name
Finally, navigate to the Perks header and make sure Enable Auto List Field is checked. Under Trigger Field, choose Activity Count:
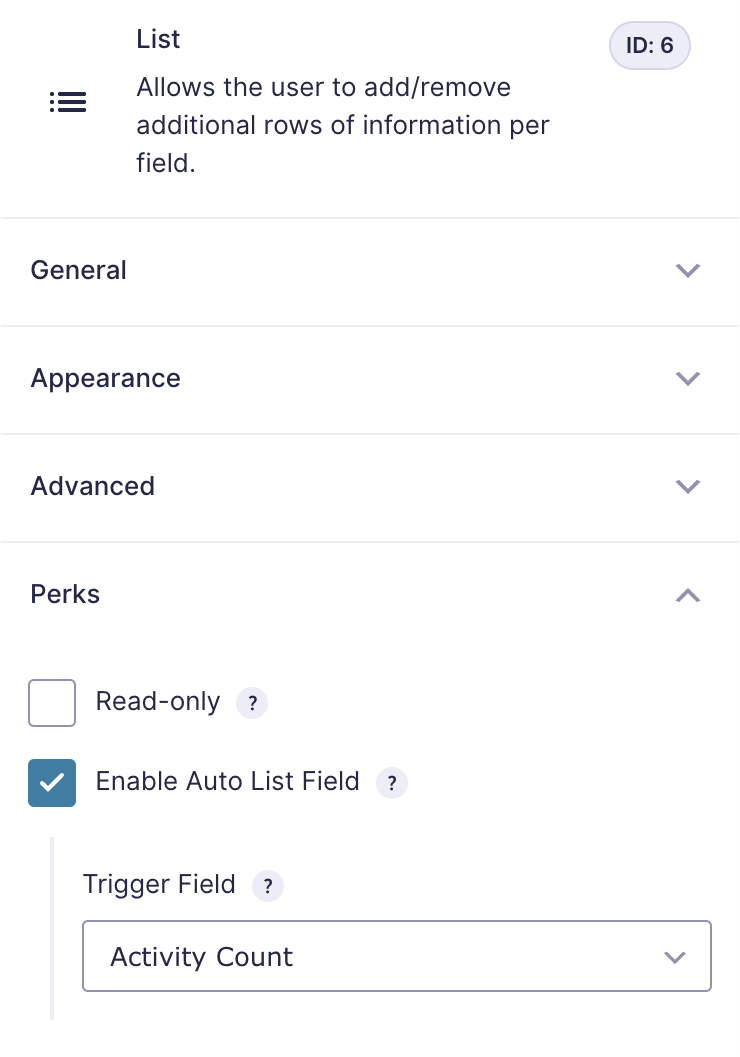
Now when your user fills out the form, the number of rows in the Captain List will match the number of activities selected!
Generate a “Check In” QR Code
Let’s take it even further by adding a “Check In” QR Code! We’ll send this to the user on the day of their event. We’ll use Gravity Forms QR Code to generate code itself from a hidden field on the form, and Gravity Forms Notification Scheduler to control the timing of the notification. For this example, we’ll assume that we want to send the user to a URL once they scan the QR code.
On your form, add a new hidden Single Line Text field called “Check In Status”. Under the Advanced header, set the Default Value to the URL you want to use.
Once both perks are installed and activated, navigate to your Form Settings › Notifications › Add New. We’ll fill the fields as follows:
- Name: Activities Check In
- Event: Form is submitted.
- Send To: Select a Field
- Send To Field: Email
- Subject: “Your Activity Check In”
- Message: Add your message text here. Make sure to add the QR code by clicking on the merge tag icon beside “Add Media”.
Look for the “Check In Status” field and click on it. You should see the tag get inserted into the Message Body. At the end of the merge tag, add “:qr”, like this:
{Check In Status:10:qr}Scroll down to the Schedule section in the notification settings. Choose Date, and select the activity date and time you’d like to send the notification:


Hi, can this plugin retrieve users custom meta_key made by ACF? For example, I made a custom field labeled “staff_departement” using ACF. I want to populate a dropdown field with its values, for example: marketing, hr, finance.
Hi Alfi,
Yes, this is possible with GP Populate Anything Perk. You would select the User Object as the source and it will show all the custom fields for the User Object.
Best,