Gravity Forms and AJAX: Everything You Need to Know
Discover how AJAX and Gravity Forms can be used together to improve efficiency and save time. Learn the advantages and disadvantages of using this powerful combination.

- What is AJAX, and what does it mean for Gravity Forms?
- How do you set up AJAX with Gravity Forms?
- How to get more out of Gravity Forms with AJAX
- Why isn’t AJAX working with my Gravity Form?
- Streamline your form submissions by setting up AJAX for Gravity Forms
One particularly useful Gravity Forms feature is AJAX support.
What does AJAX help with? For form submissions to be processed without the need for a page refresh! This opens up the door to a list of opportunities in terms of user experience. It also makes the form submission process much smoother and saves time for both website admins and users.
If you’ve used Gravity Forms, you may be aware of some of these benefits already. If you’re unsure how to enable AJAX on your forms or how to troubleshoot common issues that can arise, you’re in the right place.
In this comprehensive guide, we’ll explore everything you need to know about Gravity Forms and AJAX, including simple methods for enabling AJAX for your form submissions, tips for getting the most out of it, and troubleshooting pointers for common Gravity Form + AJAX issues you may encounter.
Let’s discover how AJAX and Gravity Forms can work together to improve efficiency and save time!
What is AJAX, and what does it mean for Gravity Forms?
Let’s not get too technical here. All you really need to know is that AJAX is a method of fetching or submitting data without refreshing the page. It’s what makes web pages feel more like desktop applications.
AJAX (Asynchronous JavaScript And XML) achieves this effect by exchanging data with a web server in the background using a built-in XMLHttpRequest object. Ok, so we got a little technical.
In the context of Gravity Forms, AJAX enables website users to traverse multi-page or multi-step forms and submit entries without the need for a page refresh. This brings several advantages, including:
- Faster form submissions – only the form is refreshed, so no slow page reloads.
- A better user experience – fast, responsive forms are a joy to use.
- Performance gains – fewer page reloads means less strain on the server.
- Do more on one page — when you don’t need to refresh a page, this opens the door to other UX possibilities.
With these benefits in mind, let’s look at how you can set up AJAX with Gravity Forms.
How do you set up AJAX with Gravity Forms?
By default, AJAX is disabled for form submissions in Gravity Forms. However, there are two easy methods of setting up AJAX for your Gravity Forms.
Method 1: Using a shortcode
Shortcodes are a versatile way to extend the functionality of Gravity Forms in WordPress. Enabling AJAX is just one of the many things you can do with Gravity Forms shortcodes. Here’s how you can enable AJAX for your Gravity Forms using shortcodes:
Step 1: Generate the shortcode for your form
There are three different ways to generate the shortcode for the form you want to enable AJAX for.
Option 1: Create the shortcode from scratch
Gravity Forms shortcodes follow a basic HTML format:
[gravityform id="form id" title="true/false" description="true/false" ajax="true/false"]To create a shortcode for your form, replace “form ID” with the specific ID of the form you want to embed on your WordPress site.
Then, choose either “true” or “false” for each of the other variables. To enable AJAX, include the parameter [ajax="true"] in your form shortcode.
Option 2: Copy the shortcode from the “Embed Forms” flyout
Open the Form Editor for the form you want to enable AJAX for. Click Embed at the top of the editor, then click Copy Shortcode from the in-line popup.
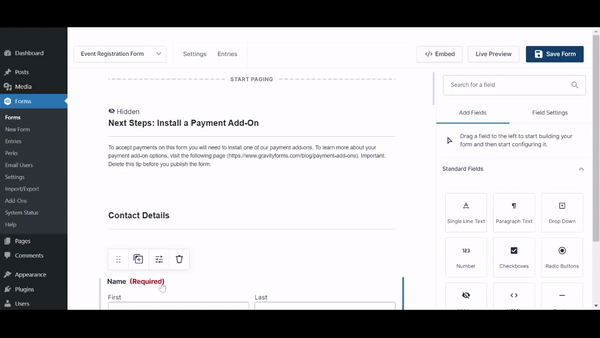
This will generate a shortcode, for which you’ll need to enable AJAX and set any other parameters as per your requirements.
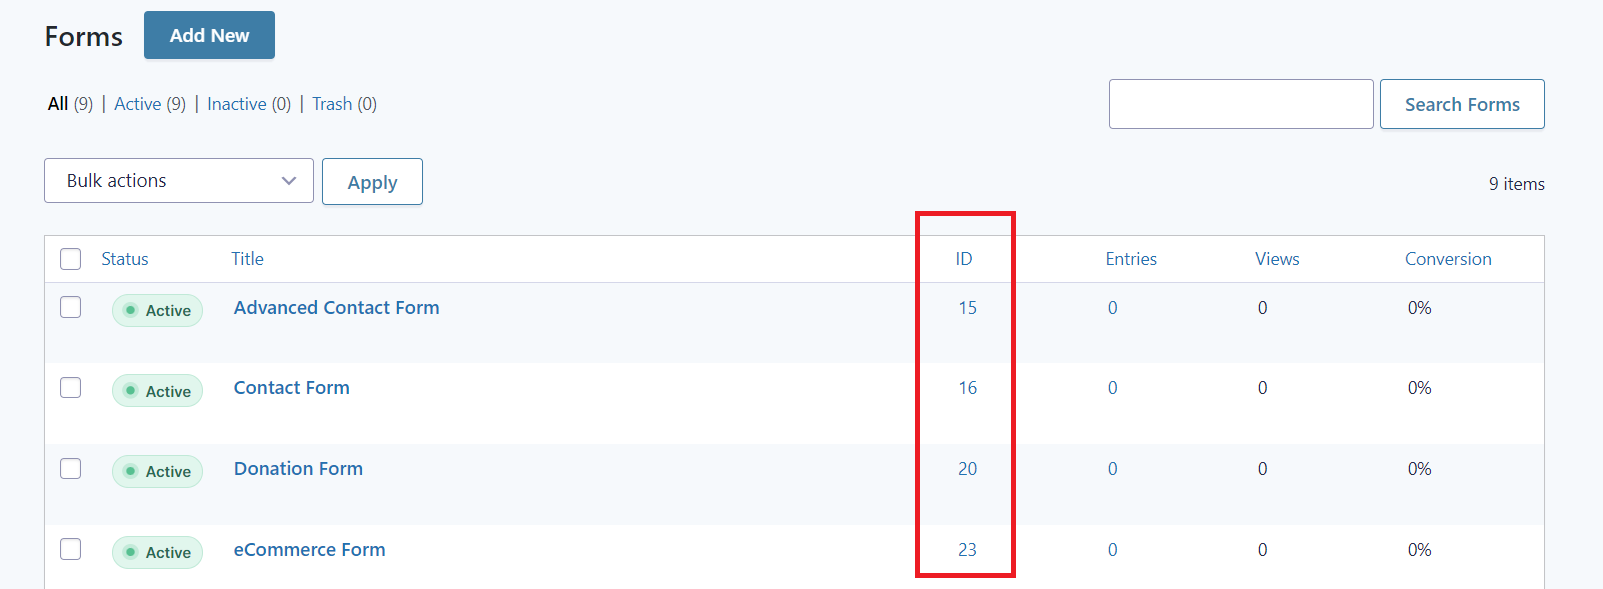
For instance, in the above example, we have generated the shortcode for an Advanced Contact Form on the site.
Option 3: Generate the shortcode using the WordPress Classic Editor
If you’re opting for this method, you likely have the Classic Editor set up already. The next steps are:
- Navigate to the page you want to add the form to.
- Choose to edit the page using the WordPress Classic Editor.
- Click Add Form.
- In the modal window, select the form you want to add from the drop-down menu.
- Choose whether or not to turn on AJAX.
Click Insert Form to automatically insert the shortcode for the form (with the AJAX parameter included) into the body of the page or post you are editing. To walk through how each of these steps looks in your WordPress admin area, you can follow along with the video below:
Step 2: Embed the shortcode
Once you have generated your shortcode and ensured the AJAX parameter is added, all you need to do is embed it into whichever page or post you want the form to appear on.
You can do this:
- Using the Classic Editor.
- By adding a shortcode block in the Gutenberg Editor.
- Adding the shortcode to any other page builder by using, for example, the Elementor shortcode widget or the Divi code module.
As you can see, shortcodes provide a versatile way to embed your forms into various page builders, making it easier to integrate your forms into your website. That said, if you’re using the Gutenberg Editor for your WordPress site, there is an even easier method to enable AJAX for your Gravity Forms.
Method 2: Using the Gutenberg/Block Editor
It is easy to enable AJAX on both new and existing forms using the Block Editor – you can do this directly from the block options for the built-in Gravity Forms block.
To embed a new form with AJAX enabled,
- Go to the page you want to add the form to.
- Click the + icon to add a new block.
- Select the Gravity Forms block,
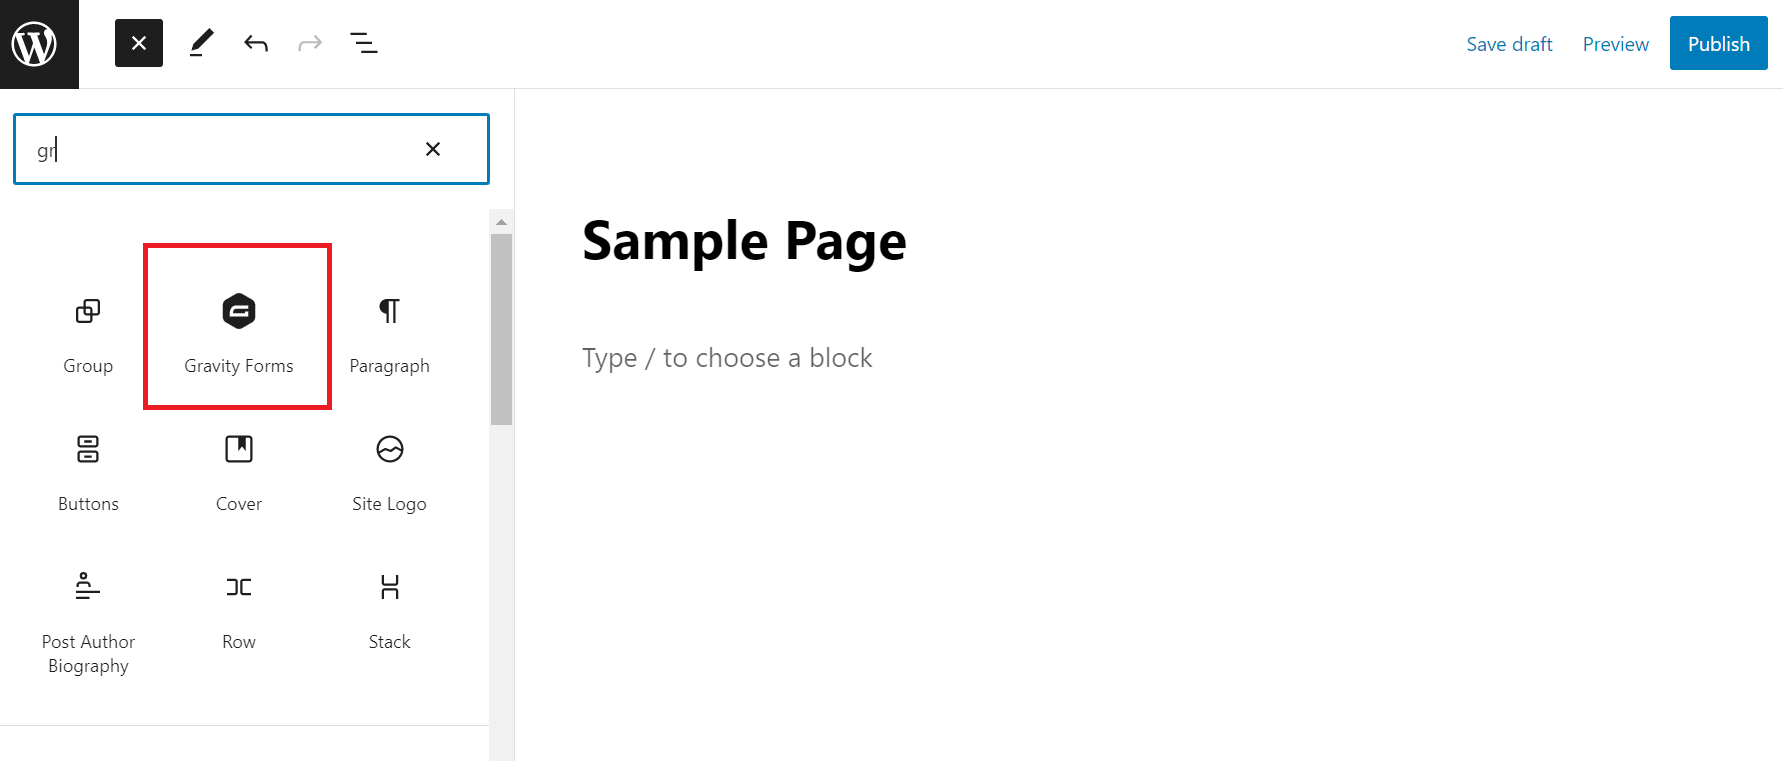
- Select the form you want to embed from the dropdown menu.

- Once your block has been inserted, navigate to the Block settings sidebar.
- Open the Advanced panel.
- Toggle the various options on and off, including AJAX.

This method will work equally well for adding AJAX to existing forms – simply navigate to the page where your form is embedded, select the form block, then toggle AJAX on from the settings sidebar as described above.
How to get more out of Gravity Forms with AJAX
Here are some tips for getting the most out of Gravity Forms with AJAX.
Use AJAX for multi-page forms
Multi-page forms are useful for longer data requests, but they can be cumbersome to navigate. Using AJAX for multi-page forms can greatly improve the user experience.
If you want to go one step further with optimizing the navigation of your multi-page forms, Gravity Forms Multi-Page Navigation offers clickable navigation links to any page in your multi-page forms, making it easier for users to move freely between pages.
Examples where Multi-Page Navigation helps: if there are errors on a page of a multi-page form, Multi-Page Navigation provides a button to take you to the next page with errors — meaning you don’t have to dig for the error yourself. It can also convert page names into clickable links, control when pages are navigable, and integrates with Gravity Forms Preview Submission.
If you want to create an even better user experience when filling out your multi-page forms, you can also make use of Gravity Forms Page Transitions, which creates animated transitions between form pages and automatic page progression. Try a quick demo below!
Update or change the default Gravity Forms AJAX spinner
Ensuring that your form image matches your website branding can be a subtle, yet important way to maintain brand uniformity. That is why it can be useful to update or change the default spinner that appears at the bottom of your form when it is loading.
- To change the spinner, you’ll just need to add a code snippet to your themes functions.php file.
- To remove the spinner, you can add the following custom CSS code to your theme’s stylesheet:
body img.gform_ajax_spinner {

display: none !important;

}
Reload your forms to allow additional submissions without a page refresh
Sometimes, you may need to allow users to submit a form multiple times in one sitting. For example, internal forms for data entry or administrative tasks that are submitted repeatedly or a QR-scanning check-in form.
The Gravity Forms Reload Form plugin from allows you to reload your forms to enable additional submissions without needing to refresh the page. You can also automate the form reload after a specified delay.
Automatically filter and populate form fields with dynamic data
Gravity Forms Populate Anything is a plugin that allows you to automatically load dynamic data in your forms using AJAX.
Gravity Forms field choices and values can be automatically filtered and populated based on values entered or selected elsewhere in the form (or, coming from other form fields, user data, etc.), making it a powerful tool for creating dynamic, zero-refresh forms. This streamlines the form submission process dramatically.
Populate Anything also simplifies the administration of forms by removing the need to create separate fields to display data conditionally, instead relying on dynamic filters to populate the desired data into a single field.
When a solution makes users and administrators happy, you know you’ve got a winner. 😉
Streamline your form’s file uploads
By default, Gravity Forms’ File Upload fields do not use AJAX. However, if you enable the “Multiple Files” setting, file uploads will be uploaded via AJAX for that field. If you want the benefits of that AJAX upload but still only want to accept a single file, just set the “Maximum Number of Files” setting to “1”.
To make your multi-file upload fields more user-friendly, use Gravity Forms File Upload Pro to include image or file icon previews and get cropping or sorting functionality, automatically optimized images, and other features.
Why isn’t AJAX working with my Gravity Form?
If you are experiencing issues with Gravity Forms AJAX not working, there are a few troubleshooting steps you can take to resolve the problem. Here are some common solutions:
Check your shortcode for errors
Make sure your shortcode is properly formatted and that all necessary parameters are included. Errors like misspelled words or missing double quotes can prevent your Gravity Forms shortcodes from working properly.
Troubleshooting Google reCAPTCHA
While Google made updates to reCAPTCHA in 2019 to make it compatible with AJAX, it is worth checking if disabling reCAPTCHA helps your form to function properly with AJAX.
If this is the problem, your first step should be to ensure you’re using the latest version of the Gravity Forms reCAPTCHA add-on.
If it’s still not working, consider replacing reCAPTCHA with Gravity Forms’ built-in anti-spam honeypot feature. To do this:
- Navigate to your form’s settings.
- Toggle Anti-spam honeypot under Form Options.
Note that reCAPTCHA should work with AJAX-enabled forms, and these steps shouldn’t be necessary. If you are experiencing issues, don’t hesitate to contact Gravity Forms’ excellent support team for assistance.
Check for JavaScript errors
JavaScript errors like “gform is not defined” indicate that JavaScript is unable to enqueue scripts correctly. This might indicate a theme or plugin conflict. You can try disabling other plugins and switching to a default WordPress theme to see if this resolves the issue.
If you need to include custom scripts in your AJAX-enabled forms, you can use the free Gravity Forms Custom JavaScript plugin from Gravity Wiz to ensure your code is always output in the correct location and is executed each time the form is reloaded via AJAX.
Check for plugin or theme conflicts
Third-party themes and plugins can interfere with AJAX submissions. If you are using a third-party plugin to embed your forms, try using the default WordPress editor instead to see if this resolves the problem.
Caching plugins and third-party themes are also common culprits for AJAX not working properly. Try disabling these and seeing if your form works, then gradually turn your plugins back on one at a time to determine which is causing the conflict.
Streamline your form submissions by setting up AJAX for Gravity Forms
Creating a seamless user experience in Gravity Forms is as easy as AJAX. Doing so will — in turn — boost submission rates and help out both website developers and the end user. And with the simple implementation process outlined, it’s easy to take your first steps!
If you’re still in need of more than what Gravity Forms provides out of the box, we’d recommend checking out plugins like Reload Form, Multi-Page Navigation, and Populate Anything. These help you do more with AJAX functionality, providing you with the customization and flexibility you may need.
So, it’s time to get started. Begin exploring the possibilities of AJAX-enabled Gravity Forms today and let us know if you have any questions below!


How can I make Gravity Forms stay on the same page after submission without redirecting, and show a confirmation message instead?
Hi Benjamin,
You could use our GP Reload Form perk, to instantly reload the form after submission, which I think may work for your use case. This snippet with the perk would allow instantly reloading the forms after the confirmation message is shown.
Best,
hi I am submitting the gravity form then all the page is loading. I have tried: => [gravityform id="4" title="true" description="false" ajax="true"]
=> // Force form ID 2 to load with AJAX add_filter( ‘gform_form_args’, function( $form_args ) { if ( $form_args[‘form_id’] == 2 ) { $form_args[‘ajax’] = true; }
return $form_args;
} );
this is not working. can you tell how will do this task
Hi Prateek,
The shortcode you’re using looks good, so it’s strange it isn’t working. I’ll suggest you run a Theme/plugin conflict test to check if another plugin is preventing it from working as expected.
Best,
How to enable Ajax when using Gravity shop product configurator?
Hi Farid,
There isn’t a way to enable it within the UI. If your form requires Ajax to enable a Gravity Perks feature, such as GP Page Transitions, it will be enabled automatically.
If you must enable it on your form, you can do so with the following snippet:
Thanks awesome info easy to follow!
Glad you enjoyed it!