How to Build a Raffle or Lottery Event using Gravity Forms
Learn how to build the perfect raffle, lottery, or prize-based system using Gravity Forms, with one winning ticket or multiple. Then, take it further with discounts, data exports, and more.
Are you hosting a fundraiser, promotion, or community event where you need to sell tickets? Hosting a raffle or lottery can be a great way to build excitement, bring your customers or community together, and are just plain fun. Who wouldn’t want a chance to win an awesome prize?
On the other hand, managing the logistics for these can sometimes be… well. Not-so-fun. How do you keep track of tickets, winning numbers, or make sure everyone receives the correct information?
Let’s take a look at how you can use Gravity Forms Unique ID and some custom snippets to create and manage your events — whether a raffle, lottery, or other prize-based happening, this knowledge can help.
In this article, we’ll cover how you can create:
- A simple raffle system where each user receives one ticket.
- A complex raffle system where each user can select multiple tickets.
- How you can take it even further with extra features and perks.
This article requires the GP Unique ID perk.
Buy Gravity Perks to get this perk plus 48 other premium Gravity Forms plugins!
Table of Contents
Build a Simple Raffle or Lottery System
Let’s build a simple raffle system where each user receives one raffle ticket. Here’s a quick summary of what we’ll be setting up.
- Create a form that users will submit to generate a raffle ticket.
- Add a notification to deliver the raffle ticket to the user.
- Restrict each user to a single raffle ticket (via Limit Submissions).
Get Started
Download the finished form here and import it to your site to get started right away.
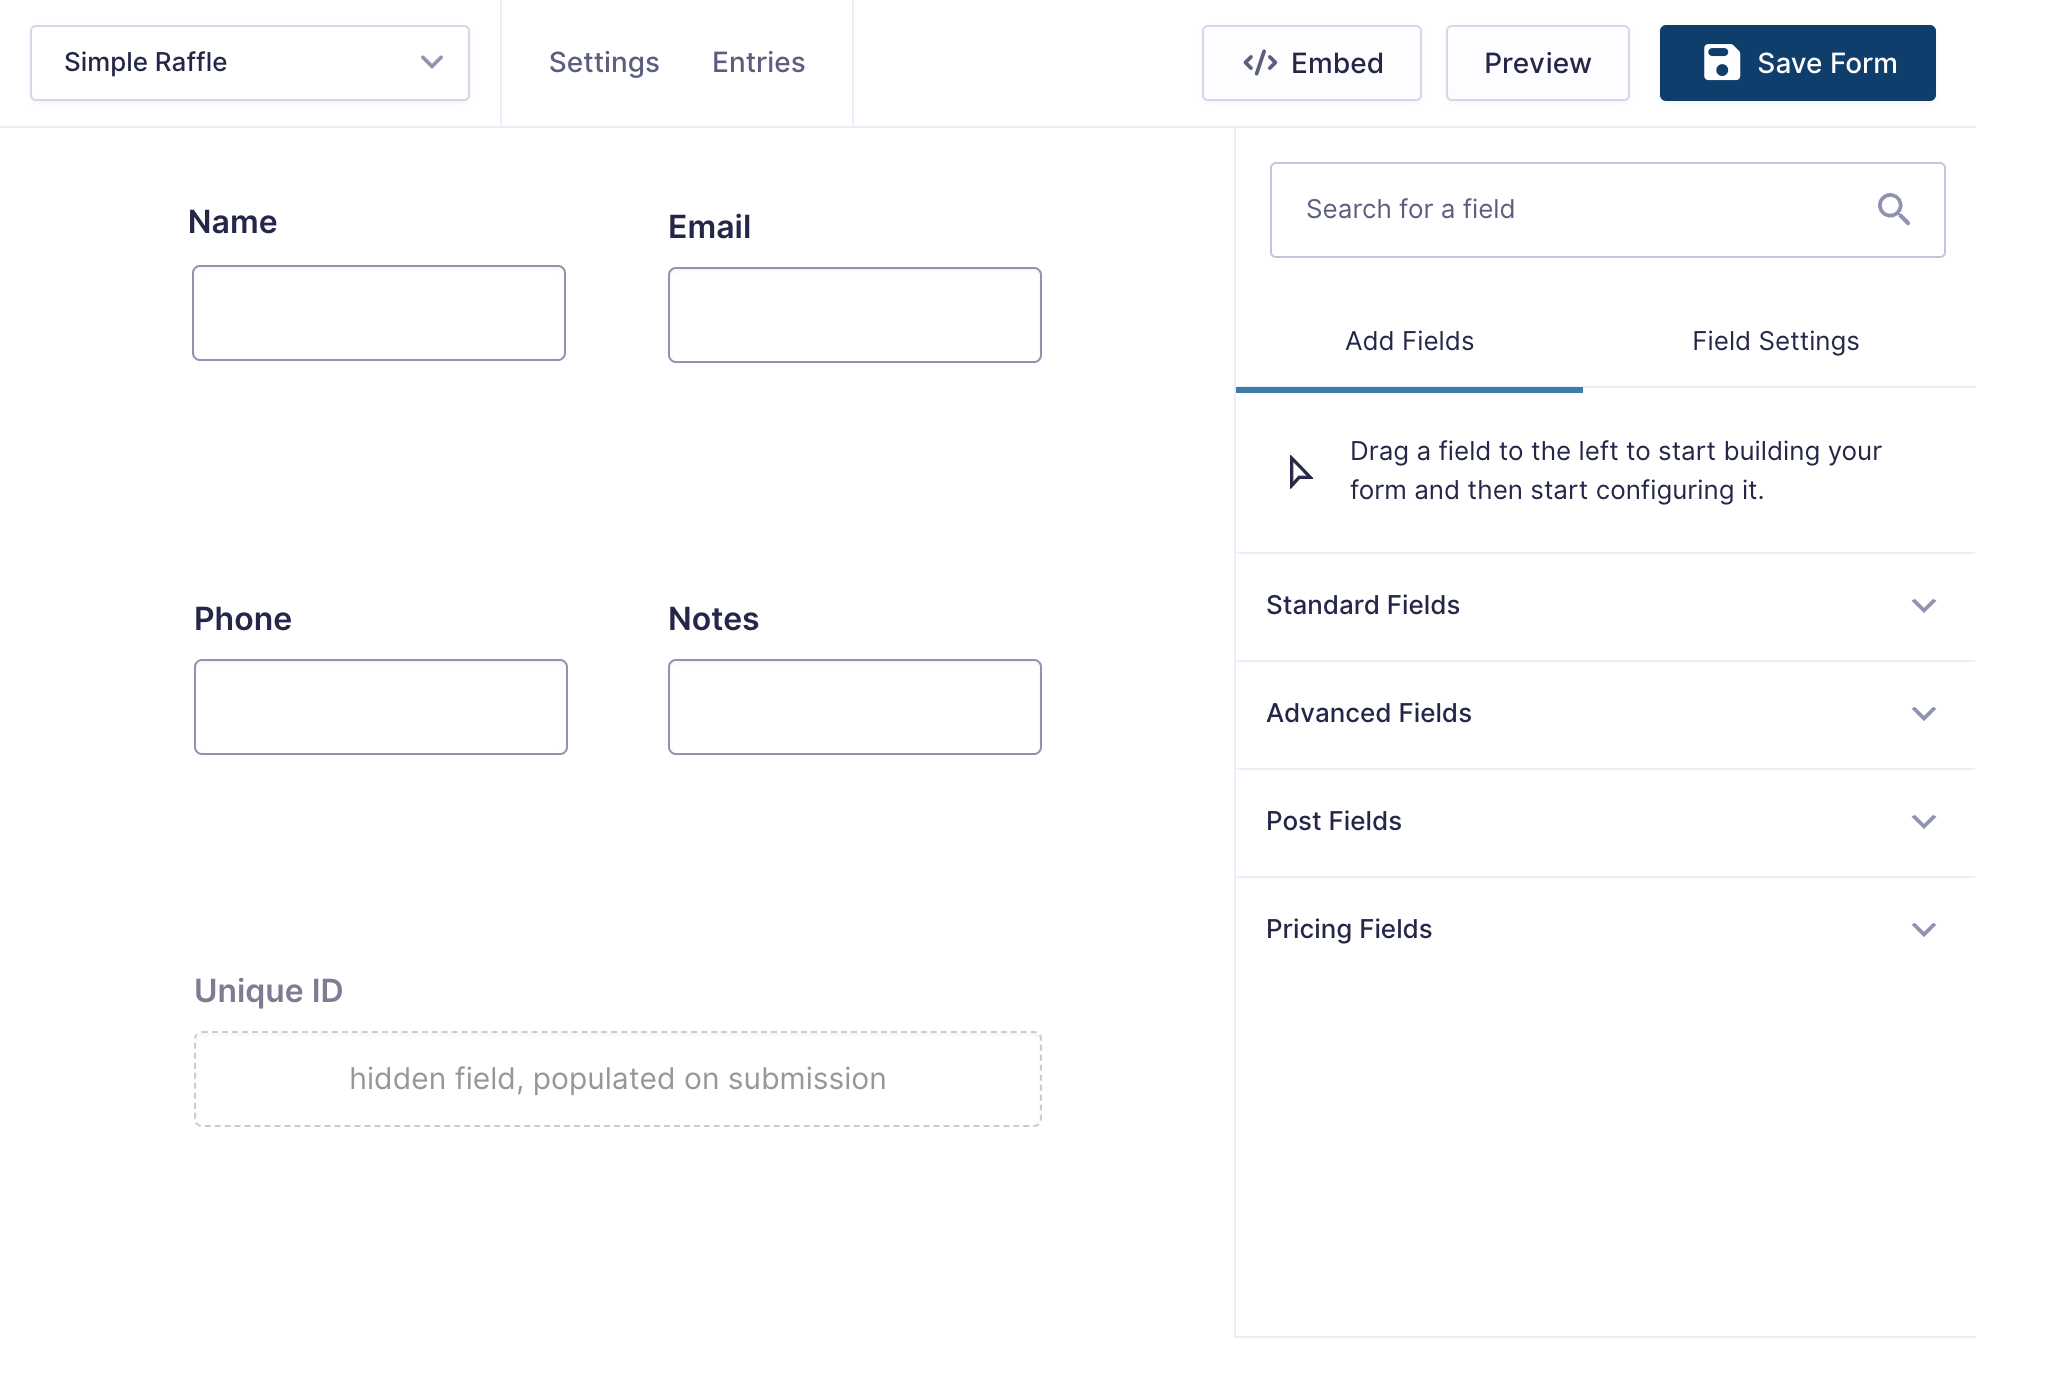
Start by creating a form with these fields:
- Name
- Phone
- Notes
- Unique ID
- Set this field to be hidden. We’ll show the user their raffle number as part of their email notification after the form gets submitted.
Customize the Unique ID Format
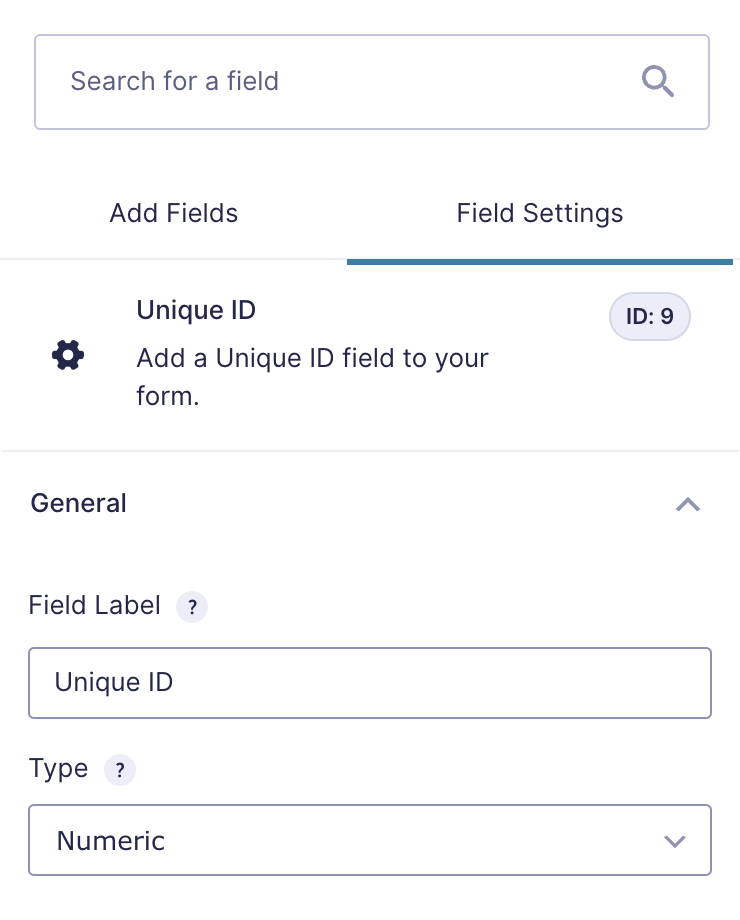
Once the form fields are added, we can customize the raffle number format. For this example, let’s assume we want each raffle ticket to be a simple six digit number.
Click on the Unique ID field, and under General Settings, set the Type to Numeric.
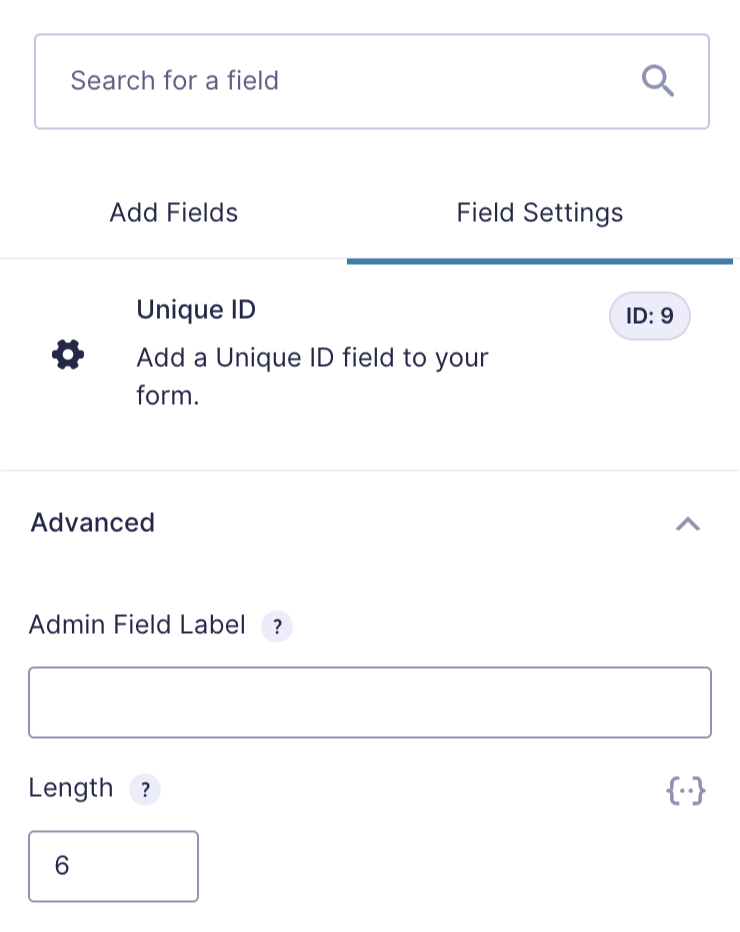
Next, click on Advanced and set the Length to 6.
Set up the Notifications
On the main form, navigate to Settings › Notifications and click Add New. We’ll fill out the notification with the following values:
- Name: “Raffle Ticket Confirmation“
- Send To: Select a Field
- Send To Field: Choose the Email field from the form
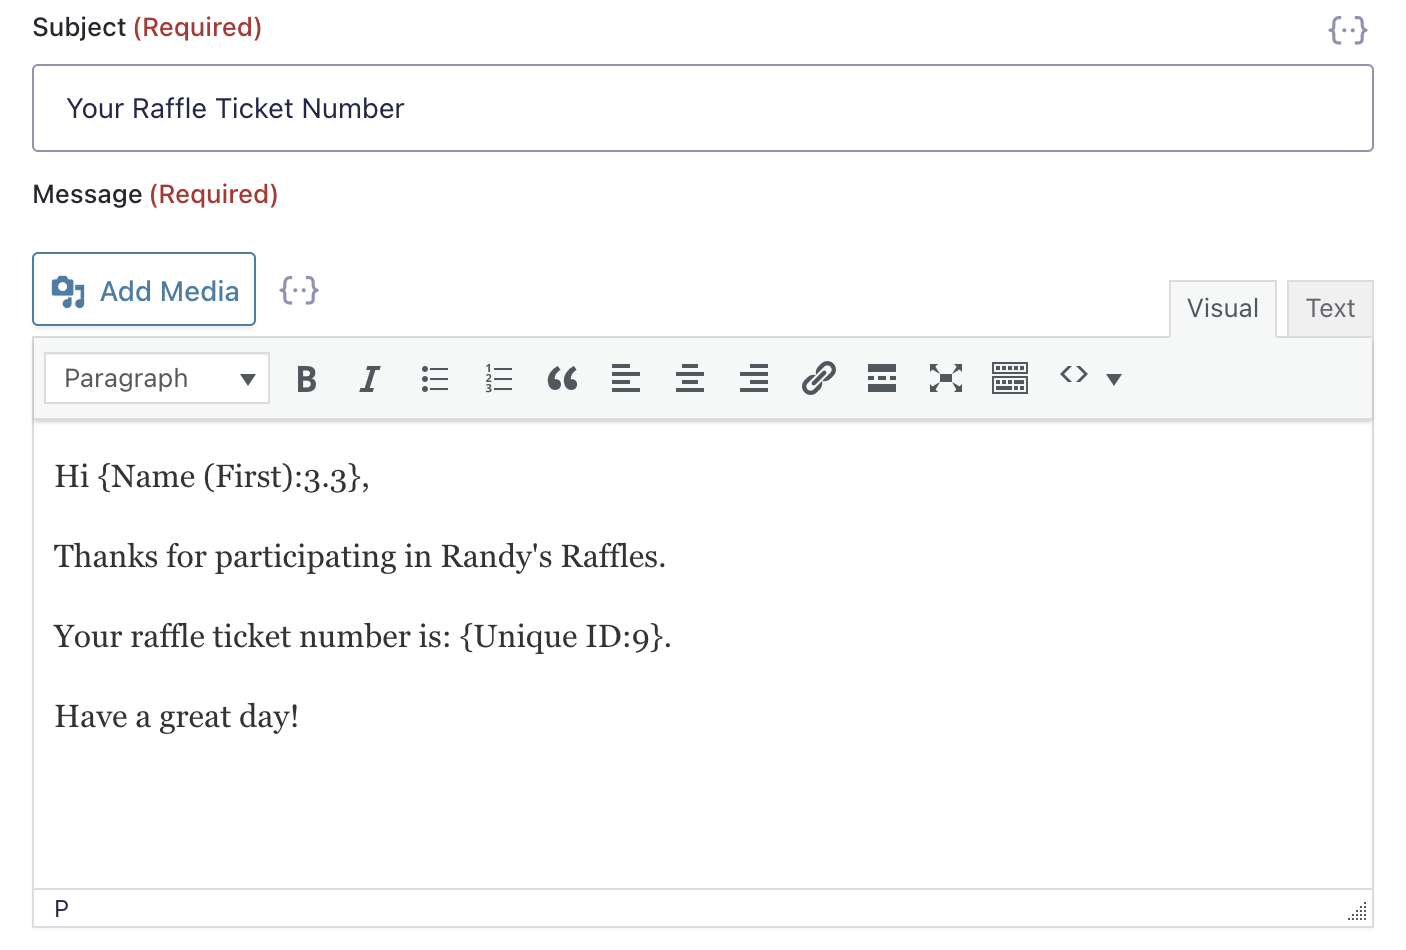
- Subject: “Your Raffle Ticket Number“
- Message: Enter your message to your user here
- Make sure to include the Unique ID merge tag at some point in the message so your user will see the raffle code
- Leave the other fields with their default values
Here’s an example of what the message section could look like:
Restrict Users to Only One Submission
To make sure users don’t game the system, let’s make sure they are only allowed to submit one form entry. We can use Gravity Forms Limit Submissions to achieve this.
On the main form, navigate to Settings › Limit Submissions. Towards the right hand side of the Limit Feeds box, click Add New. We’ll name the fields as follows:
- Limit Feed Name: “Raffle Limit”
- Submission Limit: 1
- Time Period: Forever
- Limit Message: “Oops! You’ve already received your raffle ticket number. Contact our support team if you have any questions.”
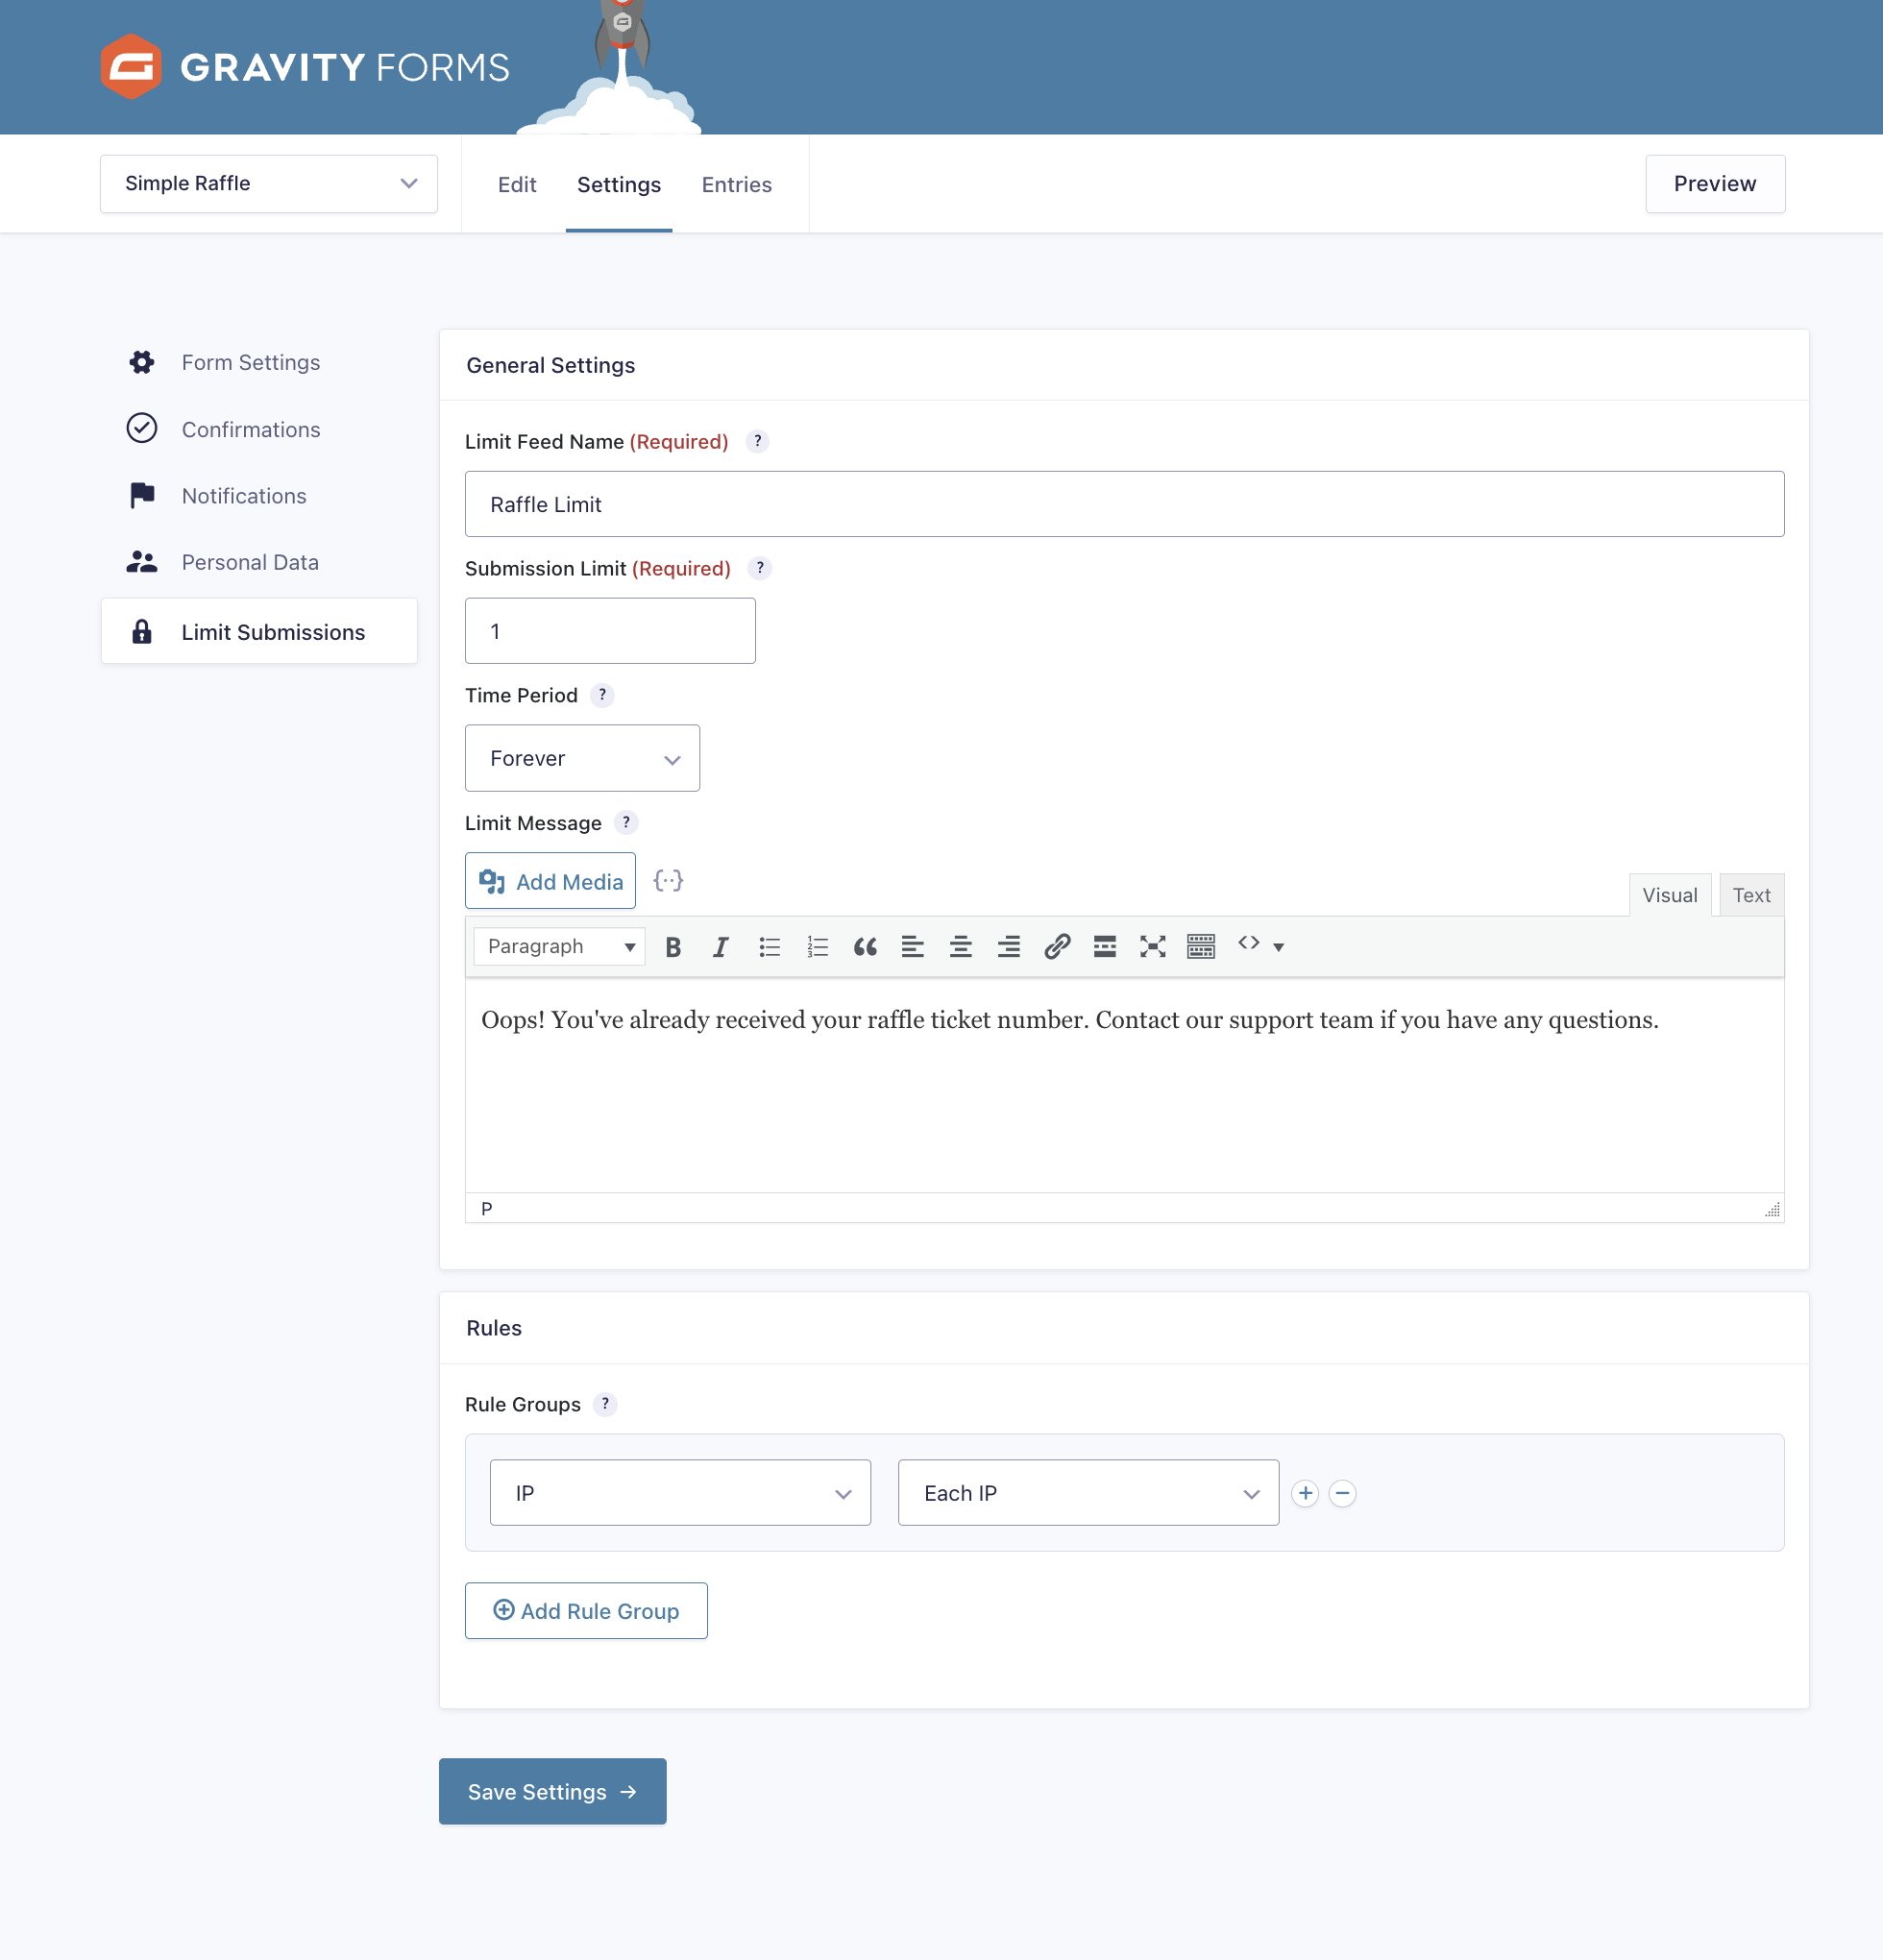
Under Rules › Rule Groups, leave the default selection of IP and Each IP:
Building a Complex Raffle or Lottery System
The steps above are great if each user only has one raffle ticket, but what if you want your users to be able to have multiple tickets? In this section, we’ll take a look at how we can:
- Create a form that allows users to choose how many raffle tickets they want.
- Install and set up the Multiple Unique IDs snippet. Check out our step by step tutorial here.
- Update the notification to include all raffle tickets.
- Review how you can sell packages of tickets and generate unique IDs for them too.
Get Started
Download the finished form here and import it to your site to get started right away.
Create a new form and add the same fields as the simple raffle form:
- Name
- Phone
- Notes
- Unique ID (hidden)
To create multiple ticket numbers, we’ll also add these new fields to the form:
- How Many Raffle Tickets (number field).
- Raffle Ticket Numbers.
- This will be a text paragraph field where the generated numbers get stored. Since the number generation happens after the form gets submitted, we can hide this field.
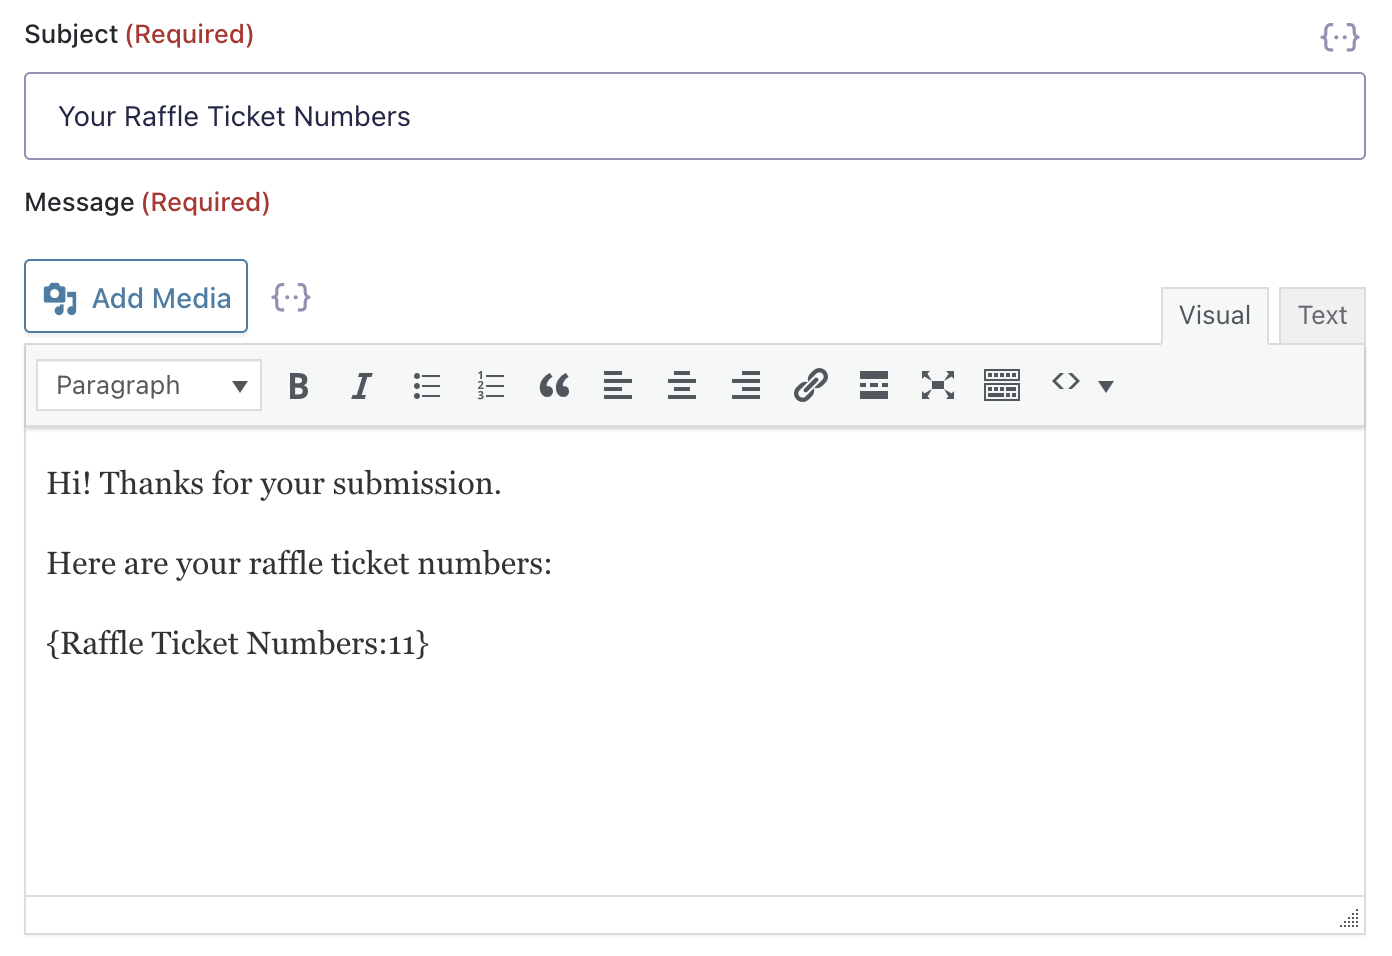
You can set up the notifications and restrict users to only one submission using the same steps described above, except that you’ll want to use the Raffle Ticket Numbers merge tag in the Message area instead of Unique ID. Here’s an example of what the Message section could look like:
Even though the user could choose multiple tickets in their entry, for this example, we’ll still only want them to submit one form entry in total.
Generate Multiple Unique IDs
By default, each time a form is submitted with a unique ID field, one unique ID is generated. For this example, we want to generate as many unique IDs as the user chooses in the form.
Get the Form and Field IDs
First, locate and take note of your form ID and these field IDs:
- How Many Tickets
- Raffle Ticket Numbers
- Unique ID
Not sure where these IDs are? Click on a field and look in the top right corner to find its ID. Here’s how you can find your form ID.
Next, download and install our Multiple Unique IDs snippet.
Not sure how to install a snippet? Here’s how you can install one.
Once the snippet is installed, open the snippet code and scroll down to the #Configuration section. Delete everything below this line and add this code with the following changes:
new GPUID_Multiple_IDs( array(
    'form_id'         => 123,
    'source_field_id' => 9,
    'target_field_id' => 11,
    'count'           => array(
        'field_id' => 10,
    ),
) );- Replace 123 with your form ID.
- Replace 9 with your Unique ID field ID.
- Replace 11 with your Raffle Ticket Numbers field ID.
- Replace 10 with your How Many Tickets field ID.
Selling Ticket Packages
What if you want to sell packages of tickets such as groups of five or ten? If you prefer to sell tickets this way instead of having the user choose how many they want, we can make a few easy adjustments to the form.
Download the finished form here and import it to your site to get started right away.
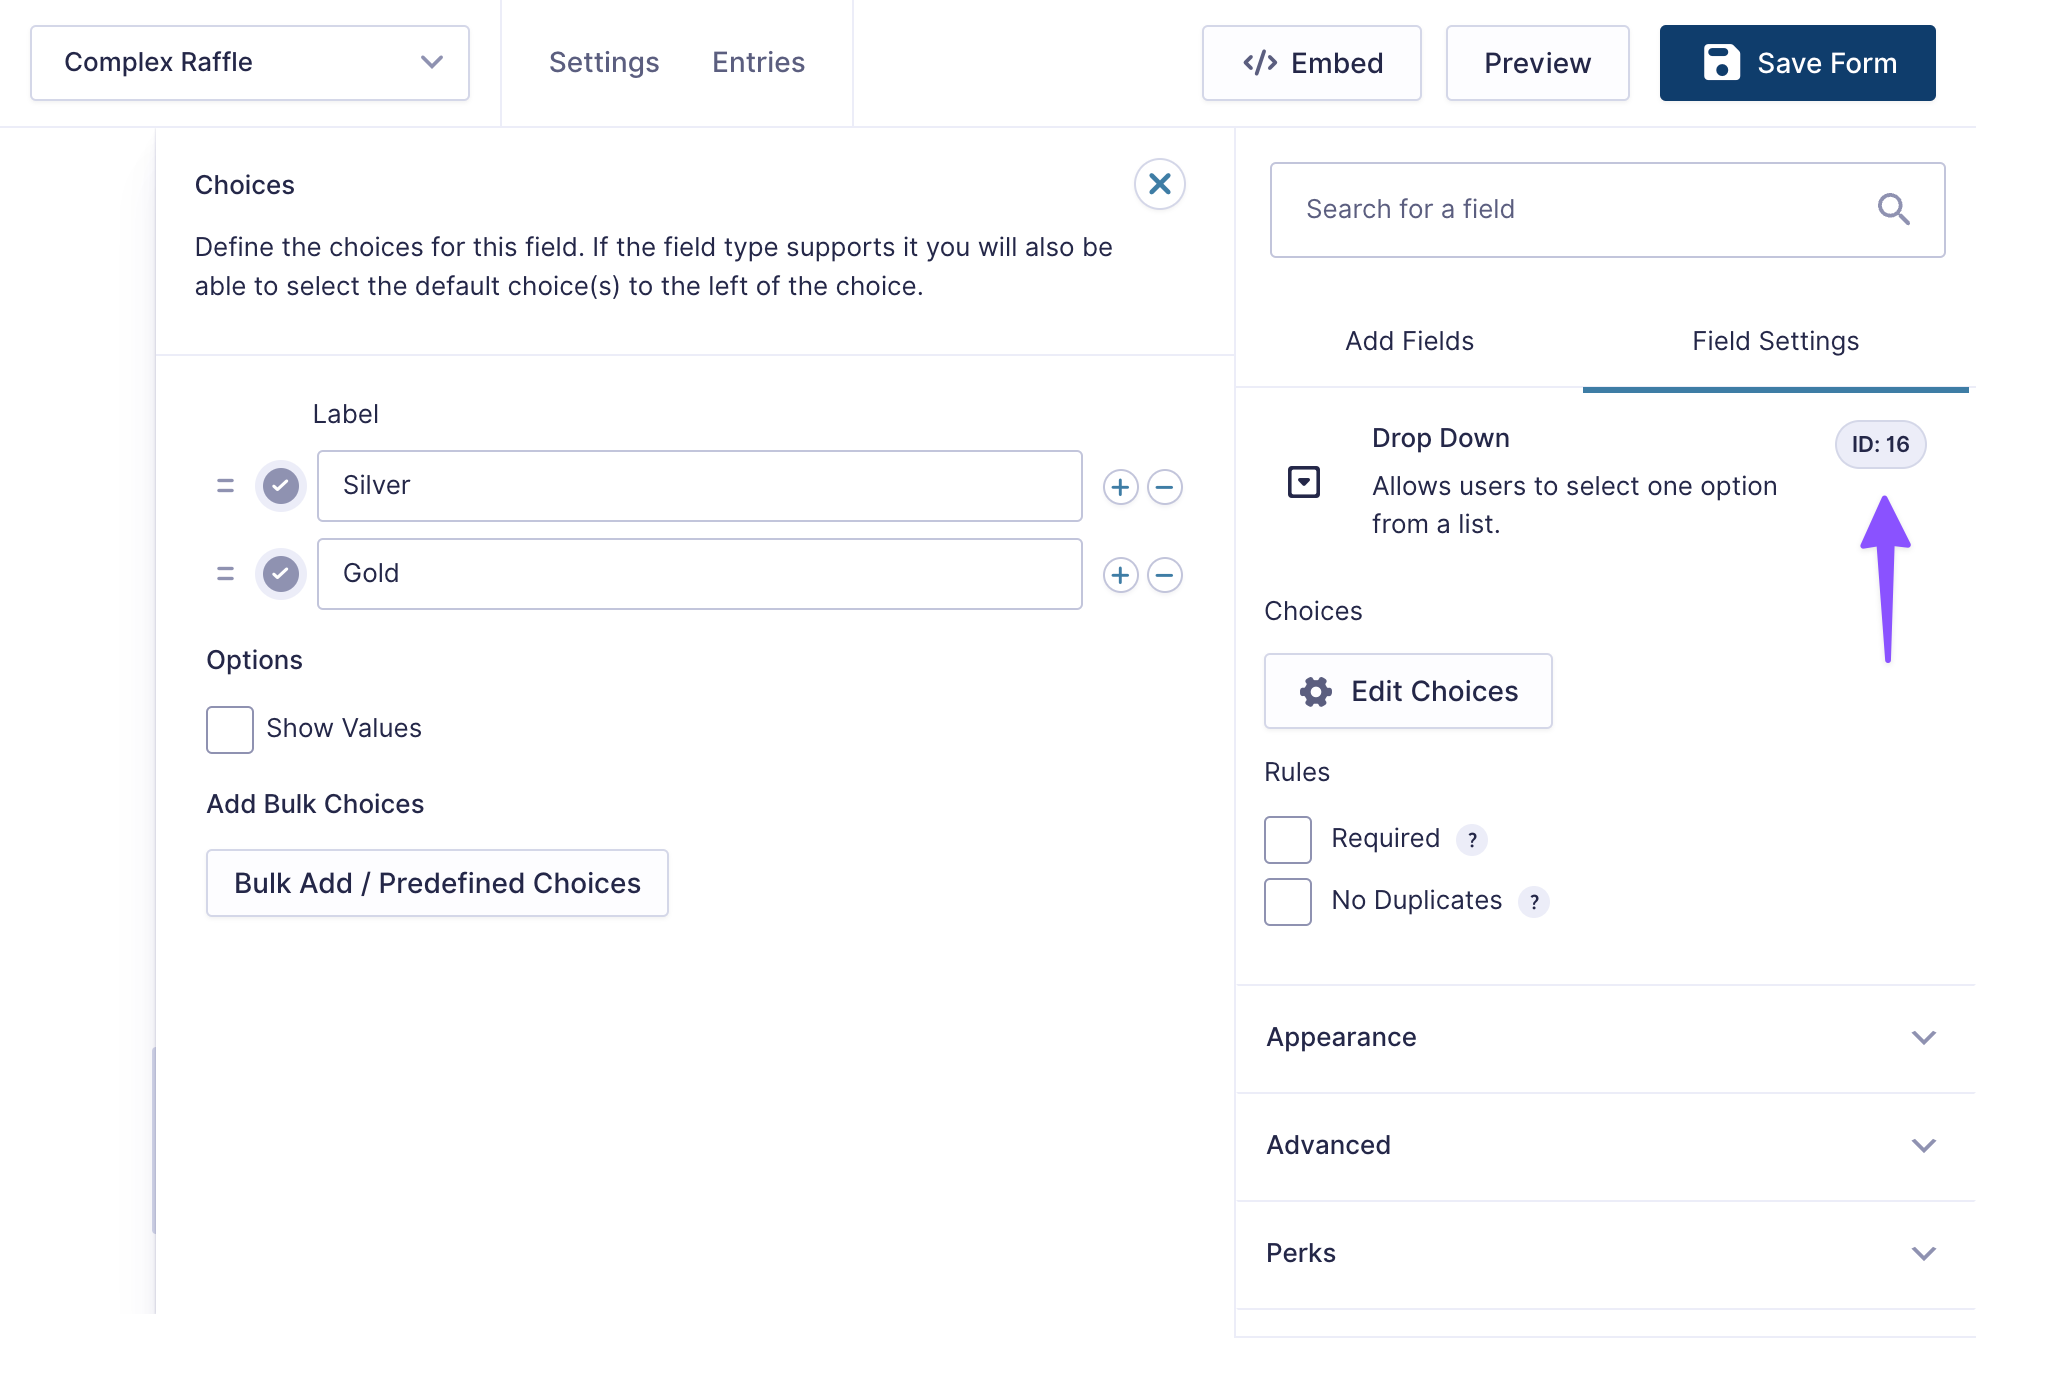
First, we’ll use a Gravity Forms Drop Down field instead of a Number field. We’ll name this Drop Down Select Package, and we’ll offer two packages: Silver and Gold. Take note of this field ID.
Next, we’ll update the #Configuration area of the snippet code to look like this with the following changes:
new GPUID_Multiple_IDs( array(
     'form_id'         => 123,
     'target_field_id' => 36,
     'source_field_id' => 35,
     'count'           => array(
         'field_id' => 16,
         'choices'  => array(
             'Silver'  => 5,
             'Gold'    => 10
         )
     )
) );- Replace 123 with your form ID.
- Replace 36 with your Ticket Numbers field ID.
- Replace 35 with your Unique ID field ID.
- Replace 16 with your Select Package field ID.
In this example, the user will receive 5 tickets if they choose Silver, and 10 tickets if they choose Gold. These numbers can be adjusted to whatever you need for your raffle.
And there you have it – an easy way to manage your raffles, all within Gravity Forms!
Want to see more tips for lottery-style campaigns in action? One of our customers built an entire business out of creating engaging marketing campaigns with Gravity Forms and Gravity Perks.
Taking it Further
There’s so much more we can do! Let’s take a look at how we can:
- Give early bird users a 25% discount with Gravity Forms eCommerce Fields.
- Use Google Sheets as a CRM and export raffle data with Gravity Connect Google Sheets.
Add Pricing and Discounts
What if you want to add a price or payment option for users to purchase tickets? Out of the box, we can add a price per ticket and total price field to our form. We can also take advantage of Gravity Forms eCommerce Fields to add a discount field.
Once this perk is installed and activated, open your form and click Add Fields. Scroll down until you see the new Pricing Fields section. Add a Product Field called How Many Tickets. This will replace the number field on your form. Make sure the following fields are set:
- Field Type: Single Product
- Price: Add your price here
- This example uses $5 per ticket.
- Disable quantity field:
- Make sure this is not checked.

Let’s also add a Discount Field where if the user submits their order by April 15, they’ll get 25% off their purchase. We’ll use a combination of Gravity Forms eCommerce Fields and Gravity Forms Conditional Logic Dates to achieve this.
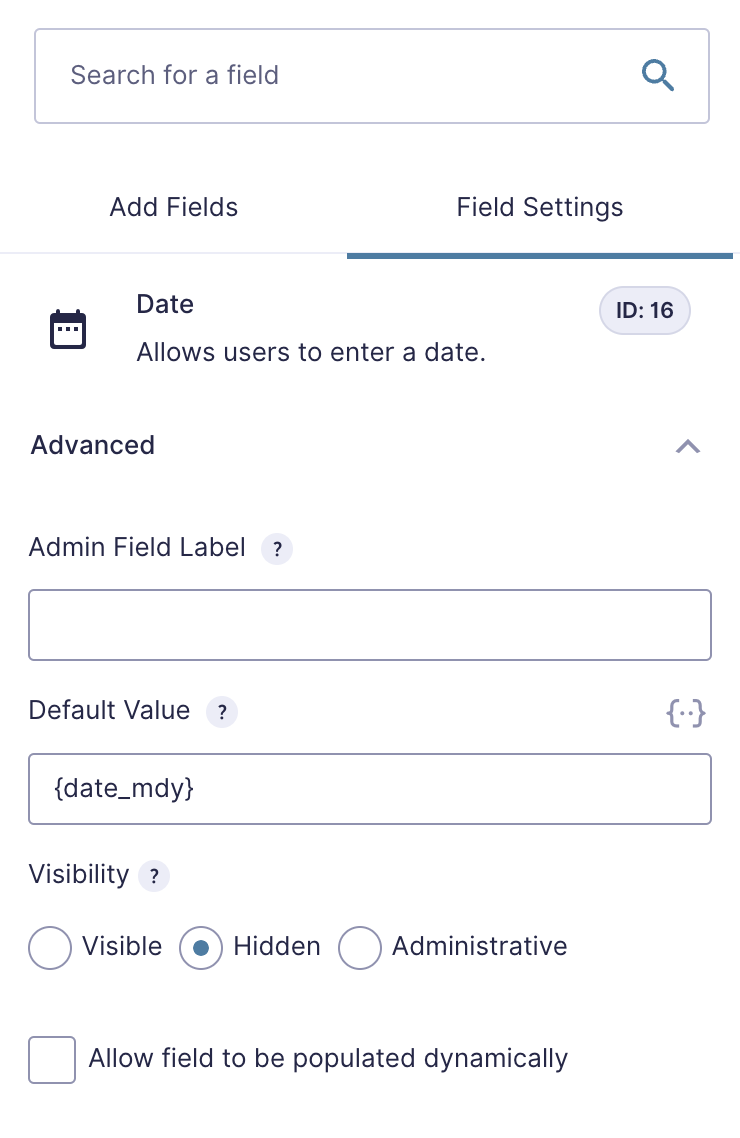
Under Pricing Fields, we’ll first add a hidden Date Field so we can track the submission date behind the scenes. Add a Date Field with the following settings:
- General › Field Label: Current Date
- Advanced › Default Value:
{date_mdy}- This dynamically sets the date to the current date.
- Advanced › Visibility: Choose Hidden
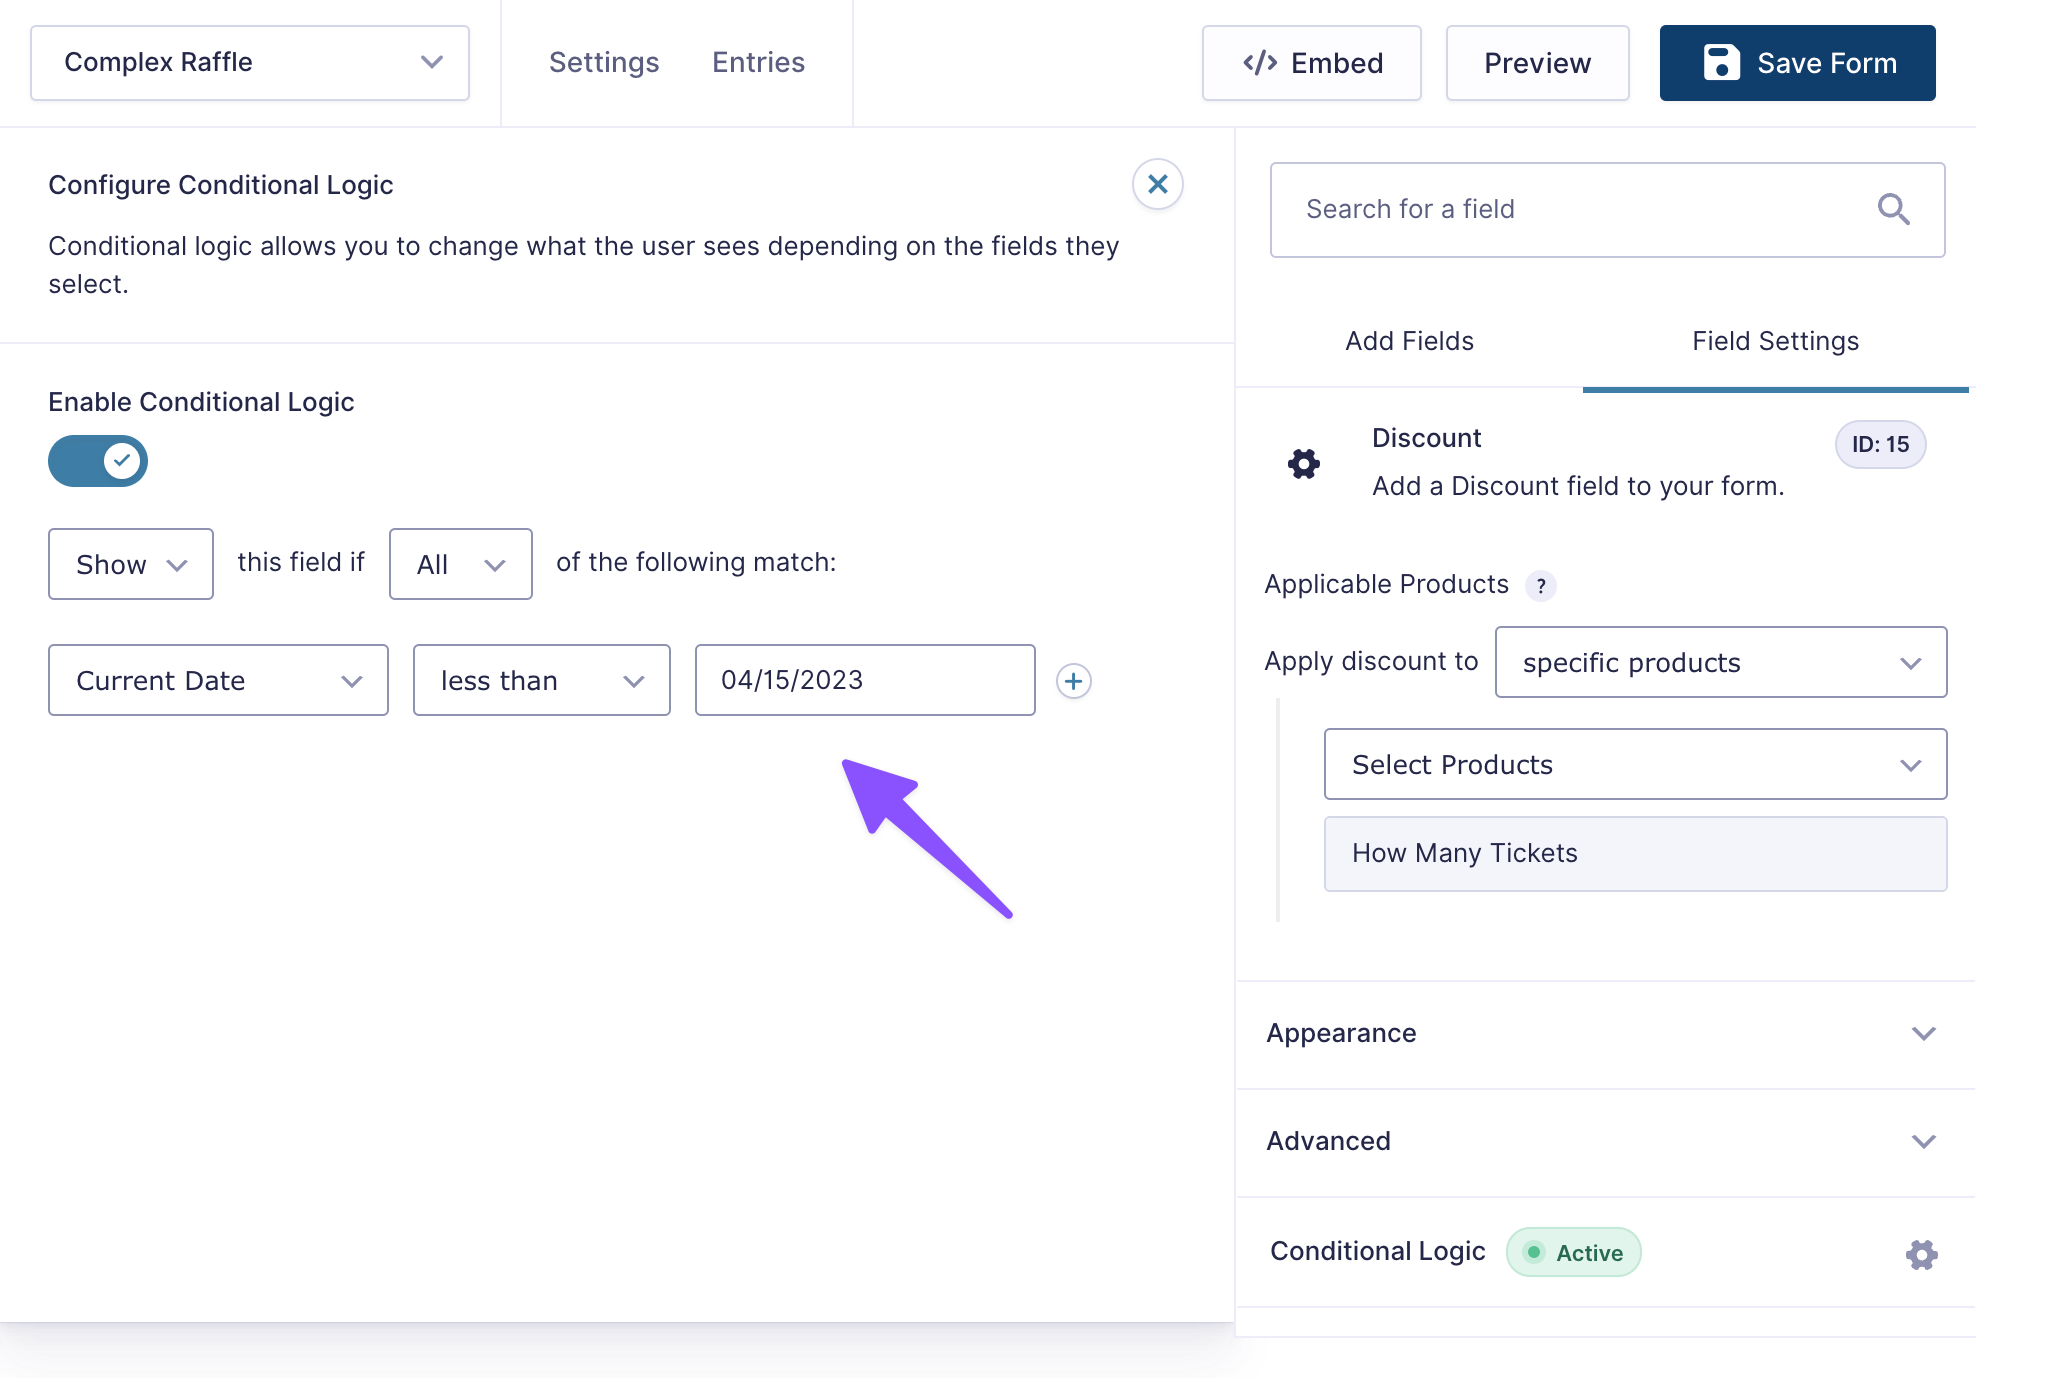
Next, add a Discount Field to your form with these settings:
- General › Field Label: Early Bird Discount
- General › Discount Amount: 25%
- General › Applicable Products: specific products › How Many Tickets
- Conditional Logic: Enable Conditional Logic with the following settings:
- Show this field if All of the following match:
- Current Date less than 04/15/2023
- Adjust this date to whatever your early bird date is.
These settings will only apply the discount if the user adds the correct code:
Let’s also add a Total Field from the Pricing Fields section. Now, you should see the discount applied only when the submission date is before April 15.
Finally, don’t forget to update the snippet code to use the Product’s field ID instead of the old number field ID. To use the quantity subfield of the Product field in the snippet, you’ll need to use 10.3 as the field ID, changing 10 to your field ID (.3 references the quantity subfield):
new GPUID_Multiple_IDs( array(
    'form_id'         => 123,
    'source_field_id' => 9,
    'target_field_id' => 11,
    'count'           => array(
        'field_id' => '10.3',
    ),
) );
Speaking of discounts…
Creating multiple coupons for Gravity Forms, WooCommerce, and Easy Digital Downloads is very similar to creating raffle tickets! Check out How to Generate Bulk Coupon Codes with Gravity Forms to learn more.
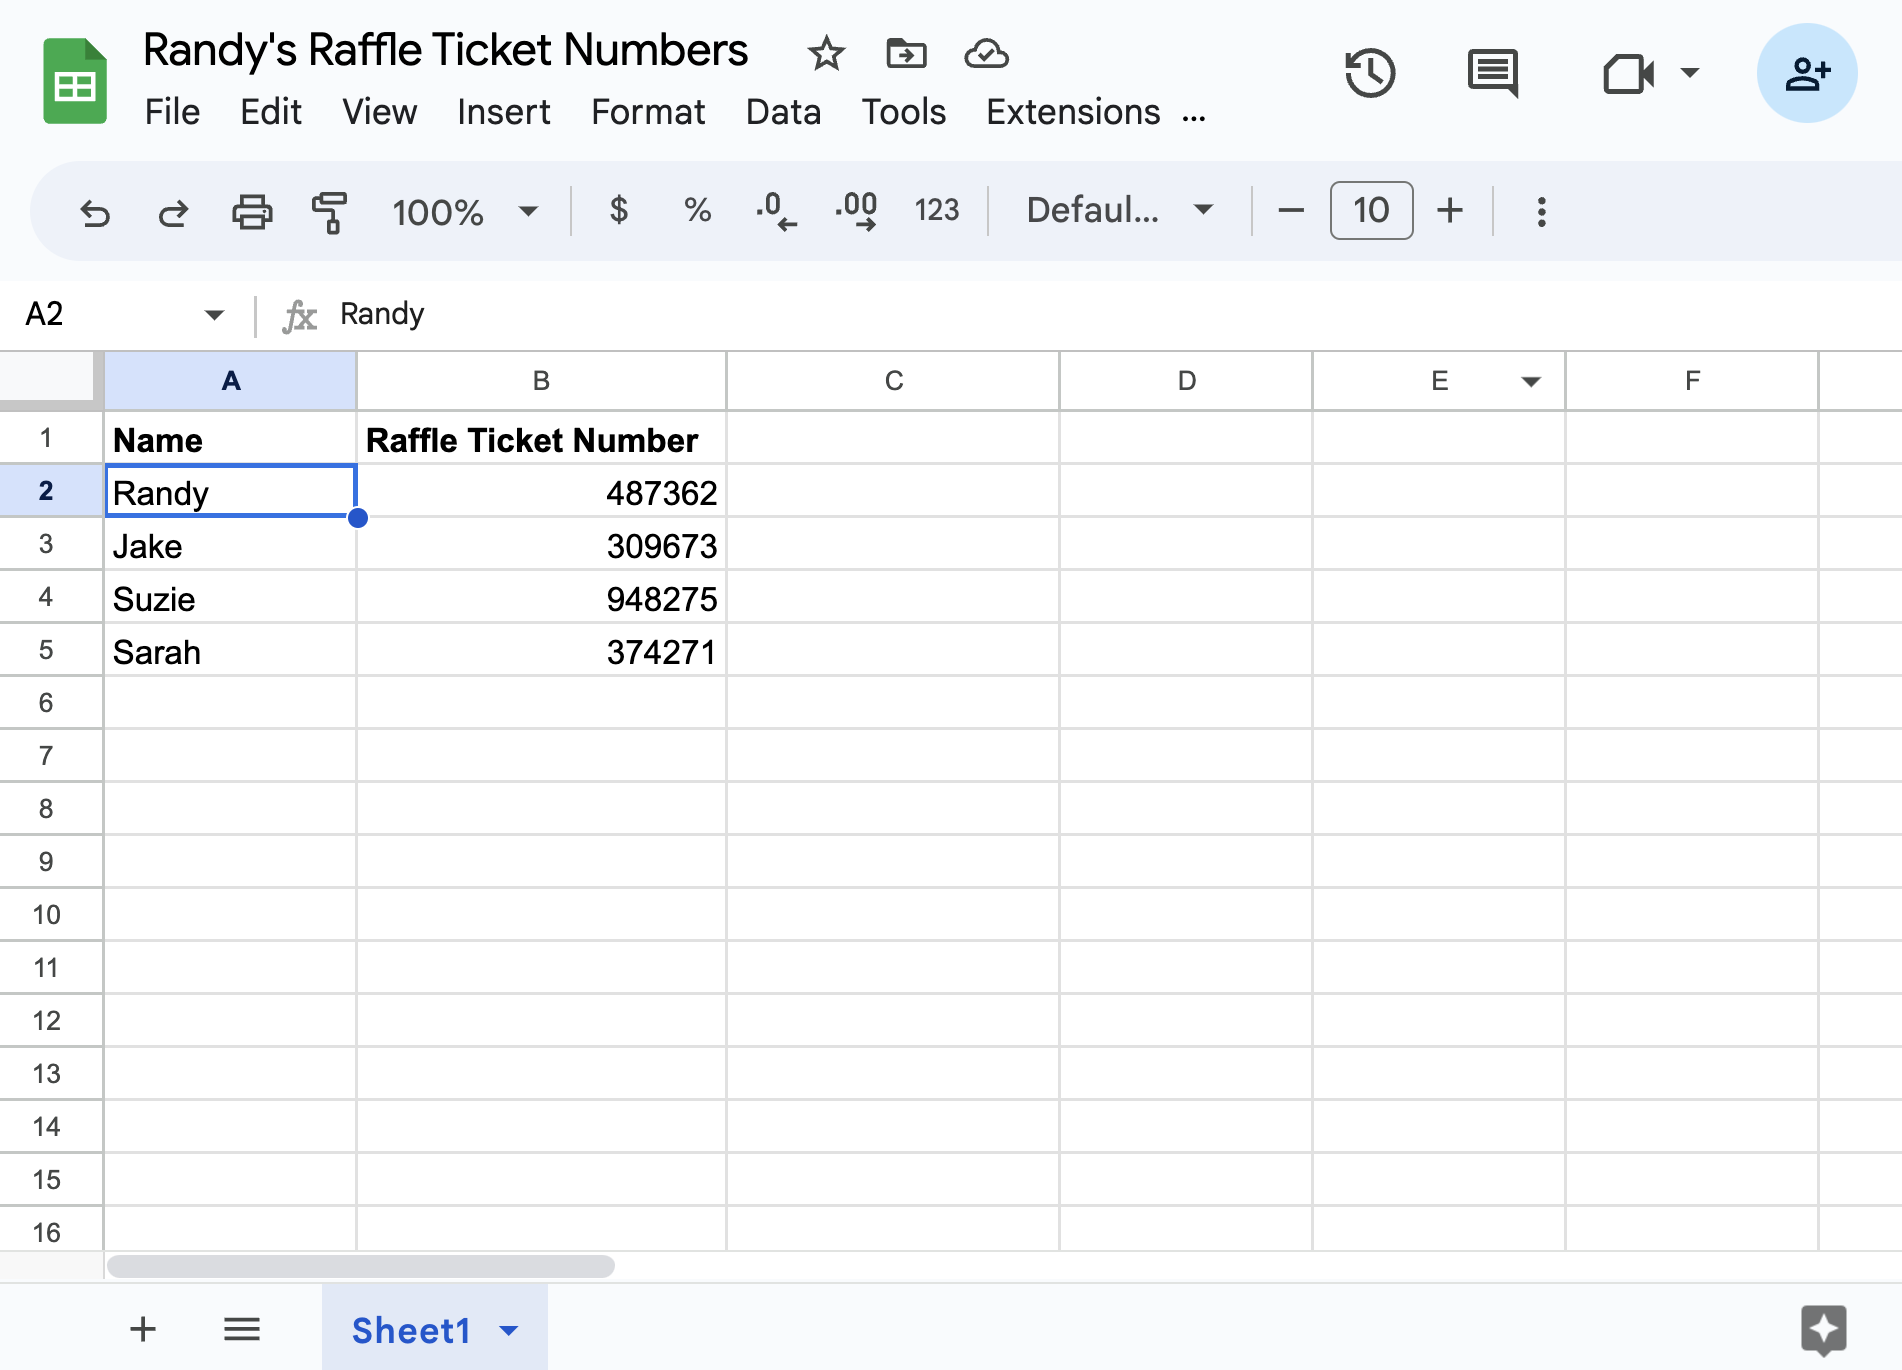
Save your Raffle or Lottery Ticket Data to Google Sheets
Once your raffle numbers are submitted, wouldn’t it be great if you could store all your form data in one place? Check out our Gravity Connect Google Sheets documentation for a step-by-step guide to setting up Google Sheets with Gravity Forms.


Hi Samuel
Thanks for the swift response, i have passed that information onto our web host and hopefully they will be able to make that work for us.
thanks
Andy
Hi David
I’m working my way through this tutorial along side our website host and its raised a couple of questions, the main one being is can you have 2 differing ticket types within the same form as they have suggested to me that this isnt possible so id like a second opinion and also does the notes field you have said is required have any purpose on the form ?
thanks
Andy
Hi Andy,
You can have different ticket types on the form, by adding multiple Unique ID fields to the form, and creating multiple instances of the class with different settings to apply to the different Unique ID fields. You can read more about how that is done here. Depending on how your form is set up, you may need to set up conditional logic on the unique ID fields, to show them one at a time.
In regard to the Note field, that isn’t required. It was just used to set up the demo form. If you have any questions, or it’s still not working for you, you can contact us via our support form so we can assist you further.
Best,