How to Show Gravity Forms Data in WordPress
Craft dynamic pages, custom posts, and seamless confirmation experiences with these methods to display Gravity Forms data in WordPress—wizard style.

Gravity Forms is a brilliant way to capture all sorts of data. One of the ways you might want to put that data to action is by showing it to the world—use it to personalize order confirmations, publish brand-new posts, or perhaps even build an internal management system.
Grab your wands, wizards: today we’ll put your forms’ data to use with these four ways (six methods) to show Gravity Forms data in WordPress. 🧙
One of the keys to displaying Gravity Forms data across many different contexts is merge tags. If you’re not familiar with them, merge tags represent submitted field values and other information (such as entry data or the current date) while templating, allowing you to dynamically display them in confirmations, notifications or post content templates.
What we’ll cover:
- What we’ll cover:
- 2. How to show Gravity Forms data with the Block Editor and Beyond
- 3. How to create new posts from Gravity Forms entries
- 4. How to use PHP to show entry data.
- Show… your thoughts
1. How to implement Gravity Forms merge tags anywhere
GP Post Content Merge Tags
If you’re just looking for an easy way to display some submitted data on the confirmation page of your form, Gravity Forms supports merge tags for the “Text” confirmation type.

But what if you are looking for a simple way to include merge tags in the “Page” or “Redirect” confirmation types, or really, any other page? That’s where you’d turn to GP Post Content Merge Tags. This brilliant perk brings forth merge tags to all WordPress content by default, and uses the handy [eid] shortcode to reach beyond to headers, footers, sidebars, and other page builders!
Its global merge tags capability (e.g. {Email} instead of {Email:3}) exponentially increases scalability, opening doors to flexible pages that can be used for multiple forms.
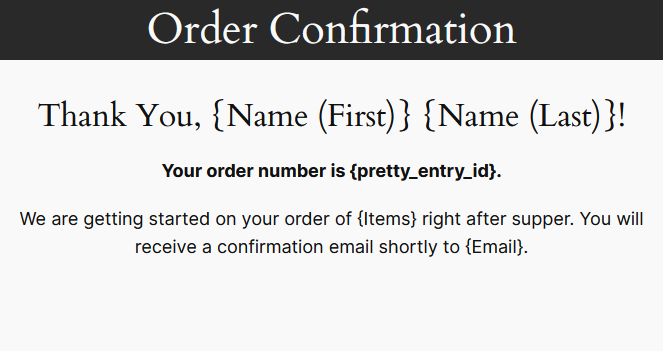
Let’s say you have multiple forms for order placements. With Post Content Merge Tags, you can create one consistent confirmation page that works like a charm ✨ across all of those forms.
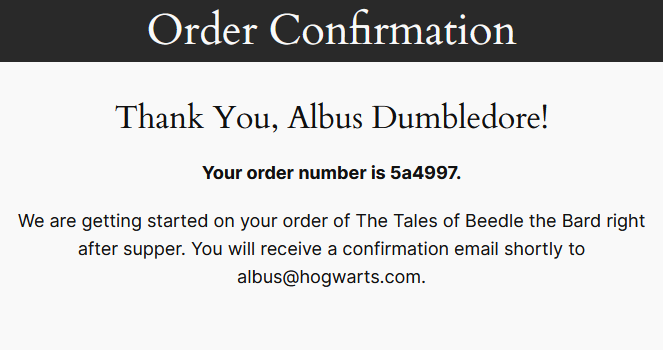
Our article Use Gravity Forms Merge Tags in Your Post Content goes into more detail on how to set this up.
2. How to show Gravity Forms data with the Block Editor and Beyond
GP Entry Blocks
NB: Before we continue, I must warn you—this is one of my personal favorites. So, please excuse my inner color commentator and let’s get ready to rumble!
To not only show but also design Gravity Forms data directly in the WordPress Block Editor (a.k.a. Gutenberg) and unleash its full potential for building user profiles, directories, and applications… roll out the red carpet for GP Entry Blocks!
This perk packs a punch with dynamic data display, harnessing merge tags, and enabling frontend entry editing to boot. 🥊 It lets you customize your data display on the fly, taking full advantage of WordPress’ modular and intuitive block editor.
If your editor of choice isn’t the WordPress Block Editor, no sweat!
Once your entries are looking sharp, you can use Reusable Blocks Extended to add Entry Blocks to other editors like Classic, Elementor, Beaver Builder, and Divi.
Plus, it doesn’t stop at showing data for just one entry—it can display multiple entries at once. Wicked!
You can either display them in a table…
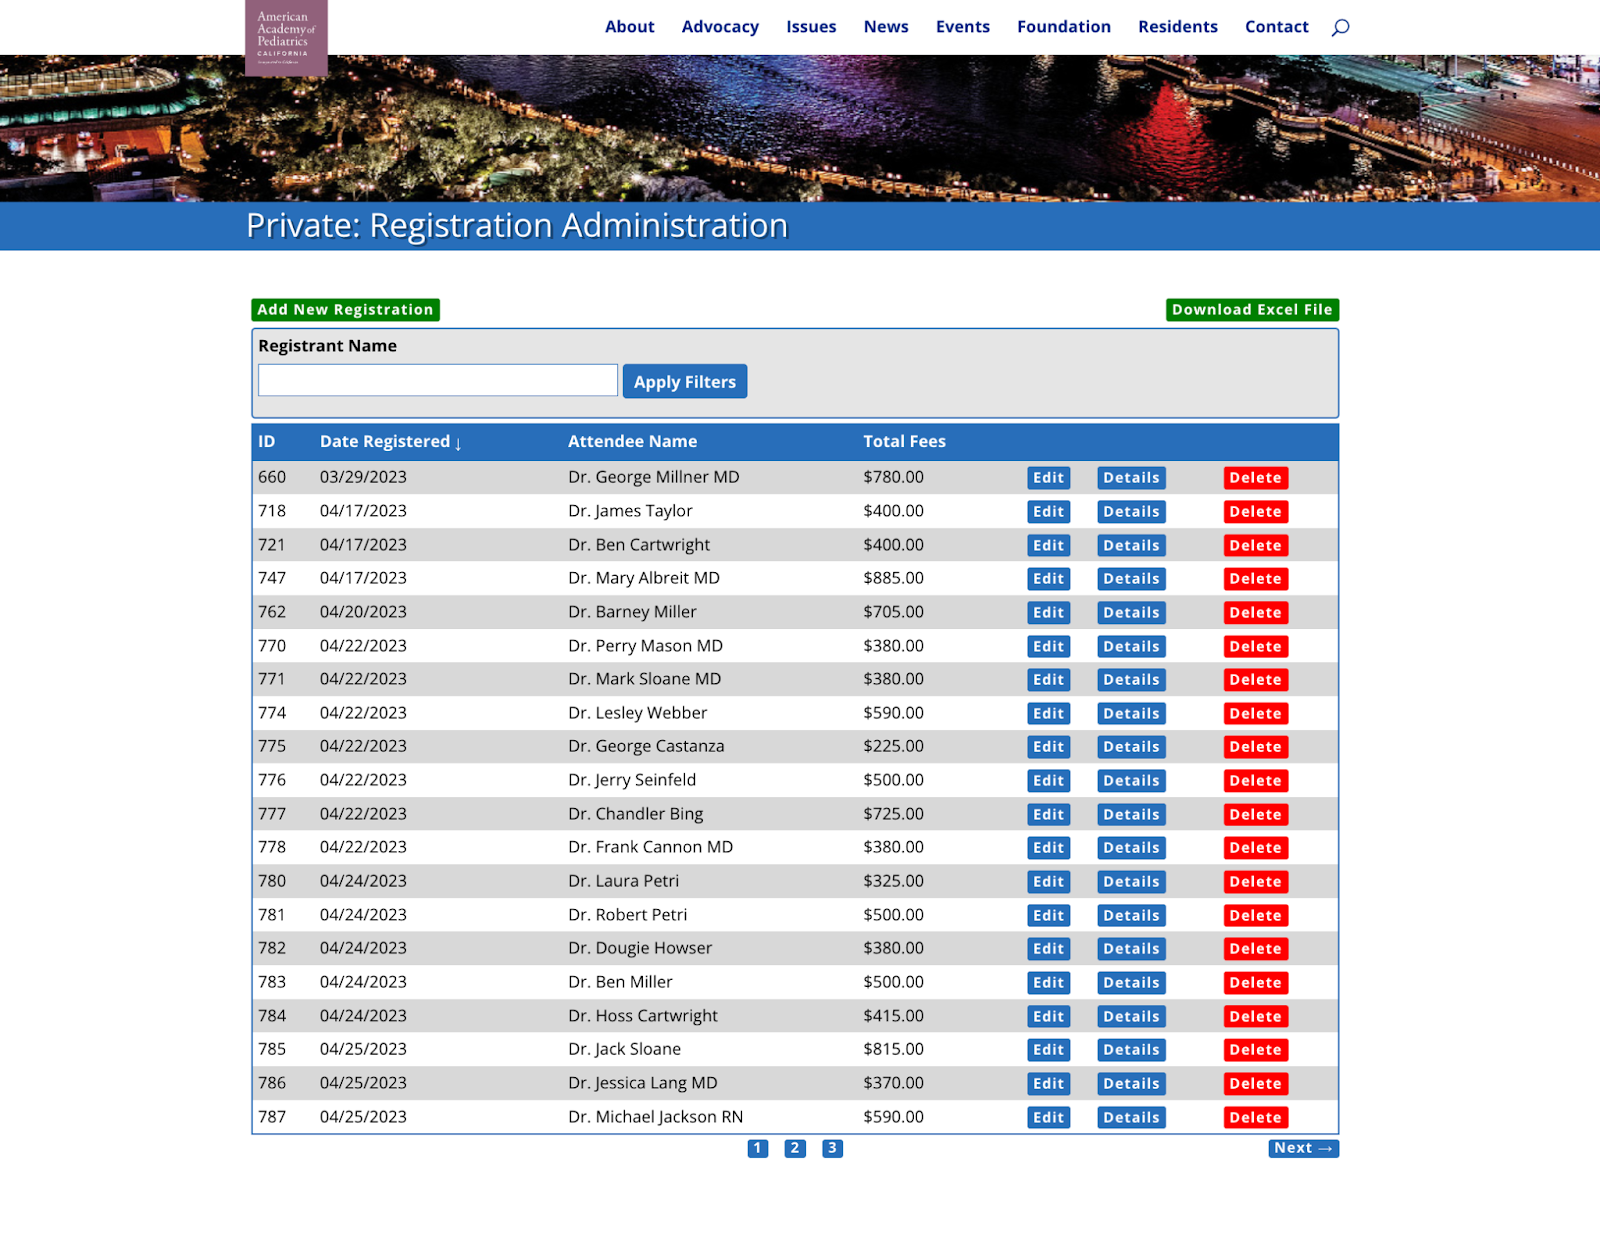
Or use the sorcerous Loop layout variation for additional block editing goodness.
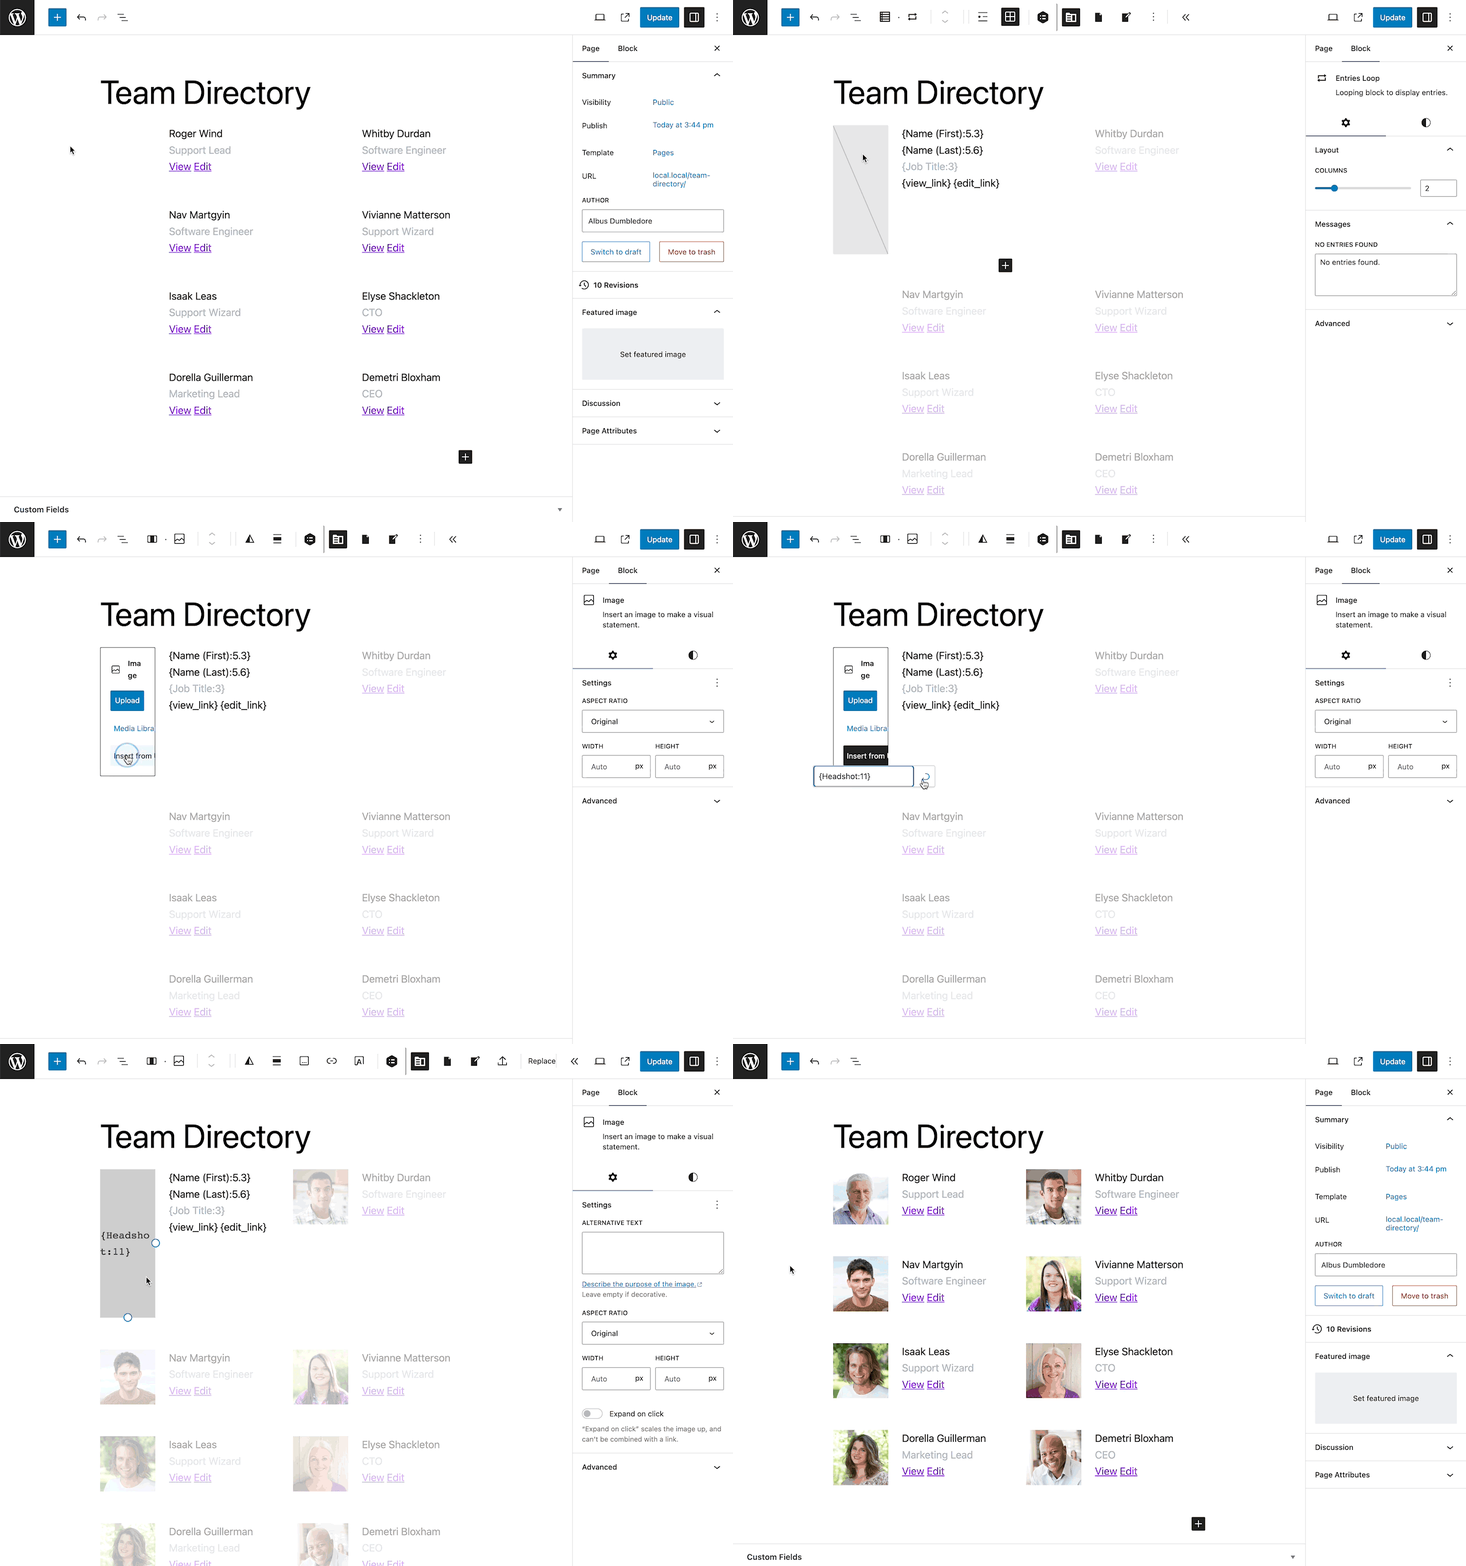
Excited to learn how to work GP Entry Blocks’ magic? Watch our workshop, where we (Dave) go through all its features and build a spicy team directory.
3. How to create new posts from Gravity Forms entries
In some cases, you might want to create posts from your entries—think user-generated content like a “Share Your Story” campaign for a travel blog. You can also integrate your submitted data with various WordPress plugins, such as ACF and SearchWP, which interact with the posts created from that data.
Gravity Forms Post fields
All Gravity Forms licenses come with Post fields, which generates a new post using user submitted data. All Post fields work in tandem to piece together a new post puzzle. 🧩
Available Post fields:
- Post Title
- Post Excerpt
- Post Image
- Post Body
- Post Custom Field
- Post Category
- Post Tags
There are some out-of-the-box limitations with this solution, like not having a convenient approach to edit posts on the frontend or to set post status (think “Published” vs “Draft”). We face those challenges and explore Post fields in more detail in Use Gravity Forms to Create User-Submitted Posts—post creation demo included. 😉
Custom post types have better, native support through the next method (spoiler alert: Advanced Post Creation). If your use case still calls for Post fields, we have a free plugin to map your Post-field-generated posts to custom post types and/or custom taxonomies.
Gravity Forms Advanced Post Creation
The Advanced Post Creation add-on (APC) is included with Gravity Forms’ Elite and Non-profit licenses. Similar to the Post fields, it generates a new post on form submission, but it utilizes a feed instead of dedicated fields and it comes with advanced features, such as:
- Generate a page instead of a post.
- Set up password protection.
- Schedule publish.
- Create new categories and tags from field data.
Also, APC natively supports custom post types, a core WordPress feature that integrates with countless plugins—like Advanced Custom Fields (ACF). Its biggest downside? There’s no easy way to edit posts on the frontend. But don’t worry—there’s still a solution with our Update Posts snippet! 🪄
One more editing option
GP Entry Blocks is another alternative for updating custom post types created via APC, with support for nested forms and file upload fields. Check out how one of our customers implemented it.
4. How to use PHP to show entry data.
If programming is your jam, you can programmatically fetch and display entry data using Gravity Forms’ API and PHP. 🐘
Fetch and display a single entry
To get a specific entry, use GFAPI::get_entry, like so:
<?php

$entry_id = 123; // Replace with your entry ID
$entry    = GFAPI::get_entry( $entry_id );

if ( is_wp_error( $entry ) ) {
	?>
	Error: Could not find entry.
	<?php
} else {
	?>
	<!-- Replace 'id', '1.3', '1.6', and '5' below either field IDs or entry meta you would like to display. -->
	<b>Entry ID:</b> <?php echo $entry['id']; ?><br>
	<b>Customer:</b> <?php echo $entry['1.3']; ?> <?php echo $entry['1.6']; ?>
	<b>Item:</b> <?php echo $entry['5']; ?>
	<?php
}
Fetch and display multiple entries
To get a number of entries, use GFAPI::get_entries():
<?php

$form_id = 123; // Replace 123 with your form ID

// Set up the search criteria to filter entries (adjust as needed)
$search_criteria = array(
	'status' => 'active', // Only get active (non-deleted) entries
	'field_filters' => array(
		array(
			'key'   => '5', // Field ID for Book
			'value' => 'The Hobbit', // Example filter: Only get entries where the 'Book' field is 'The Hobbit'
		),
	),
);

// Get the entries based on the criteria
$entries = GFAPI::get_entries( $form_id, $search_criteria );

foreach ( $entries as $entry ) {
	$first_name = ! empty( $entry['1.3'] ) ? $entry['1.3'] : '(First name not found)';
	$last_name  = ! empty( $entry['1.6'] ) ? $entry['1.6'] : '(Last name not found)';
	$book   	= ! empty( $entry['5'] ) ? $entry['5'] : '(Book field not found)';
	?>

	<div>
		<b>Entry ID:</b> <?php echo $entry['id']; ?><br>
		<b>Customer:</b> <?php echo $first_name; ?> <?php echo $last_name; ?><br>
		<b>Item:</b> <?php echo $book; ?>
	</div>

	<?php
}
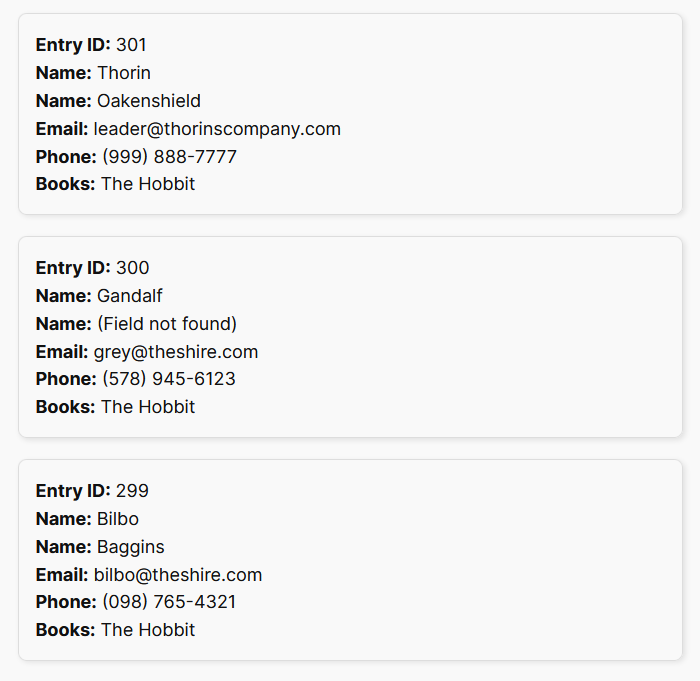
With a little styling, you can get something that looks like this:
Bonus tip: For some use cases where you might want to display entries from multiple forms in the same view, GravityView has a Multiple Forms extension.
Show… your thoughts
Is there something you’re trying to do that wasn’t covered in this article? Or did we unveil exactly the spell you were looking for? Let us know in the comments. 😄


