6 Examples of the Best Gravity Forms Add-Ons and Extensions
Use Gravity Perks to create all sorts of neat Gravity Forms examples on your WordPress website in just a few simple steps.

Given that Gravity Forms is the most popular form plugin for WordPress, it’s easy to see why web developers are always on the lookout for new and advanced ways to extend its core features. In fact, there are tons of Gravity Forms examples out there that leave you wondering How did they do that?!
Gravity Forms add-ons and extensions enable WordPress developers to transform their ordinary forms into feature-rich ones in a few simple steps. Put simply, the right add-ons can help you create advanced, professional-looking forms for your WordPress website.
In this article, we’ll show you some of the best Gravity Forms examples and explain how you can create your own using Gravity Forms add-ons and extensions.
Gravity Forms Add-Ons
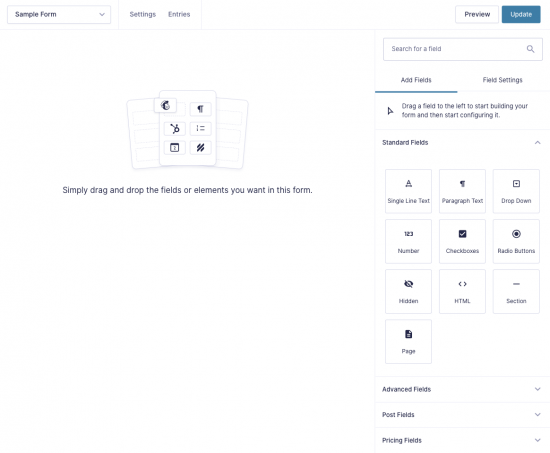
The Gravity Forms WordPress plugin comes with several form field types out of the box that let you create basic WordPress forms. All you have to do is drag and drop the form fields you want into the form builder and configure the available options.
However, in order to leverage advanced features, you need to install Gravity Forms add-ons to your WordPress website. Here’s a list of the basic and pro add-ons available with Gravity Forms plans:
Gravity Forms Basic Add-Ons
- ActiveCampaign
- AWeber
- Campaign Monitor
- CleverReach
- Constant Contact
- EmailOctopus
- Emma
- GetResponse
- HubSpot
- iContact
- Mad Mimi
- Mailchimp
- Mailgun
- Postmark
- SendGrid
Gravity Forms Pro Add-Ons
- Agile CRM
- Batchbook
- Breeze
- Campfire
- Capsule CRM
- Dropbox
- Freshbooks
- Help Scout
- Highrise
- PayPal Payments Standard
- Pipe Video Recording
- Slack
- Trello
- Twilio
- Zapier
- Zoho CRM
As you can probably tell, most of these add-ons let you integrate Gravity Forms with various third-party services. These include CRMs, email marketing services, and project management tools. However, more complex Gravity Forms add-ons are quickly becoming popular. These sorts of complex add-ons allow web developers to use advanced usages of these features like conditional logic and dynamic field population in their forms.
Introducing Gravity Perks
Gravity Perks is a collection of add-ons for the Gravity Forms plugin that allows users to enhance their forms in different ways. Each add-on is available as an individual plugin which means you can install the ones you want without worrying about plugin bloat.
Using Gravity Perks, you can do neat things like:
- Let users preview submissions.
- Limit the number of submissions.
- Create conditional pricing rules.
- Limit which days are selectable for date picker fields.
There are 50 perks available with Gravity Perks and new perks are added regularly.
Gravity Perks examples
Gravity Perks allow you to implement all sorts of advanced form features. Some useful Gravity Forms examples you can create with perks include:
- Configuring bulk pricing.
- Creating multi-page forms.
- Setting up conditional logic.
- Limiting submissions, dates, and choices.
- Letting people preview their form submissions.
- Previewing forms on the front-end of your website.
- Creating nested forms.
Each Gravity Perks add-on lets you add a different feature to your Gravity Forms. You can use them to create all sorts of Gravity Forms examples in WordPress.
6 Gravity Forms examples
Lets quickly step through some Gravity Forms examples that you can implement on your WordPress site using Gravity Perks.
1. Configure bulk pricing for Gravity Forms
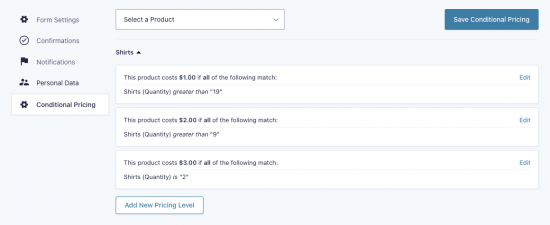
Setting up bulk pricing is a great way to encourage customers to purchase greater quantities of your products. This is especially useful for WooCommerce store owners. With Gravity Forms Conditional Pricing, you can set up bulk pricing on your site.
Simply add a Product field to your form editor and set the base product cost. Next, use Gravity Forms Conditional Pricing to create pricing levels.
Similarly, you can use Gravity Forms Conditional Pricing to create pricing levels for early bird pricing, age-based pricing, or rush pricing.
2. Create conditional discounts for Gravity Forms
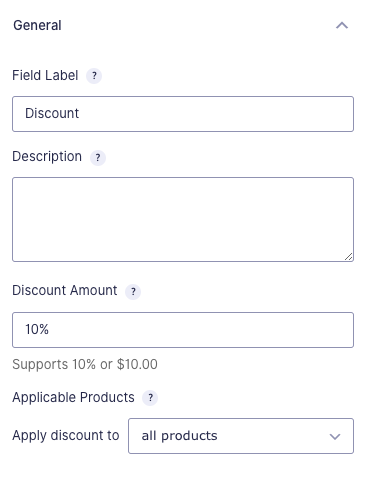
With Gravity Forms eCommerce Fields, you can apply flexible discounts to Gravity Forms form submissions. This is great for offering exclusive discounts if users meet a specific condition. For example, you may offer a 10% discount if the user is a registered member or if they choose to pay in advance.
All you have to do is add a Discount field to your Gravity Form and set the discount amount. To take things to the next level, you can offer discounts based on the total or create date (or time-sensitive) discounts. You can also use this perk to calculate tax or VAT with Gravity Forms.
3. Limit bookings and reservations with Gravity Forms
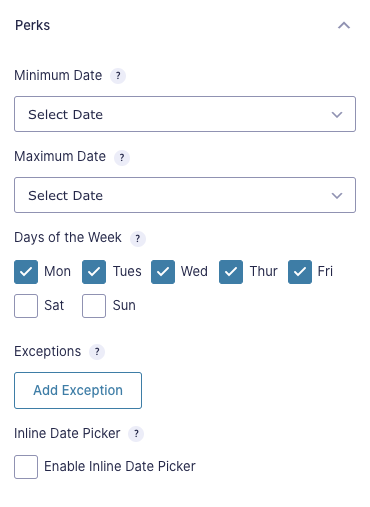
Gravity Forms Limit Dates lets you quickly limit selectable dates using the Date field. You can use it to limit dates to any specific day or group of days. For example, you might want to limit selectable days to weekdays only or weekends only.
To do this, simply install the Gravity Forms Limit Dates perk and add a Date field to your form. Next, click the All Days option to reveal the specific days of the week. Tick the checkboxes next to all selectable days.
You can also use this perk to require dates to by less than or greater than the current date or link Date fields with Gravity Forms.
4. Calculate user’s age with Gravity Forms
Gravity Forms Date Time Calculator lets you accurately calculate the user’s age based on their date of birth using merge tags. You can then use their exact age to implement all sorts of neat features such as:
- Set up age-based pricing i.e. offer discounts to people under (or over) a certain age.
- Restricting access to content or member registration (user registration) to people over a certain age.
- Send personalized happy birthday emails to customers.
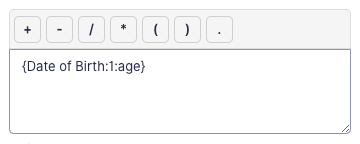
Simply add a Date field to your Gravity Form and choose a date format. Next, add a Number field to the form.
Finally, insert the merge tag for the Date field and add the Number field’s merge tag modifier to it.
Gravity Forms Date Time Calculator can also be used to calculate the number of days between two date fields in Gravity Forms. This makes billing per day for bookings, rentals, and multi-day tickets a breeze! You can even count weekdays and weekend days separately.
5. Set up time-based conditional logic with Gravity Forms
Gravity Forms Conditional Logic Dates lets you create conditional logic rules based on the current time. This is useful for time-sensitive submissions (quizzes, contests, and registrations) as well as time-dependant confirmations and notifications.
All you have to do is tick the checkbox next to the conditional logic setting (by going to the Advanced tab) from any field you want to configure the time-based conditional logic rule. Finally, choose the Current Time option using the dropdown menu and enter the time.
6. Live preview forms on the front-end
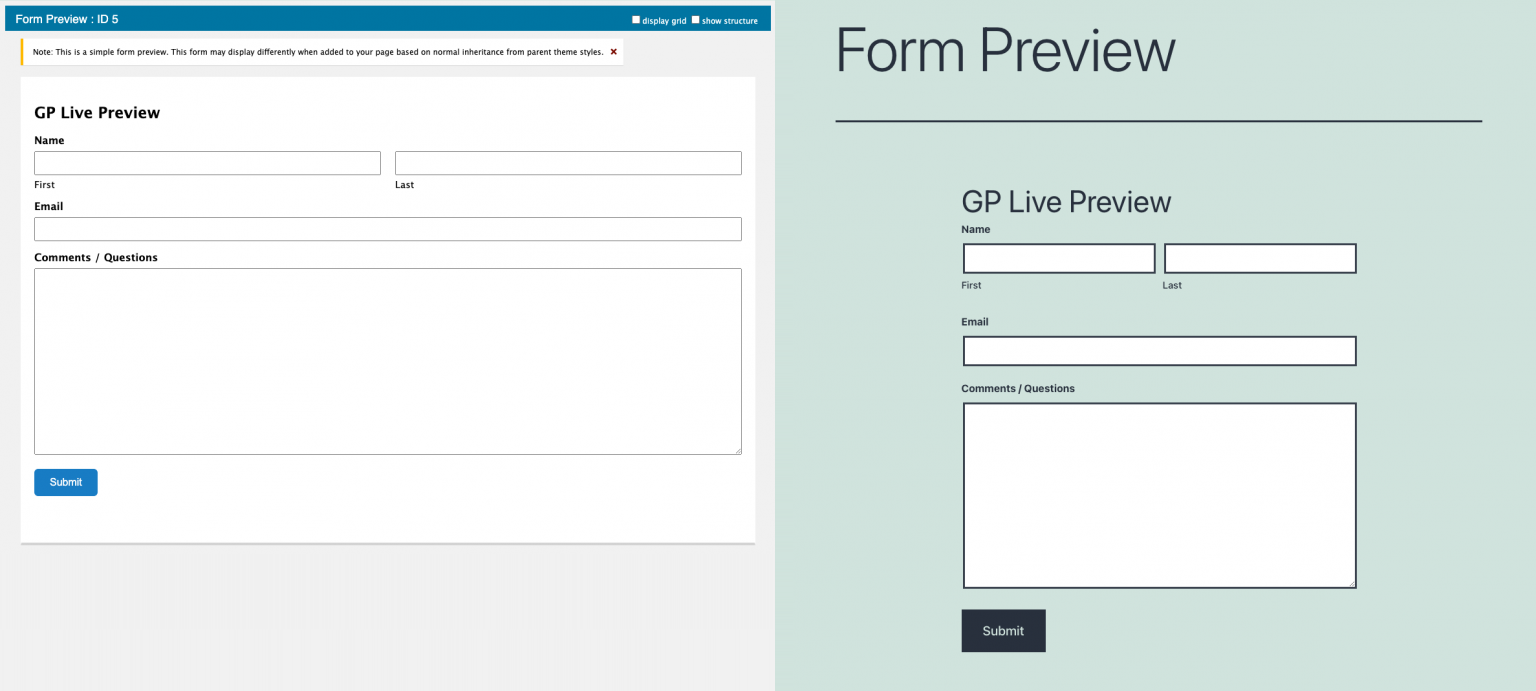
Finally, you can use Gravity Forms Live Preview to preview your Gravity Forms on the front-end of your WordPress website. This saves you from having to add the Gravity Forms shortcode to a test post to preview the live form.
Gravity Forms Live Preview is especially useful for users who frequently create forms and need an easy way to test them before publishing.
Additional benefits of using Gravity Perks
Gravity Perks also offers a variety of additional benefits including a 30-day money-back guarantee, dependable documentation, and excellent customer support.
- 100% 30-day money-back guarantee. Gravity Wiz offers customers a 30-day 100% money-back guarantee. In other words, you can try Gravity Perks risk-free for up to 30 days and claim your refund if you’re not completely satisfied with the features it offers.
- Dependable documentation. Each perk has complete documentation which is kept up-to-date with new releases. This includes a live demo and detailed instructions on how to use it.
- Excellent customer support. The entire Gravity Wiz team provides support for Gravity Perks which means you can rest assured someone will help you resolve any issues you face. It’s worth noting that the Gravity Wiz team also includes a core Gravity Forms developer. You can access the support form by logging into your account.
Pricing Plans
Gravity Perks has three different pricing plans for you to choose from:
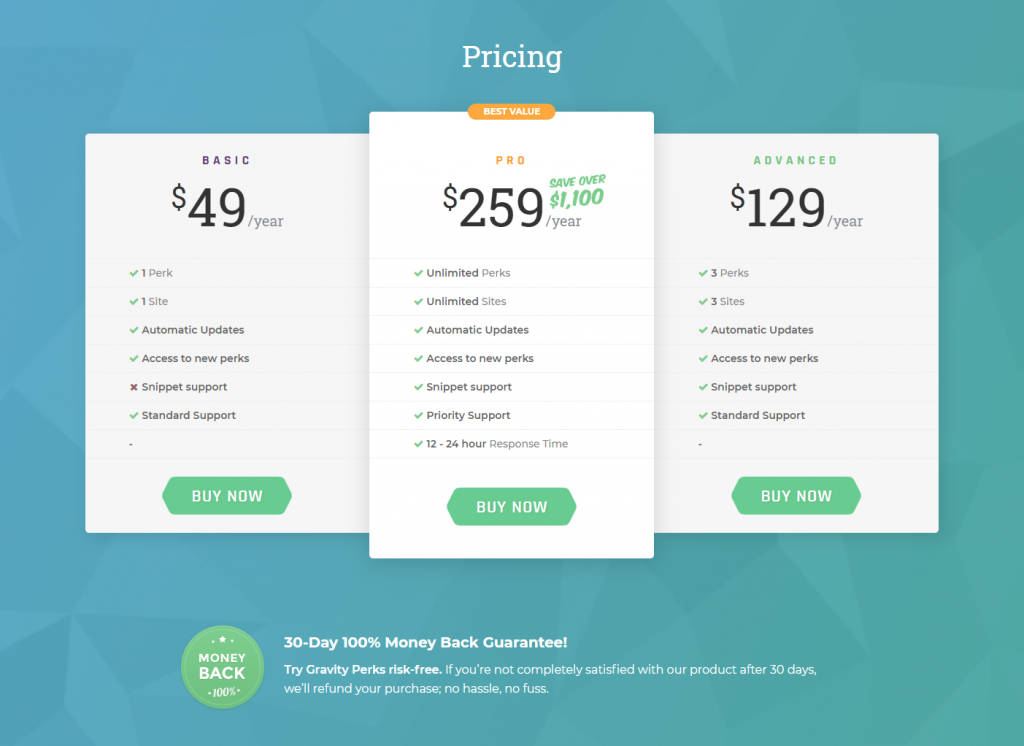
- Basic ($49 per year) which lets you install 1 perk on 1 site.
- Advanced ($129 per year) which lets you install 3 perks on 3 sites.
- Pro ($259 per year) which lets you install all perks on unlimited sites.
Check out Gravity Perks today
You need Gravity Perks to get the full power of Gravity Forms! Buy Gravity Perks today to get galactic Gravity Forms plugins!
With Gravity Perks, you can create all sorts of Gravity Forms examples on your WordPress website without having to mess around with HTML or CSS.
The best part is that there are tons of perks to choose from and they’re incredibly easy to manage from the WordPress back-end. This means you can install whichever ones you’d like to prevent plugin bloat.
To enhance your Gravity Forms, get Gravity Perks today!





Hi, I want to confirm the email in the multi-step form. For example, in the first step, the person’s information will be received, in the 2-step, In the second step, the confirmation email will be sent to the user to be directed to the 3rd-step of the form via the link. Is there such a Add-one or snippet? I need this to create a petition form. I searched a lot but couldn’t find anything. I would be grateful if you could help me with this. Best regards.