How to Use AI to Boost Gravity Forms Moderation (with GC OpenAI)
Prompt: Conjure an AI moderation golem to guard your forms and moderate entries in real time using Gravity Connect: OpenAI. 🤖

- Step 1 — Install and Activate GC OpenAI
- Step 2 — Create a GC OpenAI Feed
- Step 3 — Set Up Moderations Endpoint
- Step 4 — Test Moderation
- You’re all set!
Gravity Connect: OpenAI empowers you to take advantage of OpenAI’s moderation models to review and flag form submissions based on OpenAI’s Usage Policies. It takes the brunt of internet trolls and disrespectful users so that you and your team don’t have to.
But it’s not just about defense—it also helps you move faster. For things like product reviews or job postings, it can automatically screen submissions so you can publish with confidence, without second-guessing what might slip through. Especially if you already want to use GC OpenAI for generating texts, images, and/or audio directly from Gravity Forms, this is a nice little cherry on top.
Let’s see how that’s done using a “Leave a Review” form as an example!
This article requires the Gravity Connect OpenAI plugin.
Buy Gravity Connect to get this plus other premium Gravity Forms plugins!
Step 1 — Install and Activate GC OpenAI
GC OpenAI is part of Gravity Connect and easy to get started with—just install it through Spellbook and hook it up to your OpenAI API. 🪄
Step 2 — Create a GC OpenAI Feed
Head to the form you want to set up moderation for. In the Settings menu, click on OpenAI to get to the GC OpenAI feeds screen. From there, click on Add.
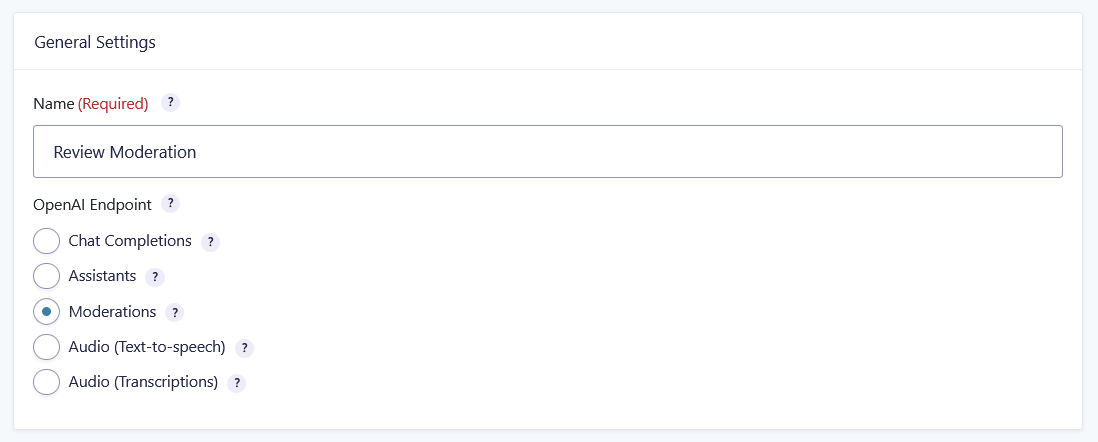
Step 3 — Set Up Moderations Endpoint
Under General Settings, select Moderations as your OpenAI Endpoint.
Moving onto Moderations, you can choose which moderation Model to use. Currently, GC OpenAI offers two endpoints that communicate with the exact same version of the `text-moderation` model, so you can leave the default selected and move on.
Context: OpenAI has recently turned the text-moderation model into legacy in favor of their newest model, omni. Rest assured that the text-moderation model works great, and we will include support for omni in the near future. When that happens, this article will be updated together with the release. Keep an eye on our weekly newsletter for updates—it’s where all the Gravity Forms magic drops first. 😉
Past Model down to Input, use merge tags to decide which fields will be sent to the model. Note that this model does moderation, not generation—only send content that you want moderated. The default is the {all_fields} merge tag.
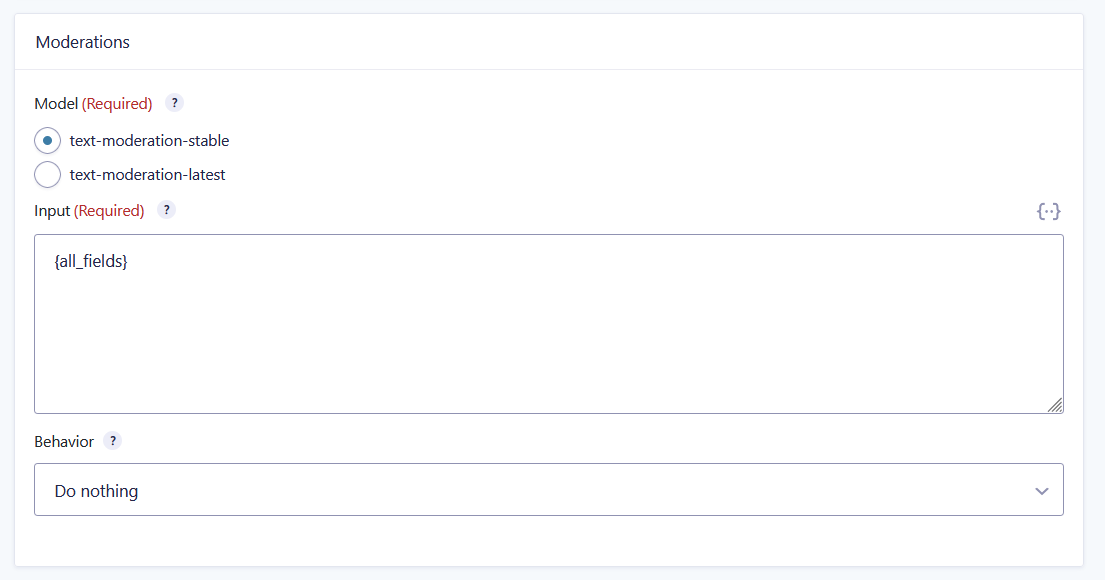
Next, use Behavior to choose what GC OpenAI should do with the entry if it gets flagged by moderation.
How it works: Submissions are scored from 0 to 1 in multiple categories. The higher the score, the nastier the submission is. High-scorers get flagged, GC OpenAI generates a report and can then either:
- Do nothing: Allow the form to be submitted and just have the OpenAI report for reference in the entry meta. (Screenshot below.)
- Mark entry as spam: Allow the form to be submitted, but mark entry as spam. This way you can keep it for additional review and recordkeeping while not running feeds or notifications for it.
- Prevent submission by showing validation error: Block form submission and communicate with the user via validation message. You can personalize this message to fit your use case. The default is
This submission violates our content policy.
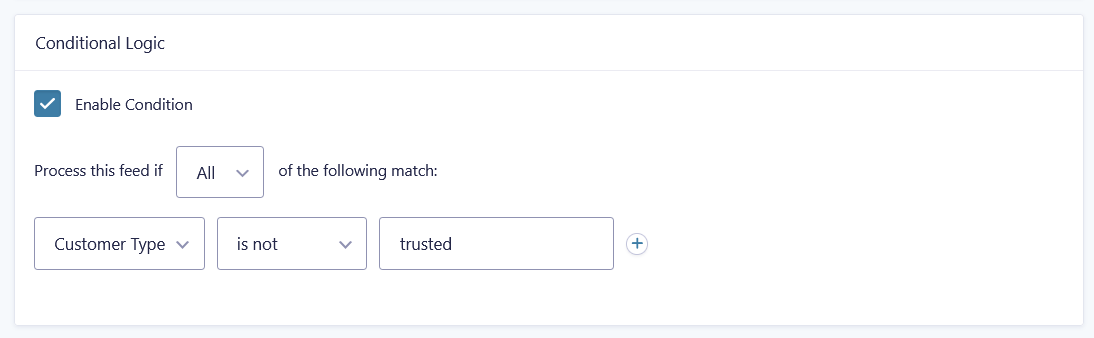
To top it all off, you can use conditional logic to only run the feed when necessary. For example, I have a handful of long-time customers that I trust, so I don’t need to spend OpenAI tokens to moderate their reviews. I set up a custom meta field in their customer profiles to tag them as trusted. Then, added a hidden field and set the default value to {user:customer_type} to be able to use it in the feed’s conditional logic, like so:
Looking for more ways to auto-fill fields based on who’s logged in? Check out How To Populate Data Based on the Current User.
Lastly, under Advanced Settings: Moderations, you can adjust the Timeout setting, aka the number of seconds OpenAI should wait to respond. You’ll typically only need to tweak this if you’re troubleshooting. We recommend giving it a minimum of 5 seconds, which is the default.
Step 4 — Test Moderation
Do your worst! 💩

You’re all set!
Your forms are now protected with the magic of AI. 🪄 If you have any questions about the setup or OpenAI, let me know in the comments!


Hi! This look promising! , But can it screen for spammy content? I don’t see that listed as one of the things it moderates for…
Hey Barbara,
Great question!
Unfortunately, the OpenAI text-moderation-latest model doesn’t include “spam” as one of the categories that it checks content for (see the full list here). With that in mind, we’d be hesitant to recommend this as a complete spam-finding solution.
That being said, if the spammy content you’re receiving on your site often contains this kind of “harmful” content, some additional prompting could potentially turn this moderation into an effective spam-catching tool.
If you’re running into any trouble getting set up, please reach out via Support, and we’ll be happy to discuss this idea further as well as other spam solutions!