Gravity Forms Zip Code Validation: A Step By Step Guide
Learn how to use conditional logic to validate a customer’s postal code before they submit their order.

This article requires the GP Populate Anything perk.
Buy Gravity Perks to get this perk plus 48 other premium Gravity Forms plugins!
If you own a business that has a limited service area, it’s important to limit online orders to that service area. Otherwise, you have to check the delivery address for every order and will likely have to cancel orders that are placed outside of that service area. This leads to more work for you and customer disappointment.
Save yourself the potential headaches with a simple Gravity Forms zip code validation process — allowing you to check a customer’s zip code directly on the order form and prevent form submissions if they fall outside your service area.
In this tutorial, we’re going to show you how to use Gravity Forms to create a simple database of zip codes and validate against that database and populate data from that database into your forms.
Getting Started
In order to have a list of zip codes to validate against, we first need to store them somewhere in the WordPress database. We’ll then use Populate Anything to retrieve that list of zip codes and validate against it. While there are lots of ways to create a database in WordPress, our preferred method is to use Gravity Forms, of course! 🧙♂️
Gravity Forms Zip Code Validation Steps
Step 1 – Create Input Form and Submit Entries
We’re going to create a form specifically to submit entries with zip codes. You might have seen a similar method before in our Using Gravity Forms as a Simple Database article.
Only have a few codes to validate against? Check out our is in operator approach instead.
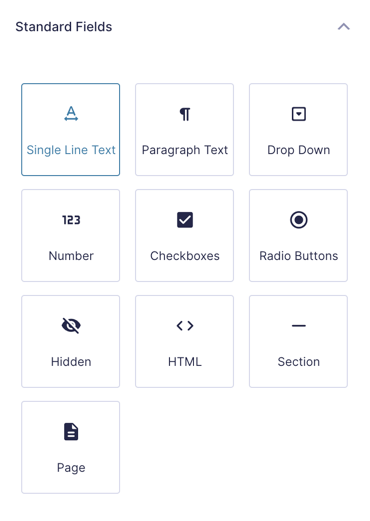
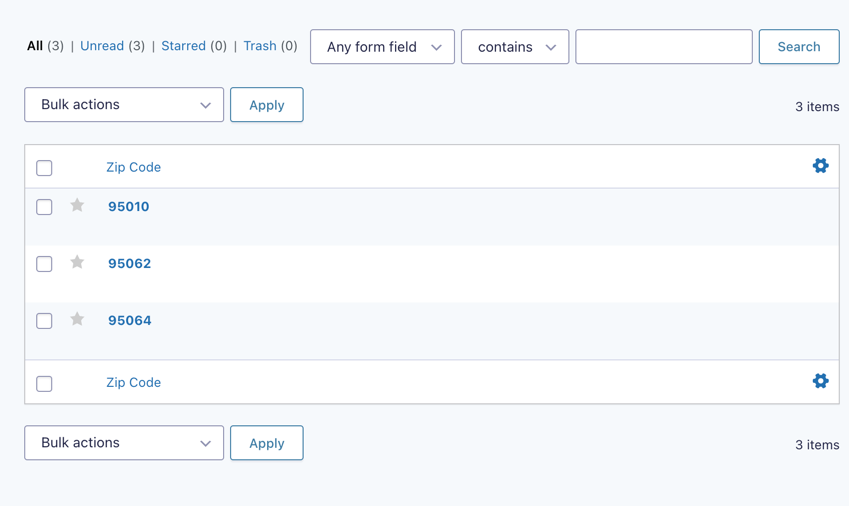
Start by adding a Single Line Text field to your input form. Name it “Zip Code” or “Postal Code,” and start submitting entries. Enter a single zip code per entry.
Once you have entered all of the valid zip codes, you are done with the input form. If you decide in the future to adjust your service area, you can add new entries or delete old ones. Here’s an example of our service area.
Step 2 – Add Zip Code Fields to Customer Form
With the database done, it’s time to add the zip code validation fields to our customer-facing form. Start by adding two Single Line Text fields to your form. Call the first one “Zip Code” and the second “Is Zip Code Valid?”
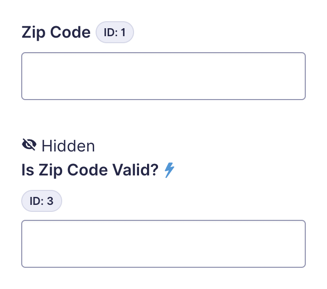
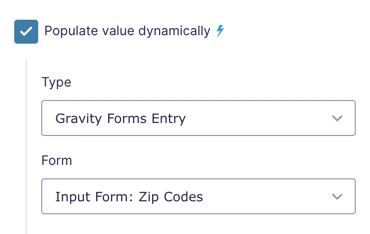
The “Is Zip Code Valid?” field is going to use Populate Anything to check if the entered zip code is stored in the database from the input form we built in Step 1. To do this, first, check Populate value dynamically and set the population type to “Gravity Forms Entry.” Then, select your input form.
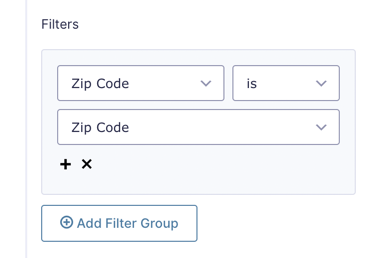
Next, we’ll need to set the Filters so that the “Zip Code” field value entered in this form matches the zip codes stored in the database.
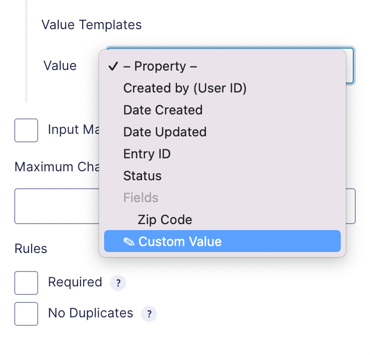
Instead of selecting a field value in the Value Templates, we’re going to insert the {count} merge tag. This will count the number of values that match our filtering, which we will use for Conditional Logic. To do this, first select Custom Value from the drop down, then insert the merge tag.
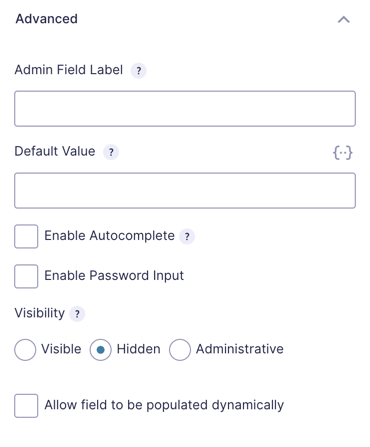
Lastly, set this field’s Visibility to Hidden. Your customers don’t need to see this field on the form.
In this example, we’re using a Single Line Text field for the zip code, but this method would also work with Address fields and some adjustments to the Conditional Logic.
Step 3 – Add Validation Messages
With the population sorted, the next step is to add validation messages. We’re going to add two for our form, one for success and one for failure. I like to end on a high note, so we’ll start with the failure message. 😁
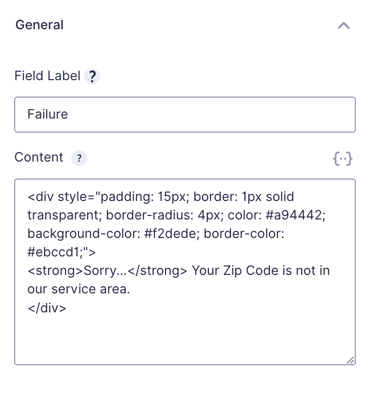
Zip Code Validation Failure Message
Add an HTML field to your form and insert your message for when the user’s zip code falls outside your delivery area. I like to style mine a bit, so there’s some additional CSS included.
Enable Gravity Forms Conditional Logic on this field and use the following settings to only show it when the zip code doesn’t exist in our database.
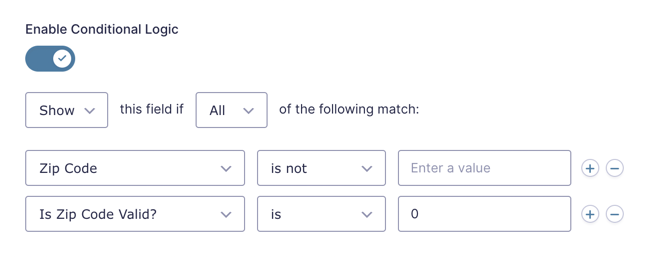
The conditional logic we’re using checks to see if the user has submitted a zip code into the “Zip Code” field and then checks the “Is Zip Code Valid?” field for any value outside of 0. Since we’re using the {count} merge tag in the Value Template, it will return 0 if the zip code doesn’t exist in the database, and 1 of it does.
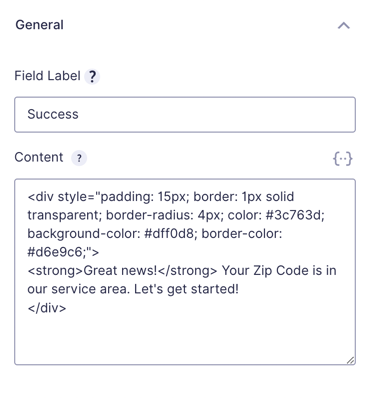
Zip Code Validation Success Message
The success message is set up similarly to the failure message, but with slightly different conditional logic. Below is my success message HTML.
And here you can see the conditional logic settings.
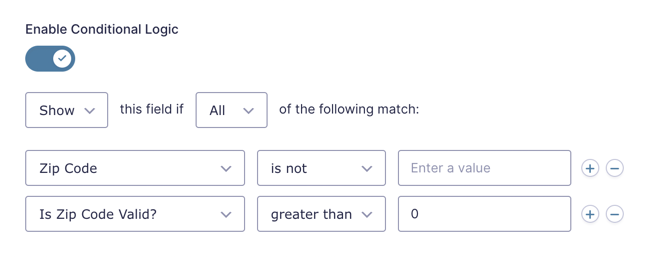
As you can see, the “Zip Code” field logic is identical, but this time we’re checking the “Is Zip Code Valid” field for values greater than 0. {count} will return 1 when the zip code exists in the database, so using greater than has the advantage of still triggering the conditional logic even if you accidentally enter the zip code more than once when building your database.
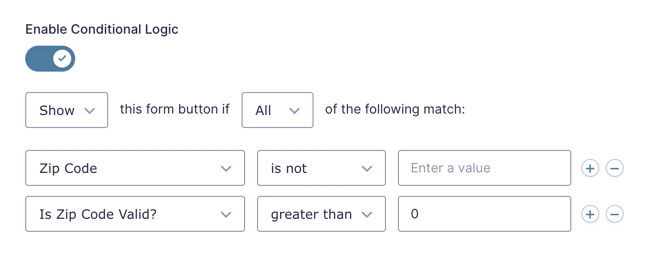
Step 3 – Set up Conditional Logic on Submit Button
The last step is to set up conditional logic on the Submit button. This will hide the Submit button when the entered zip code isn’t valid, preventing the customer from placing an order that we can’t fulfill.
The conditional logic rules match our success validation message exactly. We’ll show the button when there is an entered zip code and that zip code is found in the database.
Ready For Orders
With everything in place, our form is ready to take orders. When someone enters their zip code, the database checks to see if their zip code is within our delivery area. If it is, we show them a message and display the submit button; if not, they see a failure message and the submit button is hidden.
An Alternate Approach
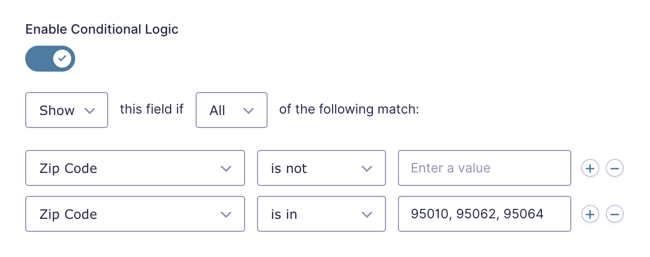
The Populate Anything approach is perfect when you have many zip codes, but if your service area only includes a handful of postal codes, you may find our “is In” conditional logic operator to be an easier option. We wrote a snippet that adds the operator to conditional logic for any field that supports it.
Once installed, using the operator is easy. In the success message conditional logic, select the “is in” operator and insert your zip codes as a comma-delimited list.
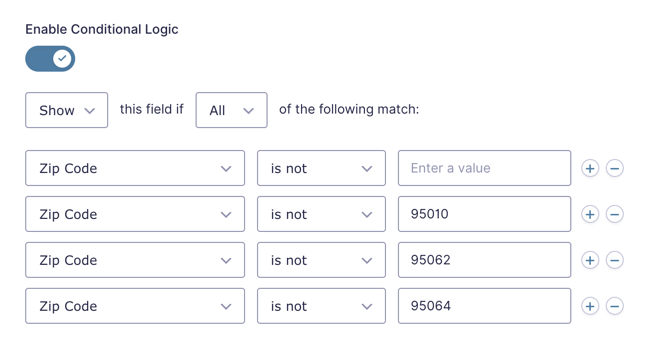
For the failure message, you’ll need to add multiple conditions to show the message if the zip code doesn’t match.
You’re good to go. Have questions? Reply in the comments or shoot us a message!
More on Gravity Forms Validation
Gravity Forms Email Validation — learn how to check an email live as a form is being filled out, without having to hit submit.
Gravity Forms for Age-Verification — how to set up age-based validation (often used for products like Alcohol).
Gravity Forms Advanced Phone Field — A Gravity Forms add-on for validating phone numbers in real time, detecting country codes automatically, improving up your Phone field with modern visuals.
Make Your Gravity Forms Validation Errors Mobile Friendly(er) — improve Gravity Forms validation errors for mobile users by automatically focusing on the first field with a validation error.
Require an Existing Value for Submission with Gravity Forms — ensure that a value entered in Form B has been previously submitted (or generated) on Form A.


I am lost I see in advanced allow field to be populated dynamically I checked that. I do not see type and form where is that? Next where is Value Templates I do not see that either. I have Gravity Forms version 2.9.16. I id download the plugin and uploaded it. Please do step by step if possible.
Hey Chris,
Great question! The “Allow this field to be populated dynamically” option is part of Gravity Forms itself, but it’s different from GP Populate Anything’s “Populate value dynamically” feature.
To use Type, Form, and Value Templates, you’ll need to have GP Populate Anything installed and activated. Once it’s active, you’ll see those extra options when editing a field in your form.
GP Populate Anything: https://gravitywiz.com/documentation/gravity-forms-populate-anything/
Is there an option to bulk import hundreds of zip codes OR use a csv file to cross reference valid zip codes?
Hey Malik,
To directly bulk import hundreds of zip codes as entries, realistically, your best option is GravityImport. With that plugin, in Step 1, you could import hundreds of codes directly from a CSV, and then follow the rest of this tutorial the same way.
That being said, if you were thinking about some more advanced functionality down the road, you could instead upload your CSV as a Google Sheet, and then use GC Google Sheets and GP Populate Anything to make those zip codes searchable, etc. If you have any follow-up questions, feel free to reach out via Support, and we’d be happy to show off some more of those advanced features!
If using a multi-page form and the zip code is the only input on the first page, can you add the conditional logic to the “Next” button on the first page, rather than adding the conditional logic to the “Submit” button on the second page?
Hi Steve,
The conditional logic should work on the navigation buttons, just as it does on the submit button. If you experience anything different, please submit a ticket for this via our support form so we look have a closer look at your form setup.
Best,
Hello. I am using ADDRESS AUTOCOMPLETE Perk with the first approach proposed here.
Unfortunately, Google Maps passes sometimes 5 digit zipcodes (99999) and sometimes 5 digits plus the secondary 4 (99999-9999)
When the latter happens, I cannot find any logical operator that can help me find the code without having to populate all variants of the ZIp Codes in expanded form.
Is there a way to only compare to the first 5 digits passed by GOOGLE?
Hi Marcos,
We have a snippet to trim the zip to the first 5 digits, which should work for here. Here’s the link to the snippet page with details on how to add it to your form.
I hope this helps.
Best,
Awesome tutorial thanks! There’s one little tweak that I think helps. On the conditional formatting for the validation messages, I added an additional condition of: Zip Code – Greater Than – 5 This way the message doesn’t show until someone has entered all 5 digits of the zip code. I found without it the validation message was showing prematurely that there was no match.
Cheers.
I couldn’t quite get that to work, Peter. Well, it works for the success message but the failure message never shows. Got a screenshot of your exact settings?
I’d be interested in this solution as well! Everything works well for our purpose, but this would make it perfect!
Hi,
I want to have a look at your setup to confirm what you have and see if we can assist you with a solution. I’ll be reaching out to you via email to assist you further.
Best,
just set conditional on the verify zip code field to show only if grater than 9999 which would require 5 digits in text value of zip code field and that way it won’t trigger message until 5th digit is entered
This tutorial looks fantastic! I have one Question before I start making changes to my forms.
Is there a way to setup different Shipping cost depending on Zip Code, using this Guide?
Hi Jesper, we’ve already followed via email. The closest we have is this snippet. A simple method for using a Calculated Product field (or User Defined Price field) as a shipping field.
This tutorial looks fantastic, and I’m thrilled to get started with it! Can I use these features with a basic license
Hi,
Only the GP Populate Anything Perk is required for this setup, so the Basic license should be enough.
Best,
Hi, Great tutorial!
Would this work if I had a very large list of zip codes? For example 20,000?
Thanks
Hi Malcolm, yes, it should work for a list of 20,000 zip codes 🔎.
Here if you have any questions.
Is there a reverse code snippet possible? I need “not In” instead of “is in” condition
Hi Anjon,
We currently do not have a snippet for “not in” condition. If you have an active Pro license, you can contact us via our support form and submit a snippet request for this.
Best,
Is it possible to have multiple success messages?
For example: Based on the zip code or zip code range, the success message would display different information. Only need one failure message but the success message would differ based on the zip code.
Hi Jennifer,
Since the text of the success message is within an HTML field, you can use multiple HTML Fields and set up the conditional logic them to show each based on specific zip codes.
I hope this helps.
Best,
Hello I need to check if the entered zip code begin as a zip code stored in database Example : We store in database : 44,55,60,72,… as zip codes
Now I want to validate 44100, will this works ?
Thank you
Hi,
Not exactly, because this tutorial populates from a Gravity Forms Entry. If you have the values saved on a Database table you will need to tweak it a bit for Populate Anything to populate the data from the Database instead. If you have an active Gravity Perks License, you can get in touch with us via our support form so can dig into this.
Best,
Hello, Thank you for your reply, you haven’t understand me The data is populated via the Gravity form plugin, but i don’t add all the zip code (5 digits) but only the 2 first digits. When a customer try to valid a zip code (5 digits), the system must check if it begins by the good digits.
Example: 44 added via gravity form and want to be able to validate 44100 Good (begins with 44), 95000 Not good (not begins with 44)
If this is Ok, i will take a license.
Hi,
You could do this using the “Starts With” conditional logic operator. Something like this should do the trick.
I am stuck on the first step. It says … and start submitting entries… where should I submit the entries?
“Start by adding a Single Line Text field to your input form. Name it “Zip Code” or “Postal Code,” and start submitting entries. Enter a single zip code per entry.”
Hi Ruslan,
You can submit the entries by previewing the form on the backend and completing it one after the other.
Best,
I was wondering, isn’t the Alternate Approach much faster when you have a big list of zipcodes in stead of filling in every zipcode in single line field? My client has 100 zipcodes for instance. Or am I missing something here?
Hi Marco,
Yes and no. With the IS IN operator, you will need to add the values in the Conditional Logic of the form. Evaluating Conditional Logic is much less performant than using Populate Anything.
I hope this helps!
Best,
Forget this reply. I see it now. I was hoping to have an easy way to import a lot of zipcodes at once.
Marco
Excellent tutorial Scott! This give me a lot of idea on how to implement validation on all sorts of fields. Thanks!
Hi Veronique,
You’re welcome.
Cheers,