How to Add a Slider Field to Gravity Forms
Add a draggable slider field to Gravity Forms so users can slide their way to a value or range instead of typing one in.

Collecting numeric values in Gravity Forms, like ratings, budget ranges, or anything users need to pick from a range? You could ask them to type their answers into a Number field, and it works.
Or… you could give them a slider with a draggable handle (or two) and let them slide their way to an answer instead. Same data, just more interactive and fun to fill out. 🎚️
Let me show you how Gravity Forms Sliders brings all of that to Gravity Forms — let’s get slidin’.
This article requires the Gravity Forms Sliders perk.
Buy Gravity Perks to get this perk plus 48 other premium Gravity Forms plugins!
How Do Slider Fields Work in Gravity Forms?
Gravity Forms Sliders (aka GP Sliders) adds a dedicated Slider field to Gravity Forms where users drag a handle to pick a value instead of typing one.
It comes in two modes: a single handle for selecting one value, or two handles for capturing both ends of a range.
You can also enable slider mode on any existing Number or Quantity field, handy when you want a slider without adding a new field.
What You’ll Build
- A single-handle slider for selecting one value
- A two-handle slider for capturing a start and end value
- A slider that snaps to set steps within a defined minimum and maximum
What You’ll Need
- Gravity Forms (any license)
- GP Sliders installed via Spellbook — Gravity Wiz’s free plugin manager
- To install, open Spellbook › activate GP Sliders.
- A Gravity Form to add the slider to
How to Add a Slider Field to Your Form
We’ll use a budget range picker as our example — a slider that lets users drag between $500 and $5,000 in $500 increments.
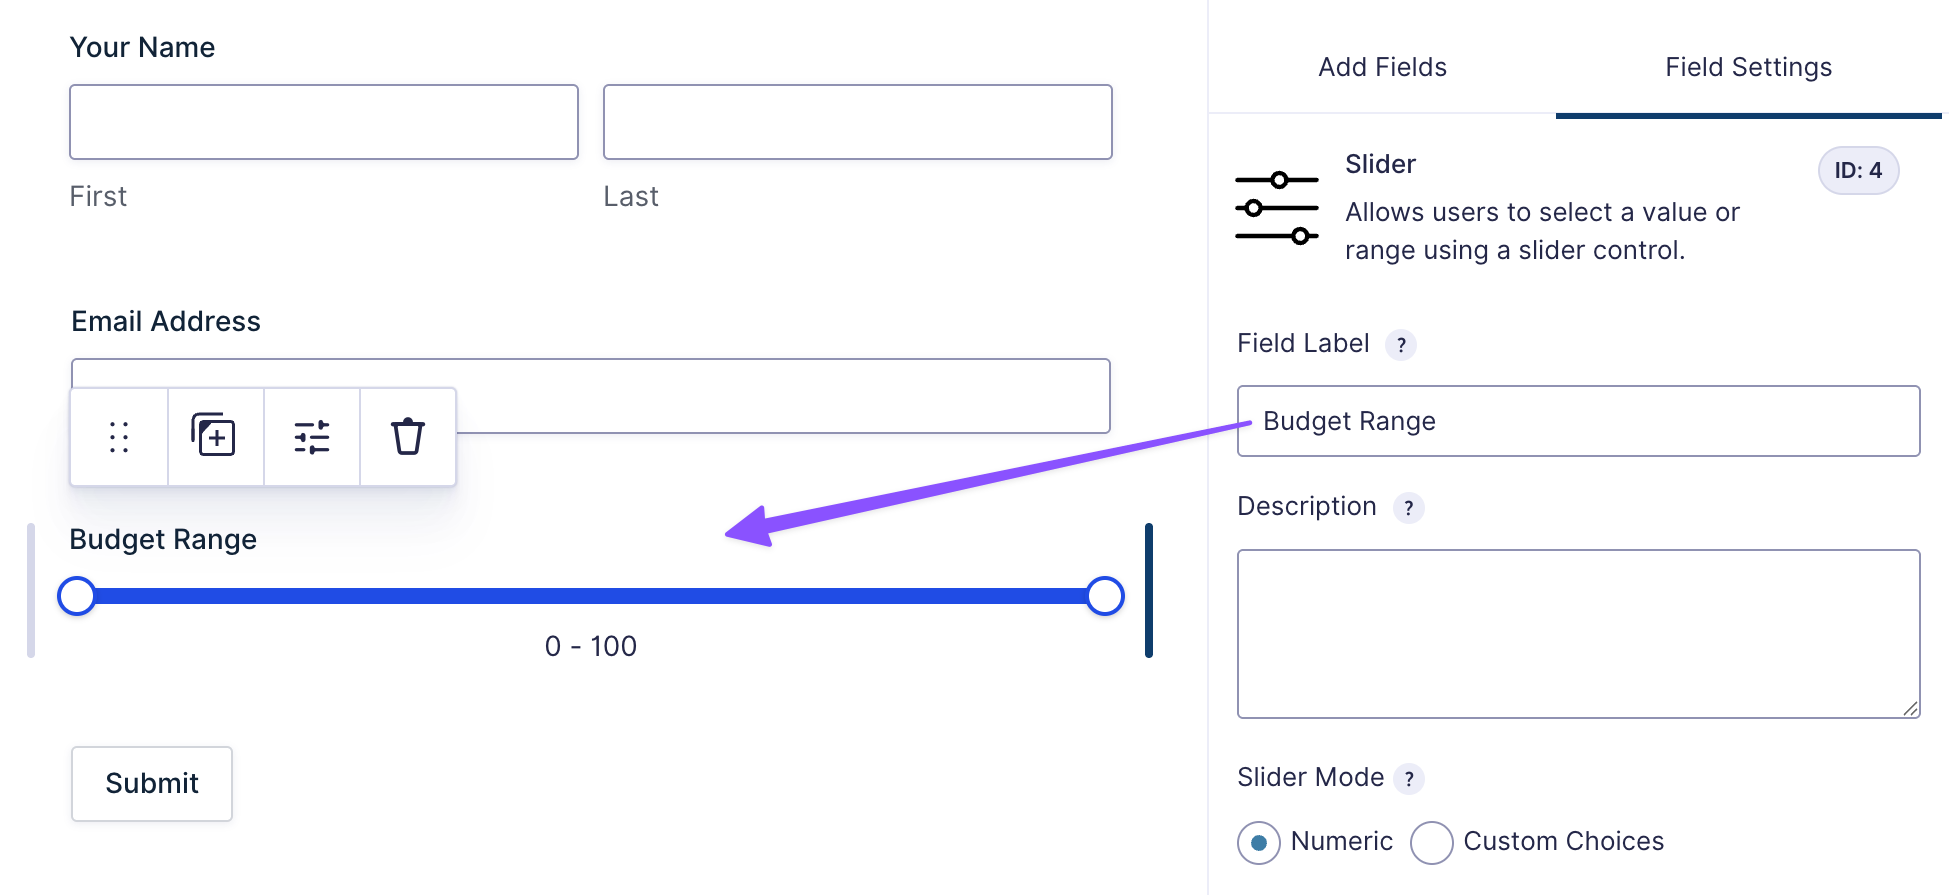
1 — Add a Slider Field
In your form editor › open Advanced Fields › drag a Slider field into the form.
Give it a clear label like “Budget Range.”
You can also enable slider mode on an existing Number or Quantity field via the Perks tab (single handle only). For two handles, use the dedicated Slider field.
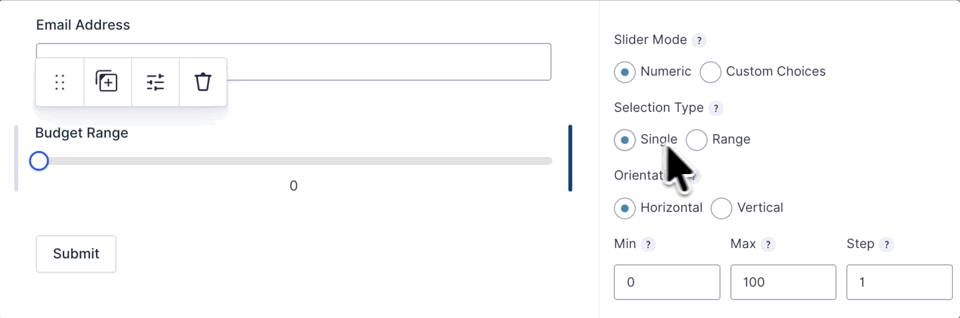
2 — Choose Your Selection Type
In the field settings, find Selection Type and pick the one that fits your use case:
- Single — one handle, one value
- Range — two handles, a start and an end
For our budget picker, go with Range.
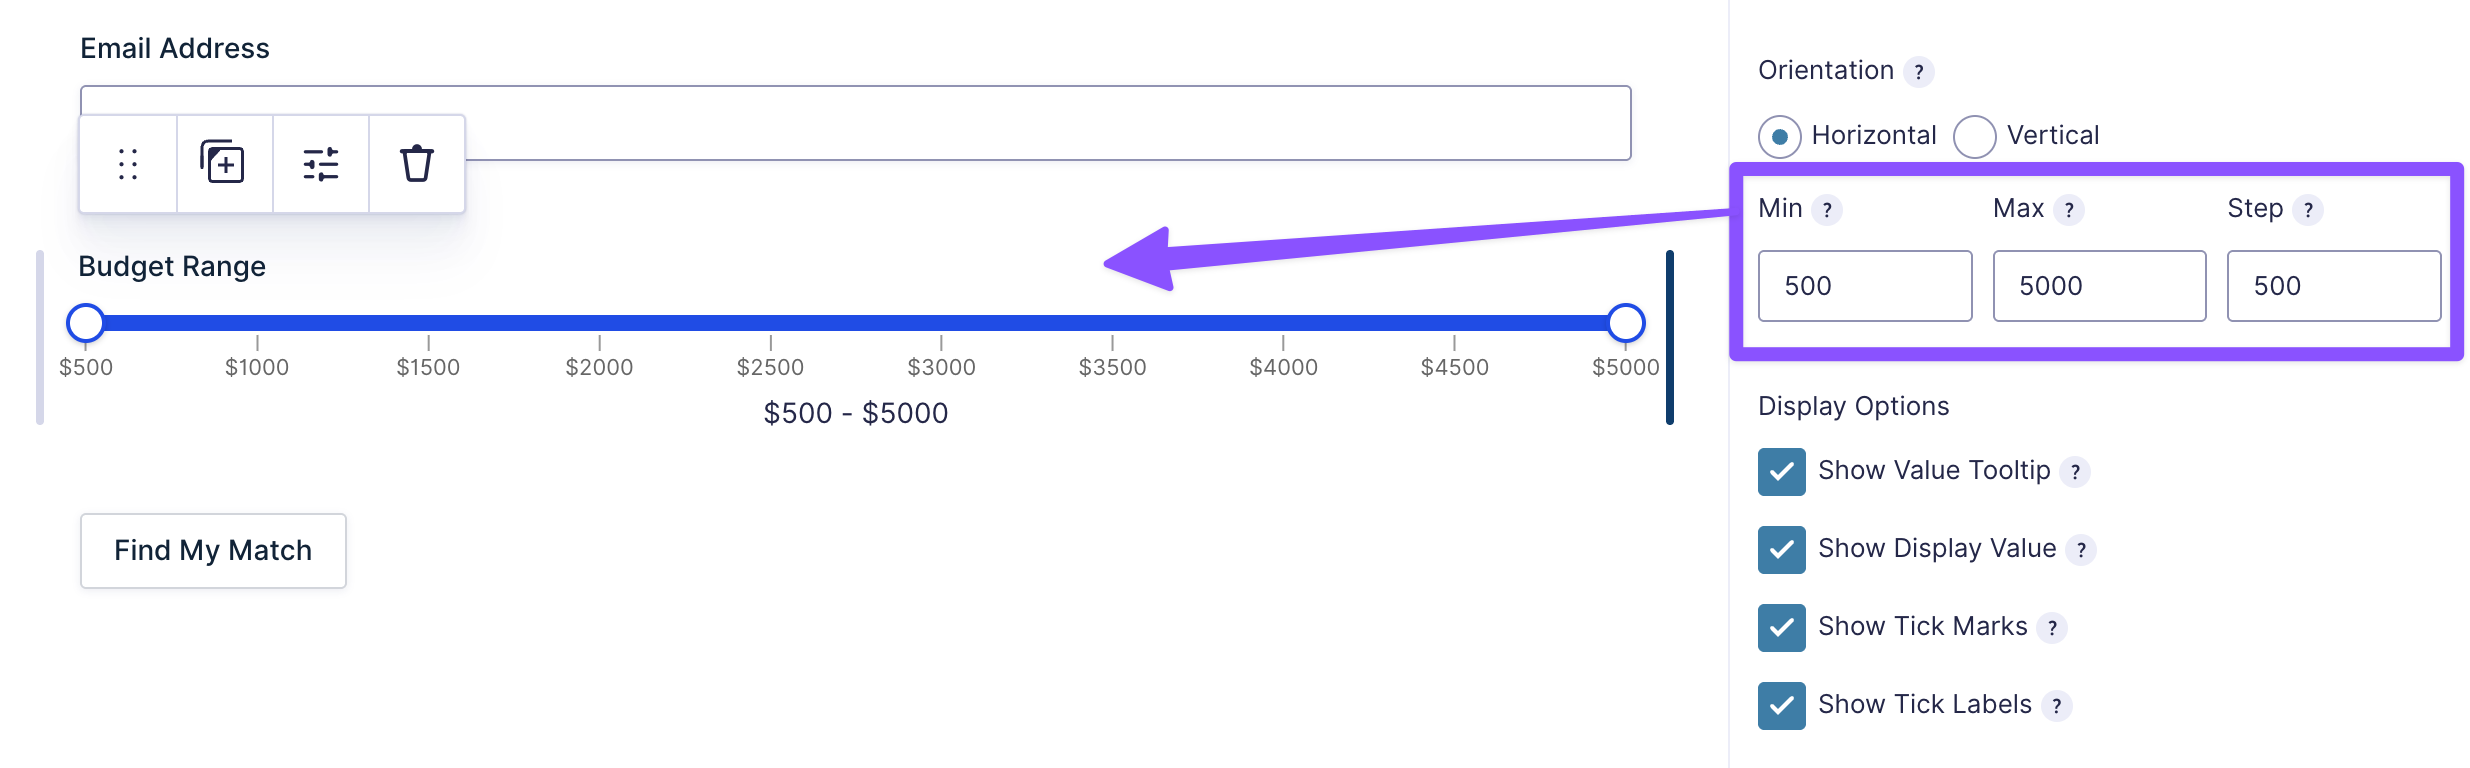
3 — Set Your Min, Max, and Step
Min and Max define where your slider starts and ends. Step is how far it moves with each drag.
For example, set Min to 500, Max to 5000, and Step to 500 — that’s a slider moving in $500 increments between $500 and $5,000.
Pro Tip
Check Show Tick Marks or Show Tick Labels (or both) so users can see where they’re landing.
Smaller steps feel smooth and continuous. Bigger steps snap to clear stops — useful for price tiers or anything with fixed intervals.
4 — Set Up Formatting
Under Formatting › add a Prefix or Suffix to make the displayed value readable.
For example, adding a $ prefix gives you $500 to $5,000 on the form.
Formatting is display only. The entry stores clean numbers. What shows as $500 to $5,000 saves as 500 and 5000.
5 — Test It
Preview the form › drag the handle(s) › and submit a test entry.
Open the entry in Gravity Forms and confirm the value(s) are stored correctly.
Ready to put those values to work?
Pull them into notifications, confirmations, or calculations using merge tags. Use {:[field_id].1} for a single value or range start, and {:[field_id].2} for the range end.
Just replace field_id with the actual ID number shown in the top right corner of the field settings. For example, if your Slider field ID is 3, your merge tags would be {:3.1} and {:3.2}.
Taking It Further
A few things worth exploring once your slider is set up.
- Want to use slider values in a calculation? Slider values work natively with Gravity Forms’ built-in calculation fields — add a Number field, set to Calculate, reference the slider by its merge tag, and the math updates as users drag.
- Want labeled steps instead of numbers? Switch Slider Mode to Custom Choices to replace numeric values with your own labels, like Poor, Fair, Good, Excellent. Users see readable labels — entries store the numerical value you assign to each choice. Great for surveys and rating scales.
Key Takeaways
- With GP Sliders, you can replace any number input with a draggable slider — single handle for one value, two handles for a range.
- You can display slider values with prefixes, suffixes, and formatting without affecting what gets stored in the entry.
- Slider values work natively in Gravity Forms calculations, so totals and scores update live as users drag.