How to Filter Gravity Forms Spam with AI

Get Spam Hexer to filter Gravity Forms spam with AI, even the kind sneaky enough to pass the human test. 🤖
Spam has gotten better at pretending. Not in the obvious, bot-like way, but the kind that reads like it was written by an actual person (with manners).
And that’s exactly what Spam Hexer, our free spam-fighting plugin for Gravity Forms, was built to catch. It blocks most bots automatically, quietly, before they ever get the chance to submit.
But every so often, something slips past. So let’s hex it. 🪄
How Spam Hexer Works
First, Spam Is Blocked Before It Even Reaches You
Proof of Work is Spam Hexer’s first layer. It asks a visitor’s browser to solve a small puzzle before their submission goes through, invisible and instant for real visitors, but a dead end for most bots.
If it ever feels too strict or too loose, you can change the Proof of Work protection level and what happens to failed submissions on each form.
Then, AI Catches Whatever Slips Through
Some bots get through anyway, and so does spam that a real person typed themselves. That’s where AI Classification picks up, checking whether a submission actually makes sense, not just who or what sent it.
It scores every submission from 0 to 100% by how likely it is to be spam. Once that score crosses your set threshold, Spam Hexer flags, rejects, or blocks it — whichever you’ve chosen.
Already using Akismet or another spam solution?
We put together a side-by-side comparison of Gravity Forms spam solutions if you’re weighing your options.
What You’ll Need
- Gravity Forms (any license)
- Spam Hexer, installed via Spellbook, Gravity Wiz’s free plugin manager
- To install: open Spellbook › search Spam Hexer › click Install
Setting Up AI Classification in Spam Hexer
Spam Hexer can protect more than just your forms, it covers WordPress comments too. In this article, we’ll focus on forms, but the same AI Classification setup applies either way.
We’re also working from the global settings — Gravity Forms Settings › Spam Hexer — which apply to every form by default. Each form has its own Spam Hexer settings too, in case you ever want different behavior for one form specifically.
1 — Connect an AI Provider
Once you’re in the Spam Hexer global settings › click the AI Provider tab. In the AI Provider Mode dropdown, you’ll see two ways to connect your choice of AI:
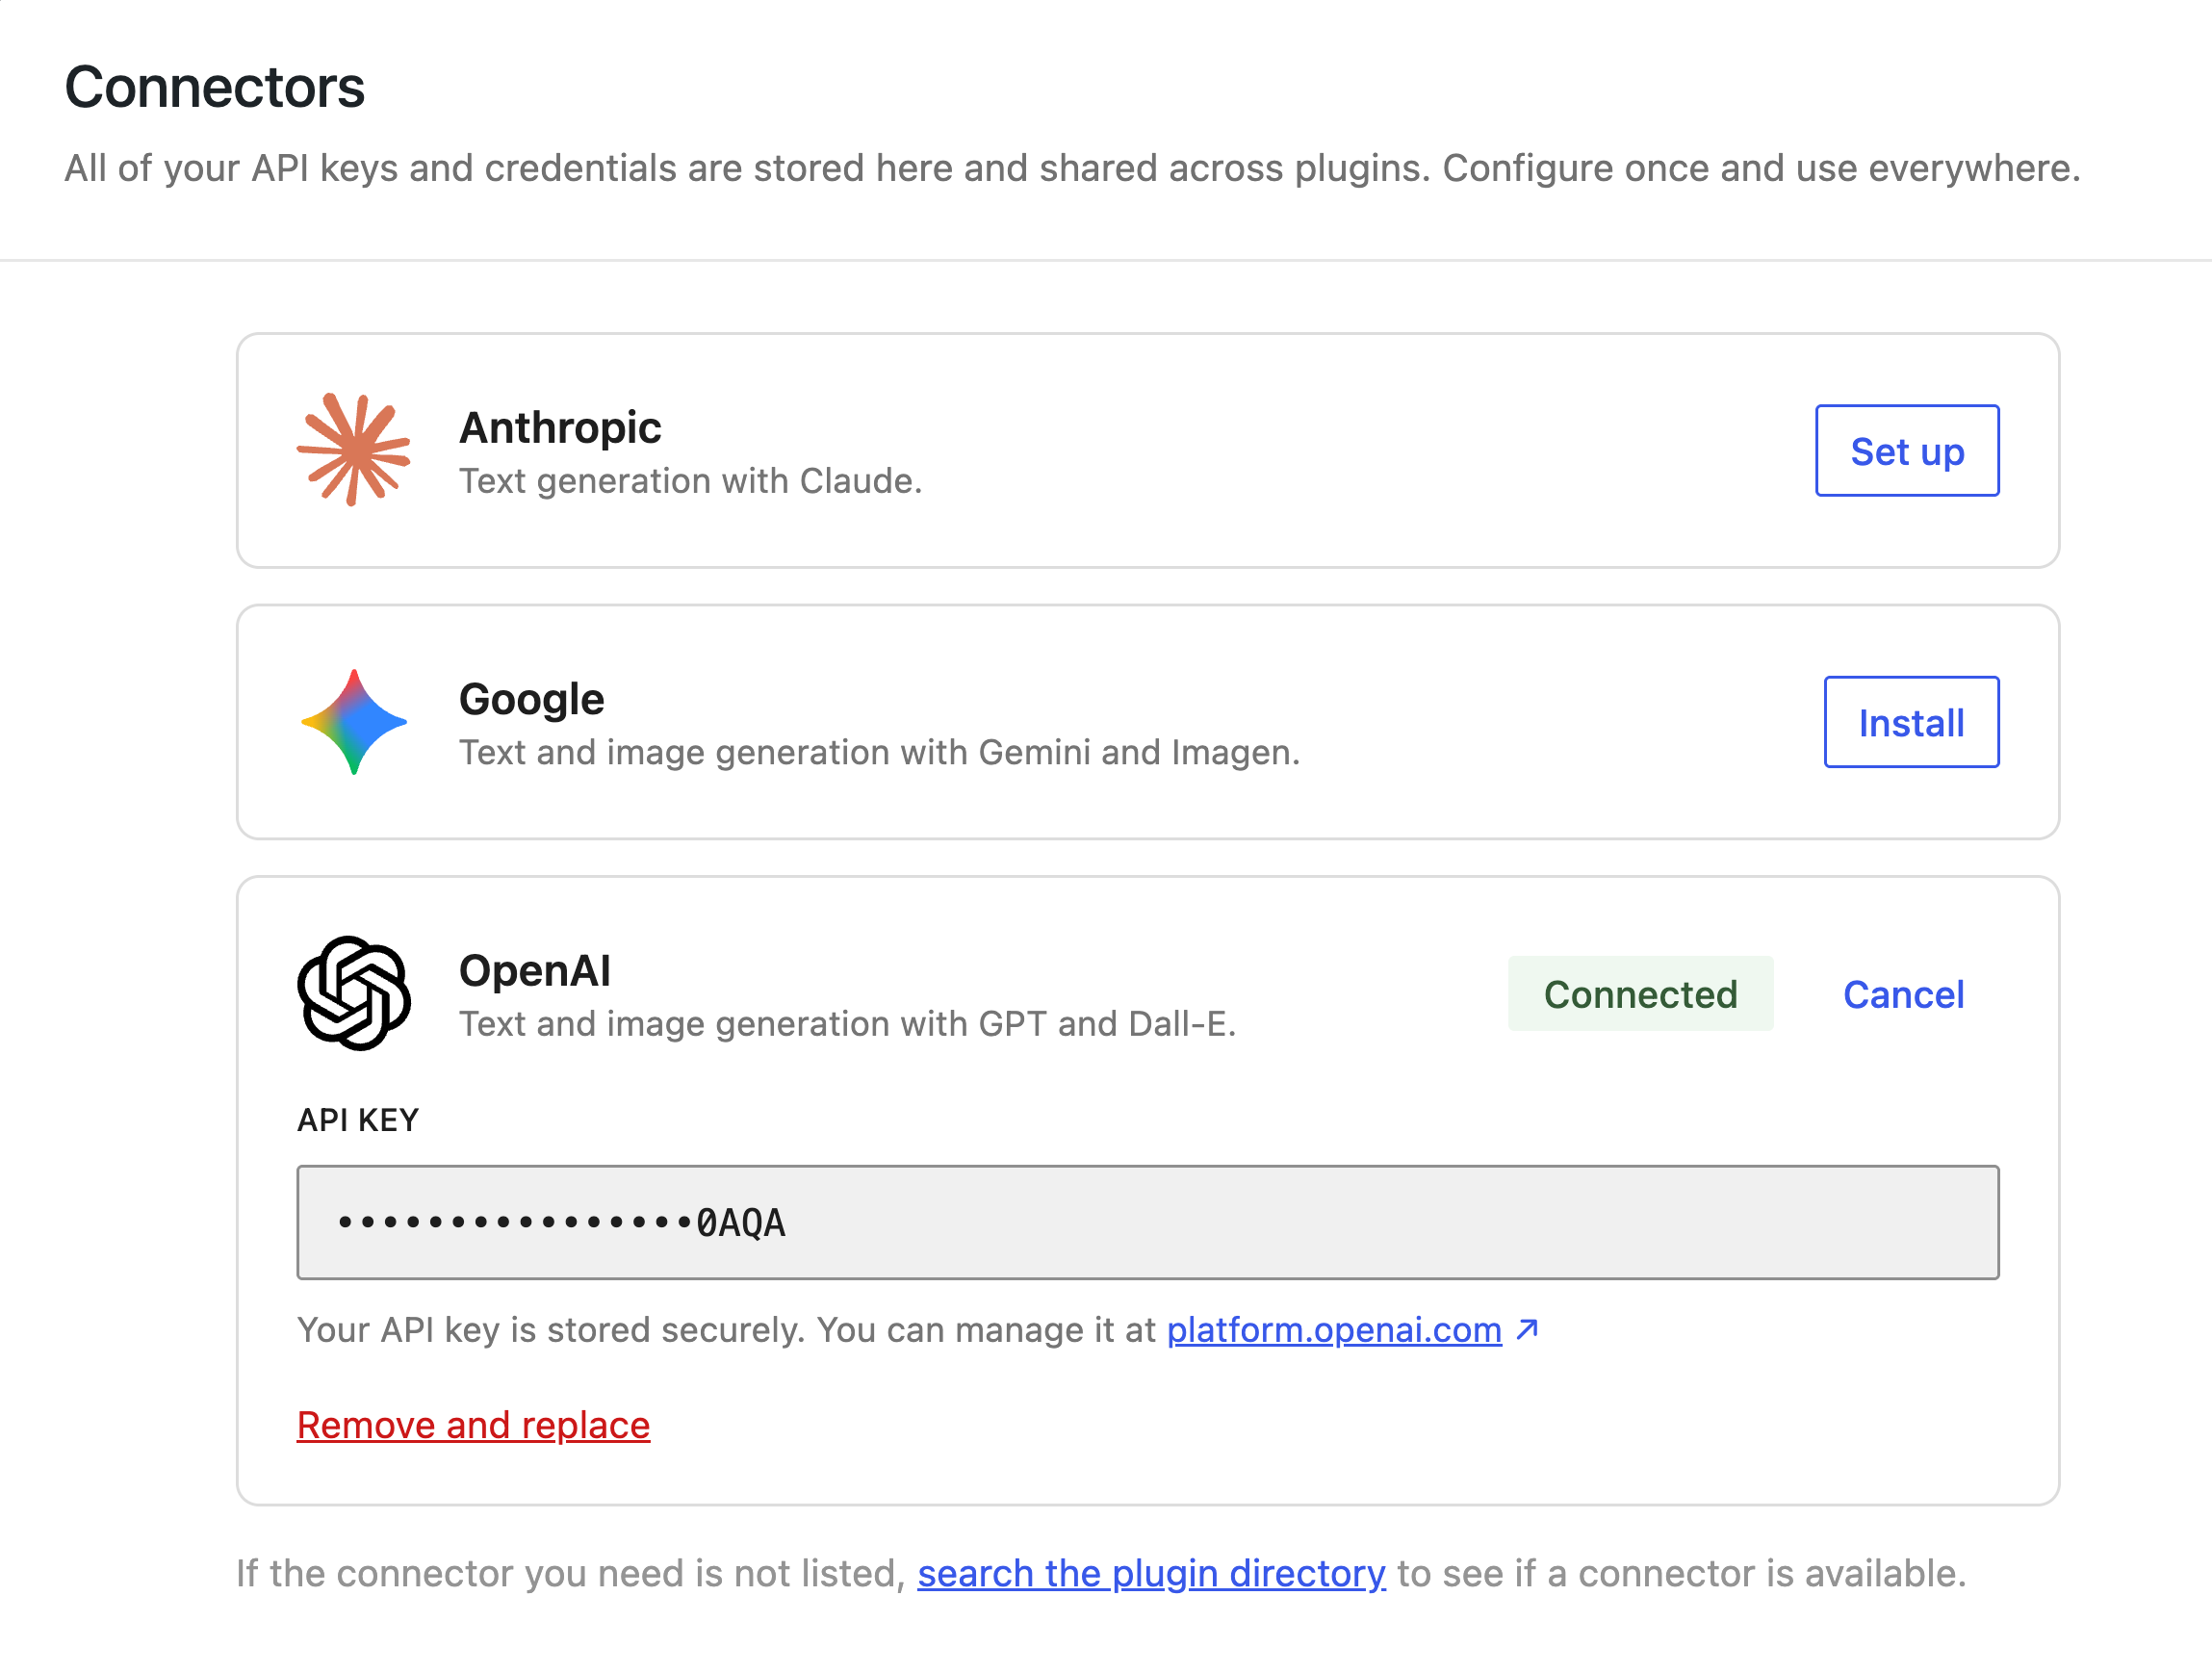
- WordPress AI Client uses WordPress Connectors, letting you connect an AI provider to your site once and share that same connection across any compatible plugin:
- Head to WordPress Settings › Connectors and connect an AI provider (Anthropic, Gemini, or OpenAI).
- Back in Spam Hexer › select WordPress AI Client from AI Provider Mode.
- OpenRouter (Direct) connects you to a wide range of AI models using a single API key, instead of setting up a separate connection for each provider:
- In the AI Provider Mode dropdown › select OpenRouter (Direct).
- If you don’t have one yet, grab an API key from openrouter.ai/keys and paste it in.
- Choose or add the model you want Spam Hexer to use.
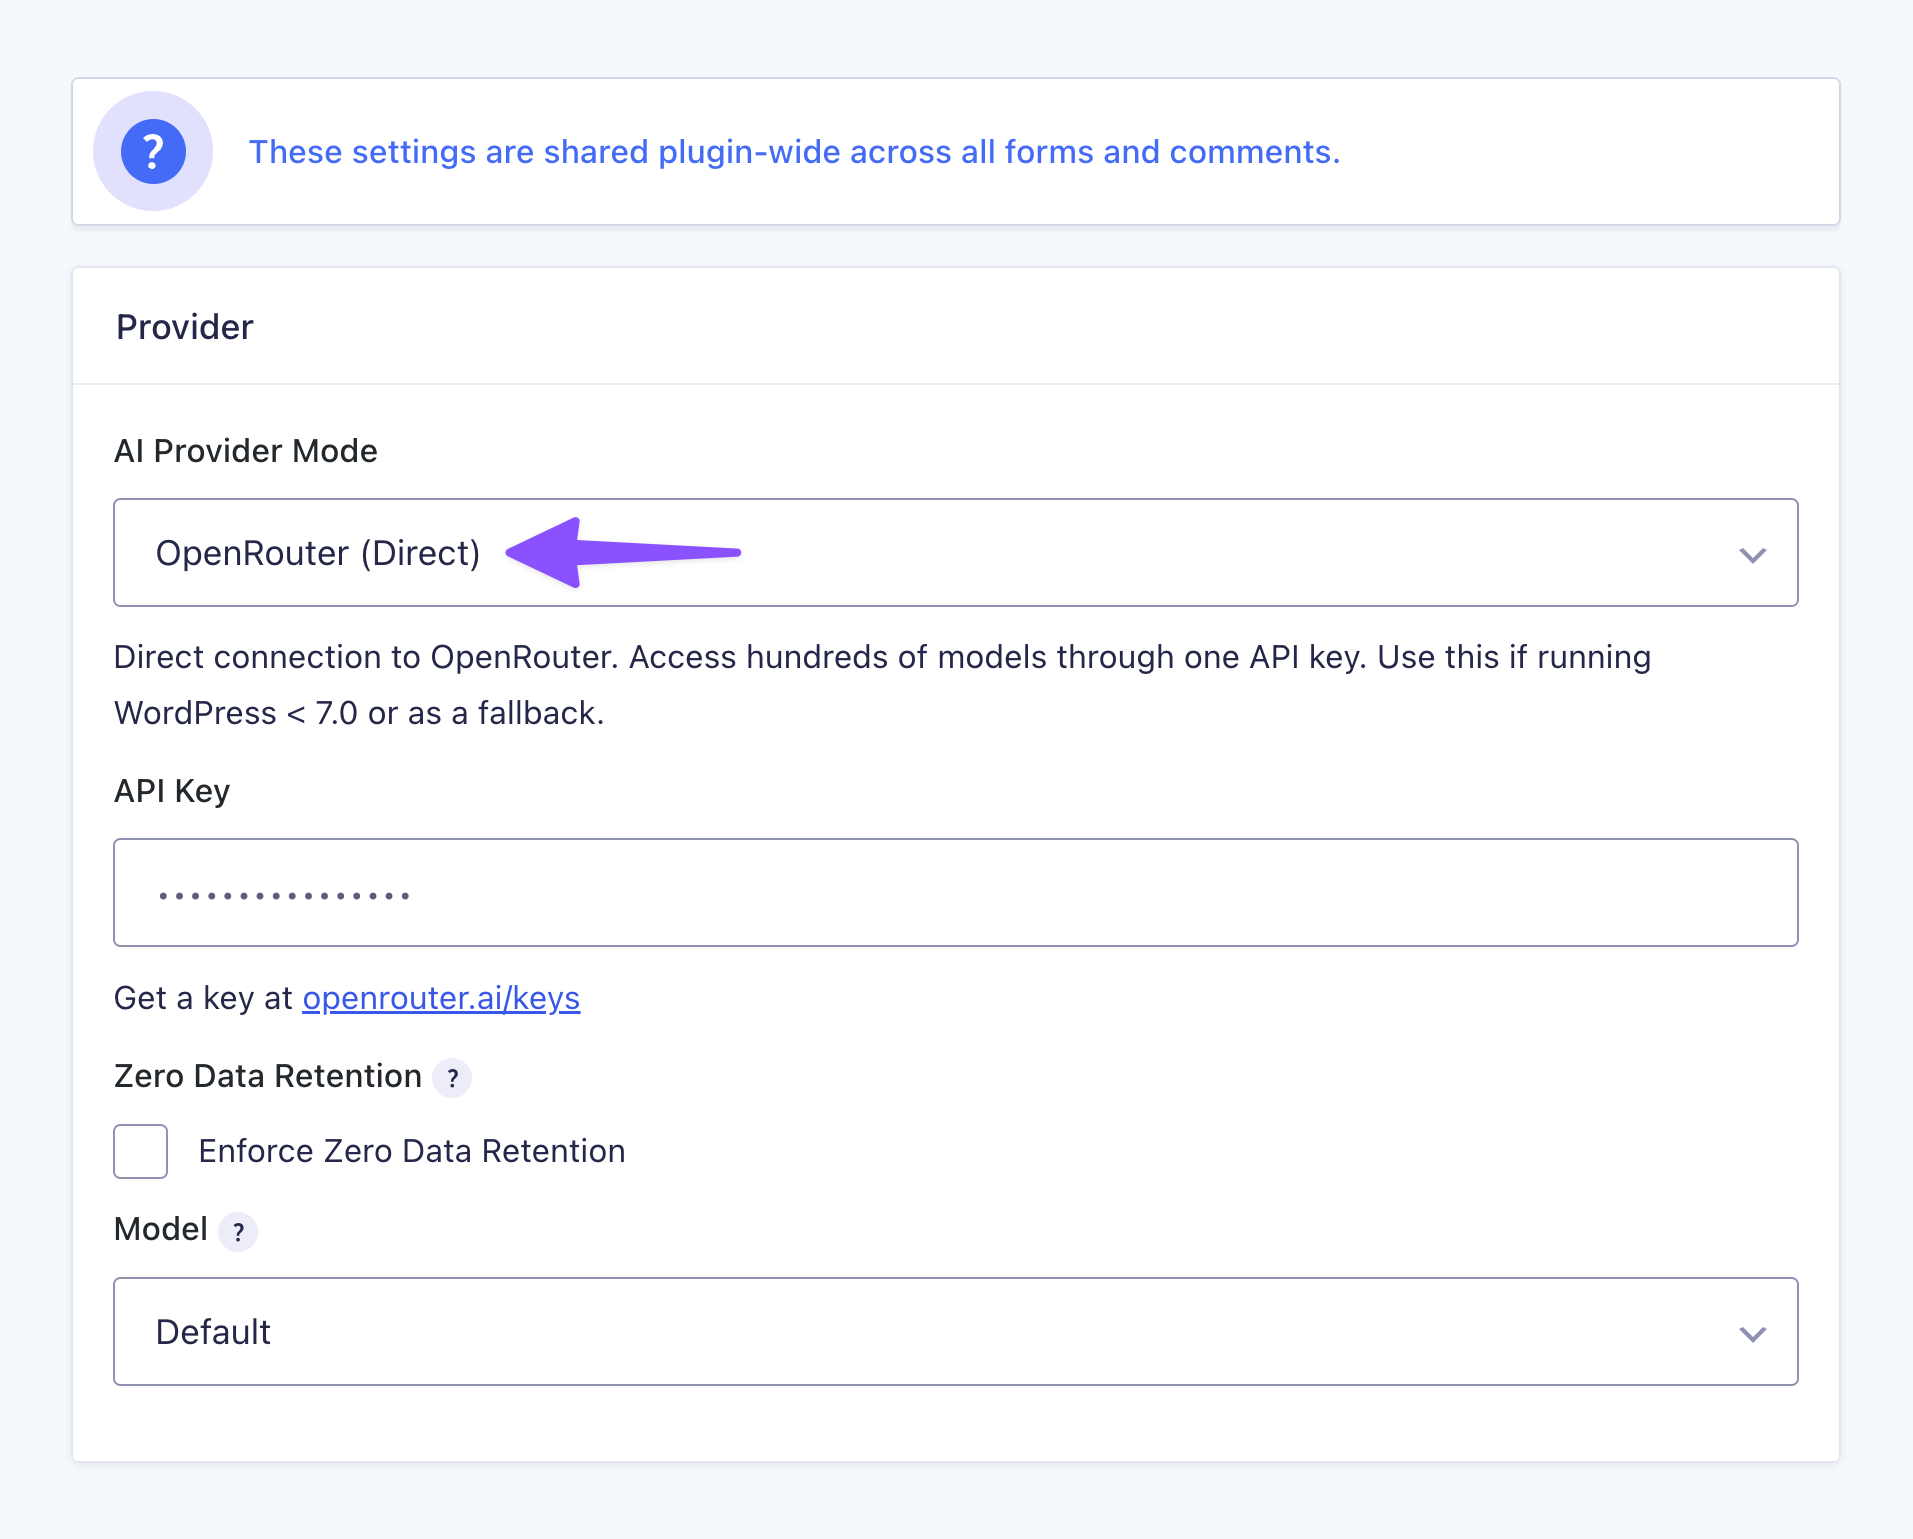
Note: If privacy matters, OpenRouter also offers Zero Data Retention, so your data stays private and isn’t used to train AI models. Just make sure your chosen model actually supports it, or it won’t work as expected.
2 — Configure AI Classification
Still in the Spam Hexer global settings › click the Settings tab › turn on AI Classification.
Note: AI Classification only checks submissions that already passed Proof of Work, so just make sure it’s on (it is by default 😉).
- Under When spam is detected, choose how spam is handled once caught:
- Flag as Spam: the submission is saved as an entry and marked spam, so you can review it yourself
- Silent Reject: it’s discarded quietly, the submitter never knows
- Validation Error: it’s blocked with a message, giving the submitter a chance to fix and resubmit
- Right below it, drag the Confidence Threshold slider to set your cutoff line. Once a submission’s score crosses it, that spam gets hexed. 🪄
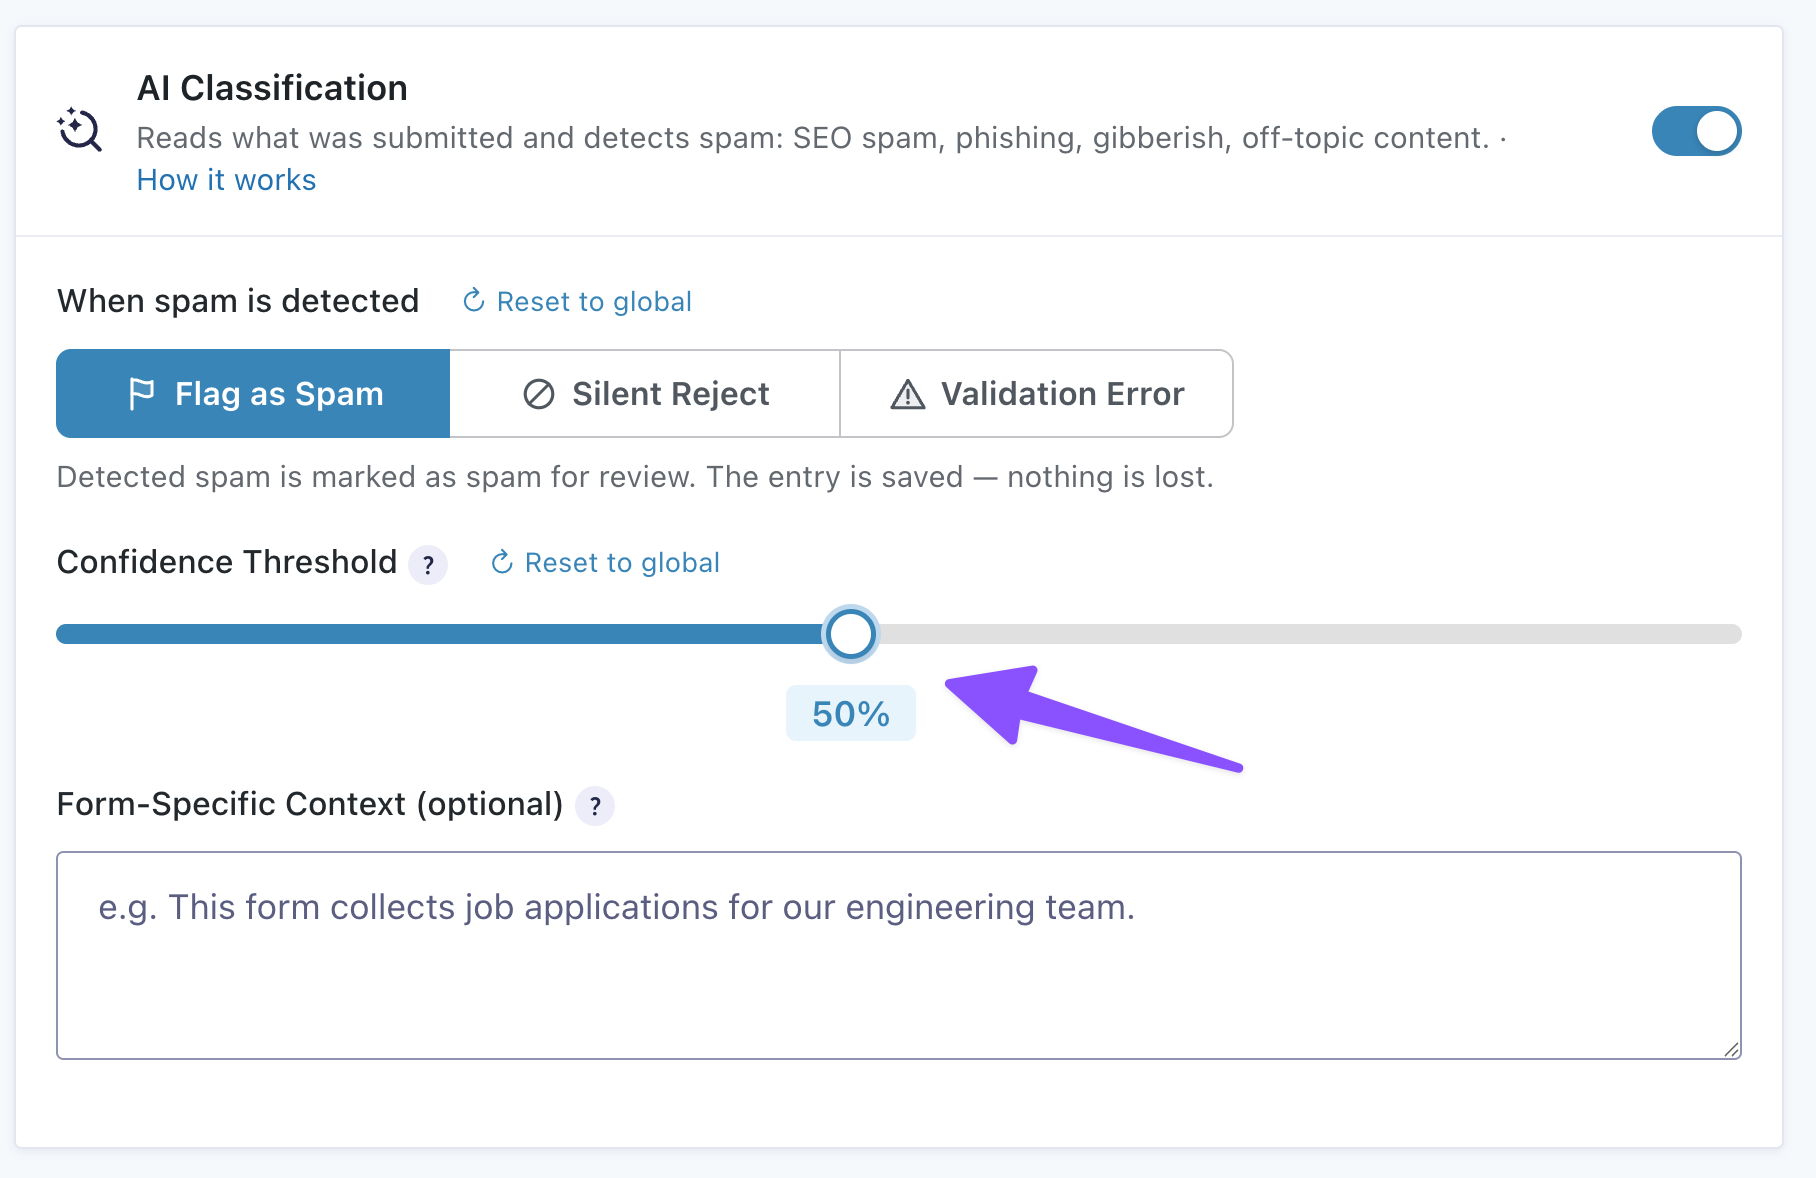
- Set it lower if you’d rather catch more spam, but might occasionally flag a real submission.
- Set it higher if you’d rather play it safe with real submissions, allowing some spam to slip through.
- In Custom Context, you can describe what a real submission looks like for your form, so the AI doesn’t flag the ones that are actually fine.
Spam Hexer in Action
Once you’re set up, try it yourself. Submit test_generic_sales in any field, and Spam Hexer will catch it.
Pro Tip
Test not working? Head to Bypass Rules in your global settings and make sure Bypass for Logged-In Users is turned off.
What the Visitor Sees When Spam Gets Hexed
Say you’ve chosen Validation Error: the submission gets blocked, with a message explaining why, right on the form.
Choose Flag as Spam or Silent Reject instead, and the visitor sees a normal success screen either way. The difference only shows up on your end.
Where to Check Why Something Got Flagged
If you go to the entry, you’ll see the reason under Spam Hexer Analysis.
For the bigger picture across all your entries, check the Stats tab in your global settings.
Key Takeaways
- Spam Hexer’s Proof of Work layer catches most bots automatically, before they ever reach your form
- AI Classification catches what Proof of Work can’t — like spam that reads like it came from a real person
- AI Classification checks what a submission contains, not who or what sent it
- Every flagged submission comes with a reason, visible in its Spam Hexer Analysis or in the Stats tab .
Now even the polite spam doesn’t stand a chance. Turn on AI Classification and see what Spam Hexer catches next. 🕸