How to Group & Repeat Fields in Gravity Forms
Learn how to group and repeat fields in Gravity Forms using a range of methods, including page fields, columns, sections, and nested forms.

- Why group fields in Gravity Forms?
- How do you group fields in Gravity Forms?
- Tutorial: How to group fields using GP Nested Forms
- Transform your field data collection process with GP Nested Forms
The truth is, at its simplest, creating a cohesive and intuitive user experience with Gravity Forms can often be a game of strategically grouping and repeating fields.
With this in mind, how do you get the most out of Gravity Forms’ default grouping fields functionality? While Gravity Forms does offer basic support for this, its built-in features may not always cater to complex form structures or extensive data collection needs.
This is where GP Nested Forms steps in, acting as your trusty partner in the quest for optimal form functionality.
In this comprehensive guide, we will peel back the layers on the benefits of grouping and repeating fields in Gravity Forms, before diving headfirst into the how-to aspect. From the default functionality of Gravity Forms to leveraging the robust capabilities of GP Nested Forms, we’ve got you covered.
Let’s dive right in!
Looking for information about how to use repeater fields in Gravity Forms? We have a ridiculously comprehensive resource that will cover everything you need to know about using Gravity Forms Repeaters.
Why group fields in Gravity Forms?
Grouping form fields in Gravity Forms is a strategic decision with a host of benefits for both form builders and users, including:
- Creating an intuitive form submission process: Grouping fields into sections helps break down a complex form submission process into manageable chunks, providing clear indicators for your users and facilitating a smoother, more intuitive submission experience.
- Streamlining conditional logic application: By grouping fields together, you can show or hide entire sections based on user input, ensuring that users only see what is relevant to them. It’s a way of personalizing the form-filling experience without creating an entirely separate form for each user group.
- Making your form fields repeatable: Repeatable form fields make it easy for users to enter multiple instances of similar data, such as adding team members or listing beneficiaries.
Making form fields repeatable has its own set of advantages as well, such as:
- Quicker complex form building: Including repeater fields can accelerate the form-building process, reducing potential errors. No more duplicating multiple sets of fields or intricate conditional logic to hide them.
- Keeping forms sleek and easy to read: Users who need to repeat fields can generate them as required, while those who don’t can keep their form view uncluttered. This flexible functionality ensures that forms remain clean, organized, and easy to follow for everyone.
- Simplifying data analysis: Repeating fields using Nested Forms greatly simplifies the process of data analysis. Exported form data becomes more structured and digestible, saving you from the headache of sifting through disorganized data.
So far, so good. Now, the obvious question is…
How do you group fields in Gravity Forms?
Gravity Forms, at its core, provides several intuitive options to group fields together. While these methods predominantly amplify user interaction and streamline form readability, they don’t necessarily leap into functional advancements.
You might also notice that Gravity Forms offers limited provisions for repeating form fields, namely:
- The Repeater API, currently in beta, has some room for refinement and can be tough to use for the average user.
- As of now, there is no Form Editor UI component, and this feature is only intended for developers.
Despite these minor hiccups, there are versatile ways to group and repeat fields employing the intrinsic capabilities of Gravity Forms, coupled with an array of certified add-ons. Here, we’re about to explore five of the most frequently employed strategies.
Method 1: Grouping fields using page fields
The page fields option allows you to create multi-page forms, dividing various form fields into distinct pages. This effectively transforms your form into a series of linked pages, each representing a unique section of the form.
This method of field grouping is not just about aesthetics; it also has several benefits. By segmenting your form into different pages, you can guide your users through each section seamlessly.
This way, users can focus on one group of fields at a time, making the process less overwhelming and more organized.
When combined with plugins like Page Transitions and Multi-page Navigation, you can create visually enticing form completion experiences:
- Page Transitions allows for smooth transitioning between pages and automatic page progression, for a touch of flair and fluidity.
- The Multi-page Navigation plugin provides users with more options and improved flexibility when navigating through a form’s pages, promoting a more interactive and user-friendly experience.
Method 2: Grouping fields using Columns
With columns, you can place multiple fields side by side on a single row, providing a distinct visual grouping that enhances the readability, reduces the visual load on your users, and makes it easier for them to fill out the form.
For instance, think of a dropdown product field (in this case, showing color), with the quantity input placed right beside it.
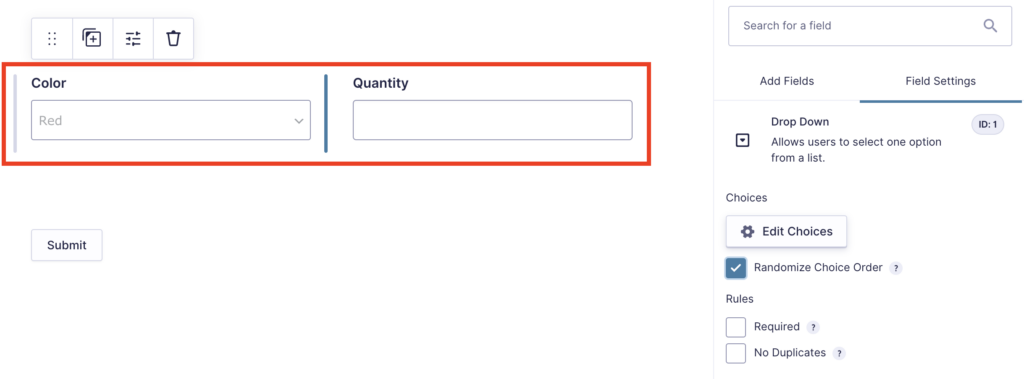
Creating columns in Gravity Forms is as straightforward as it sounds. Within the form editor, you can easily arrange your fields into columns using the user-friendly drag-and-drop interface. No coding, no complexity, just a simple, intuitive process.
Gravity Forms gives you the flexibility to customize your columns to suit your form’s needs. You can define the number of columns per row and adjust their widths to create a layout that works best for your form’s design and content.
However, while columns offer a visually appealing way to group fields, they may not suffice for advanced form structures as they cannot cater to complex, logic-based grouping requirements.
Method 3: Grouping fields using Sections
If you want to get more out of your grouped fields using the default Gravity Forms feature set, you can use the Section field. The Section field enables you to group multiple fields together under distinct section headings.
Users can swiftly locate the fields they need to fill out, courtesy of the clear, identifiable section headings.
That’s not all – conditional logic applied to the Section field automatically applies to all fields within that section. This is a powerful way to simplify your form’s conditional logic by hiding an entire section instead of hiding multiple fields individually.
If you don’t want the section to appear visually but still want to take advantage of this conditional logic efficiency, you can simply remove the Section field’s label and it will effectively be invisible.
Here’s how you can group fields by section using Gravity Forms:
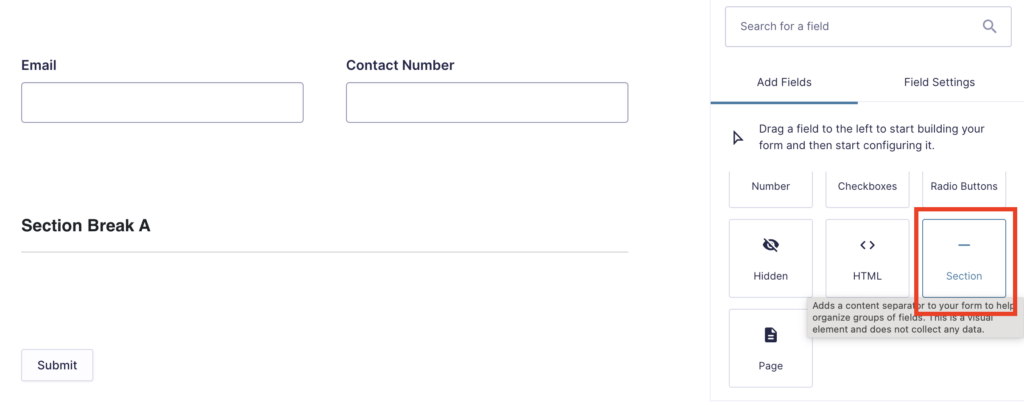
- Navigate to the form editor for the form you want to add a group of fields to, then drag a Section field into your form.
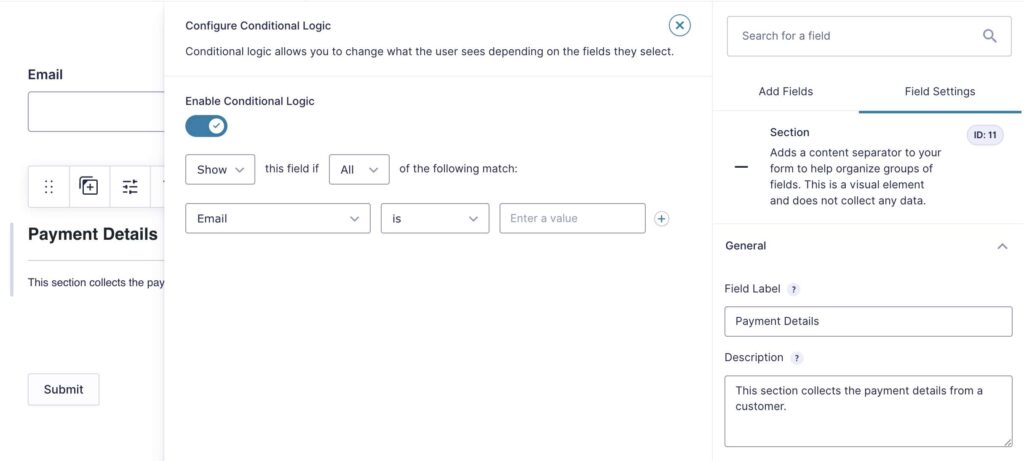
- Add a field name and description, then configure any conditional logic rules for the field. Note that these rules will apply to every field in the section. For example, if you choose to show the field only based on certain criteria, all fields that are within the section will also be hidden unless those criteria are met.
- Every field you add below the Section field will now be part of that section. To create another new section with different rules, simply add another new Section field.
Limitations of the Section field in Gravity Forms:
- Absence of section headers in data exports: This omission can make your exported data harder to manage and analyze. When you’re sifting through your form data, the absence of section headers means you lose the context of grouped fields, making it more difficult to understand relationships between fields and discern patterns in your data.
- Every field within the group must be set up individually: This process can be time-consuming, especially when dealing with complex forms with multiple fields. The need for individual field setup also introduces more room for errors and inconsistencies, which could affect your form’s overall functionality and user experience.
- No capability to repeat field groups: While Section fields can group fields together, they lack the capability for easy repetition of these groups. This limitation means if you have situations where users may need to enter similar sets of data multiple times, you can’t simply duplicate the entire group of fields.
Method 4: Grouping fields using collapsible sections
Picture this: Instead of a tedious, long-scrolling form, your users see a neat list of section headers. Each section can be expanded and collapsed in an accordion-like format, revealing or hiding the fields underneath as needed. This way, users can navigate through the form one section at a time, making the process more manageable and less overwhelming.
This is possible, courtesy of collapsible sections.
We recommend Collapsible Sections by Jetsloth for this functionality, which allows you to group collapsible sections into accordion-style fields. You can edit existing forms, and add new sections if desired.
Method 5: Grouping fields using Nested Forms
For those craving more functionality and advanced options in form field grouping, consider stepping up your game with Gravity Forms Nested Forms, a powerful perk from yours truly.
Nested Forms elevate the idea of field grouping by introducing a new field type that allows you to “nest” groups of fields from other forms within your primary, or parent, form. So, what does this mean in practice?
- Enhanced form grouping and repeating: With just a click, you can populate your parent form with a pre-made group of fields from another form. This capability not only saves time but also reduces the chance of errors in field setup.
- Simplified form display: Nested Forms help de-clutter complex forms by segregating “child” entry collections within the “parent” form. This segregation makes the form easier for users to comprehend and complete, reducing the cognitive load and improving the overall form experience.
- Streamlined form completion: With the use of merge tags, Nested Forms can dynamically populate child forms with data from the parent form. This capability streamlines the form completion process by reducing redundancy and maintaining consistency in data entry.
- Improved data management and analysis: Nested Forms facilitate better data management by exporting child entries along with their associated parent entry. This feature ensures that your exported data maintains its context, making it easier to manage and analyze.
- Effortless field repetition: Need to repeat a set of fields multiple times? Nested Forms allow users to collect child entries and attach them to their parent entries on submission. Form entries gathered through your nested forms get displayed in a neat, compact table on the parent form, where they can be viewed, edited, or deleted.
Considering these advantages, it is clear that Gravity Forms Nested Forms provide a more advanced, functional, and user-friendly way to group and repeat fields. Now, let’s see how you can implement this on your site.
Tutorial: How to group fields using GP Nested Forms
- Download and install the plugin from Gravity Wiz – you can purchase GP Nested Forms on its own for $59/year, or you can bundle it with additional perks for a discounted price.
GF Nested Forms
- Select the form you want to add a nested form to, or create a new form from scratch.
Need to refresh your memory on how to create a new form? Check out this guide from Gravity Forms to help you get started.
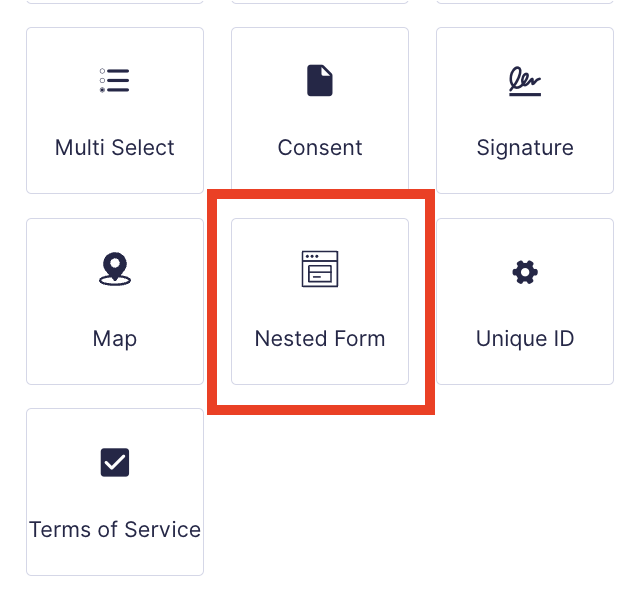
- Add a Nested Form field to your form by dragging it from the Add Fields tab.
- Go to the Field Settings tab for your Nested Form field. From here, configure the options for your nested form, including:
- Add a name and description for the Nested Form field.
- Choose which of your existing forms will be nested within the field from the Nested Form dropdown. You can also edit your nested form directly by clicking the Edit Nested Form button.
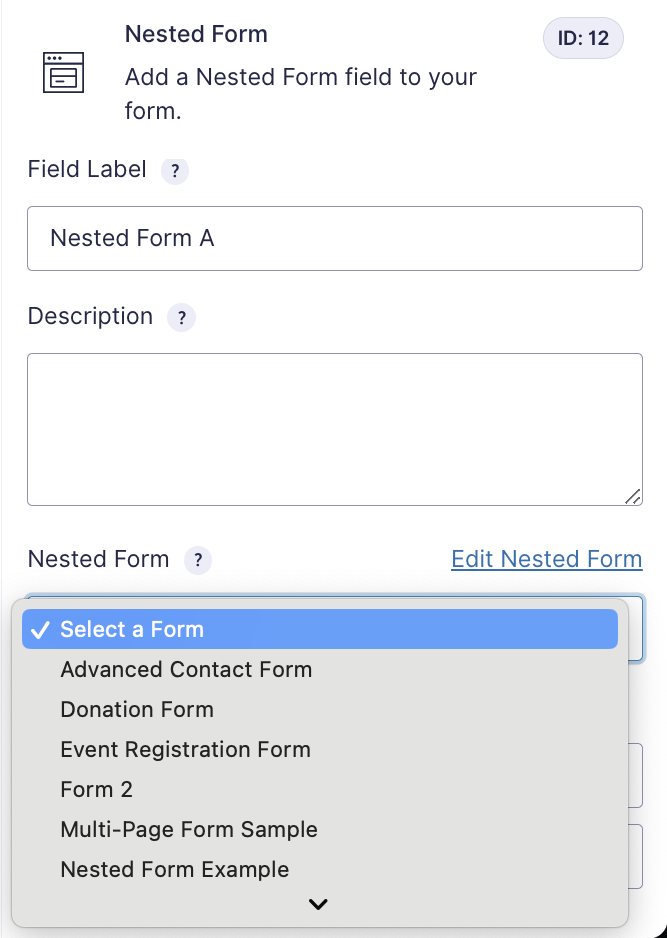
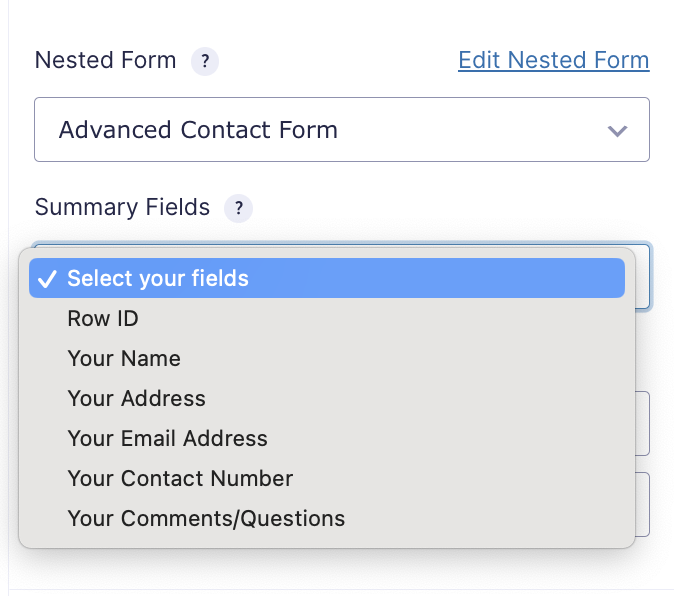
- Once you’ve selected a form, you can choose which specific fields will be used to gather data in your nested form.
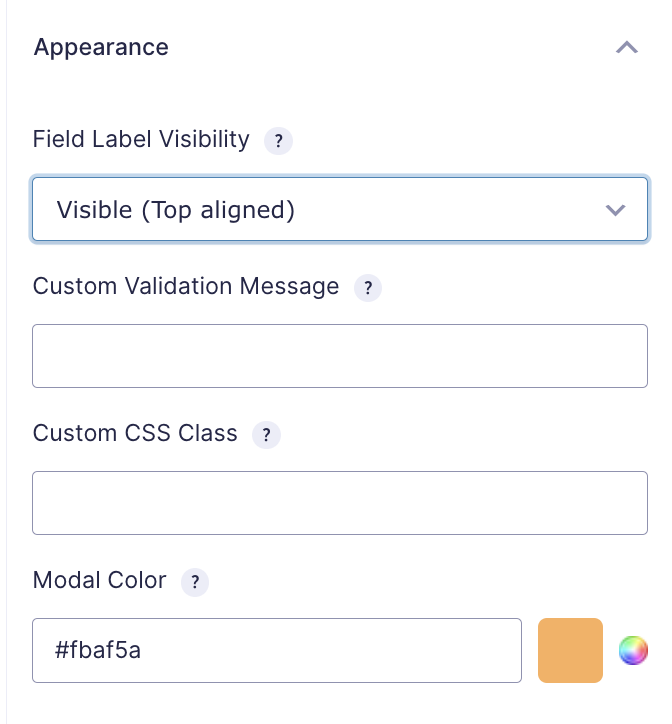
- Make adjustments to the appearance of your nested form, including the modal color, field label visibility, and description placement. You can also make stylistic changes to your nested form using custom CSS or CSS classes as required.
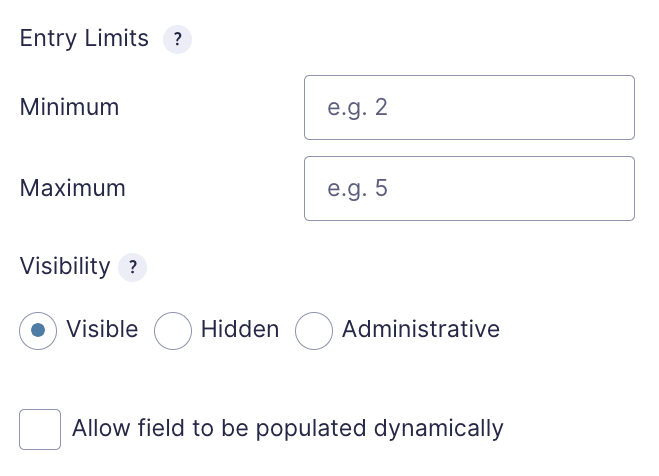
- Set a limit to the maximum/minimum number of entries a user can add to your nested form. This is ideal for booking or registration forms where you require details for a set number of participants.
- Optional: Add conditional logic to your Nested Form field.
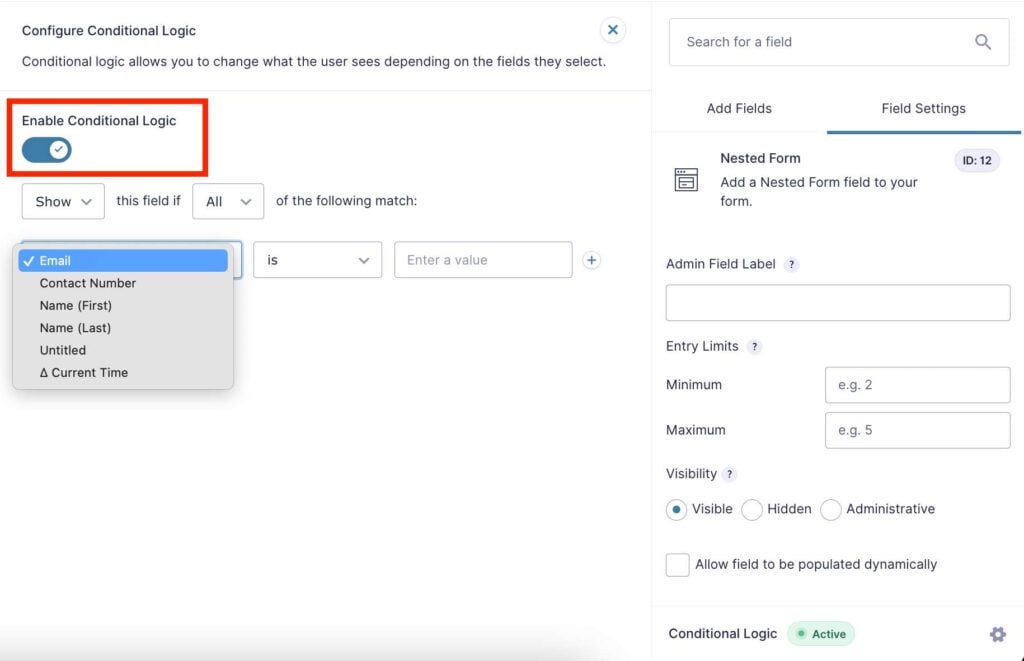
- Once you’ve finished configuring these options, and added any additional fields to your parent form, that’s it! You’ve created a group of form fields that can be easily repeated with the click of a button.
- Check out how your form looks on the front end of your site, and make any changes you need to the form settings before you release your new form and start collecting data!
Transform your field data collection process with GP Nested Forms
Grouping form fields in Gravity Forms is more than just a means to organize your forms; it’s a transformative approach that fundamentally improves the form building, completion, and data analysis processes.
Tools like GP Nested Forms can magnify this advantage, helping you construct sophisticated, dynamic forms and collect intricate data swiftly and seamlessly. By nesting entire forms or groups of form fields within a parent form, you create an intuitive user experience and facilitate efficient data collection.
But why stop there?
The realm of form building is vast and rich with potential. To truly harness the power of Gravity Forms, explore an extensive suite of perks that can revolutionize your approach to form building and help you surpass any Gravity Forms limitation you’ll find.


