How to Create Timesheets with Gravity Forms
Learn how to take timesheets and time tracking to the next level using Nested Forms and Date Time Calculator. Plus, calculate overtime pay, restrict entries to available weekdays only, and other tips.

This article requires GP Nested Forms and GP Date Time Calculator.
Buy Gravity Perks today and get 48+ premium Gravity Forms plugins, including these perks!
Ever been asked to submit a timesheet and track your time while you’re working? Or, maybe you run a business and need timesheets from your employees so you know how much to pay them.
With Gravity Forms, you could create a normal form and have users submit a new entry for each block of time they worked. But wouldn’t it be nice if they could add multiple time entries, and submit them all at once?
Let’s take a look at how you can use Gravity Forms Nested Forms and Gravity Forms Date Time Calculator to easily build a timesheet entry system.
Getting Started
This article assumes that you already have Gravity Forms, Gravity Perks, GP Nested Forms, and GP Date Time Calculator installed and activated on your site.
Steps
Step 1 – Create the Time Entry Child Form
Let’s start by creating a new form for users to enter their time entries. We’ll call it “Time Entries”.
Configure the Child Form Fields
In this form, we’ll add:
- A “Name” field for the user to enter their name.
- A “Date” field for the user to enter the day they worked.
- A “Time In” field for the user to enter the time they started working.
- A “Time Out” field for the user to enter the time they finished working.
- A “Total Hours Worked” field. Set this field to be hidden.
Here’s a rough idea of what your form should look like:

For a cleaner look, try dragging your fields so that there’s two fields on each line. Learn more about Gravity Forms field columns here.
Calculate the Total Hours Worked
Now that we have the fields created, let’s use Gravity Forms Date Time Calculator to calculate the total hours worked. We’ll want to use this formula:
Hours Worked = Time Out - Time InTo set up this calculation, click on Hours Worked and check Enable Calculation. Click on Insert Merge Tag and choose Time Out. Click again and choose Time In. Place a “-” symbol in between the two merge tags. You’ll notice that the field ID gets automatically added to the formula.
The calculation box should look similar to this:
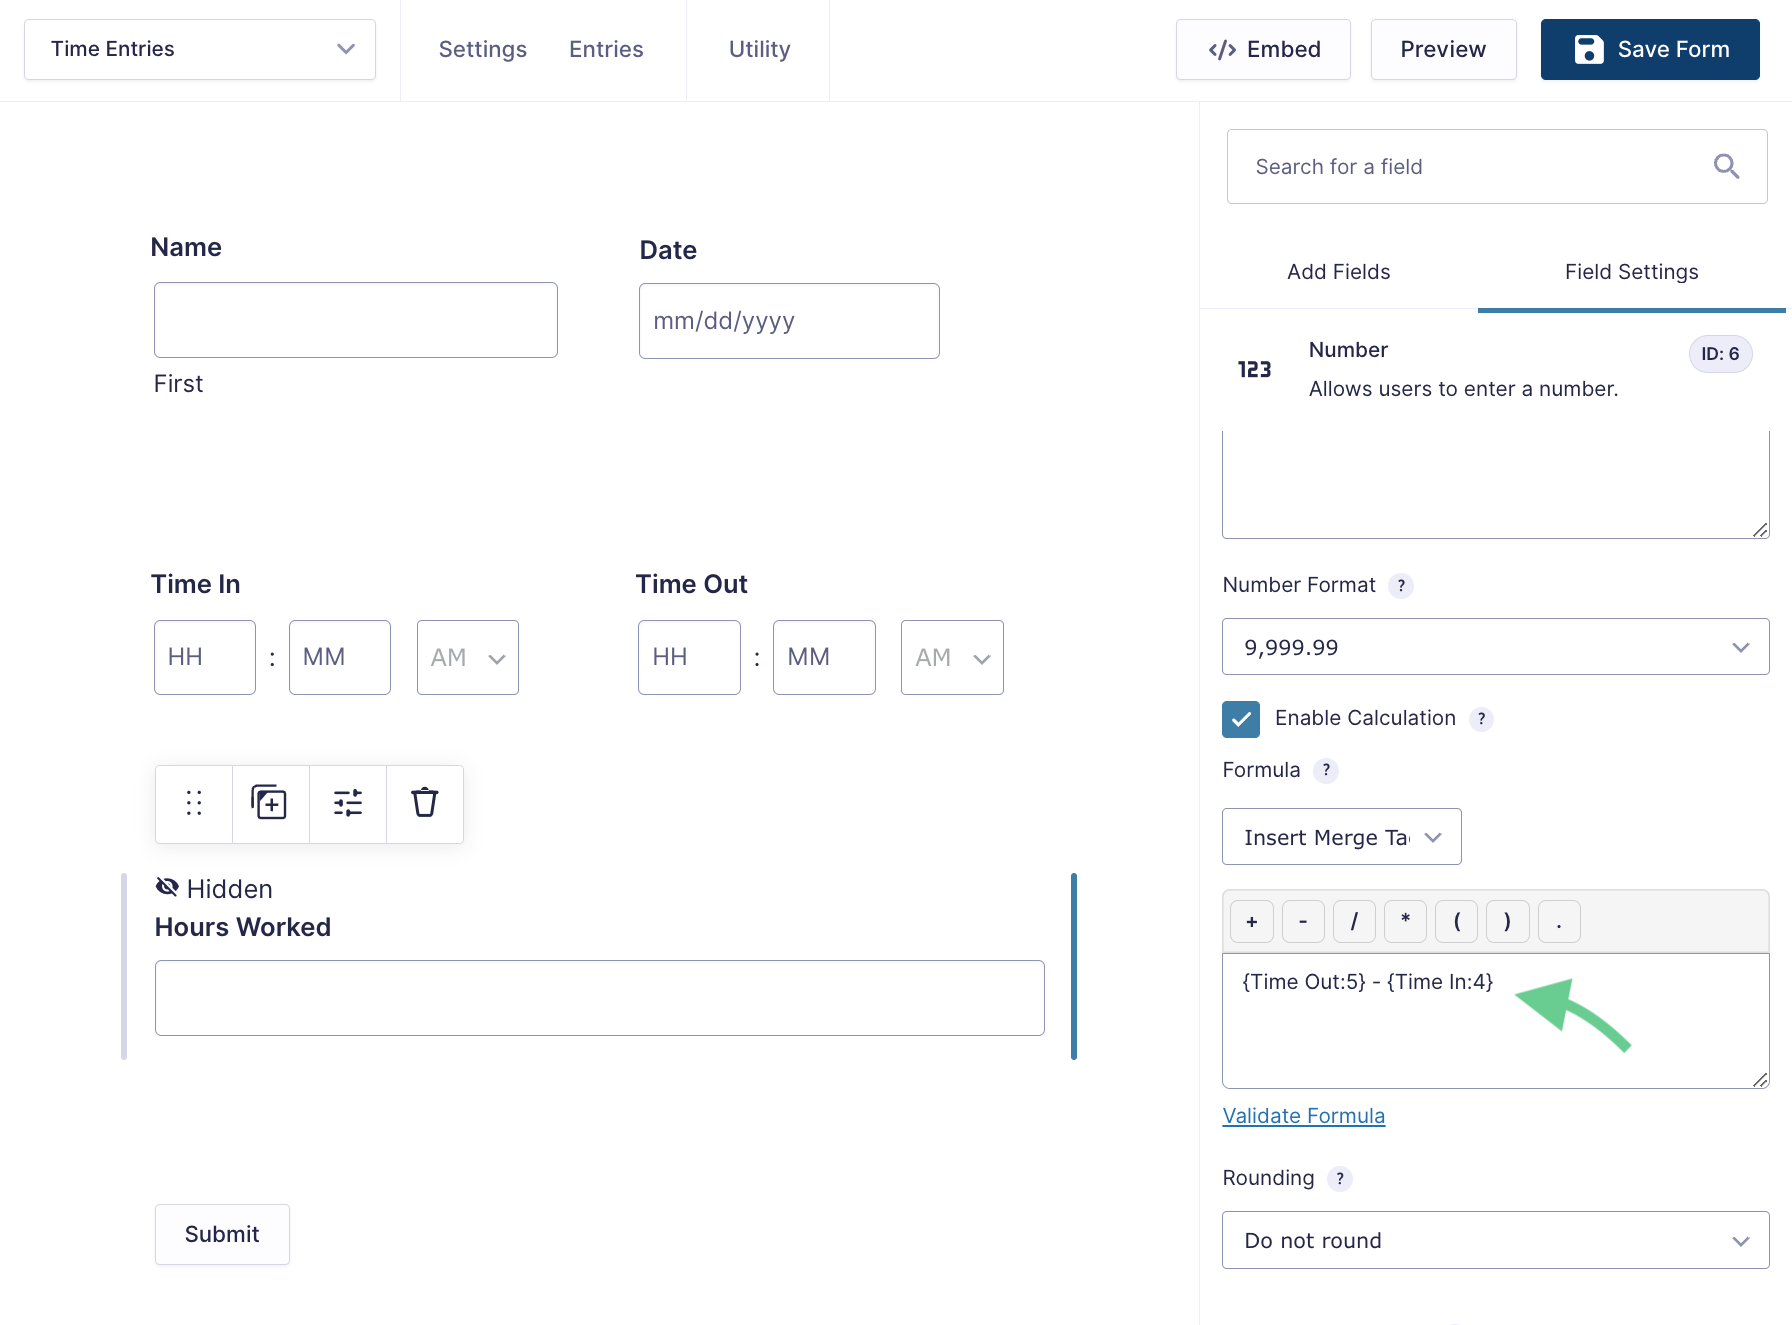
With Hours Worked still selected, look for the field ID in the top right corner. In the example above, the field ID is 6. Make note of this field ID – we’ll use it later.
Your child form is now ready!
Step 2 – Create the Parent Form
Configure the Nested Form Field
Next, we’ll create a parent form where users can submit multiple time entries. Let’s call this form “Timesheets”.
In the Timesheets form, add a new nested field. Choose Time Entries as the Nested Form, and under Summary Fields, we’ll add:
- Name
- Time In
- Time Out
- Hours Worked
Your configuration should look similar to this:

Create the Total Weekly Hours Field
Once the Nested Form field is configured, create a new number field called “Total Weekly Hours”. We’re going to use this field to add up all of the hours from the child sheet entries.
While Total Weekly Hours is selected, navigate to General Settings › Enable Calculation and make sure this checkbox is selected. Click on Insert Merge Tag and choose Timesheet Entries: Sum from the dropdown list.
You should see something like this:

Remember that field ID you took note of in Step 1? Replace CHILD_FIELD_ID with your Hours Worked field ID and save the form.
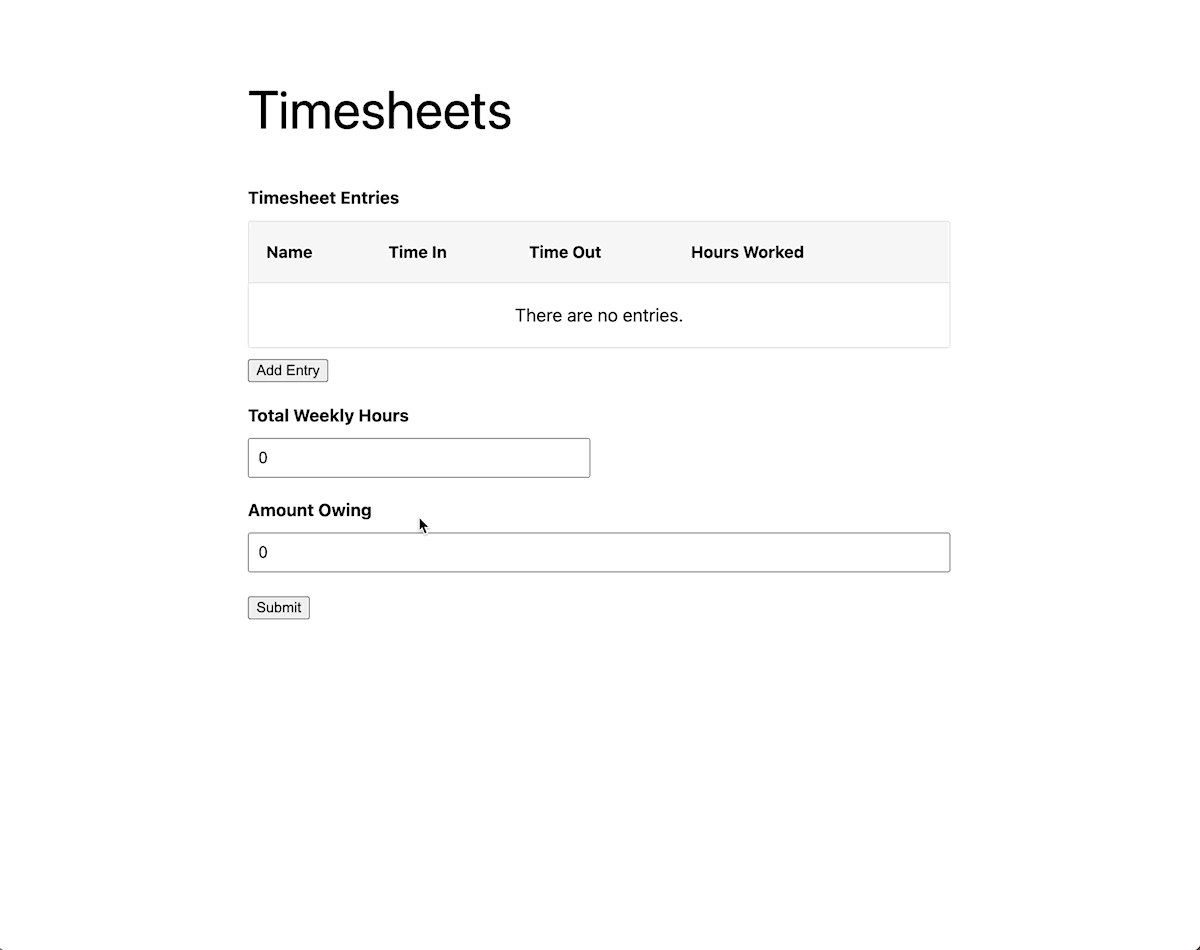
And that’s it! Here’s what the finished form looks like in action:
Taking it Further
Restrict Entries to Weekdays Only
Let’s say that we only want to allow employees to enter time on weekdays, and block weekends. We can use Gravity Forms Limit Dates to accomplish this.
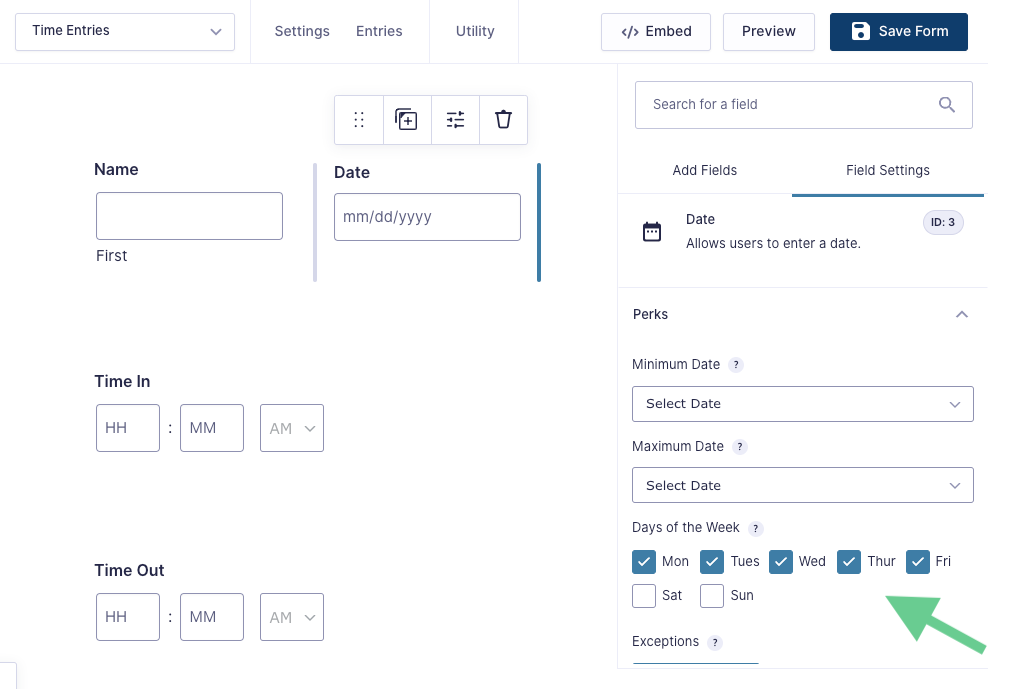
Once Limit Dates is installed and activated, open your Time Entries form and click on the Date field. Navigate to Field Settings › Perks › Days of the Week. The default option is set to allow all days to be selected. Click on All Days and make sure to only check the week days, like this:
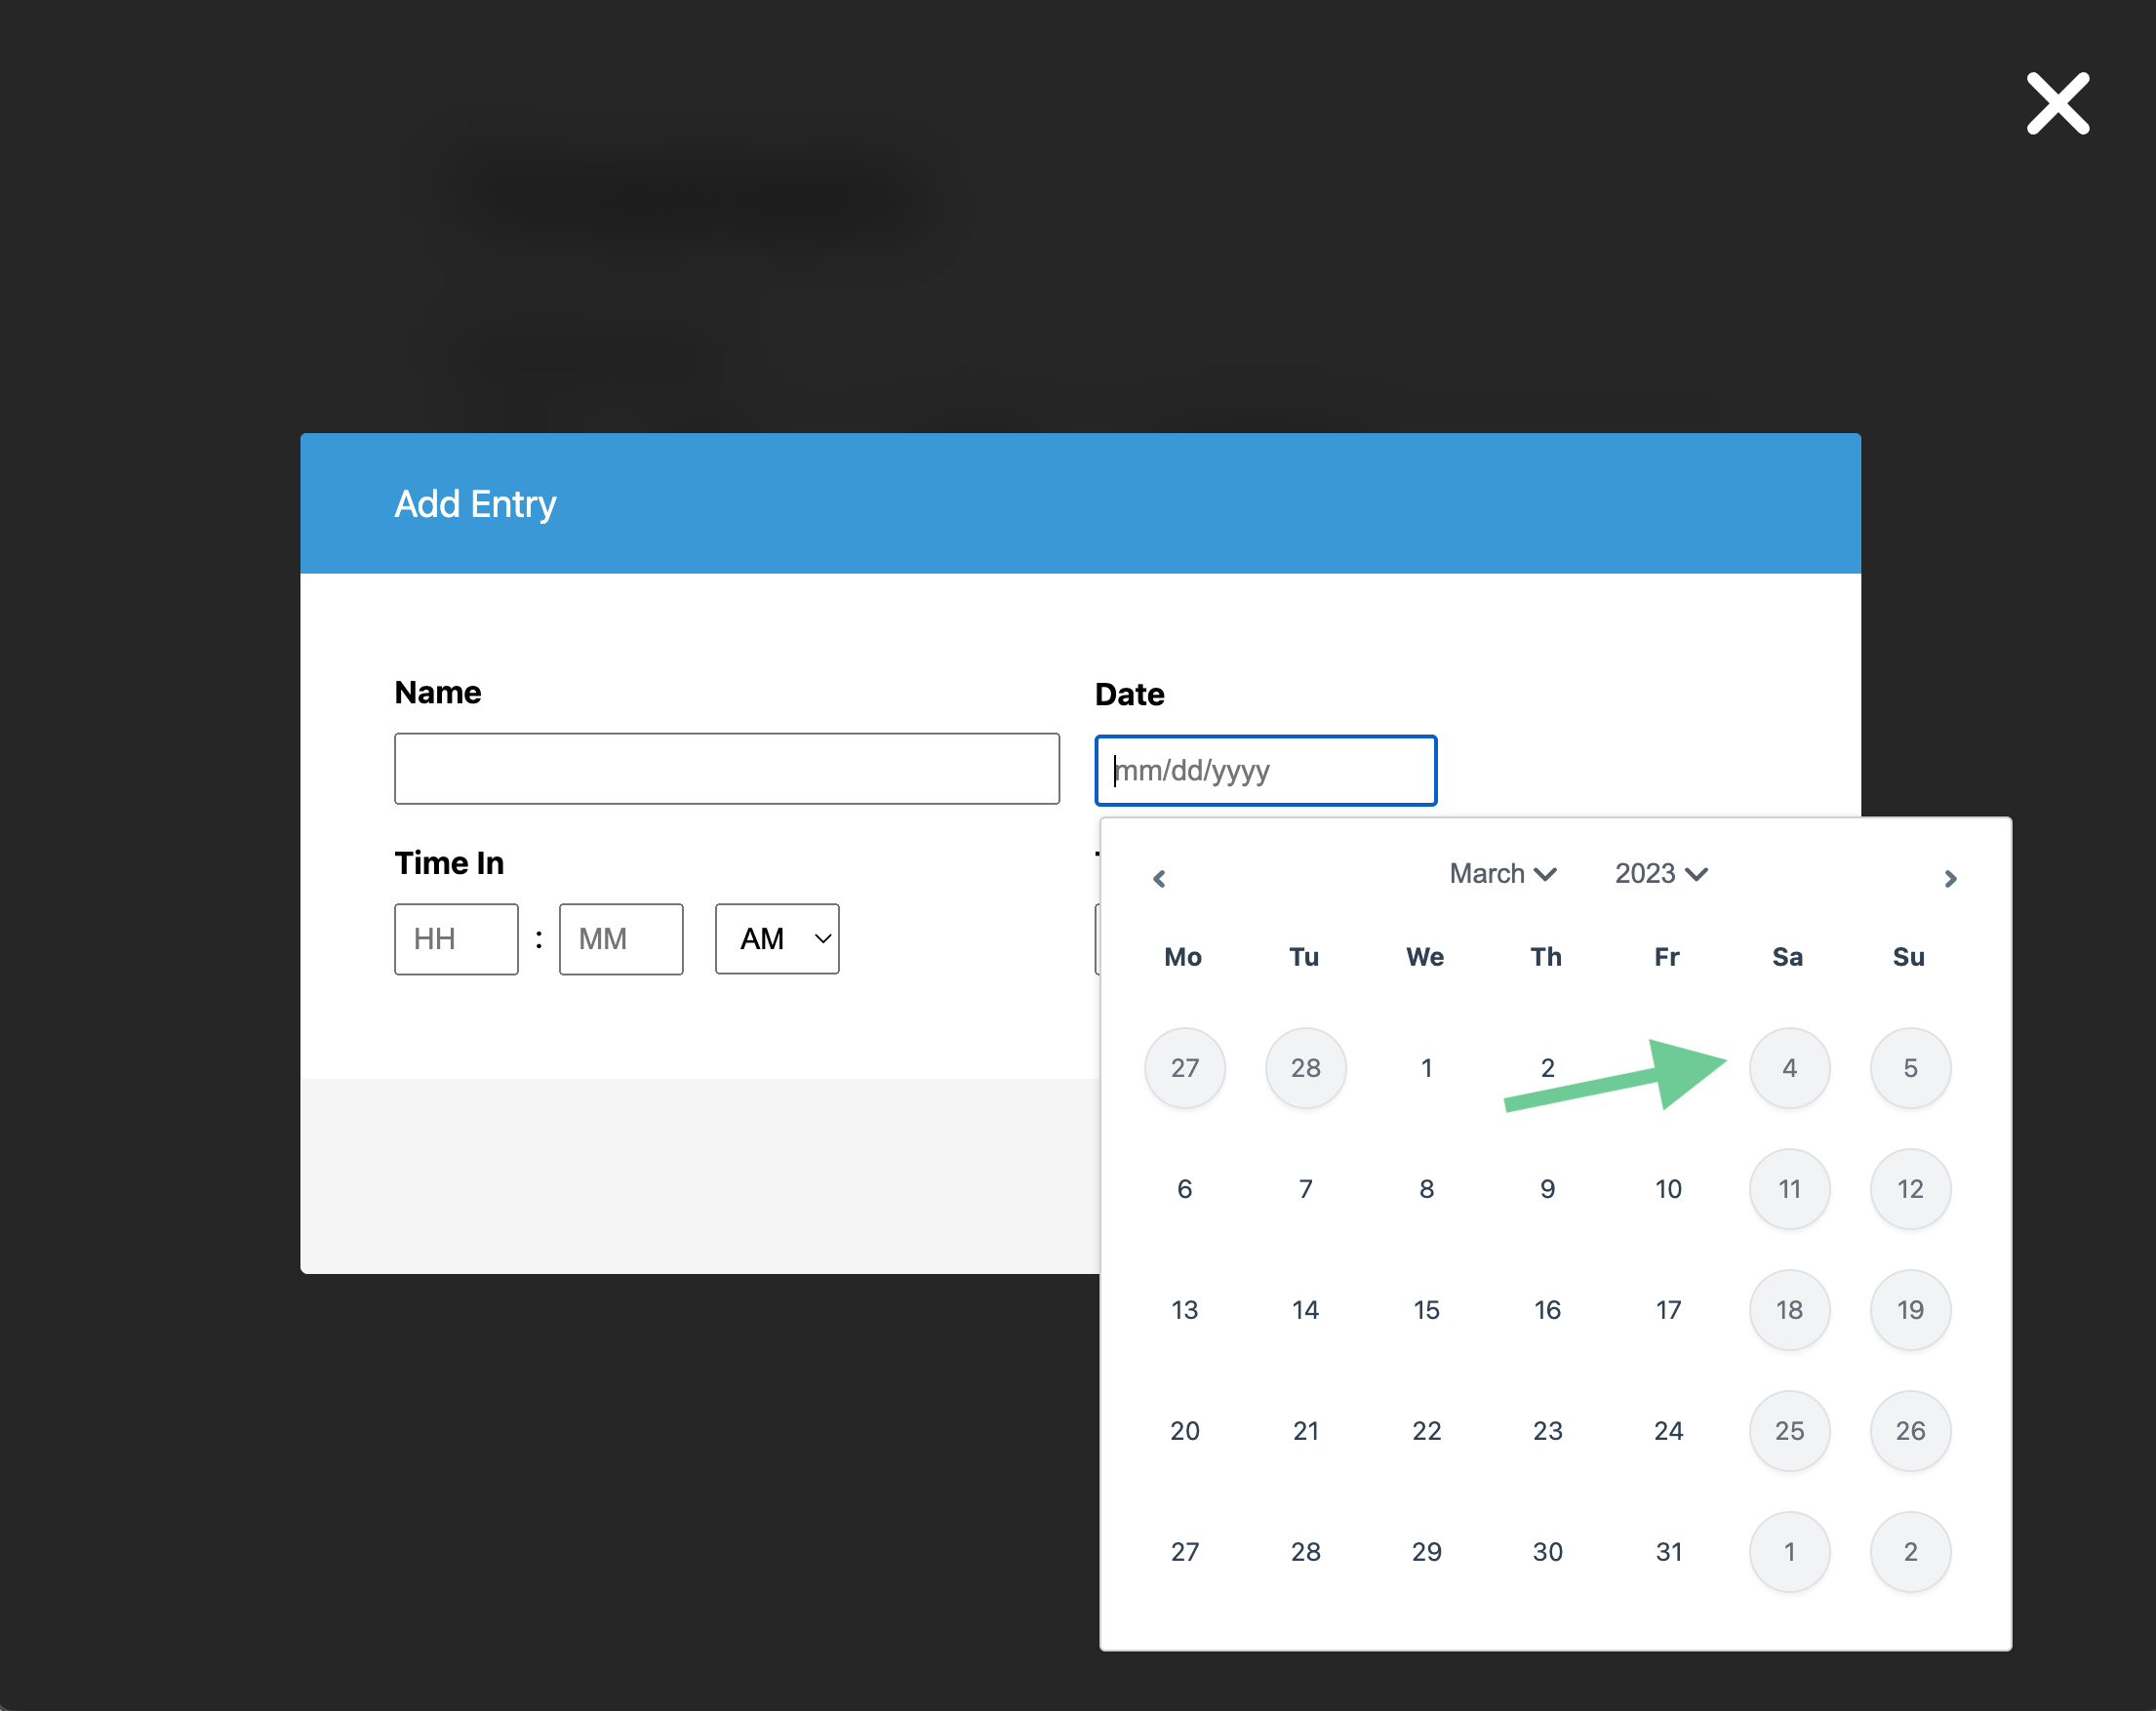
Once the weekdays are selected, save your form and try to submit a new time entry. You’ll see that weekends are now blocked:
Calculate Overtime Pay Based on Total Weekly Hours
At many companies, workers often get paid at time and a half if they work over 40 hours in one week. Let’s take a look at how we can set this up with Gravity Forms Advanced Calculations.
Once Advanced Calculations is installed and activated, open your Timesheets form and add a new number field called “Amount Owing”. Under General Settings, make sure Enable Calculation is checked.
For this example, let’s say that employees get paid a regular rate of $20 per hour. However, if they work more than 40 hours in one week, they get paid $30 per hour for each hour worked over the first 40 hours. We’ll use an advanced formula to calculate the total amount owed to the employee.
Since our calculation will be based on the Total Weekly Hours, we’ll need to get this field ID first. Click on Total Weekly Hours and look in the top right corner to get the the field ID. Take note of this ID for the next step.
Click back to the Amount Owing field and insert this formula into the Formula calculation box. Replace 2 with your form’s Total Weekly Hours field ID:
if( F2 <= 40 ):
    F2 * 20
elseif( F2 > 40 ):
    ( 20 * 40 ) + ( ( F2 - 40 ) * 30 )
else:
    0
endif;
Here’s what the formula field should look like:

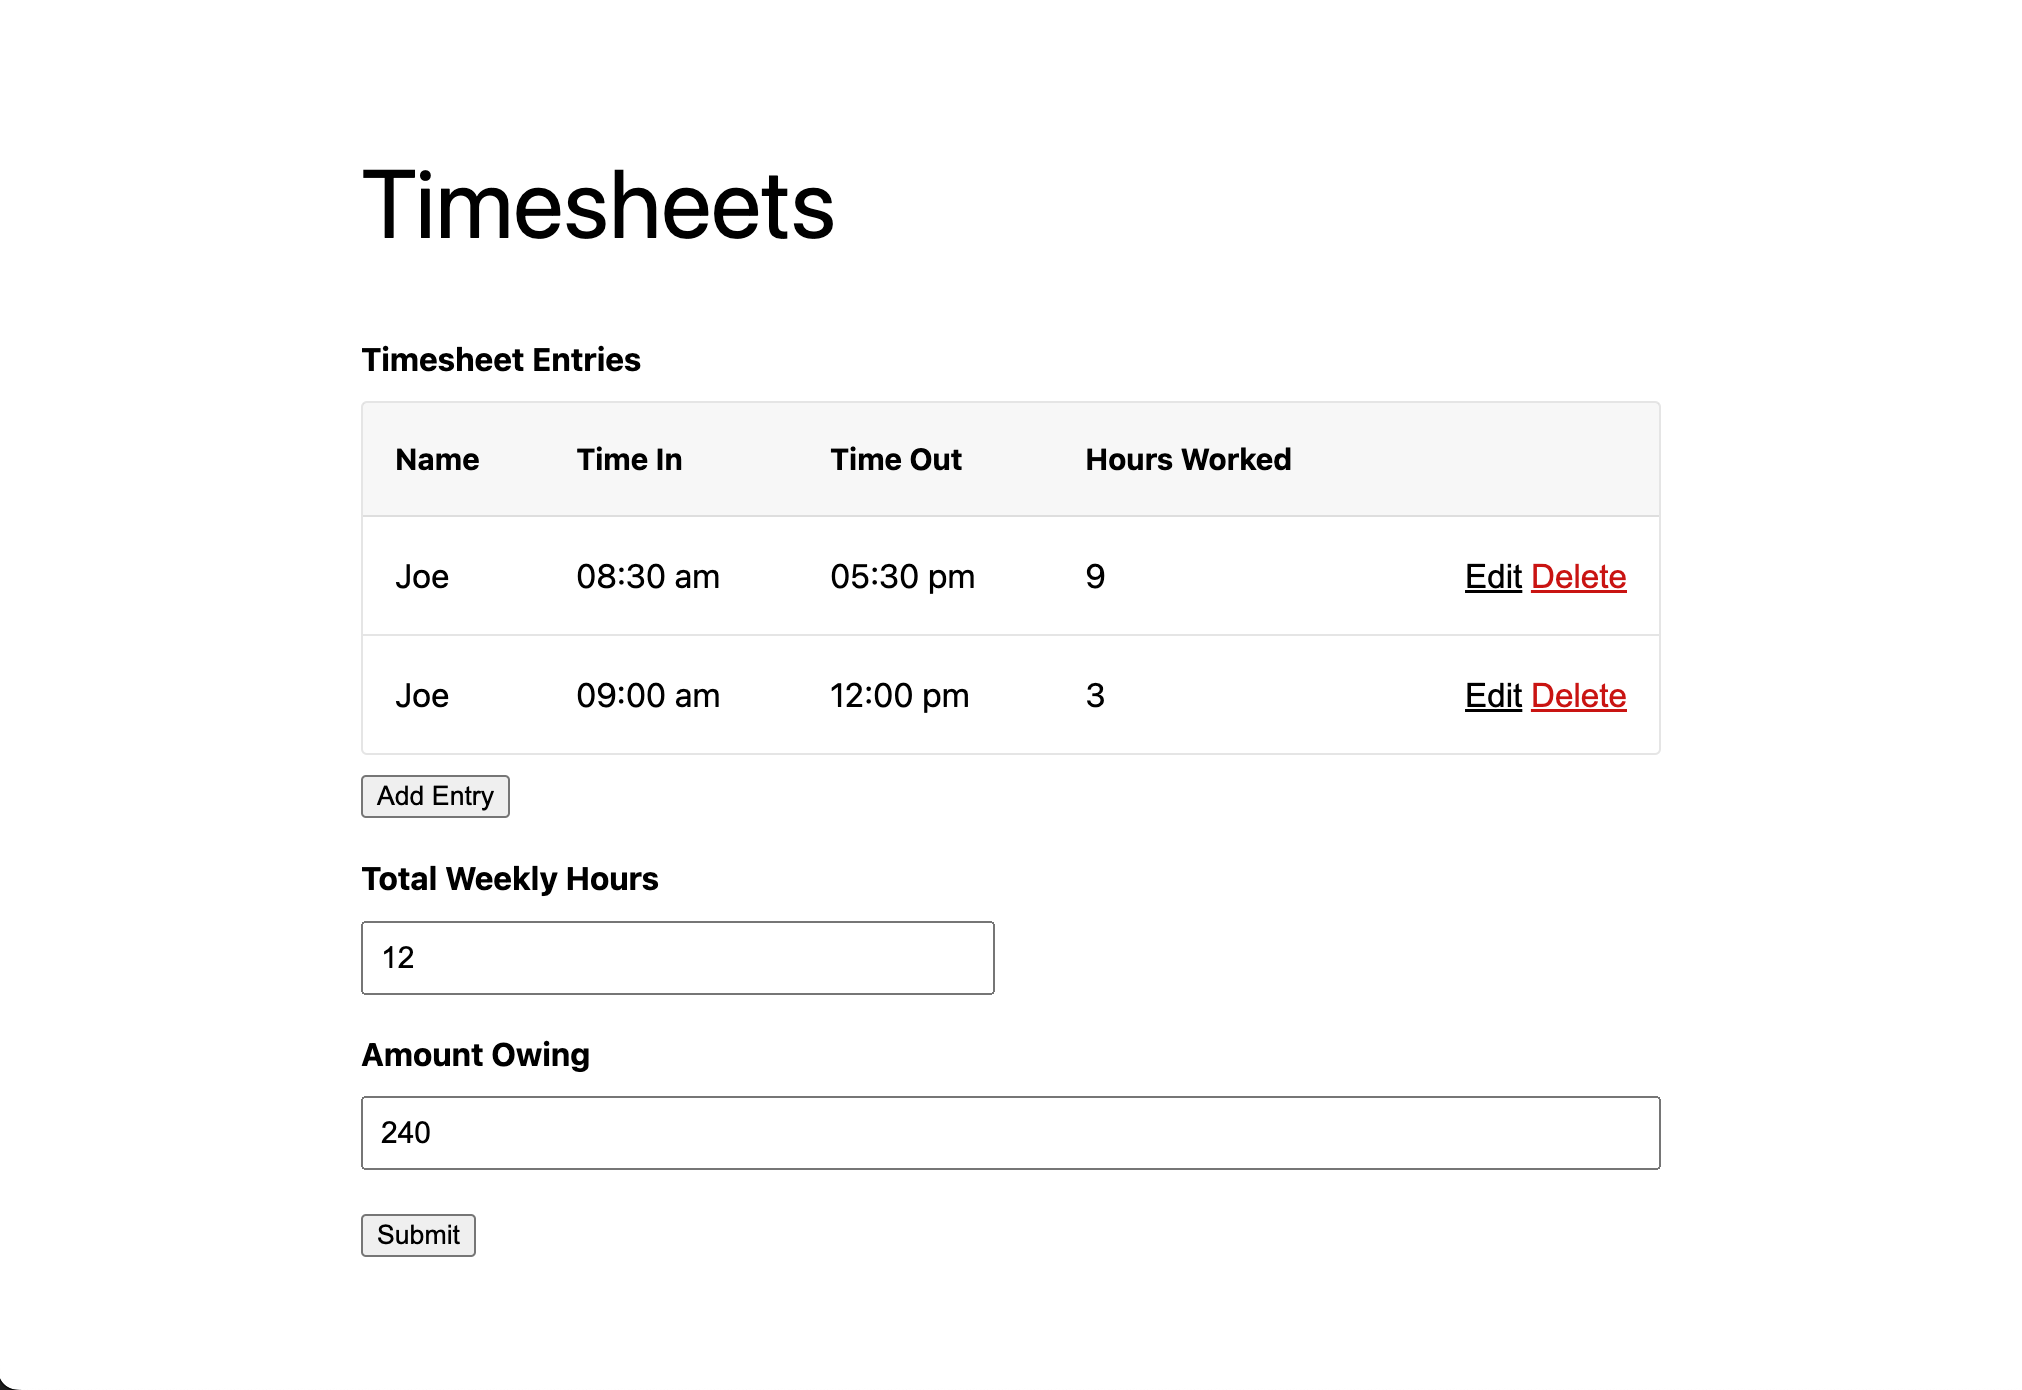
Save your form and try adding some time entries. You should see the first 40 hours being calculated at $20 per hour, and every hour after being calculated at $30 per hour:
If you want to use dynamic values in your calculations, Advanced Calculations can do that too. Our guide on dynamic pricing goes over how to set that up.


For those trying to make a formula for employees working past midnight, add an end date, then this formula (replacing with your ID numbers). The modifier I have added is for the break time, which has values set as 0.5 for 1/2 hour, 1 for an hour 0.25 for 15 min, and 0 for no break.
( ( {End Date:3} – {Start Date:2} ) + ( {End Time:7} – {Start Time:6} ) ) * 24 – {modifier:5}
Since our employees rarely work past midnight, I set conditional logic with a radio button that asks if the shift went past midnight. If yes, the end date pops up and only uses this formula. Otherwise, it uses the formula that only needs the start date which is {End Time:7} – {Start Time:6} – {modifier:5}
Hey Tricia,
Thanks for sharing this! The conditional logic approach for overnight shifts is really clever 🙌
Couple of quick questions.
What happens if someone works past midnight?
How would you approach using the current time merge tag to allow clock in and clock out ability. This would also require the use of save and continue.
Hi Ian,
Excellent Tutorial. Just what we needed
Glad it helped you Arvind!