How To Set Up Conditional Pricing with Nested Forms
Want to provide discounts for large groups? Learn how to offer quantity-based discounts with Nested Forms and conditional logic.
This article requires the Gravity Forms Conditional Pricing perk.
Buy Gravity Perks to get this perk plus 48 other premium Gravity Forms plugins!
Many of our customers use Gravity Forms Conditional Pricing to offer bulk pricing on their forms, but did you know that you can combine it with GP Nested Forms and GP Copy Cat to offer quantity-based discounts on products added in a Nested Form field?
If you’ve ever needed to build a form for registering a team or signing kids up for summer camp and wanted to offer a discount for large groups, this tutorial is for you.
Getting Started
We’re going to combine these three perks to build our form:
Make sure you have all of them installed an activated before you begin. Let’s get started.
Steps
- Create Child Form
- Add Your Nested Form
- Count Nested Form Entries
- Calculate Quantity
- Configure Conditional Pricing
Step 1 – Create Child Form
Start by building the Child Form. I’m building a form to bulk order shirts for our local quidditch team, so it will contain the appropriate fields for those orders: House, Shirt Size, Name, Number.
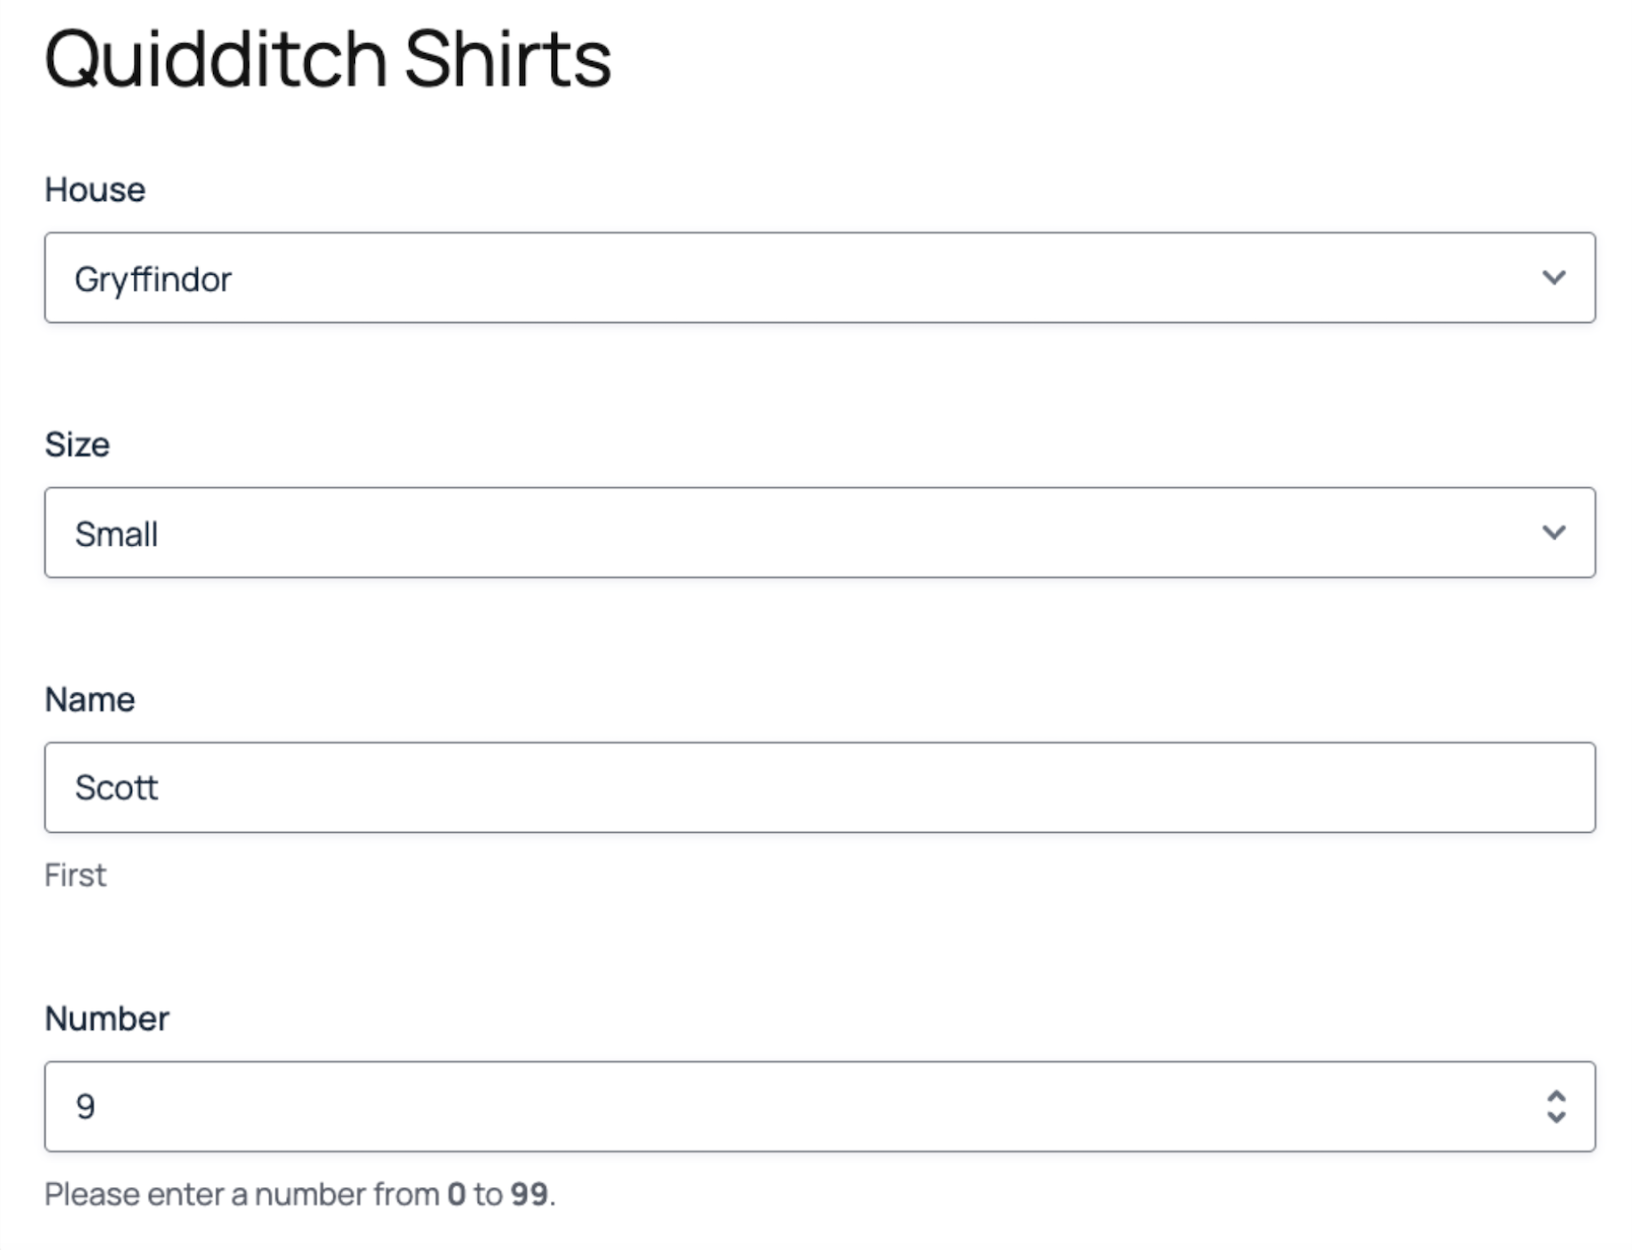
Note that while the Nested Form is going to be used to collect the shirt order information, the form itself doesn’t contain any Product fields. All of that will be handled in the Parent form.
Step 2 – Add Your Nested Form
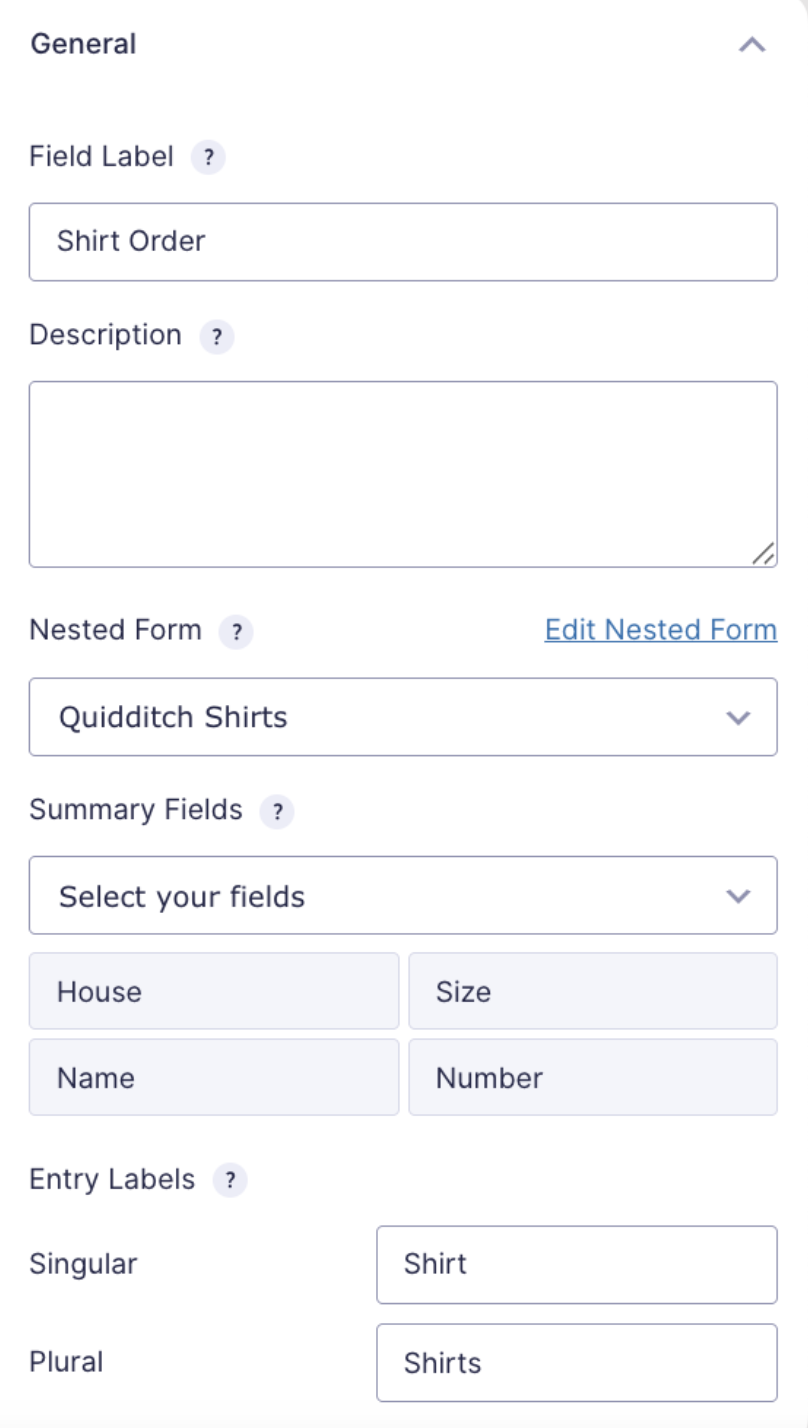
Create your Parent form and add a Nested Form field to the form. Select the Child form you built in Step 1, and choose which fields to show in the Summary Fields section.
Step 3 – Count Nested Form Entries
Add a Number field to the form and enable calculation. Insert the merge tag for the Nested Form field above with the :count merge tag modifier. To easily insert the merge tag, click the Insert Merge Tag Drop Down, scroll to the bottom, and select Field Name: Count as shown in this screenshot.
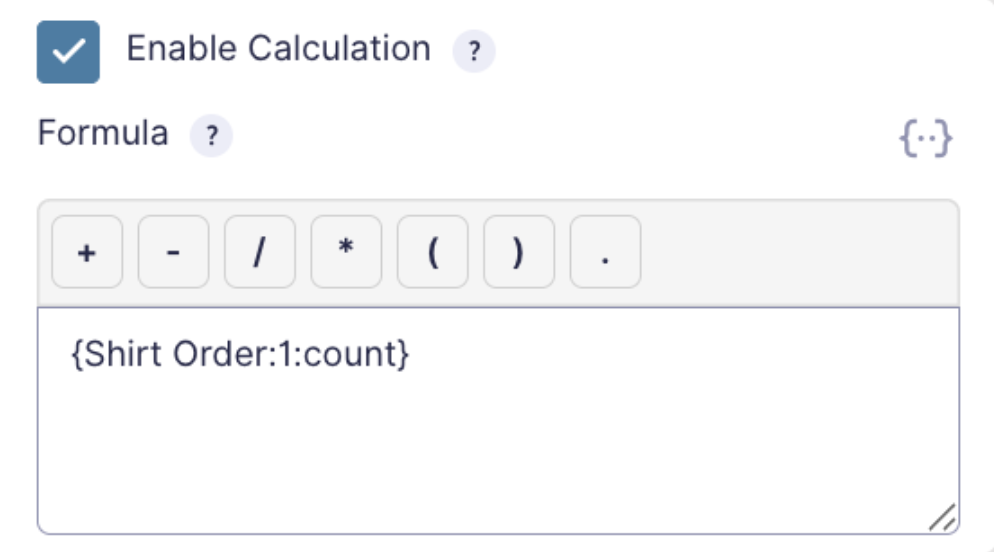
What this merge tag does is count up the number of submitted Child Entries and output that number into the Number field. We’re going to use that to determine the quantity of shirts being ordered. Since this field is only being used for the calculation, set it as Hidden in the Advanced tab.
Step 4 – Calculate Quantity
With the Nested Form entries counting into the hidden Number field, we need to copy that value into the Quantity portion of a Product field. For this we’ll use GP Copy Cat.
Start by adding a Product field to your form and giving it a base price. Note the Field ID for the Product. We’re going need that for Copy Cat.

With the Field ID in mind, go back to the Number field from Step 3 and click on the Appearance tab. Insert a Custom CSS Class in this format where x is the Field ID for the Number field and y is the Field ID for the Product field:
copy-x-to-y.3Here’s how this looks once inserted:
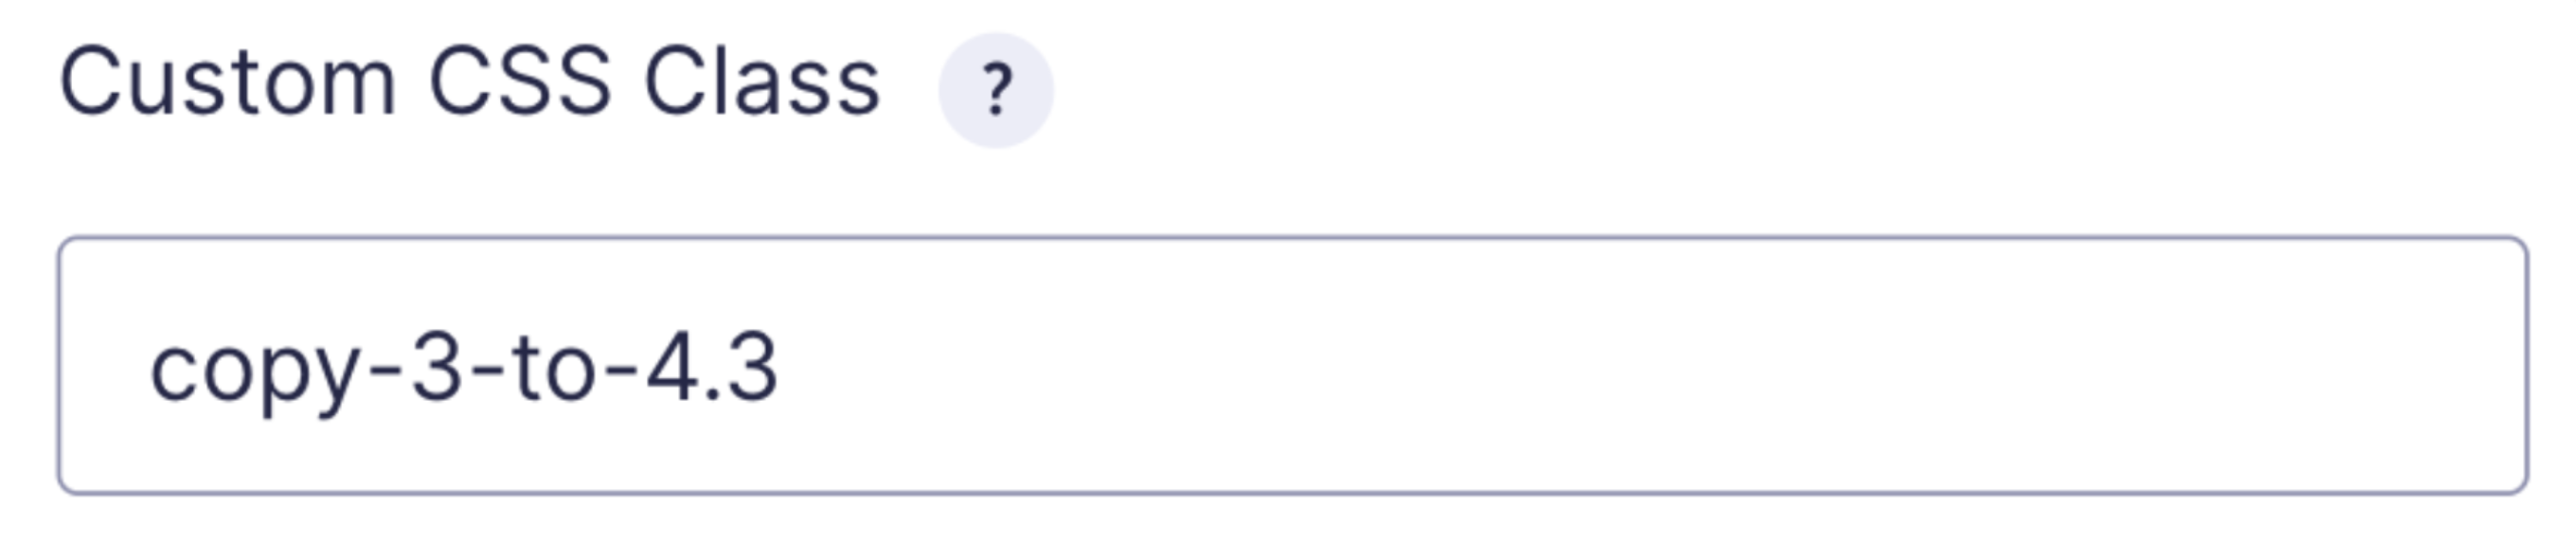
Note the .3 at the end of the CSS class. This tells Copy Cat to copy the value into the Quantity portion of the Product field.
Step 5 – Configure Conditional Pricing
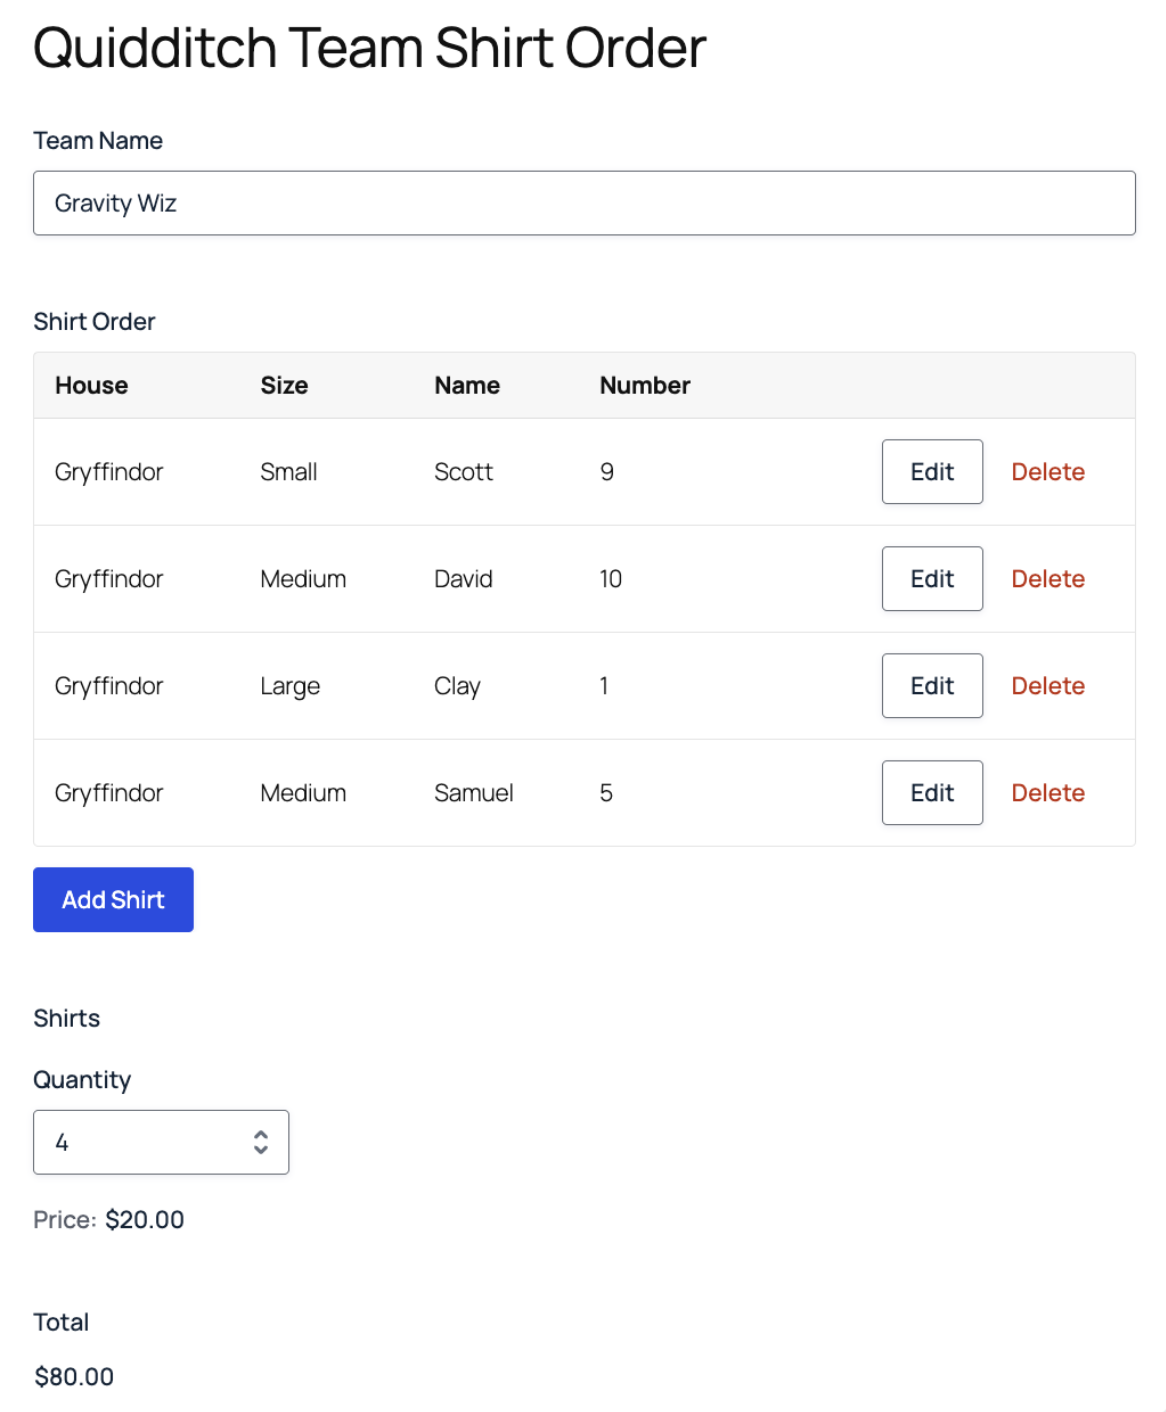
At this point, our form is fully functional aside from the bulk discount. If a new Child entry is created, that entry is added to the Quantity of the Product field.
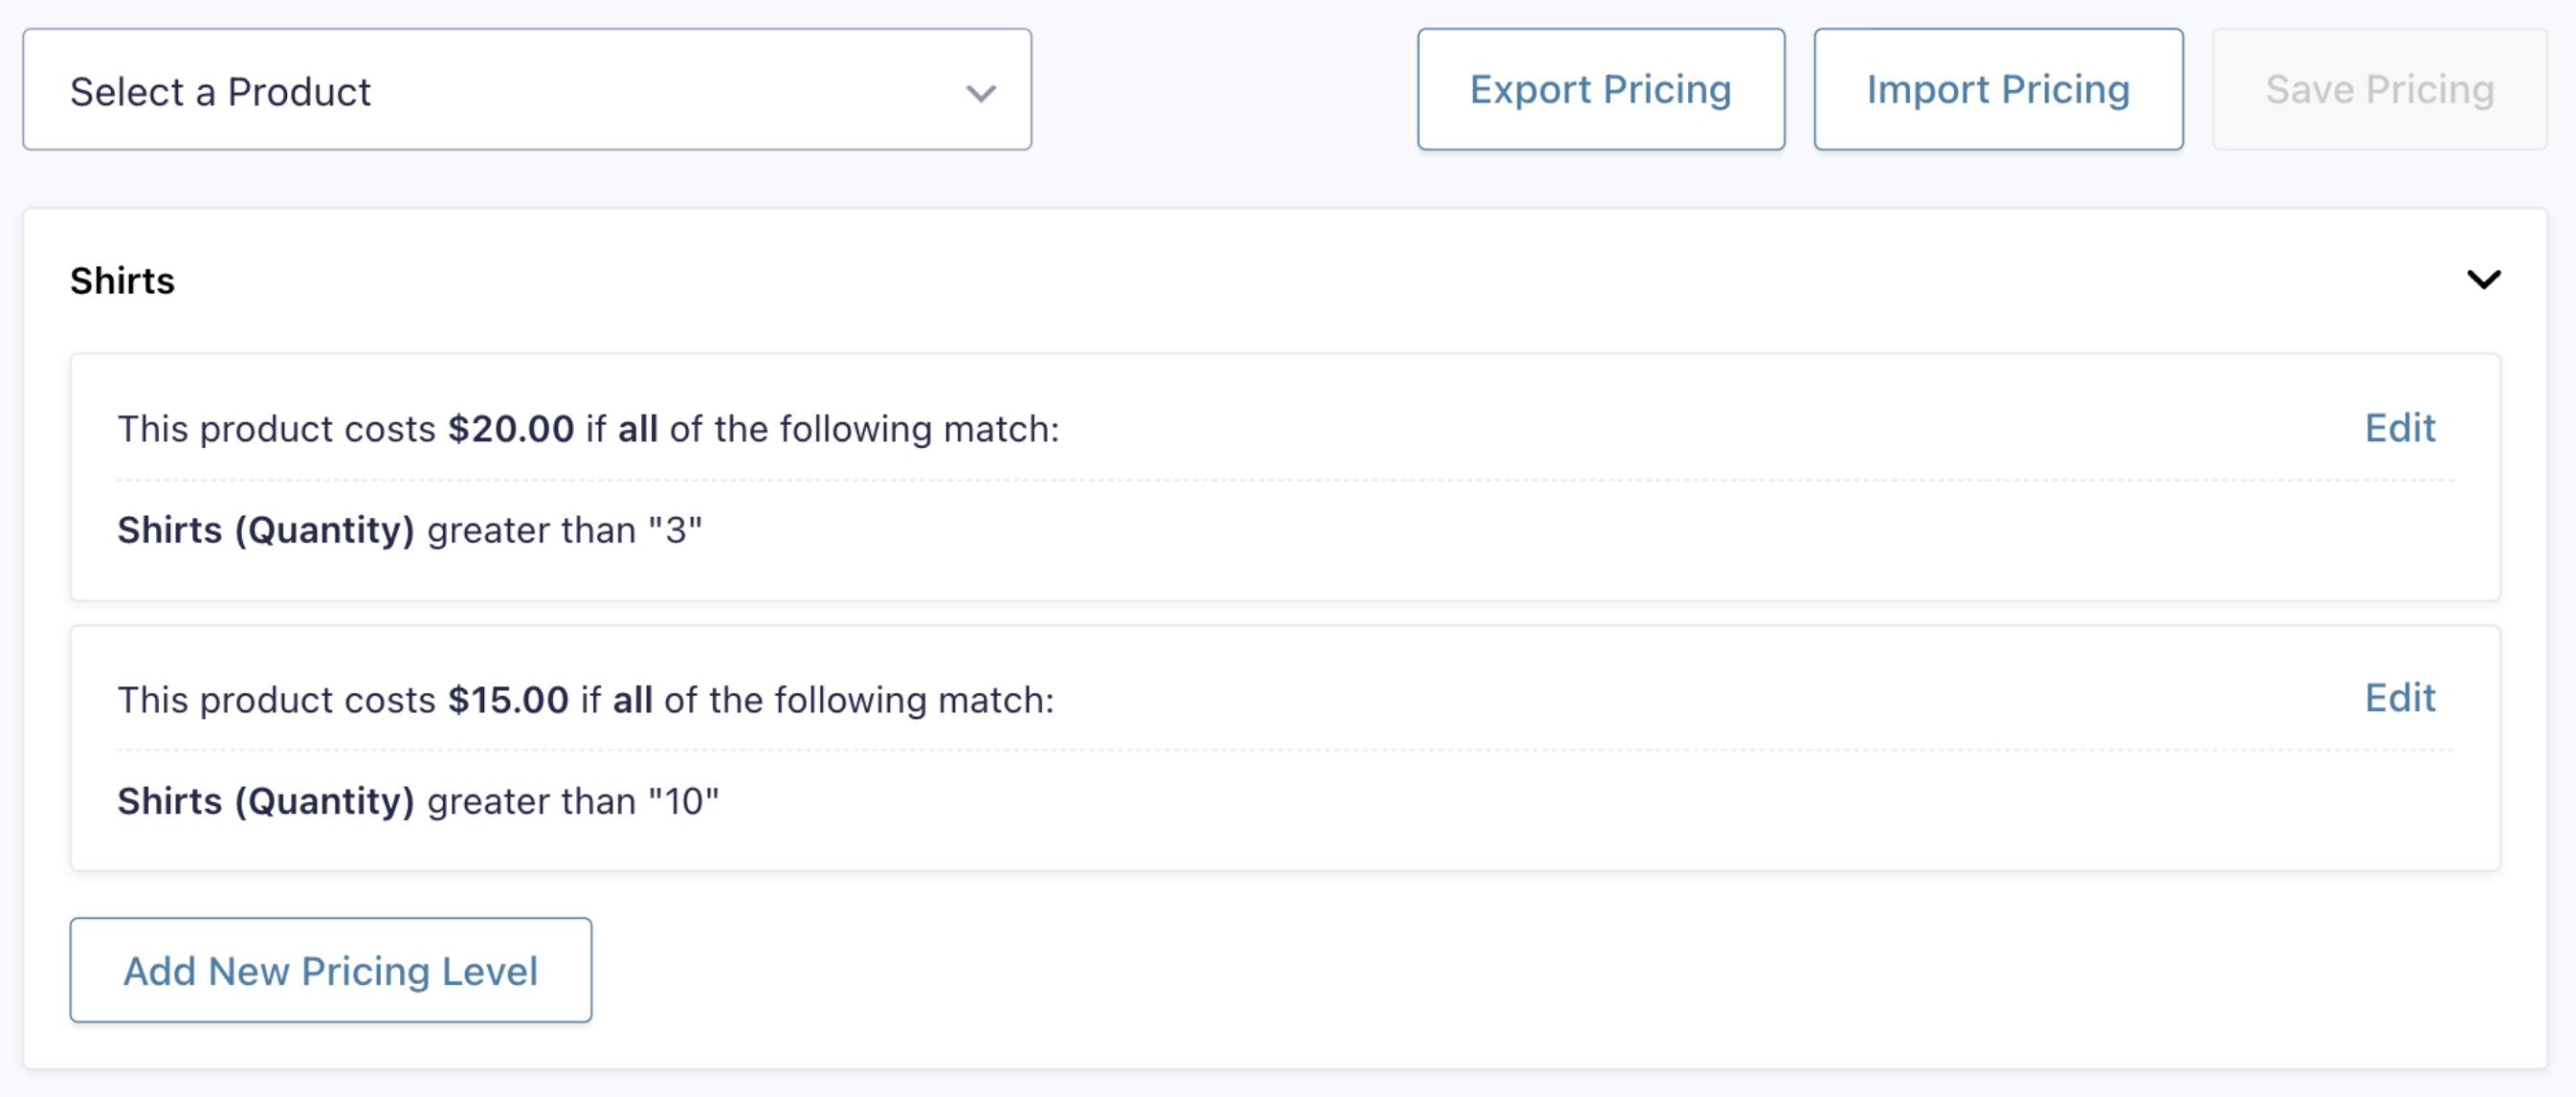
To offer bulk discounts, navigate to Settings > Conditional Pricing. From there, select the Product field you made in Step 4, and configure your pricing brackets.
For more complex pricing rules, it might be simpler to set them up using GP Advanced Calculations instead. Read this guide to learn how it works.
That’s It!
With the Conditional Pricing in place, your customers will receive a discount on shirts if they order more than 3, and they’ll get a further discount after ordering more than 10.
Taking it Further
Read Only Quantity
In its current state, a clever customer could override the Quantity entered in the Product field. To prevent this, you have two options:
- Hide the Product field using the
gf_invisibleCSS class. - Use GP Read Only to disable the Quantity field.
I recommend using GP Read Only to disable the Quantity field, because hiding the Product field isn’t the best UX.
Strike Through Original Price
Use this snippet to automatically strike through the original price when the discount is applied. That way your customer knows how much they’re saving by purchasing multiple shirts at the same time. To add the snippet to your form, simply drop it into your form settings using our Custom JavaScript plugin.


Hello. Great tutorial, my follow up question is how would this work if you have 2 nested child forms? For example, one nested form for Child Tshirts and one for Adult Tshirts…how would the calculations work then?
Hey Justin,
Great question!
If you have 2 separate nested forms, then you are first going to want to set up 2 separate product fields (one for the Child T-shirts, and one for the Adult T-shirts).
With those set up, the next major change would be repeating steps 3 and 4 twice, once for each product.
Since you would want a separate count for each type of shirt, you would need to set up two separate Number fields in Step 3.
Then in Step 4, you would copy each respective count to their respective product’s quantity field. Make sure to be careful here, since each Nested Form Field is going to have a different field ID.
Finally, in Step 5, when configuring your conditional pricing, you would have to set up pricing rules for each product separately, using the Product select dropdown (see top left of the Step 5 screenshot).
Hoping that makes sense overall, and please don’t hesitate to reach out to Support if you run into any issues getting this set up!