

Getting Started
Build Your First Workflow
Build an inactive workflow that waits 30 seconds after a form submission, then sends a personalized email.
In this walkthrough, a form submission starts a workflow, the workflow waits 30 seconds, and then it sends a personalized email.
The finished route is Form Submitted → Delay → Send Email. You need a form with a name field and an email field, plus an address where you can receive the test message. Here is an export you can use.
1. Create a new form workflow
Section titled “1. Create a new form workflow”- Go to Forms and open the form you want to use.
- Select Workflows in the form’s toolbar.
- Select New Workflow.
The builder creates Untitled workflow and opens it Inactive. Rename it from the workflow-name menu, then keep it inactive while you build so a real submission cannot start an unfinished route.

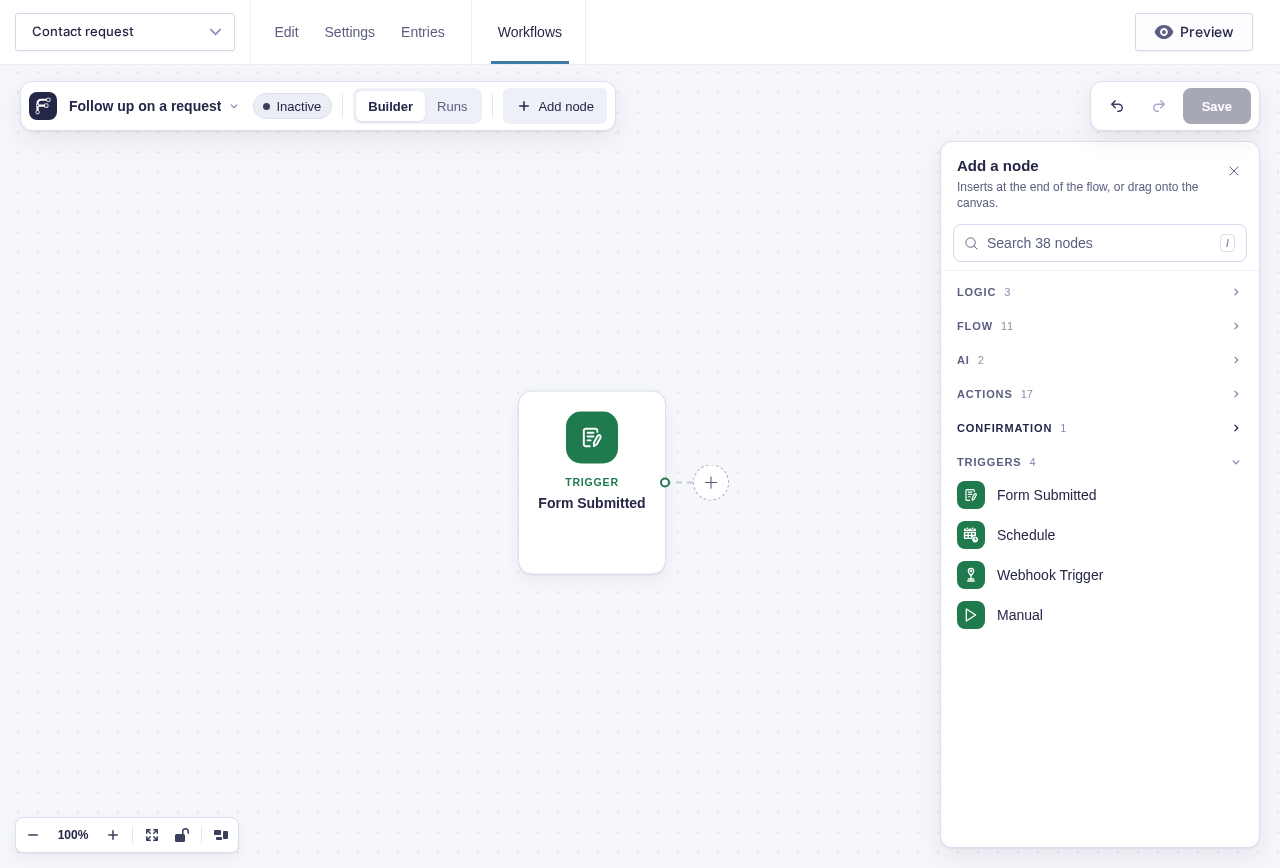
2. Add the Form Submitted trigger
Section titled “2. Add the Form Submitted trigger”Select Add Trigger, then choose Form Submitted. This trigger starts one run for each new submission to the workflow’s selected form.
3. Add a 30-second delay
Section titled “3. Add a 30-second delay”Select the + on Form Submitted and add a Delay node.
Double-click Delay and set:
| Setting | Value |
|---|---|
| Delay | Wait a set amount of time |
| Delay duration | 30 |
| Unit | Seconds |
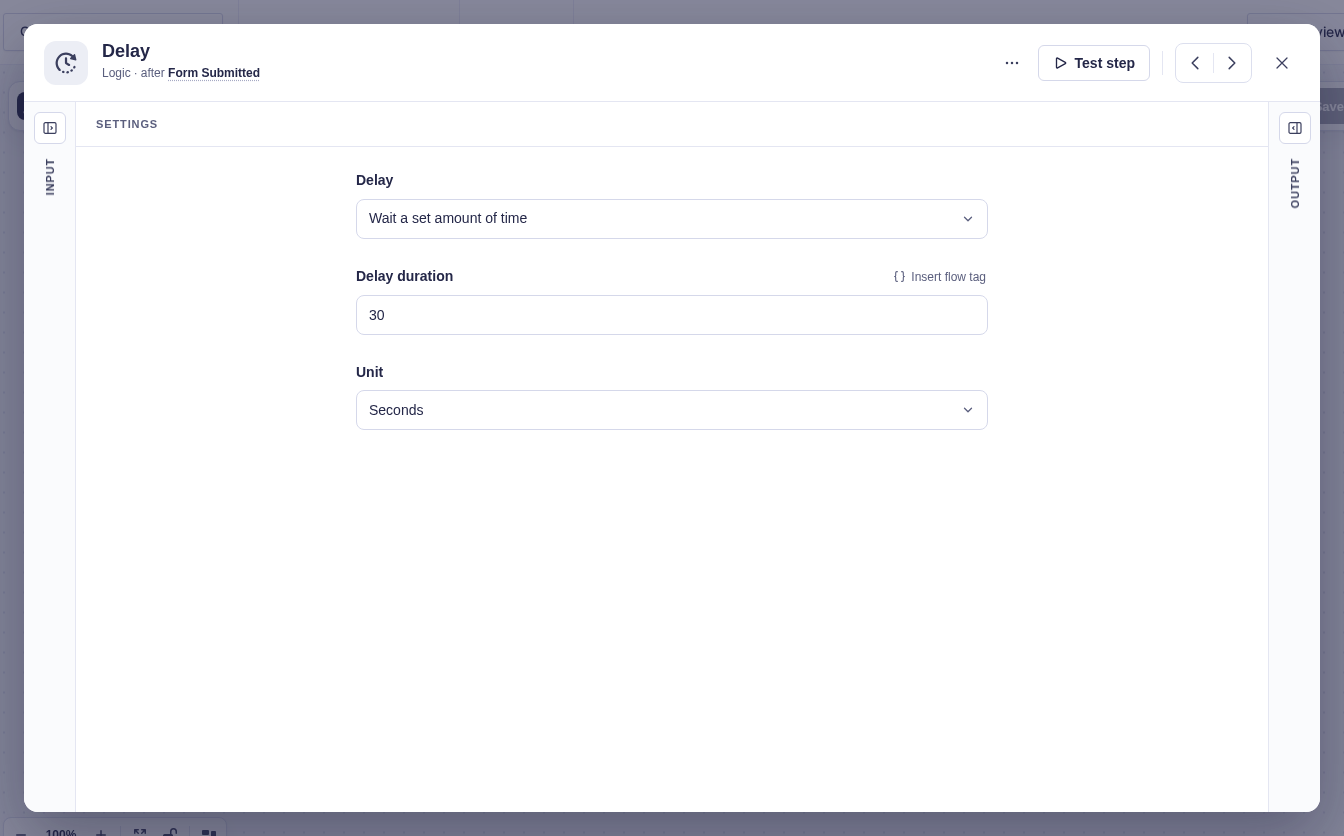
Close the settings panel. The short delay makes the first live check quick.
4. Add and configure Send Email
Section titled “4. Add and configure Send Email”Select the + on Delay and add a Send Email node. Double-click Send Email to open its settings.
Set Body format to Plain text. Then select Insert flow tag beside each supported field to insert values from Form Submitted:
- In To, select the form’s email field.
- In Subject, write
A quick follow-up,and insert the first-name value. - In Body, add a short message and insert the first-name value where you want it.
For example, the resolved message can read:
Hi Merlin,
Thanks for getting in touch. We received your inquiry and will follow up with the next steps.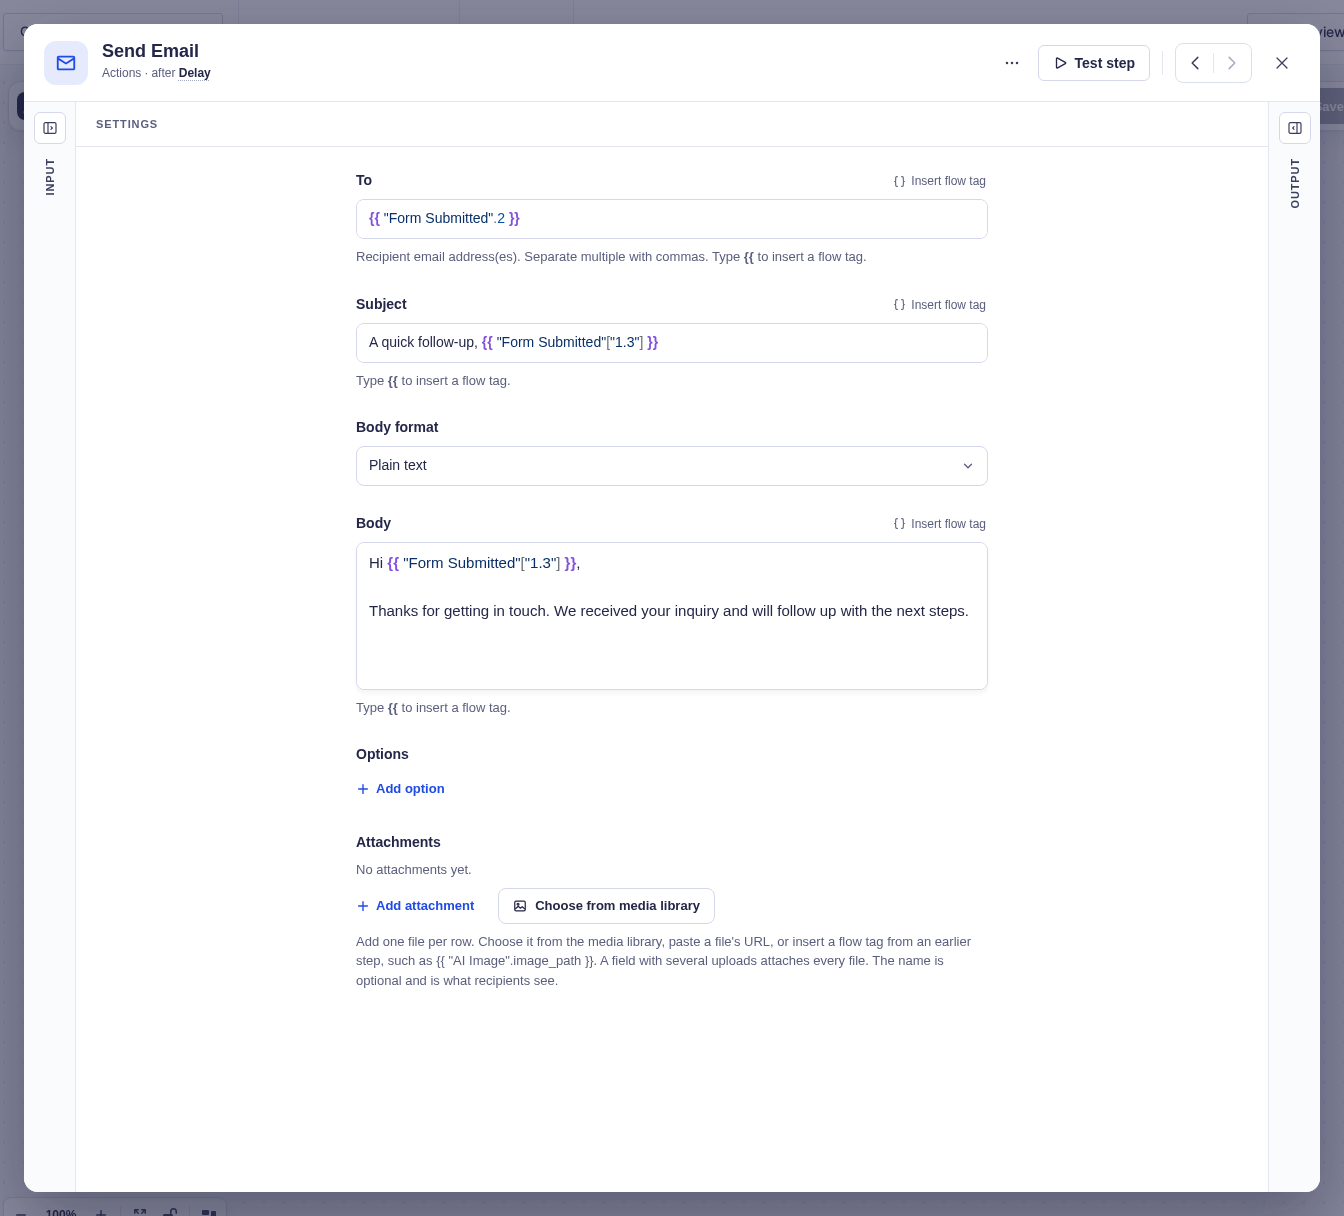
5. Check the nodes while inactive
Section titled “5. Check the nodes while inactive”Select Save. Fix anything listed under Issues before continuing.
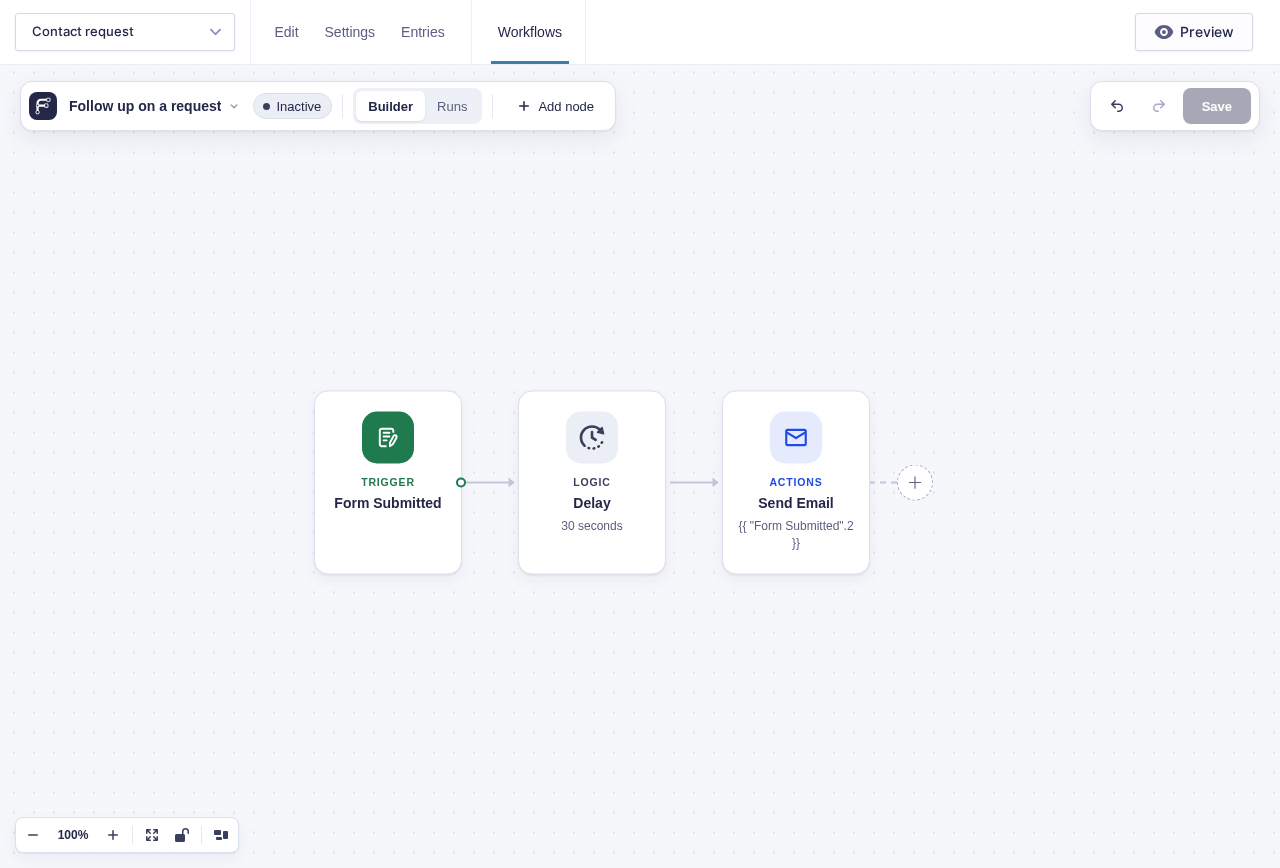
Use the builder’s node test controls to confirm that Delay accepts its settings and Send Email resolves the expected recipient and message. A test can have real effects, including sending an email, so review the test summary before approving it.
See Testing Before You Go Live if you want to see the complete test procedure.
6. Activate and submit the form
Section titled “6. Activate and submit the form”Select the Inactive pill beside the workflow name to activate it. You already saved the workflow, so the status changes immediately. Open the form in another tab and submit it using an email address you can check.
Return to the builder and switch Builder → Runs. The newest run opens automatically. Before the delay ends, its path should show the trigger complete, Delay waiting, and Send Email not yet complete.
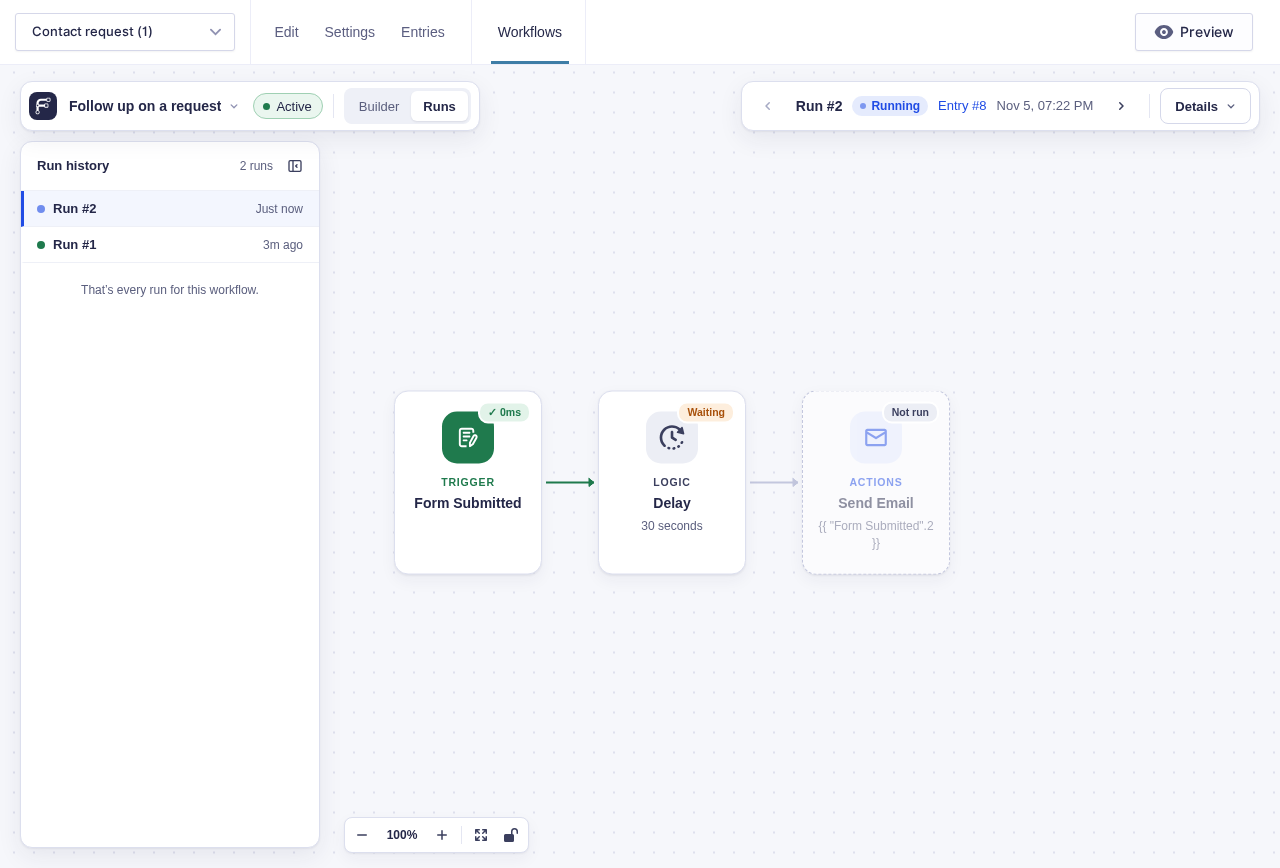
After the delay ends and the site’s background queue finishes processing, the run completes and the message arrives.
7. Turn it back off before editing
Section titled “7. Turn it back off before editing”Return to Builder, then select the Active pill and confirm that you want to deactivate the workflow while you make further changes.
Change Delay to the interval you actually want, such as one day. Save, review the route, and reactivate the workflow.
Runs that already started keep the workflow settings they began with. Changing the delay affects new runs only.
Optional: check the entry again after the delay
Section titled “Optional: check the entry again after the delay”A delayed follow-up often needs one more decision. For example, your team might update a Follow-up Status field to Complete before the delay ends.
Insert a Condition (entry) node between Delay and Send Email by hovering over the path connecting them and clicking the +. Configure the Yes path to continue only when follow-up is still needed. Leave the other path without another node if it should simply finish.
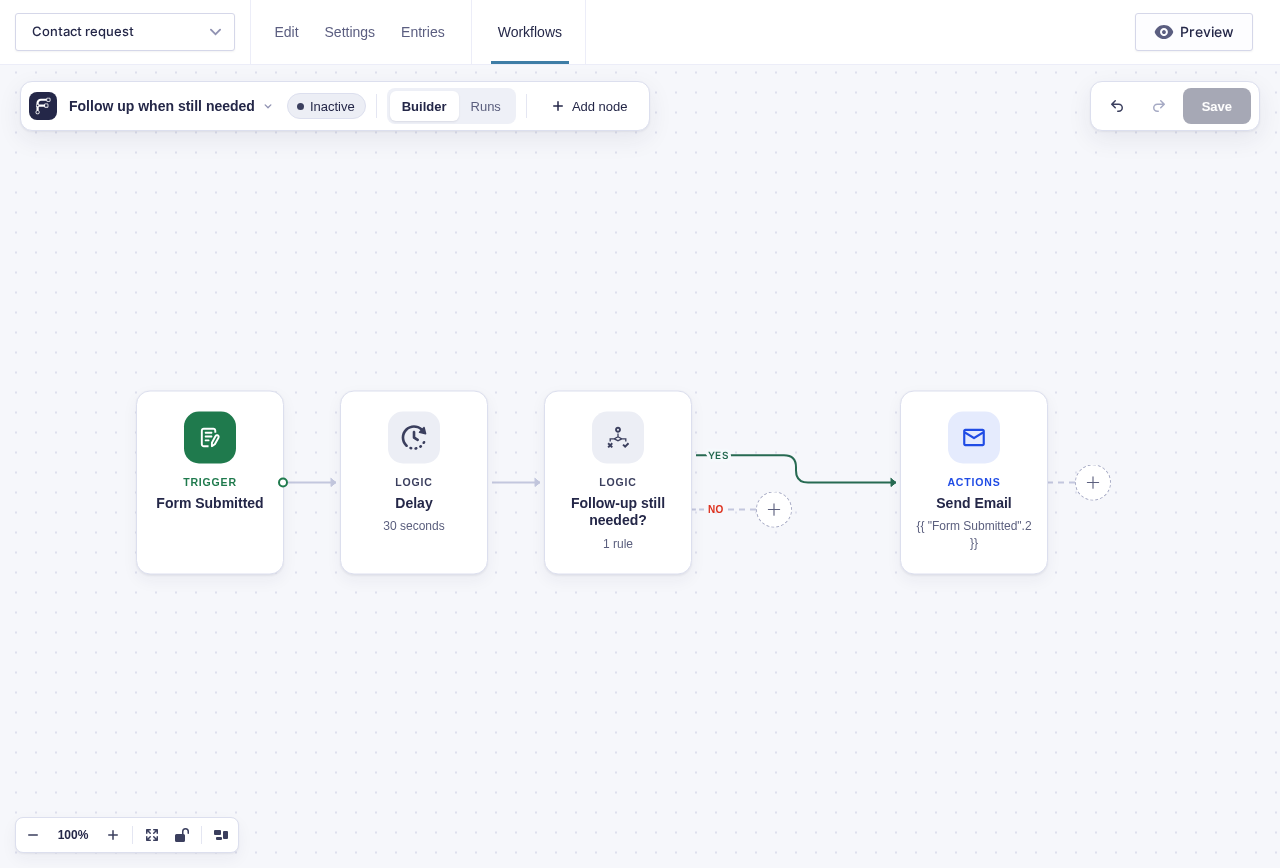
When Condition (entry) executes, it reloads the Gravity Forms entry. It sees changes made during the delay instead of relying on the values captured at submission time.
What you built
Section titled “What you built”Each matching submission now creates a run. The submitter receives the normal Gravity Forms confirmation immediately, while Flowcrafter continues the delayed work in the background.
Next, read: